
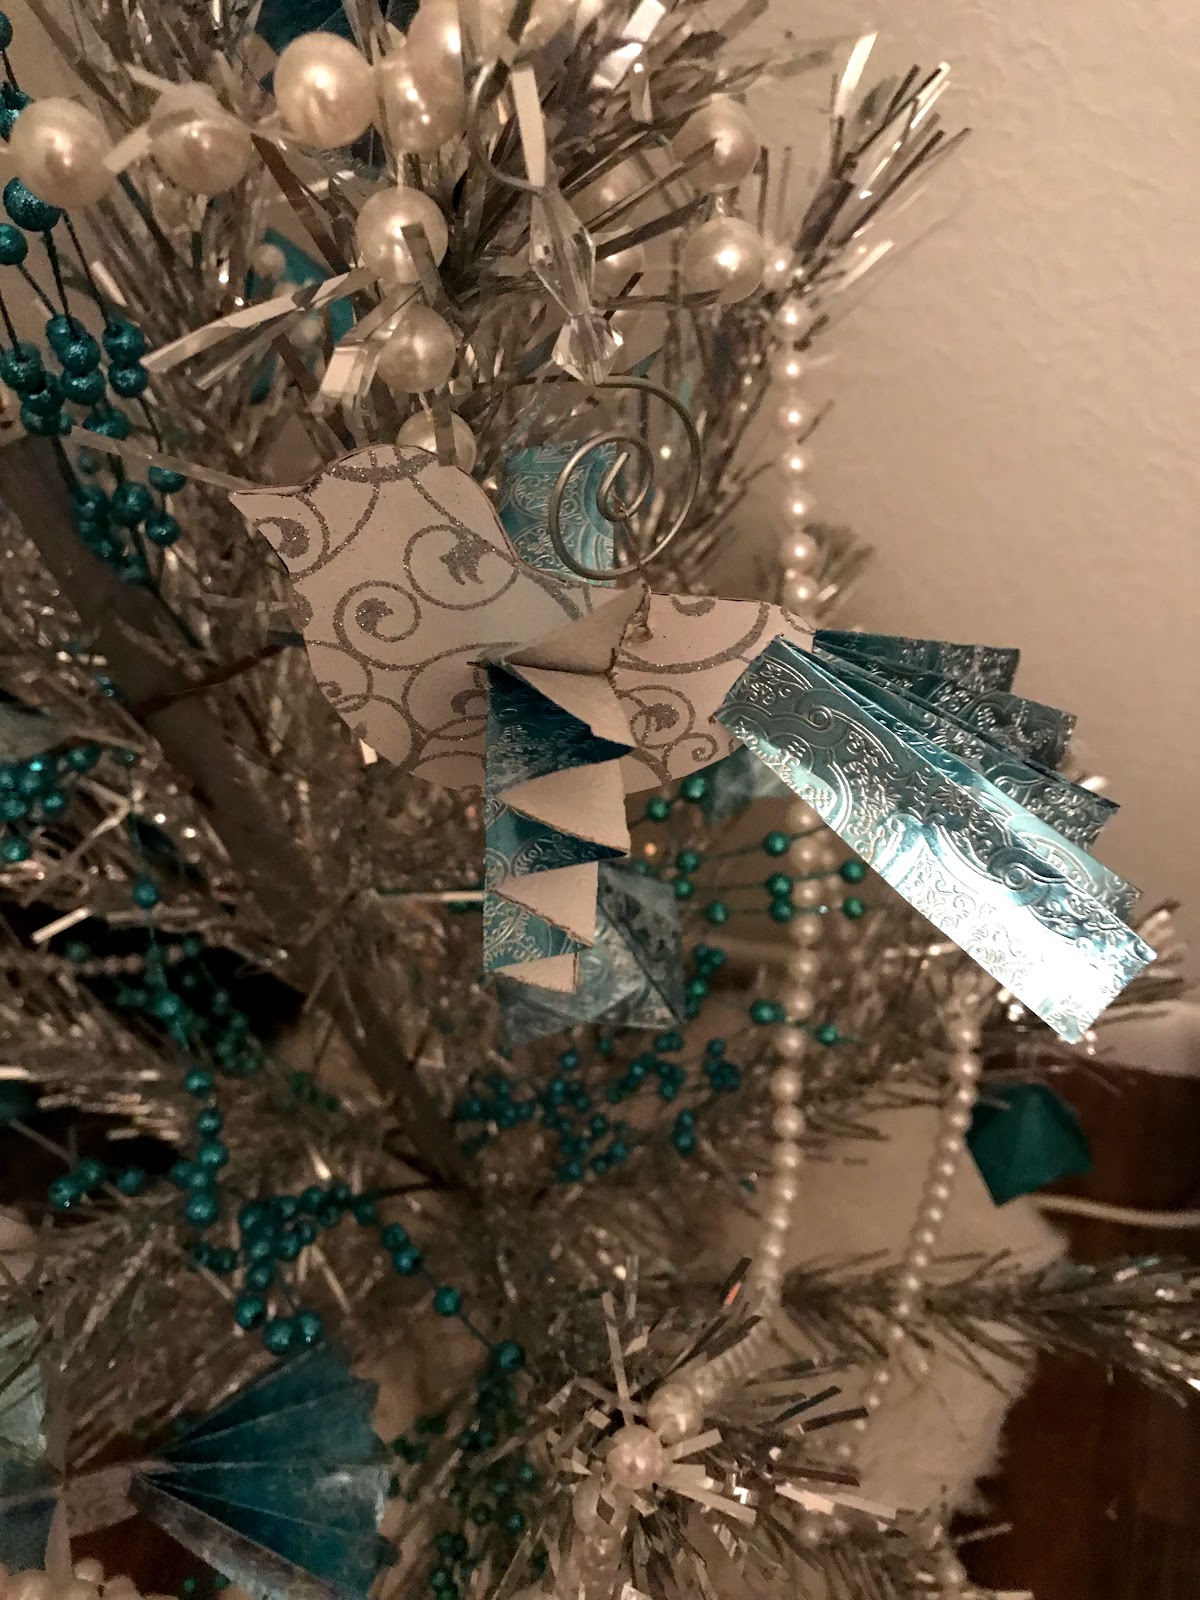
As I promised yesterday, I am back with the instructions on how to make the bird ornaments that I have up on my aluminum retro Christmas tree.

These birds are very easy to make. If you can do an outline of a bird and you can still make the accordion style fans that you used to make as a child, you can make these pretty little birds.
Paper Birds in Flight Ornament
1 page of scrapbook paper 12 x12
Pencil
Elmers Glue
Hot Glue Gun
wrapping paper
Ruler
Scissors
Razor or Exacto Knive
Thread
Instructions
I would like to say that I came up with this idea all on my own, but the truth is that I did not. As is the case with many of the things that I make, I happened across these bird ornaments while I was looking for something completely different on the internet and I fell in love with them.
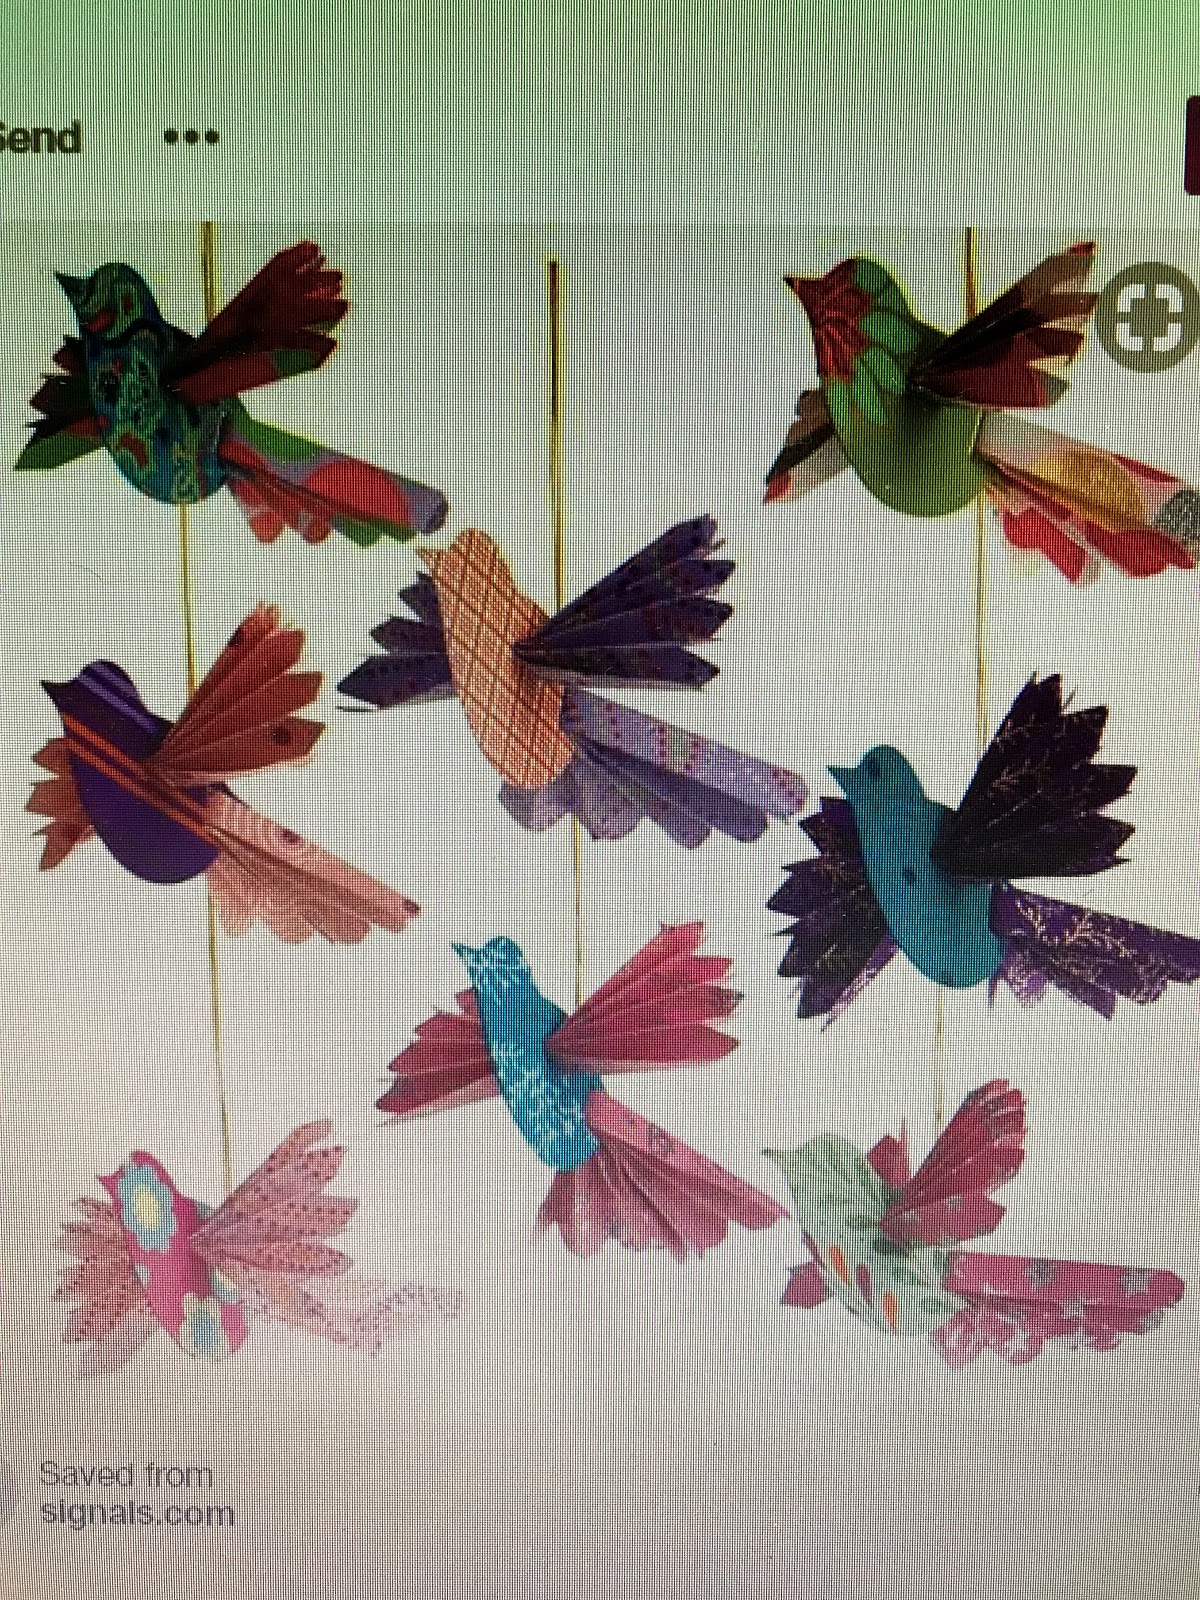
I did not fall in love with their price tag however, and I decided that I could make my own.
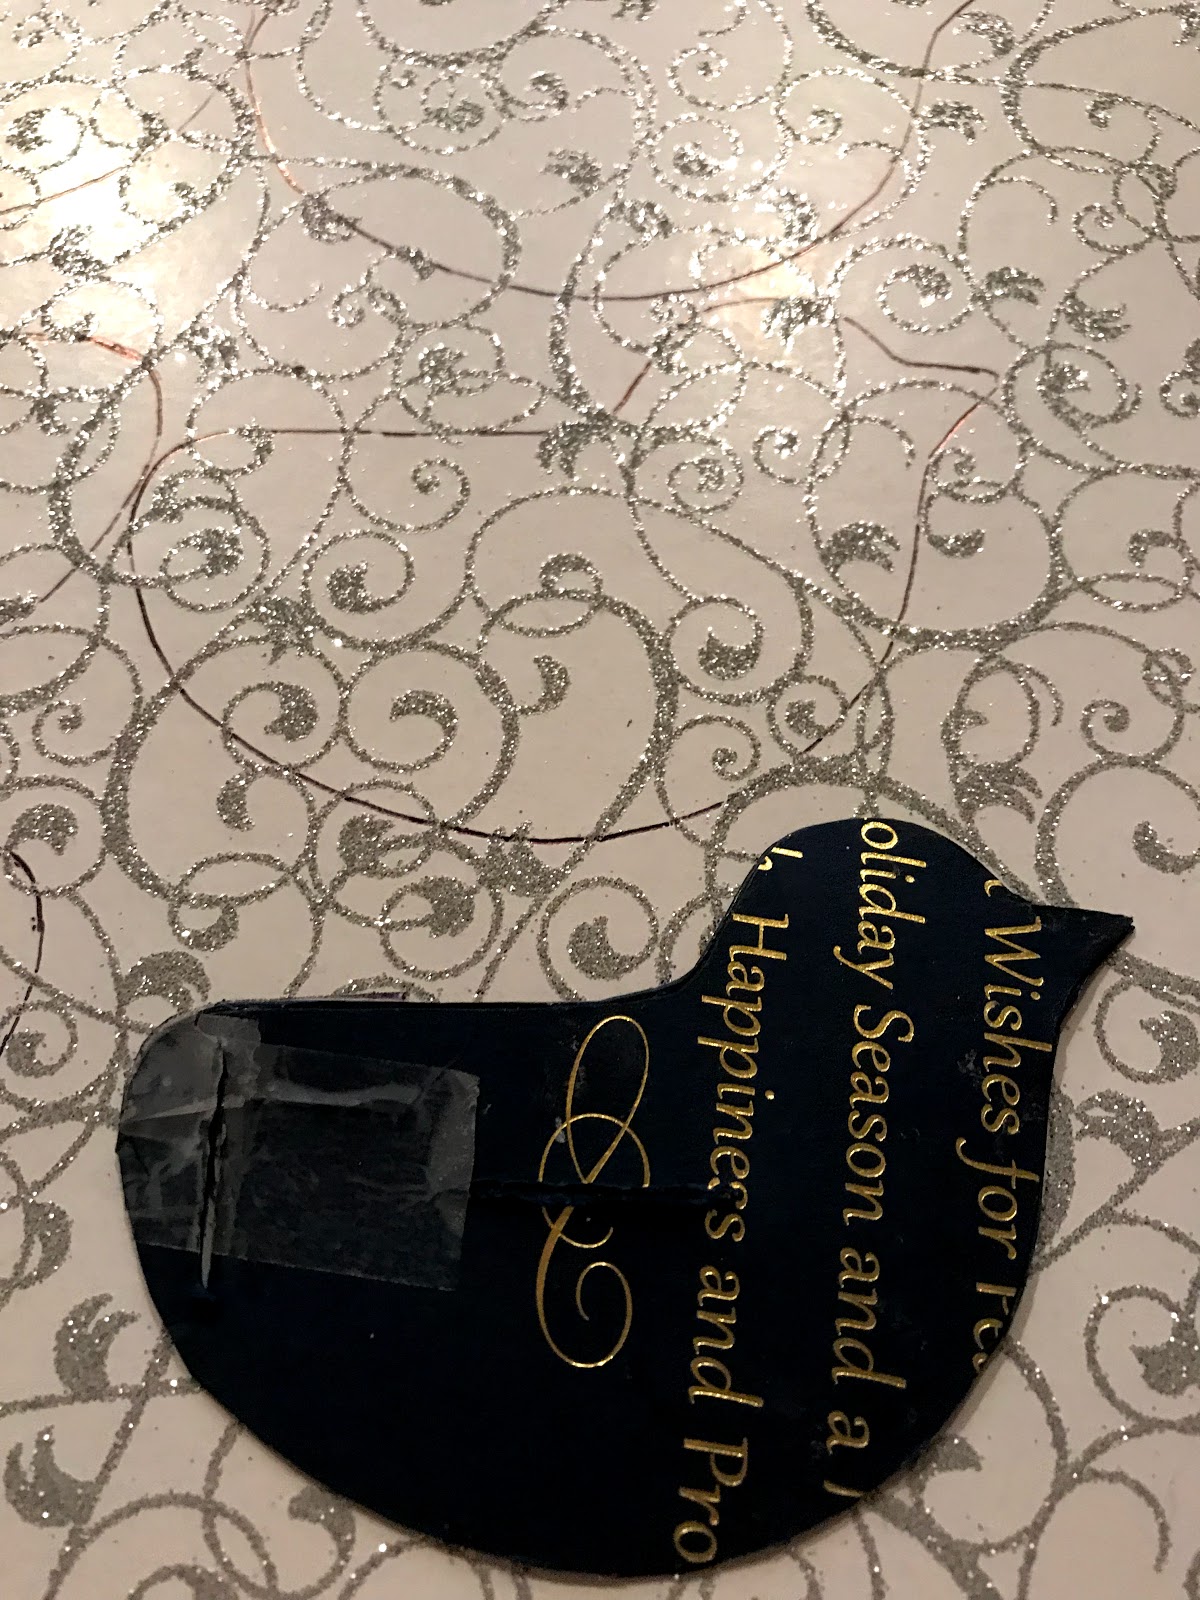
To start, I had to create a template for my bird body. I did this using the picture above and an old Christmas card and drew my bird free hand, but there are several templates that you can find online if you do not trust your drawing skills. Just type in bird body template in the search engine and a myriad of options will become available to you.
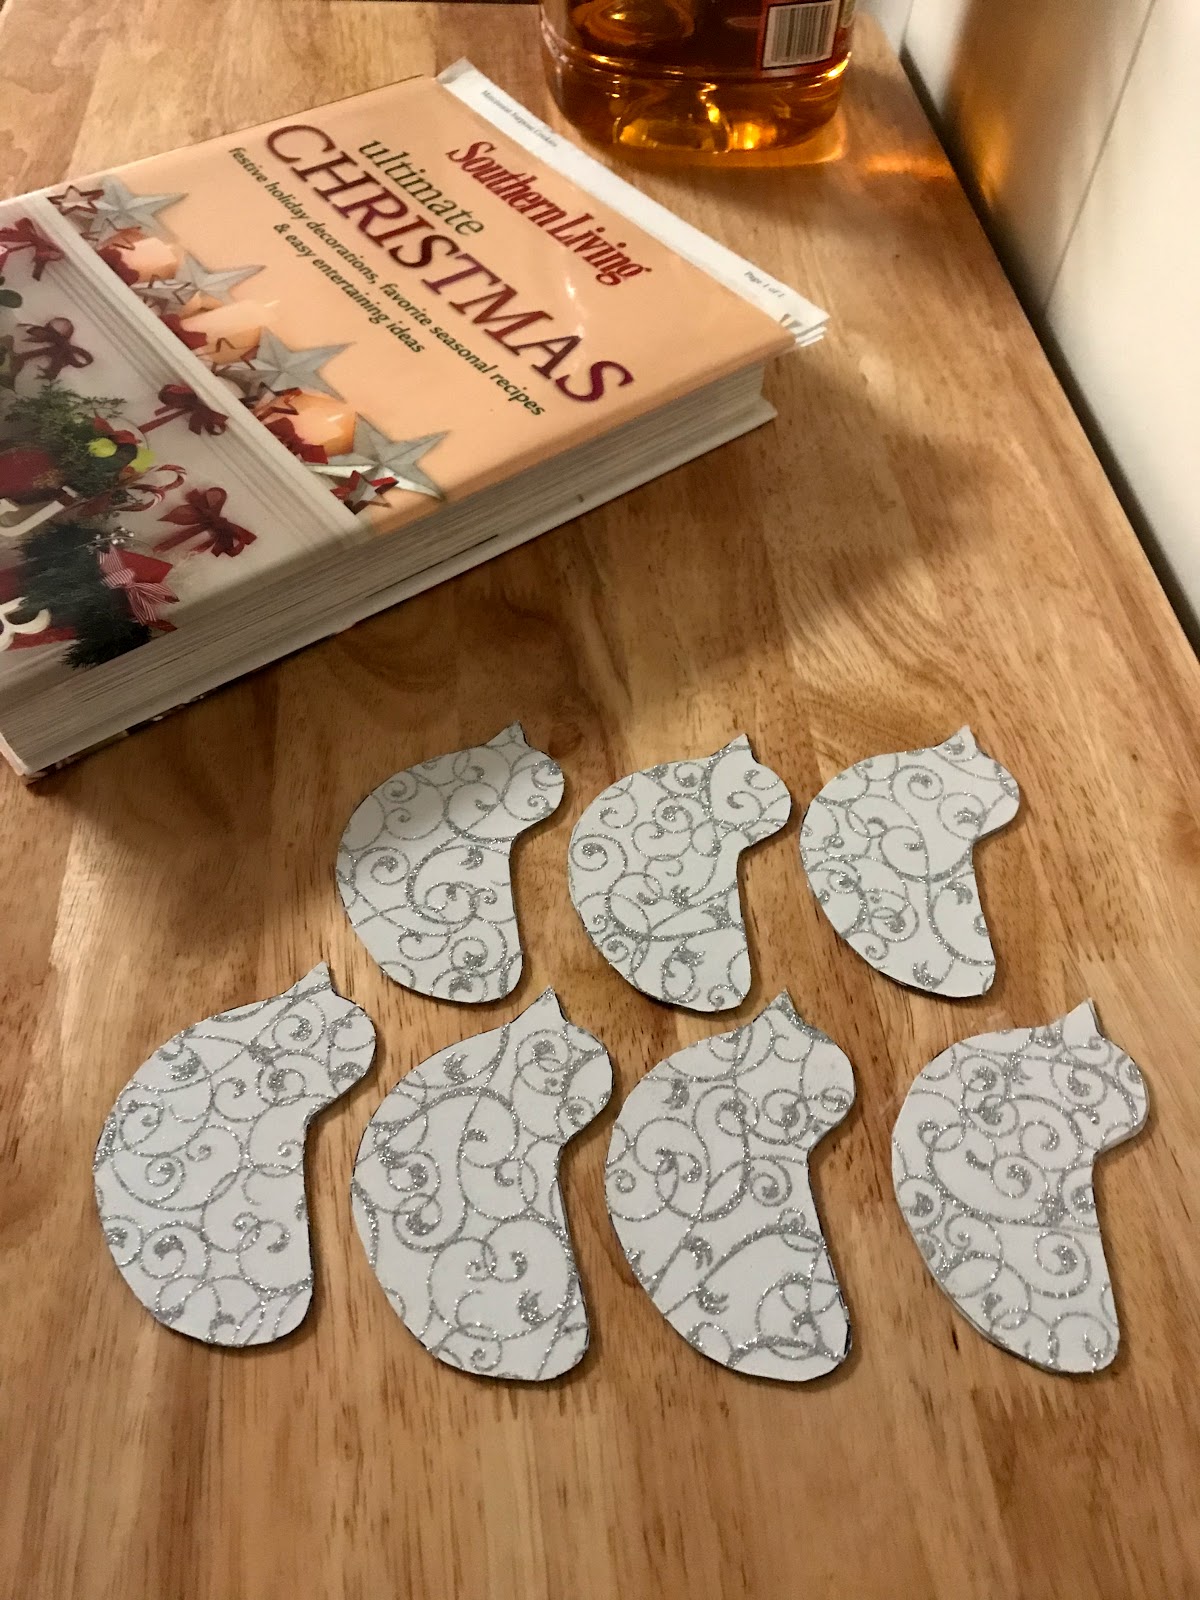
1. Place your bird template on the scrapbook paper and trace around the bird. Flip the template over, and place on another part of the scrapbook paper and trace around the bird again until you have a mirror image of the bird you just drew. Continue these steps, using all of your scrapbook paper until you no longer have any room left to draw birds.
I tried to show this step in the picture below, but it is kind of hard to see with all of the sparkly glitter on this paper all the outlines of the birds that I drew, but if you look closely above the bird template, you will see the outline of my birds.
2. Using a pair of scissors, cut out all of the bird bodies.
3. Take one bird body and put glue all along the back of the body. Take the mirror image cutout of the bird and place them back to back and press together tightly. Once all of the birds are glued together, line them up and place them under a heavy book to dry so that they will dry flat and as glued together as possible.
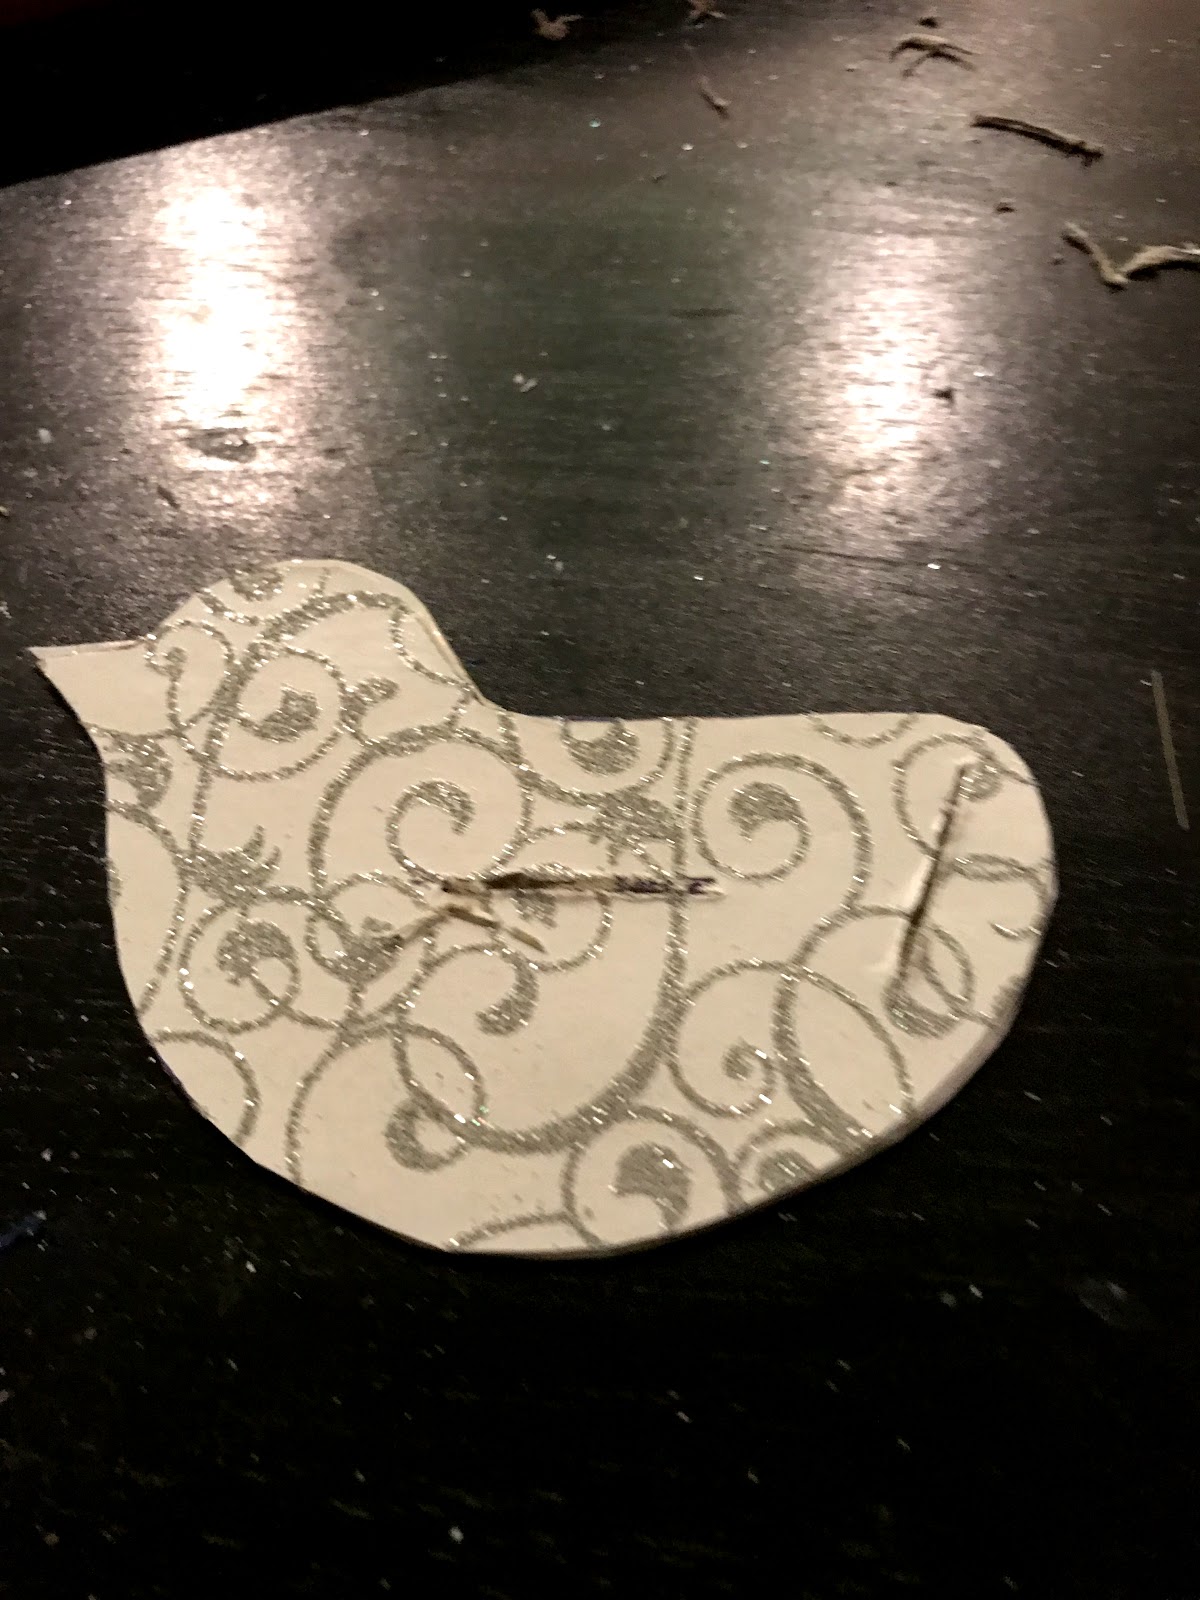
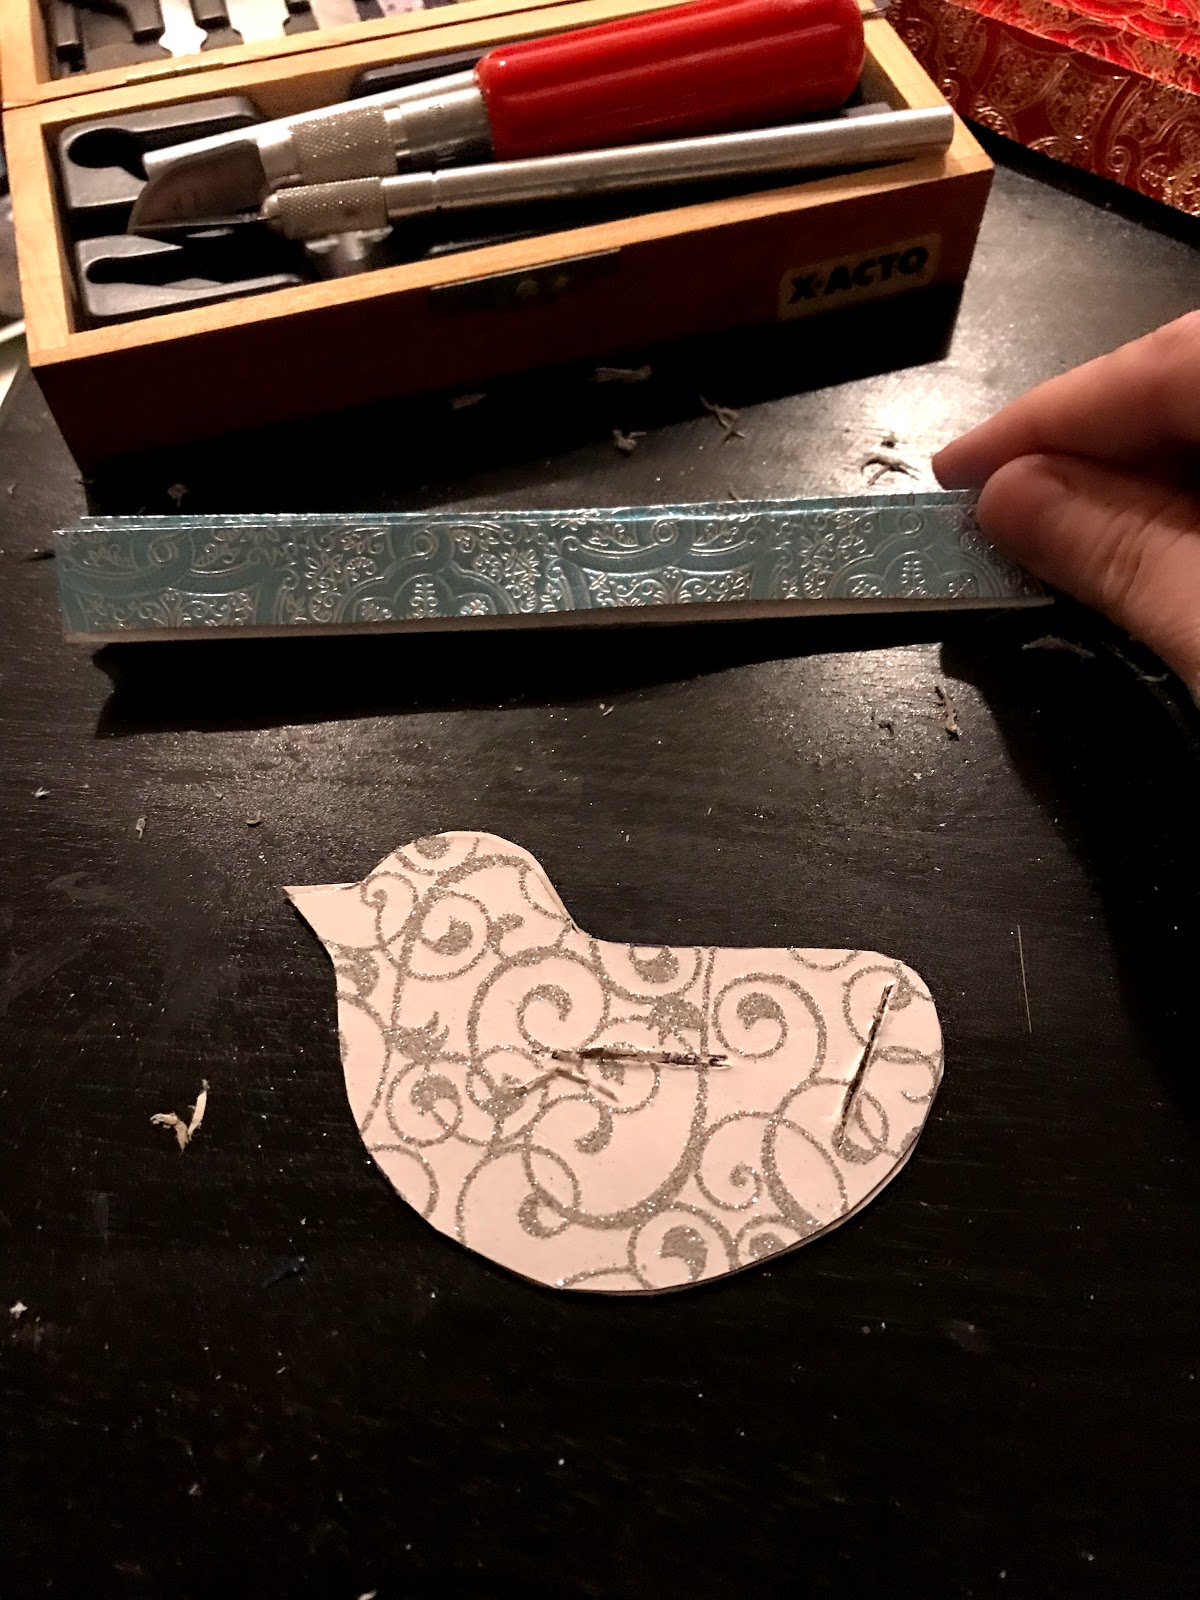
4. Using a ruler mark a 1.5 centimeter horizontal line in the middle of the glued together bird body. Toward the back of the bird, do a 1.5 centimeter diagonal line, with the diagonal moving down to the left. Use the picture below to get an idea of where the lines should be drawn.
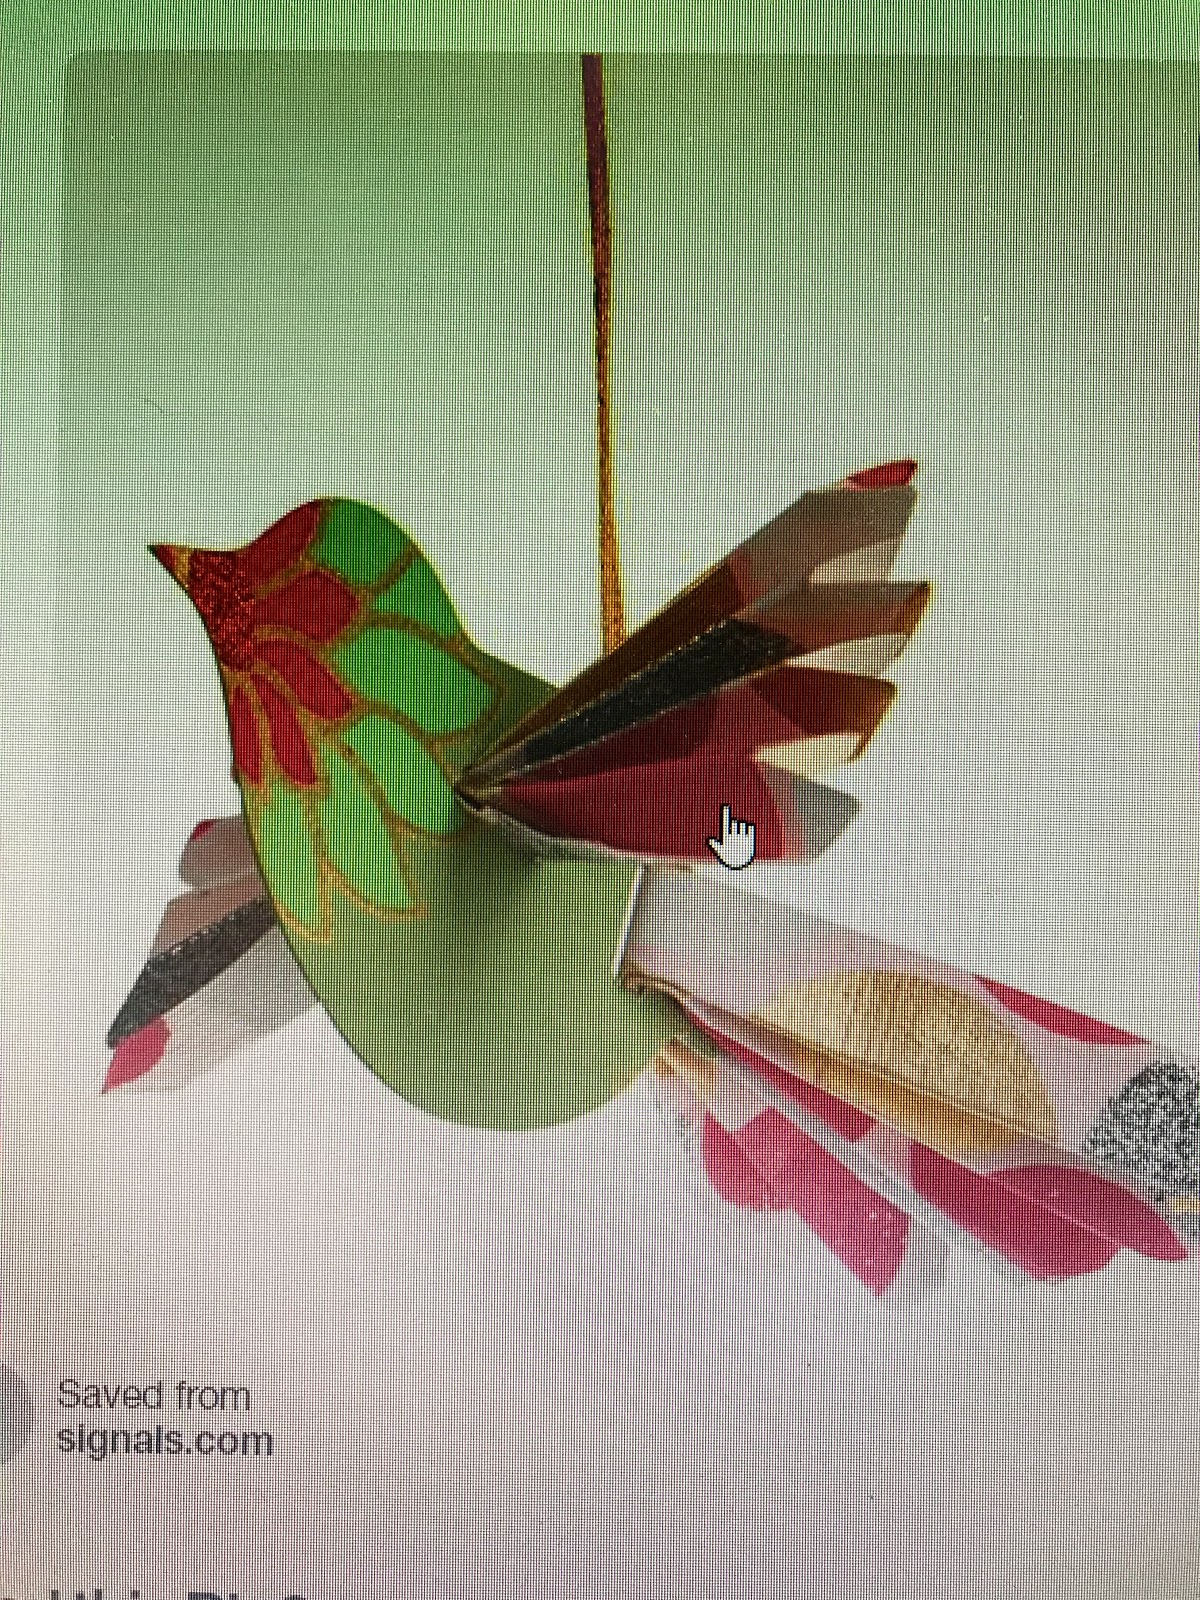
6. Using the ruler measure out the length and width of the wings and the tail on the wrapping paper. Using the scissors, cut these out of the wrapping paper and make as many as you need. For me I needed enough to complete seven birds
My tail was 6 inches long and 4.5 inches wide.
Start the first fold lengthwise and make the fold one centimeter in width. Flip the paper to the opposite direction and make another fold. Basically, use the same technique that you would use to make a paper fan.
For the tail, with the measurements that I gave you, there should be five total folds in the tail.
For the wings my paper was 14 centimeters in length and 9 centimeters in width.
Again, fold the paper lengthwise to one centimeter in diameter and fold back and forth using the fan technique. Using the measurements given, there should be a total of 7 folds in your wings.
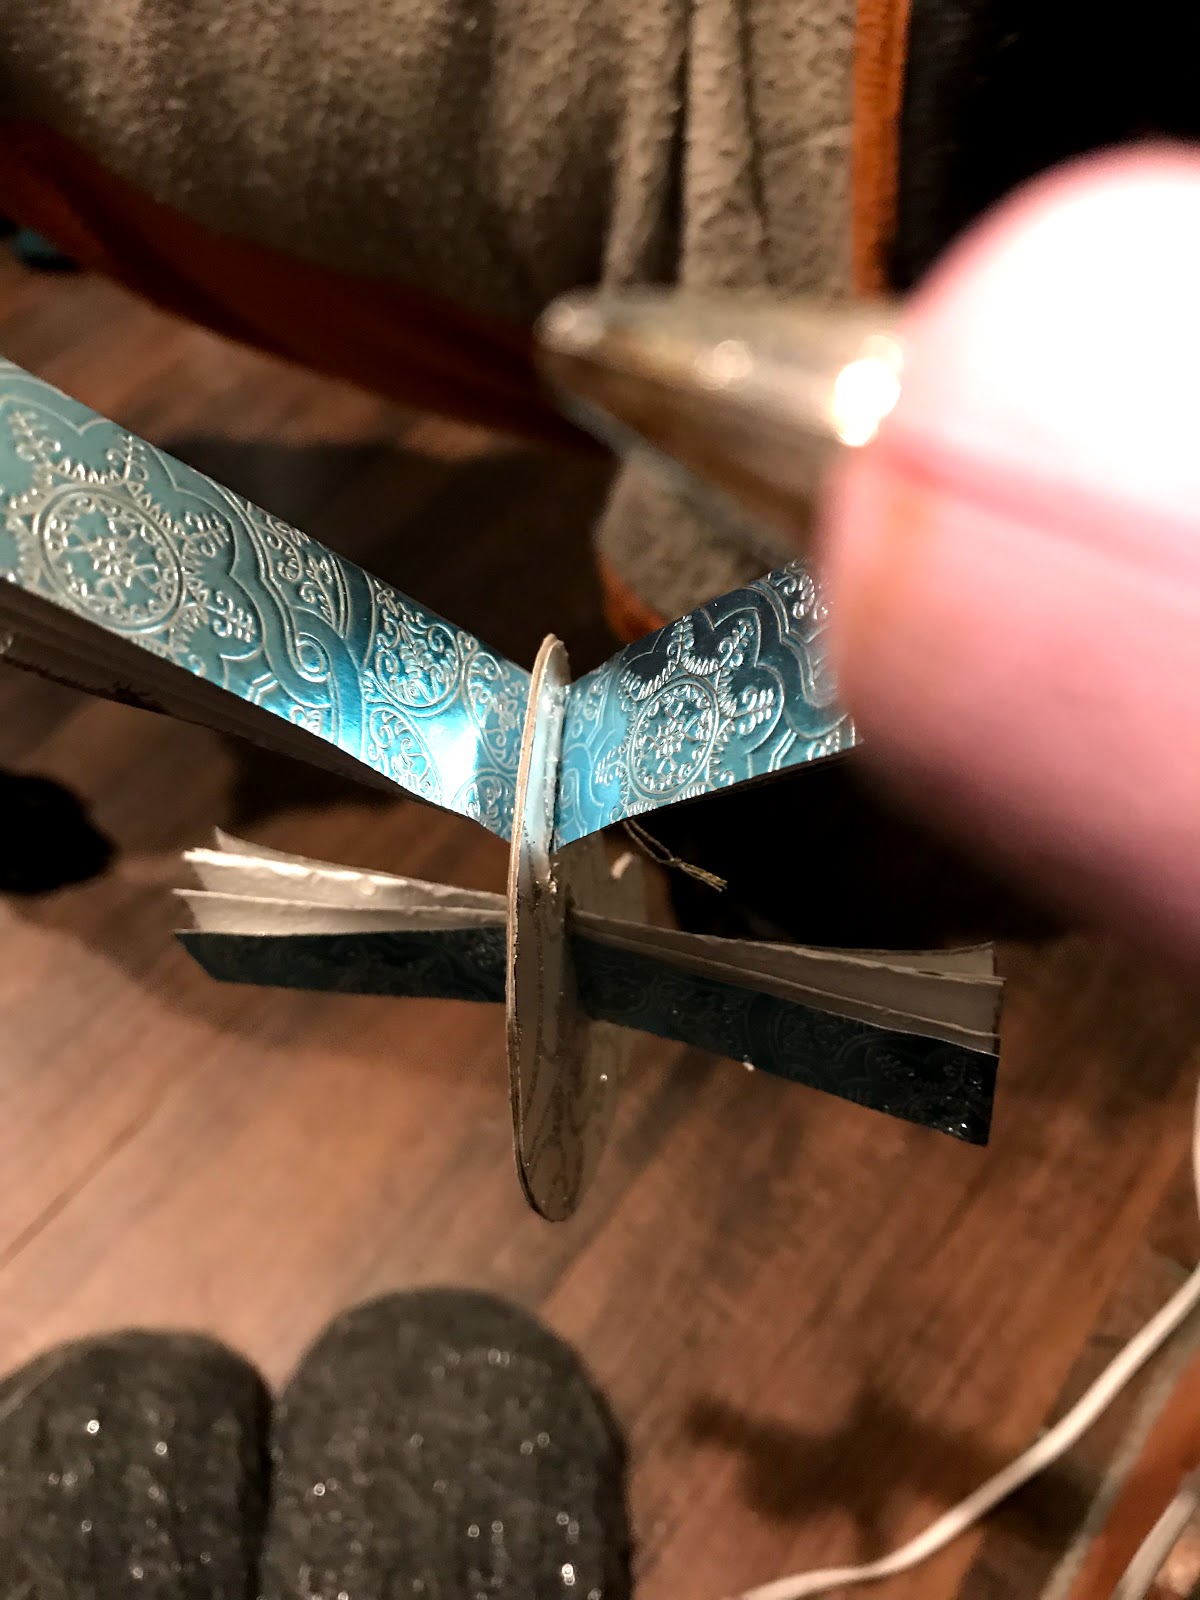
Take the "tail" and gently slide it into the diagonal slot. Slide until your tail is evenly split in half. (The colored part of the wrapping paper should be the top, the white should be the bottom.)

8. Fold the tail so that the two halves are pressed together. Using the hot glue gun, glue the two end folds together forming one single tail. (If this seems confusing, look at the picture for clarification.)
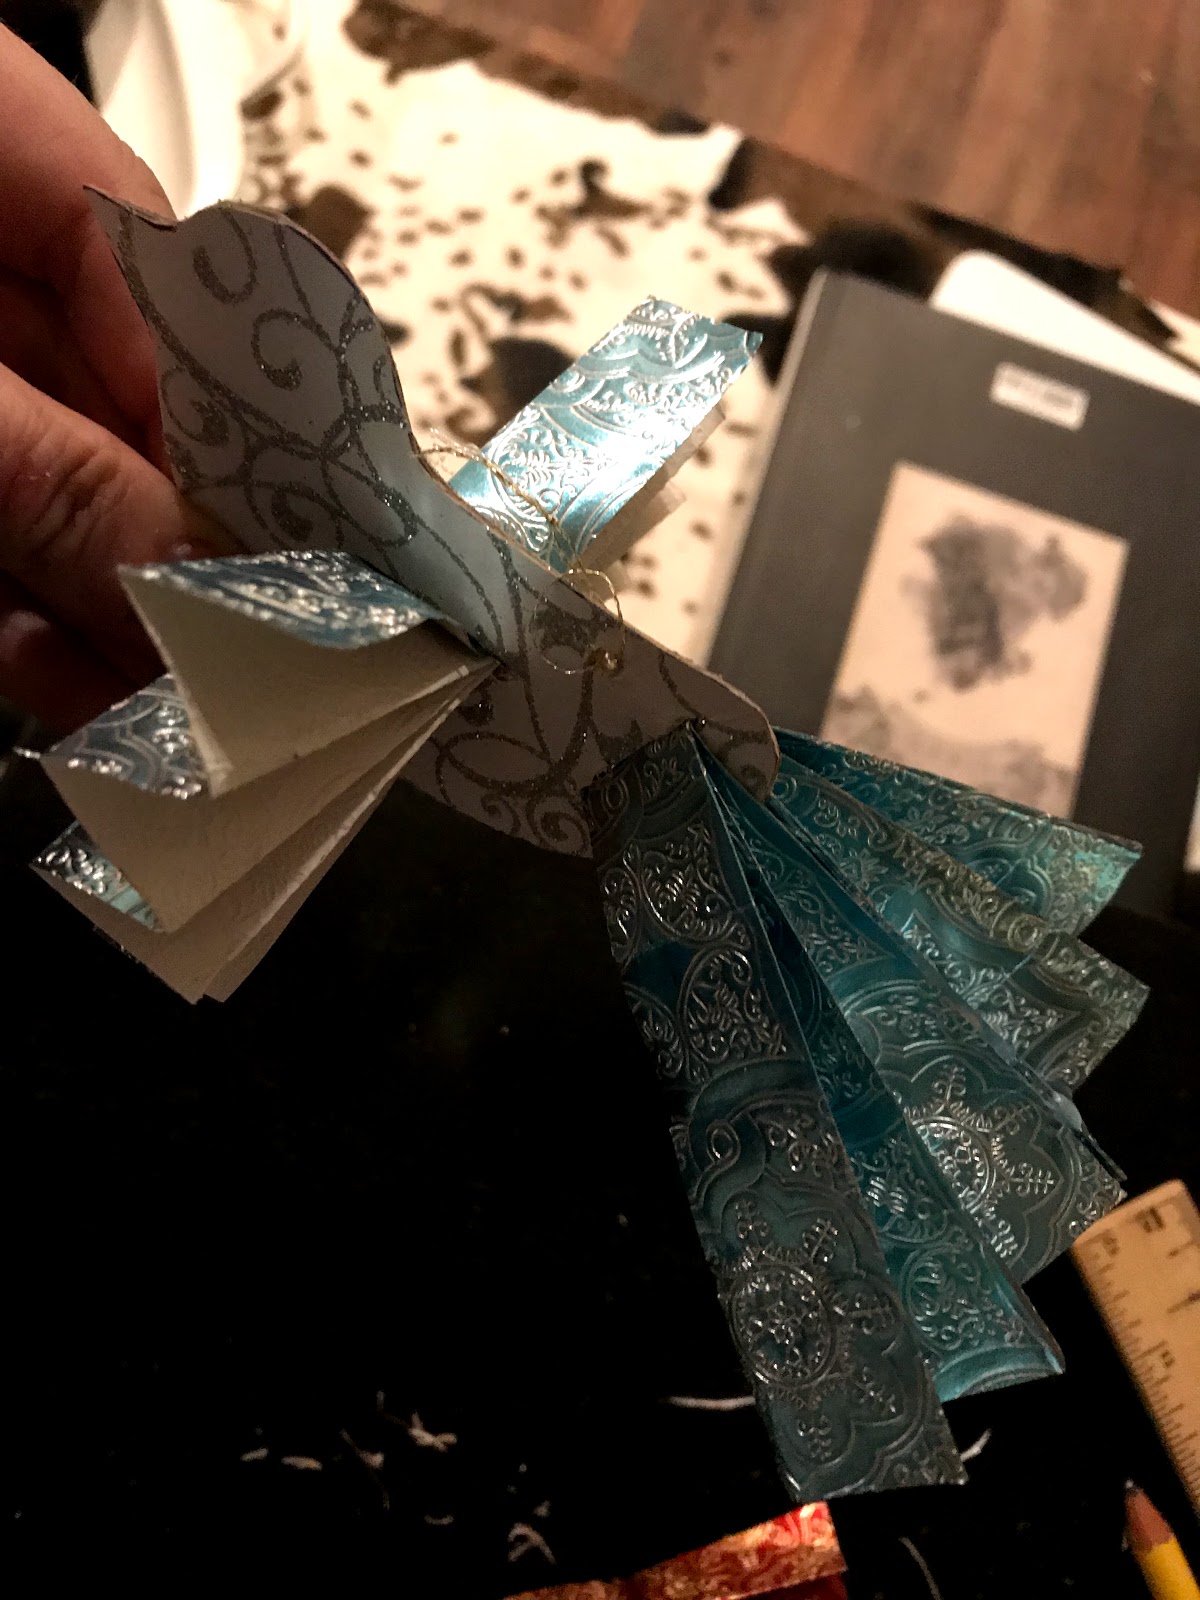
10. Using the tip of the Exacto knife, put a small hole in the bird directly behind the wings. String some embroidery thread to make a loop. This will be how you hang your ornament.
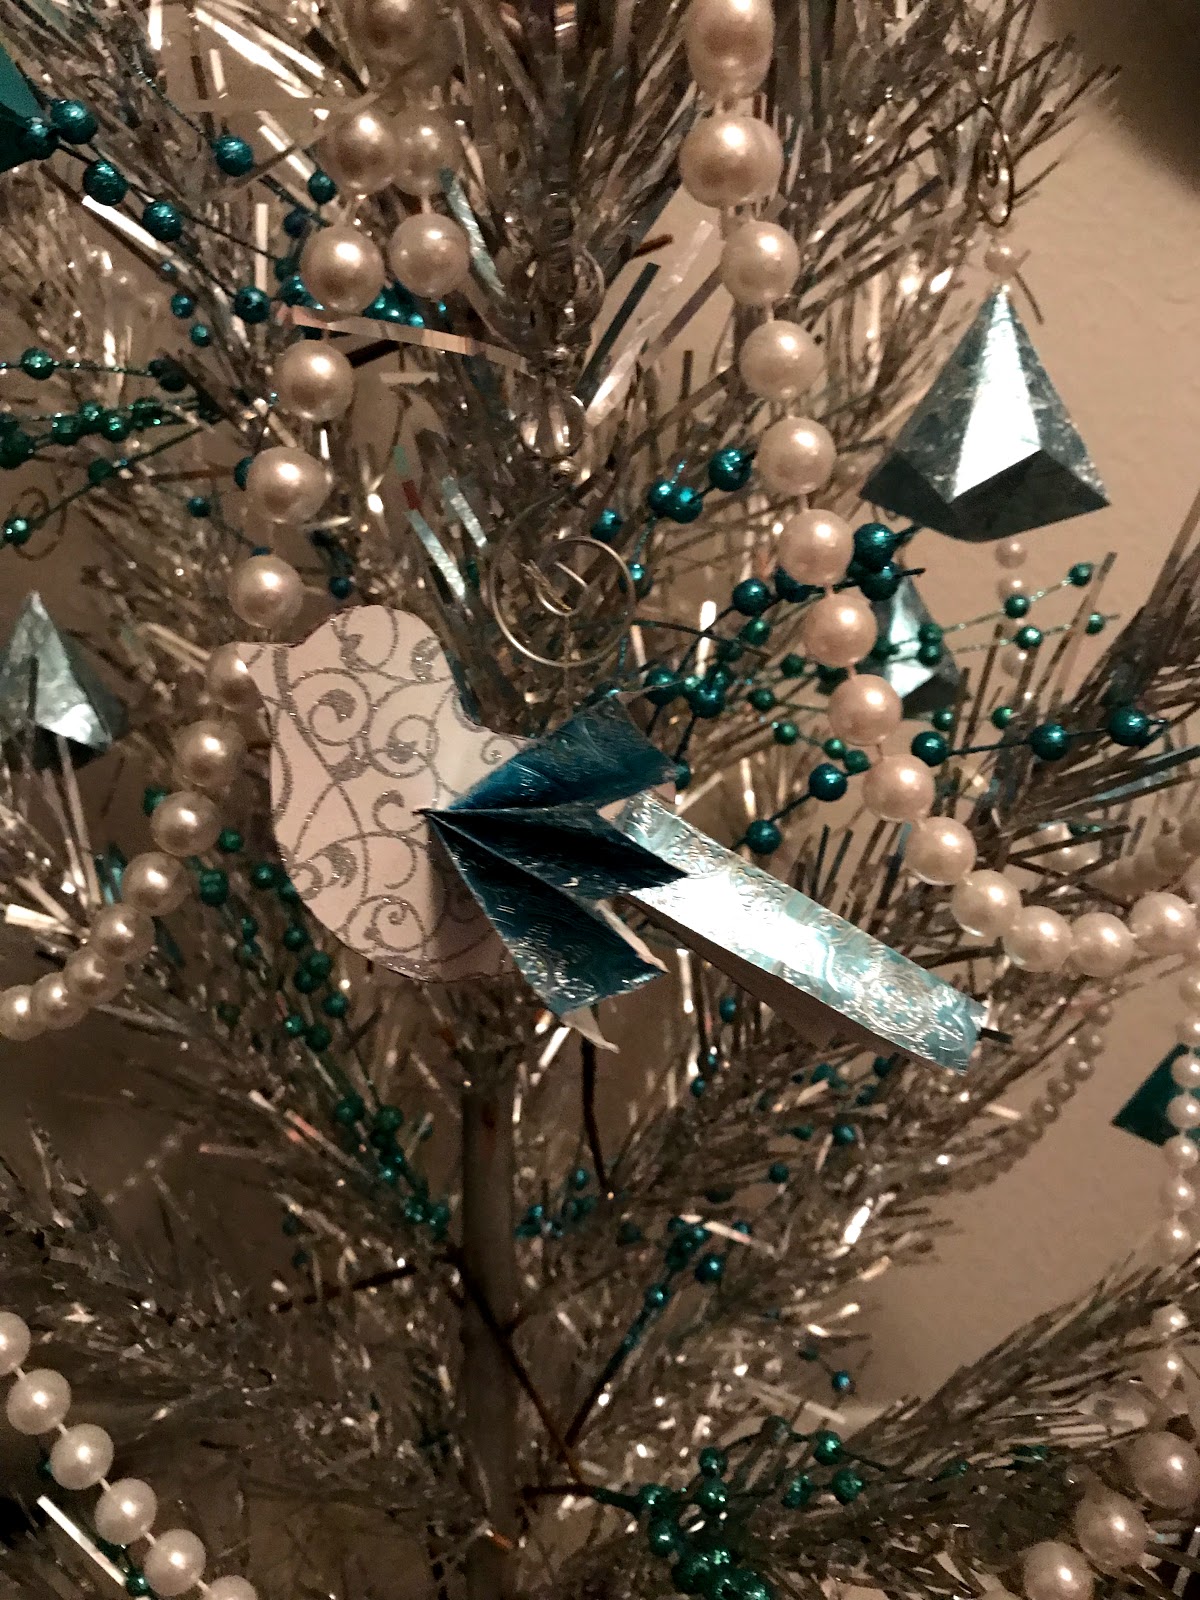
And there you have it! A beautiful ornament that cost you pennies to make.
I also promised you a recipe!
This is not one of my recipes, but it is one of my favorite for the holiday season. As the holidays progress and you host/attend and gift your way through the many holiday parties, you may find your self with a multitude of little cheeses that aren't enough to keep out on the cheeseboard or to use in a recipe, but are too big to throw away. A couple of years ago I found this recipe from Alton Brown and it has been one of my go to recipes ever since. I have the link below but, just in case it doesn't work, I have included the recipe as well.
Fromage Fort

Ingredients
1 lb left over cheese*, at room temperature
1/4 cup dry white wine
3 tbsp. unsalted butter, softened
1 tbsp. dried dill weed (This is my change, Alton uses 2 tbsp. fresh parsley leaves)
1 small clove garlic
Instructions
1. Remove any rinds form the hard cheeses.
2. Grate the hard cheeses. Cut the softer cheeses into 1/2 inch cubes.
3. Place cheese, wine, butter, herbs and garlic in food processor and blend until smooth, approximately two minutes.
4. Serve immediately or refrigerate for at least one hour for a firmer consistency.
This can be stored in the refrigerator for up to one week.
* You may use any left-over cheese you wish, such as cheddar, parmesan, provolone, fontina, camembert or St. Andre. Make certain that you use a combination that is not too salty
Frugal Femme NOTE: You do not have to use dill or parsley. I have used Herb de Provence and Italian seasoning depending on the cheeses that I had on hand. Rosemary, basil and chives are also good choices, but go light on the rosemary as it can overpower if you put too much.
I have also taken out one tablespoon of the butter and replaced it with 1 tablespoon of flavored olive oil. My personal favorite is a Tuscan Herb olive oil. What I am saying here, is don't be afraid to deviate from this recipe. Use it as a template and use the items that you think will taste good.
Well, that is it for this post, but I'm not done with the holiday fun yet. In an upcoming post, I will tell you how to make a truly elegant meal for ten people for under $85.
Happy Holidays!

No comments:
Post a Comment