Thursday, May 19, 2016

Spring Cleaning - General Tips

Hello Everyone!
It is that time of year again. What time of year is that you say?  Spring Cleaning Time!


I do not know why, but there is something about the months from October thru April that make cleaning house difficult if not impossible.  I try to keep my house in order but then, in May, I look around and I have piles of little things that need to be cleaned, repaired, or given to Goodwill and every room needs a deep clean instead of merely a wipe down.  UGH!
So this post will be dedicated to tips and tricks for cleaning your house for the Spring.  One of the grand dames of clean is the Fly Lady.
http://www.flylady.net/
She has made an industry out of giving tips for cleaning your house so that you have more time to do the things you love. 
I was reading a blog from a stay at home mom chastising the Fly Lady for making cleaning seem like a chore that should be finished quickly so as not to be endured for very long.  This mom was sharing that she enjoyed cleaning and thought that the "get it over with" mentality was not the way to approach cleaning your house. 
I must admit, I come from somewhere in the middle.
I do NOT enjoy cleaning.


But..........  You put on some good tunes, open up the windows to let in some fresh air, and give me some private me time with no one in the house and cleaning actually becomes almost fun as you watch your house turn back into the home that you love.


So, here are some general tips that I have for cleaning the house.

1.  Go room by room and have a "to go" basket.

     I always have two baskets that I carry with me into the rooms that I am cleaning.  The first is my
     basket filled with the cleaning supplies that I will be needing.  The other is a large empty basket. 
     This empty basket will get filled as I clean one room of items  that really belong in another room.
     The basket allows me to remove items that do not belong in the room that I am cleaning, without
     making several trips to other rooms to put items away.  This basket will go with me and, as I move
     from room to room cleaning, I will put away the items that I have collected.  Eventually, the
     basket will be empty and everything will be in its place.

2.  Make a cleaning basket and bring it with you to every room. 


     This basket should be filled with the items that you use to clean the house.  I do this for every 
     room but the bathroom.
     (I use specific cleaning items for the bathroom which I keep in the bathroom.)  At  a bare
     minimum, your basket should contain cleaning rags, rubber gloves, cleaning solutions in spray
     bottles, spare small trash bags and cleaning brushes.

3. Start from the top and work your way down.

    This seems like a common sense thing, but I am amazed at how many friends that I have that do
     not follow this simple rule.  You should start with the ceiling. Yes, the ceiling. Clean the ceiling
     fans, light globes and vacuum the ceiling corners and walls. 
     You will have dust and other ick falling down, if you had already cleaned the floors or counters
     this mess floating down will destroy all of your hard work, thus why you do the top first. 
     From the ceiling move on to the surfaces that are waist height such as countertops, tables, chairs
     and sofas. This allows you to wipe things from the counter onto the floor.
     Floors are last.  First you sweep or vacuum and then you mop. 


4.  Allow your cleaning fluids/solutions time to work.


     This was a tip that I learned from the housekeepers on staff when I worked in hotels.  They would
     go into a room and the first thing they would do would be to spray down the countertops,
     stovetops, oven and sink in the kitchen.  They would then go into the bathrooms and spray down
     the sink, bathtub and toilet. 
     After doing all this, they would  return to the kitchen and begin to clean the areas they had just
     sprayed. 
     By doing this, they allowed the cleaning fluids time to do their work.  One swipe and grime would
     and dirt would come off as if by magic.  A good rule of thumb is that you should allow your
     cleaning fluids at least 10 minutes to soak into the areas that you are cleaning before you start
     scrubbing.  Again, use the top to bottom rule.  For example, spray the top of the sink or the
     bathtub and allow the cleaner to move down the sides.  Gravity working for you!

5.  Don't over do. 


     Be realistic about what you can do in the amount of time that you have allotted for cleaning.  But,
     also, don't get side tracked by "little" tasks that will prevent you from cleaning the room.  This
     means that, for example, if you are cleaning the kitchen, don't get side tracked by a  messy junk
     drawer and spend hours of your time organizing the drawer.  Note that the drawer needs
     organizing and plan on doing that at another time but continue cleaning the room that you have
     started to clean.

6.  Clean your cleaning tools before putting them away.


     This is another one that seems like a common sense thing to me.  Once you are done cleaning,
     clean your cleaning tools before putting them away.  This means wiping down all of your bottles,
     brushes, broom, vacuum and mop.  This will help make your cleaning tools last longer and will
     keep you from grossing yourself out the next time that you go to clean because your tools will be
     clean and ready and not encrusted with grime and gross.

7. Clean a room a day.

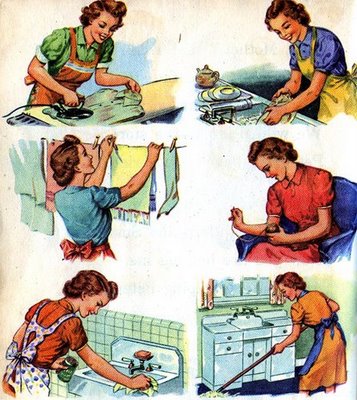
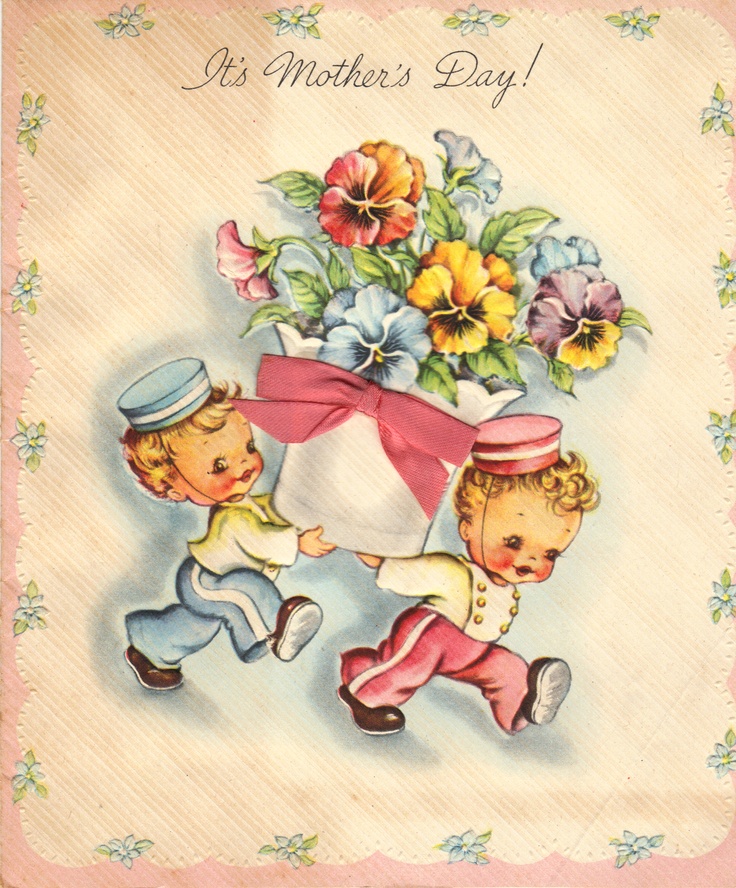
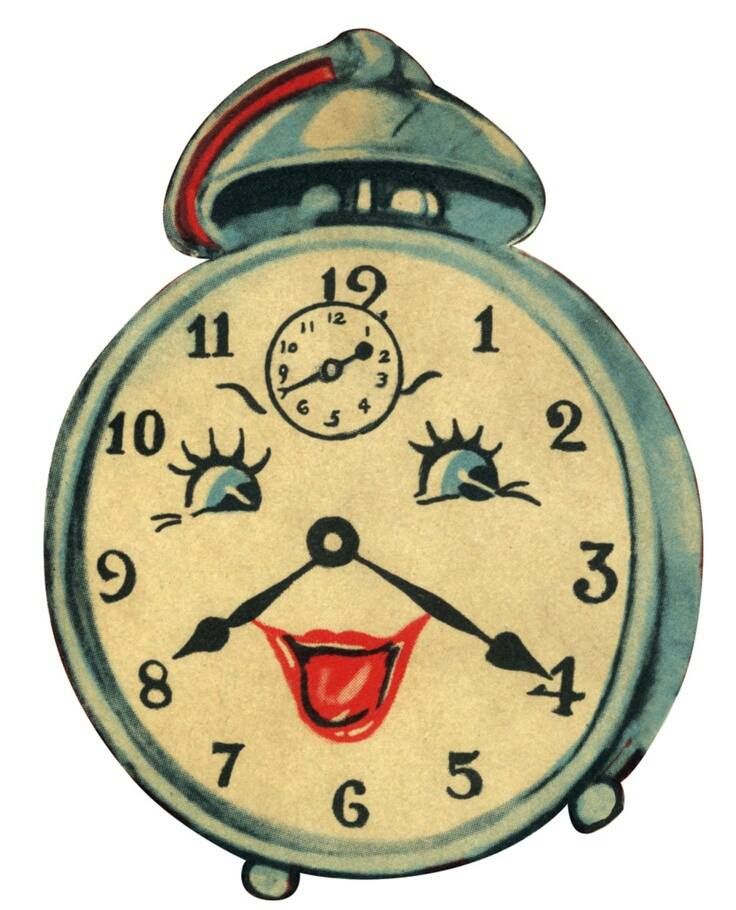
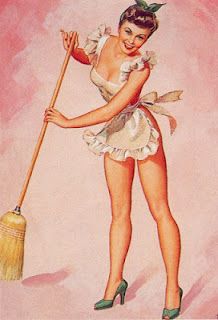
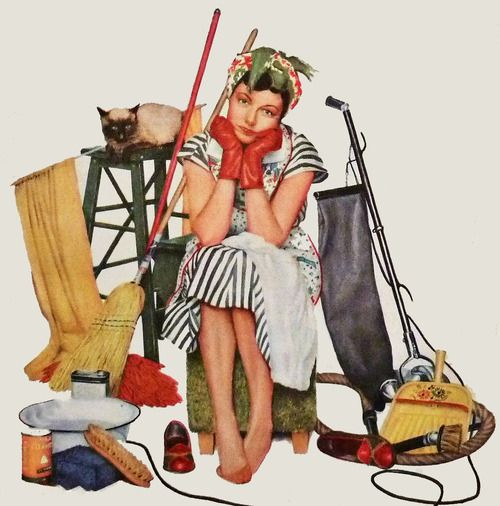
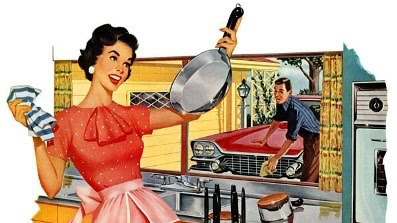
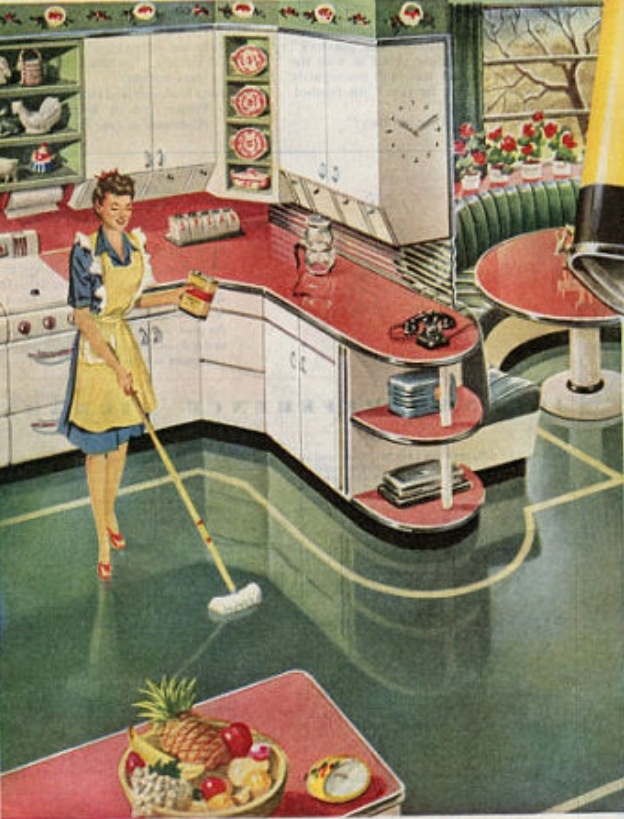
I love these illustrations from the 1940's.  I especially love that she seems to own five different aprons.

    This is the best tip that I ever got from a housekeeper.  Unfortunately, it is one that I just have
    never been able to do myself.  Her advice was to clean one room, every day.  If you do this, she
    told me, your week-ends will be free to do fun things and not used to just complete chores. 

So, these are the general tips of cleaning advice that I have to give.  The next few posts will go room by room giving more specific tips and cleaning "recipes" for cleaners that you can make at home.

Thursday, May 12, 2016

In preparation for Friday the 13th

Hello Everyone!
Tomorrow is Friday the 13th and my second appearance on the Jeff and Company Morning Show!  So, that isn't at all terrifying. 


Since it is the only Friday the 13th that we are going to have this year, I thought that it might be fun to research some history on why it is considered unlucky and then come up with some do it yourself good luck charms.  Do I believe in Friday the 13th and good luck charms?  NO!  But I love having an excuse to theme accessorize.

There are many theories as to how the belief that Friday the 13th became an unlucky day.
The most popular theory as to why Friday is considered unlucky or an evil day is thought to spring from Christianity. By tradition, Friday is considered the day that Eve gave Adam the “apple” and they were kicked out of the Garden of Eden. So that could be why Friday is considered unlucky.  But why the 13th?

Is it just me, or are the cherubs that are nothing but heads and wings kinda creepy?

Some historians trace the infamy of the number 13 back to ancient Norse culture. In Norse mythology, the beloved hero Balder was killed at a banquet by the mischievous god Loki, who crashed the party of twelve, bringing the group to 13. This story, as well as the story of the Last Supper, led to one of the most entrenched 13-related beliefs: You should never sit down to a meal in a group of 13.  Also, in the Norse tradition it was considered unlucky to marry on Friday as this was the day of Freya, one of their goddesses.  So this could be, yet another reason, why Friday is considered unlucky and Friday the 13th especially so.


Another significant piece of the Friday the 13th mythology is a particularly bad Friday the 13th that occurred in the middle ages. On a Friday the 13th in 1306, King Philip of France arrested the revered Knights Templar and began torturing them, marking the occasion as a day of evil.

I'm a victim of my generation.... I cannot see a picture of a Knight Templar without seeing Indian Jones and the Last Crusade and seeing the ancient knight say:  "He chose.......poorly."  Best understatement line in a movie possibly of all time.

In spite of these ancient origins, documents alluding to Friday the 13th being an unlucky day do not appear until the 17th century.  Meaning, that no one really knows how this belief began.

So how can we protect ourselves from the un-luck that is about to unfold tomorrow?  By making cute, good luck charms!
Everyone knows of lucky rabbits foot and four leaf clovers.  But I think one is gross and the other is extremely associated with St. Patrick's Day, so I wanted some different good luck charms.
Here are some things that mean good luck around the world and you can inexpensively incorporate them into your wardrobe:

acorns- The luck of acorns is a Norse superstition having to do with Thor, the god of thunder and lightning and I thought that it would be appropriate to include because of the possible Norse connection with Friday the 13th.  The Norse believed that the oak tree, on which acorns grow, was sacred to Thor. Since Thor was so fond of oak trees, they placed the tree’s seeds near their windows to ward off his lightning attacks. Acorns were also seen as representatives of prosperity, youth and spiritual growth.
So, if you have an oak tree in your yard or around your neighborhood, you can put an acorn on your windowsill or, better yet,  drill a hole through the top, paint it a metallic color (I personally like copper for the top/cap and gold for the bottom), thread a necklace loop through the hole and the put it on a chain  and wear it as a totally cute necklace.


This is an actual metal necklace, but I used it as my inspiration for an acorn necklace.

 
As you can see, it is cute as just an acorn.  But I like to paint mine


elephants - The origins of the lucky elephant charm can be found in the Hindu religion of India. There, the god Ganesha, the elephant-headed son of Siva and Parvati, is worshipped as a luck-god, among other things. The  idea of the charm itself most likely began when Europeans, especially the British, started colonizing India and all things Indian and Oriental were considered trendy.  The lucky elephant should always have his trunk facing up, never facing down.  This may be an extension of the lucky horseshoe "catching" luck. 
I don't have a craft for the lucky elephant, but how cute is this charm?  I have several elephant charms.  I like them so much, I even have a couple pairs of sandals that are decorated with elephants.

lady bugs - Ladybugs are seen as lucky around the world. One reason this superstition may exist is due to the ladybug’s eating habits. These spotted insects are known for eating tiny creatures that are harmful to crops, such as aphids. Reversely, if you kill one of these little beetles you will be doomed with misfortune.  They do have such things as lady bug beads, but I like to paint a lady bug on my ring finger nail or on my toes.
This is not my pedicure.  I wish my fee were this pretty.  But this manicure is very easily done.
I will put detailed instructions on how to get this look in another post.  But, if you want to try it now, the secret is those little ring support stickers that you can get from the office supply store.  Cut one in half and place it over your toe nail which you have already painted red and allowed to dry.  Then paint the lady bug's head.  Allow to dry and remove the sticker template.  I like to use a Sharpie to do the line down the middle and, even sometimes, to do the dots.  Using the end of a bobby pin, dip the pin in white nail polish and then dot twice in the head to make the eyes,  Voila!  you have a lady bug.  (If you would prefer to use nail polish for the dots and the line, you can also use the tip end of a bobby pin to create those.)

keys -  This particular good luck charm was just made for the Tiffany key necklace craze. But for those of us who don't have the money to own the Tiffany version, wearing three keys together is said to be good luck as one unlocks the door to health, wealth, and love, respectively, but also hopefully your building door, your apartment door, and your car.  You can use your daily keys, or you can try to look around and find more decorative keys. 

These are keys that I have in my home.  Two of them actually open something.  One opens a hope chest and the other a china cabinet.  However, you can get keys like this at a craft store like Michaels for under $2.00.


the evil eye - Although I had "heard" of the evil eye, it wasn't until I went to Turkey that I really got to know about this symbol of good luck.  Wikepedia says "The evil eye is a curse believed to be cast by a malevolent glare, usually given to a person when they are unaware. Many cultures believe that receiving the evil eye will cause misfortune or injury.     Talismans created to protect against the evil eye are also frequently called evil eyes."
These things are everywhere in Turkey and before I left I had at least 10 of them that I brought home and handed out to friends and still had about 6 left for me.

Aren't these fun?  I wore mine somewhere on my person the entire time that I was in Europe.

I plan on putting mine on some hoop earrings that I own and wear them that way but, for those of you who don't have evil eye amulets, I went online and found this cool  tutorial on how to make an evil eye friendship bracelet.  Actually, I found two. I couldn't decide which one I liked better, so I am posting both of them here:

This one can be found on  http://friendship-bracelets.net/tutorial.php?id=4504


 And the pink one can be found on :  http://www.mylittlesecrets.ca/diy-evil-eye-bracelet/

 What I want to try to do is combine the two and make the first evil eye bracelet and then use it as the center for the second evil eye bracelet.  I will try making it and, if it turns out, I will post the tutorial here in another post.

sailors knots -  Sailors knots were considered to be good luck by sailors and their families.  As nifty as that is, the truth is, I just really think this is one of the coolest bracelets that I have ever seen.  Just click on the link below the picture for instructions on how to make this bracelet and also for further information on why sailors believed sailors knots to lucky.


 http://www.flightsofdelight.com/2013/05/25/sailors-knot-bracelet-diy/

So, there you have it.  A little information on Friday the 13th and some cute, inexpensive and fashionable ways to bring a little luck........Because it never hurts to be cautious. :-)

Friday, May 6, 2016

Creating a Table Setting for your Mother's Day Brunch

Hello Everyone!
This post is much later in the evening than I expected to be.  I wasn't planning on my brain going on meltdown because I had woken up so early to go on the Jeff and Company morning show. But, after the show and a regular work day, I could barely form words, let alone type, so I took a nap and now I am ready to go.


I wish I looked this glamorous while I napped.
So we have covered what we are going to eat for our Mother's Day Brunch, now we have to tackle the setting.
It is sometimes hard to make food beautiful, although the brunches that I chose for this year's Mother's Day brunches are all very pretty on their own.  But you can make food look better if you set a lovely table on which to serve it.  In today's day and age, very few people have, and use, their formal dining rooms for the purpose that they were intended.  I myself am guilty of this -- I turned my formal living/dining room into a pub/library.  Because of this, most of us eat in the kitchen, or on the bar counter top or in the breakfast nook and, very few of us, I'm sure, take the time to set the table and make dinner an occasion.  This is also the reason why very few of us have the trappings for a more formal dining occasion.
Rather than panic and go out and spend your money on trying to buy the things that you would use to set your table, I am going to give you some ideas on using things around your home.
First, the table cloth.
PLEASE don't go out and buy a cheap, plastic table cloth. Your mom is worth real cloth.  Everyone of us has sheets.  Grab one of your prettier CLEAN, flat sheets  and fold it so that it will fit your table without draping onto the floor.  Voila, instant table cloth.
If you have Star Wars sheets, or some other pattern that is equally unusable as a table cloth, you can, usually, purchase a lone flat sheet for a dollar at your local Goodwill.
Once you have the table cloth on the table, you have won half of the battle.  A table cloth instantly makes a table more elegant. 
From here, start thinking about what you can use as a centerpiece.
Do you have an old vase that you never use from flowers you received from an old beau?  You can fill it with flowers, but, unless you have a garden,  flowers can get expensive.  Look for other interesting things to fill the vase.  If you have an oak tree in your yard, or neighborhood, collect some pine cones, spray paint them in colors that will match your place settings and place them inside your vase.
Do you have eggs leftover from your brunch?  This is a brunch- so use them, carefully put the uncracked eggs into the vase and you have a funky, brunch-y centerpiece.  When you are done eating and no longer need them as decoration, you can put them back in the fridge and use them for another meal.
You don't have a vase you say.  What do you have in your house that could be moved for the purpose of the brunch?  I am not in your house, but I am certain that you have something that can be used as a centerpiece.
The point is, think outside the box.  If you really can't think of anything, take out the jelly, still in the jar, that you were planning on serving with brunch.  Soak off the label, tie a ribbon around the top. If you are having more than one jelly, place the decorate jars all on one plate.
Find a small plate and put your butter on that.  If you don't have butter, but use margarine, take a lemon baller and form your butter into little balls and put those on a plate. 
On another plate, put the bread that you are going to serve with brunch. 
Place all of these in the center of the table. 
Arrange them so they look balanced. 
If you have a candle, light it and put it in the center of the plates.  It is practical and pretty.
This, of course, leads me to plates and silverware.  Things do not have to match to work as a table setting but they do need to coordinate.
For example, I have a collection of my grandmother's vintage tea cups.  None of these cups are the same color or style.  But they look beautiful when I  put them together with a white tea pot and serve tea.
These are not my tea cups, but I actually own two of these, so you get the idea. None of them match, but they do coordinate.
You can use the same idea when setting your table. Use plates that, at the very least coordinate with one another.  Use your clear glasses rather than plastic cups.  You get the idea.
If you don't have any dinnerware that will work to make a pretty table, you can always go to your local grocery store or Walmart and buy some decorative plastic plates.  These will usually run you about $5.00 which is an expense that I try to avoid.  But, in a pinch, they are less expensive than buying a dinnerware set and, plus side, unless your planning on using them again, you don't have to wash them.
The ones in this picture are packaged for larger groups, but you can get them in packages of eight.  You can also find different styles in the wedding section in party stores.
Now that we have covered tables cloths, center pieces and place settings, lets move on to napkins. You can use paper towels, although I am cringing even as I type this.  But, I am a cloth napkin person. I use cloth napkins for every dinner I eat-even when I am eating take-out from a cardboard container. I get cloth napkins for between $3-$6 at Marshall's and I find them well worth the expense.  There is something about a cloth napkin that instantly makes a meal more elegant.  But, if you would never use a cloth napkin again after this brunch, that would be a waste of money. 

Whether you use paper napkins, paper towels, or cloth napkins, please take the time to fold them prettily.  There are all sorts of instructions that you can find on the internet.  Here is a diagram that I found online.
I know, its not the clearest picture in the world because I enlarged it.  But it gives you a starting point.
 
I don't do napkin folding you say?  Well, then roll your napkins and place them in a napkin ring.  The napkin ring could be as simple as a ribbon tied around your napkin or as complicated as a decorated piece of a toilet paper tube.
Yes, I said toilet paper tube.
I ALWAYS save some empty toilet paper tubes once a roll is done because they come in so handy for so many things. (I hide them from my husband so he doesn't think that I am some weird, crazy, hoarder and I limit myself to no more than 20 at any one time, unless I am colleting them for a project.)
To make a napkin ring from a toilet paper tube, take one toilet paper tube. Cut the tube in half.  Take the half and cut that it half.  Do the same thing with the other half.  You should now have four small pieces that you can now decorate in a multitude of ways.  You can spray paint them a bright or a metallic color and call it a day.  If you have leftover, small, pieces of pretty wrapping paper, you can wrap them in paper.  You can glue a spare piece of ribbon around it.  You can leave it unpainted, wrap the center with a paper bag that you cut into strips to make "ribbons" and hot glue a pretty stone in the center for a more rustic feel to your brunch.  You can decorate it with beads, flowers, etc.  You get the idea, they can be decorated with anything that you already have around the house. If all you have is old news paper, tear it into strips and decoupage the rings.  The idea here is to save money.  So don't buy supplies that you are only going to use for this one project.

This is a picture that I found on AnExtraordinaryDay.net.  It epitomizes what you can do if you use your imagination when it comes to place settings.  Instead of a place mate, she uses overlapping pages of an old book and for the napkin ring she used some fresh flowers from her garden. I don't encourage tearing apart books, but if you have one that is already falling apart, why not refurbish it in another manner?


Wow!  This post has already gotten fairly long and I haven't even gotten to the gift ideas yet.

Personally, I think that a lovely meal, made by you, wonderfully presented and then cleaned up by you afterwards is a gift in itself.  Especially if you have one of those mothers who actually means it when she says she doesn't want you to buy her anything because she already has enough stuff.  (I have a mother-in-law like that.)  Add a card telling her you love her and you are done.
But, if you feel that you need to give her a little something extra, here are some ideas that won't break your bank:
1.  Homemade bath salts
2.  A manicure by you  (If you are talented enough to do a manicure for another person.)
3.  People always need a pen.  Make her a pen bouquet  (I love these.  They are regular ball point pens, but you put a fake flower on  the top and wrap floral tape around the stem and the pen.  Put them in a flower pot or mug
4.  For the gardener, make her plant identifiers by using permanent markers and river stones.
5.  Hand paint or decoupage a coaster made out of small 4x4 tiles and cork.

I will give detailed instructions on how to do all of these tomorrow, as this post is getting really long and I don't want to make it any longer, and I will continue with housecleaning on Sunday!

Thursday, May 5, 2016

Mother's Day Brunch Meals, Brunch #3

Hello Everyone.
I am so nervous and excited!  Tomorrow I start my guest appearances for The Frugal Femme Friday's on 103.3's morning show Jeff and Company. 


There is no vintage version of this logo. :-)

I go on EARLY in the morning, or at least early for me.  I go on after 6:30 and before7am and I think I will be on, off and on, throughout the morning.  I am usually still sleeping then so, hopefully, I will be coherent and interesting to listen to.  If you are from Baton Rouge, awake, and near a radio, please listen to me tomorrow. 
Okay, enough of plugging myself-- onto the third and most complicated of the brunches!
This brunch is inspired by a Jacques Pepin cooking show I saw on LPB's Create TV.  I haven't really changed the recipe at all except to change the portions for two people.  If it is more than just you and your mother for dinner, here is a link to the original recipe:

http://www.foodandwine.com/recipes/aspen-2003-les-oeufs-jeannette-eggs-Jeannette

I tried to find the video from his show for public television, but I could not find it.


Jacques Pepin Eggs Jeanette

Don't these look fancy?  Imagine them on top of a bed of Romaine lettuce.  Elegance personified

Ingredients
3 large eggs (preferably organic)
1 tsp. chopped garlic (I use more than Jacques because I like mine garlic-y, but you can use less if you would like.)
1 tbsp. dill  (Jacques uses parsley.  I don't care for parsley so I substituted dill.)
1-2 tbsp. whole milk  (I don't have whole milk.  I have two percent and it turns out fine or, if I have it, I add a little sour cream to my milk to thicken it up a little.)
1/4 tsp. kosher salt
1/4 tsp. freshly ground pepper
1 tbsp. vegetable oil
(This recipe is SOOOO good if you also add a few drops of truffle oil)
Crunch French bread

Dressing
1-2 tbsp. left over egg dressing
1/2 tbsp. Dijon style mustard
1/2 tbsp. water
Dash of kosher salt and freshly ground pepper
2 tbsp. extra virgin olive oil

Instructions
1.  Put the eggs in a small saucepan and cover with boiling water. Bring to a very gentle boil and let boil for 9-10 minutes.
2.  Drain off the water and shake the eggs in the saucepan to crack the shells. (Jacques Pepin says this will help in the removal of the shells later on.)
3.  Fill the sauce pan with cold water and ice and let the eggs cool for 15 minutes.
4.  Shell the eggs under cold running water.  (I admit it, I don't do this, I stand above my counter and shell them.  Bad Carole!) Split the eggs lengthwise.  (Just as you would if you were making deviled eggs.)
5.  Carefully remove the yolks and put them into a bowl.  Add the garlic, dill, milk, kosher salt, and pepper.  Crush with a fork to create a coarse paste.  (Here is where you can add the few drops of truffle oil.)
6.  Spoon the mixture back into the hollows of the eggs whites, reserving 1-2 tbsp. of the filling to use in the sauce.  (This is where you do not want it to be like deviled eggs.  You want the filling of the egg to be even with the egg white to create a flat surface.)
7.  Heat the vegetable oil in a non-stick skillet and place the eggs stuffed side down.  Cook over medium heat for 2-3 minutes, until the eggs are beautifully browned on the stuffed side.
8.  Removed and arrange stuffed side up on a platter.  (In the television show, Jacques Pepin lay down a bed of sauce first and then put the eggs on the sauce, stuffed side up and then drizzled more sauce.  LATER ON IN THIS RECIPE, I am going to show you another way that you can serve this.)
9.  For the dressing, mix all of the dressing ingredients in a small bowl or a mini food processor until all the ingredients are well combined.
10.  Coat the warm eggs with dressing and serve lukewarm with crunchy French bread.

NOTE:  This is a delicious way to eat this meal and is how I ate it when I prepared the eggs in the picture I have posted here.  Another excellent way to eat this is over Romaine lettuce.  Put the lettuce in a bowl and then toss gently with about half of the dressing.  Place the eggs, stuffed side up on top of the salad and drizzle with the remaining dressing.  Sprinkle with two-three slices of crumbled bacon that you have pre-prepared.  (Please don't use pre-packaged bacon bits, they do not give the same texture and flavor.)  You can add other things to this salad, such as green onions, but I find that it is more delicious if you leave it simple.  Serve the salad with French bread.

French Bread in the Bread Machine

This is another one of those items that I *'ed in the first Mother's Day post. This is because French bread is so easy and inexpensive to buy these days, with many grocery stores selling them for $0.99 per loaf, so why go through the hassle.  But I have included this recipe in case you want to make your own French bread the day before and make your mother believe that you are a genius in the kitchen.

As you know, I don't come up with many of my own baking recipes.  This recipe is no exception. I wish that I could remember where I got this recipe, but I wrote down this recipe years ago, before I realized I might be sharing recipes on a mass medium,  and I did not record where I found it.  I apologize to the baker who created this yummy bread recipe for not giving them credit.

Ingredients
1  1/4 cups water (70-80 degrees)
2 tsp. sugar
1 tsp. salt
3 1/2 cups bread flour (Yes, you have to use bread flour it doesn't come out right if you don't.)
1 1/2 tsp. active dry yeast (1 packet)
1 tbsp. cornmeal

Glaze
1 egg
1 tbsp. water

Instructions
1.  In a bread machine pan, place the first 5 ingredients in the order suggested by the manufacturer.  (This is why I never throw away the instruction book that came with my machine, I can never remember the order of ingredients.) 
2.  Select the dough setting.  (Check after 5 minutes of mixing to see if need to add more water or flour.)
3.  When the dough cycle is completed, turn dough out of the pan onto a lightly floured surface. Divide the dough in half. Roll each portion into a 10 inch by eight inch rectangle.  (If you don't have a ruler and need a guideline, regular paper that goes in office printers is 8 1/2 by 11.  So you want it slightly smaller than a piece of printing paper.)
4.  Starting with the long side, roll up, jelly roll style and pinch the seams to seal.
5.  Sprinkle a greased baking sheet with cornmeal.
6.  Place the loaves, seam side down on the prepared pan.
7.  Cover and let rise in a warm place until the loaves have doubled, about 20 minutes.
8.  Whisk together the egg and water and brush the mixture over the loaves.
9. with a sharp knife, make four shallow slashes across the top of each loaf.  (This will make the bread look cool and like you bought it at a bakery.  I'm sure it does other things as well, but, for my mom, I am all about how it looks.)
10.  Bake at 375 for 20-25 minutes or until golden brown.
11.  Cool on a wire rack.

Tomorrow I will be back with some ideas for decorating the table now that you have a menu and some last minute, hand made gift ideas that your mom will adore and your pocket book will love.


Wednesday, May 4, 2016

Mother's Day Brunches Continued

Hello Everyone!
As promised, I am posting the second in the Mothers Day Brunches.  I have not included it in the menu, but a small bowl of fresh fruit would go perfect with the other elements of this brunch and would look so pretty.


I am loving these vintage Mother's Day Cards. 


With this particular brunch, you should start the Gourmet hash browns first. They are going to take the most prep and take the longest.

Gourmet Hash Browns

These hash browns are a more "genteel" version of the country hash browns I usually make.
I love this table setting.  In Friday's post, I'm going to show you how to lay out a pretty table without spending a pretty penny.

Instructions
3 large Yukon gold potatoes  (You can also use russet potatoes.),  cleaned
kosher salt
1 tbsp. butter
1 small onion, chopped
1 clove garlic, minced
1/4 cup cheese, this can be a cheese of your choice.  I like asiago, mozzarella, or montasio but it is also very good with cheddar. 
1/4 tsp. - 1/2 tsp. freshly grated nutmeg (if you don't have fresh nutmeg, you can use dried nutmeg.)
1/2 tsp. herb de provence  or you can use basil
1/2 tsp. dill
2 tbsp. canola oil, split  (You can also use olive oil or grape seed oil.)
1 small shallot or green onion, minced
1/2 - 1 tsp. sherry wine vinegar or white wine vinegar (to taste)

Directions
1.  In a medium pot, put the scrubbed potatoes and cover with water.  Put about 1 tsp. of salt into the water with the potatoes.
2.  Bring to a boil on medium high heat and cook until potatoes are fork tender, about 45 to 50 minutes.  Drain the potatoes and let them cool slightly.
3.  While the potatoes are cooling, melt butter in a heavy bottomed 8-in. skillet (I like to use cast iron.).  Add the onions and garlic and cook on medium heat until the onions are translucent,  Make certain to stir constantly and make certain not to burn the garlic.  This will take about 6 to 8 minutes. Take off heat and set aside.
4.  Peel the still-warm potatoes and crush them gently into small pieces with a fork in a medium sized bowl.  (The pieces should be about 1 inch, you are not make mashed potatoes.)
5.  Gently fold in the onion/garlic mixture, cheese, pinch of salt, nutmeg, herb de provence or basil, and dill.  Do not over mix.
6.  Wipe out the heavy 8-in. skillet and heat the pan until hot but not smoking.  Add one tbsp. of oil to the pan and heat oil. The oil will begin to shimmer when it is heated through.
7.  Add the potato mixture to the skillet in an even layer. 
8.  Let the mixture cook on one side until golden brown, about 3-4 minutes.  Run a spatula around the edge of the pan and underneath the potato mixture to loosen from the pan.  Give the pan a shake to loosen potatoes from the bottom completely.
9.  You can try flipping the potato mixture with the spatula or do the fancy flip move that you see chef's do on tv, but I prefer the plate method.  Place a plate over the top of the skillet and quickly turn the skillet so that the plate is on the bottom and the skillet on top.
10.  Put the skillet back on the burner and, using a spatula, carefully push the potato mixture, brown side up, back into the skillet.  Smooth the top if necessary.
11.  Let the potatoes brown on the bottom for another 3-4 minutes.  Using the spatula, loosen the sides and bottom of the potatoes again..
12.  Carefully slide onto a plate or serving platter. Set aside and allow to cool slightly. The potatoes will firm up as it cools. 
13.  In a small bowl mix together 1 tsp. olive oil,  the sherry vinegar and the shallots.  Salt to taste.

To Serve: Cut potatoes into wedges and drizzle the vinegar mixture over the potatoes.

Ham and Egg Cups

These look super fancy and will impress, but they are super easy to make and are so delicious!  This is one of my husband's favorite breakfast dishes of all time.


Ingredients
3-4 slices deli ham  (Although I have used the thin sliced prepackaged ham it worked just fine.)
3-4 eggs
1 tsp. Boursin cheese, per cup
basil, to taste
kosher salt and freshly ground pepper, to taste

Instructions
1.  Pre-heat oven to 350 degrees.
2.  While oven is heating, spray muffin pan with non-stick spray or brush with melted butter.
3.  Place one slice of ham into each muffin cup.  I like to flute the edges so that the ham sort of looks like a rose.

All of my baking pans are pink.  They make me happy.

4.  Put one teaspoon of Boursin cheese into the bottom of each ham cup.


5.  Carefully break one egg and slide into the ham cup.  If it is easier for you, you can break the egg into a custard cup first and then slide the egg into the ham cup. Repeat the process for the remaining eggs.


6.  Top the eggs with basil, kosher salt and freshly ground black pepper.


7.  Bake for 18-20 minutes until the egg whites are set and the yolk has thickened.


8.  Let stand in muffin cups for 3-4 minutes to cool.
9.  Carefully remove from muffin pan and serve.  (I use silicone pans, so I just gently press from the bottom and it pops right out.)

Aren't these pretty?!?!?!

Variations:  You don't have to use Boursin cheese, any cheese that you like can be used.  Also, this dish goes up to another element if, before baking, you top each egg with 1 tsp. of pesto and place a   cherry tomato sliced in half over that.  So yummy and so pretty!

Tomorrow, we do our final dishes!
 

Monday, May 2, 2016

Ideas and Recipe for Mothers Day Brunches

Hello Everyone!
Oh my goodness this year is going fast. I sat down tonight to continue on my Spring cleaning posts and realized that this weekend is Mothers Day!!!!

Isn't she adorable?  I have a lady vase that looks a lot like her that stores my paint brushes.

I made a promise that I would give y'all recipes for awesome brunches for your mom when I couldn't do them for Valentine's Day and I don't plan on reneging on that promise.  So, we will continue on with Spring cleaning later this week and will focus on brunch for this post.


Making brunch for your mother is a great way for you to spoil mom and save on our pocket book.  Most of the supplies will only cost about $10 (excluding alcohol)  total when you purchase them at the grocery store. That is less than the cost of one brunch meal at a restaurant, let alone two meals, and that doesn't even include if you decide that you would like a Bloody Mary or Mimosa to go with Brunch.
I'm sorry that I don't have pictures for most of these, but the holiday snuck up on me. 
Brunch is, overall, not a difficult meal to create. The hard part comes in the timing of when you prepare the dishes.
My timer actually looks like this, minus the face, and with minutes instead of hours.  I actually use it quite a lot when I am preparing breakfast.

If you are not a frequent cook, for some of these recipe, I would advise that you have breakfast for dinner some time this week and practice your timing so that you get it just right for mom on the big day.
I have broken these down into individual meals, but please feel free to mix and match to your heart's content.  I also have avoided the breakfasts that you may make every week-end such as scrambled eggs, bacon, and pancakes. Instead, I have opted for the brunches that will look prettier and feel more luxurious when eating, so that it feels more like it belongs in a ladies salon than a farmhouse table.

Please note, if I have put a * by the name of the dish it means that you can do it yourself and feel smug about the fact that you are awesome and did everything by hand, but it is more work than most of us are willing to do. I have included the recipes, but I would suggest cheating and just buying them at the store.


Brunch #1  (Easy)  Blueberry Scones* with Clotted Cream & Lemon Curd or Strawberry Jelly
                               "Parisienne" Coddled Eggs
                                Thick-cut Bacon

Brunch #2 (Medium) Ham and Egg Cups
                                 Gourmet Hashbrowns

Brunch #3 (Hard)  Jacques Pepin's Eggs Jeanette  (A dish named after and inspired by his mother)
                               Served over Romaine lettuce and sprinkled with Bacon
                               Crusty French Bread* 

I want both of these outfits.  The be honest, I want this picture to be my life.  But this is the feel that I strive for when making a Mothers Day Brunch.

Brunch #1:  Blueberry Scones with clotted cream (or butter) with Lemon Curd or Strawberry Jelly                                           "Parisienne" Coddled Eggs    and   Thick Cut Bacon               


Blueberry Scones


Although I have baked blueberry scones, to be brutally honest I usually purchase them from the market.  But I am including this recipe for those of you who like to bake.  This is my favorite recipe for blueberry scones and is on a website that truly has some wonderful baked recipes.

http://sallysbakingaddiction.com/2014/07/22/my-favorite-blueberry-scones/

I am not a baker, so I do not come up with my own recipes when it comes to baking, so I thought it only fair that I give all the credit to Sally.

Microwave Lemon Curd

I got this recipe from the book The Complete Book of Small-Batch Preserving by Ellie Topp and Margaret Howard. 

I am not being paid to endorse this book, I just like it.

I found it at the library and loved it so much that I had to go online and buy it for myself.  As you know, I am starting to garden now that I have a house, and I wanted to have recipes for the items that I am growing in my garden.  But I did not want 20 jars of tomato sauce.  This book tells you how to can fruits and vegetables in small batches so that it is more practical for the smaller household. The only hard thing about this recipe is making certain that you monitor the temperature in your microwave.  You have to be careful not to overcook it or it will separate.
I have included this recipe in case you cannot find lemon curd or if the lemon curd that you found is too expensive for your budget.  This recipe is extremely budget friendly.

Ingredients
2-3 Lemons
1/4 cup butter
3/4 cup granulate sugar
2 eggs

Instructions
1.  Finely grate (zest) the thin outer rind of the lemons. 
2.  In a small bowl or juicer, squeeze the lemons until you have about 1/2 cup of lemon juice.  (Please don't try to cheat and use ready made lemon juice.  It won't taste good.)  Pour the juice into a 4 cup microwavable container.  (I have a 4 cup Pyrex measuring cup that I like to use.)
3.  Stir in the grated rind (zest), butter and sugar. Microwave, uncovered, on high (100%) for 1 1/2 to 2 minutes OR until the butter is melted and the mixture is hot.
4.  In a medium bowl, beat the eggs.  GRADUALLY add the hot lemon mixture to the eggs, stirring constantly.  You have to be gradual and stir constantly or the hot lemon mixture will scramble/cook the eggs and you don't want that.
5. Return the mixture back to the microwaveable container and microwave, uncovered, on medium heat (50% power for 1 to 2 minutes OR until just thickened, stirring every 30 seconds. (This was the hard part for me because it took me forever to try to figure out how to get my microwave to half power.)
Do not allow the mixture to boil; the mixture will thicken as it cools.
6.  Let cool.
7.  Pour curd into a container that can be tightly sealed.  In can stay in the refrigerator for up to two weeks or in the freezer for longer.

NOTE:  This will make about 1 2/3 cup lemon curd.  You can make this at least a week in advance or the night before and it is one less thing that you have to worry about the day of your brunch.
If you want to be a little naughty, you can stir 1 tbsp. Amaretto or Grand Marnier into the curd after cooking.

"Parisienne" Coddled Eggs

I adore coddled eggs.  I make them for my husband and myself for breakfast at least once a month.  Although it is easier to coddle your eggs in a coddler, I realize that not everyone has this breakfast tool, so I have also included instructions for how to coddle an egg in a teacup.  Both are beautiful in presentation and will make your mom feel like a queen.

This is one of my set of four coddlers.  As you have probably figured out, I love little birds and every time I see these coddlers I get happy.


Ingredients
Cooking spray or melted butter
3-4 large eggs
1/2 tsp. milk or cream each (for each egg)
1 clove garlic, minced
1 tbsp. freshly shredded parmesan cheese.
1/2 tsp. dried herb de provence  (Or, if you have an herb garden, you can use any herbs that are in your garden and that you think would taste yummy on your eggs.)
kosher salt and freshly ground black pepper to taste

Instructions (For Coddler)
1.  In a small bowl, I use a custard cup, mix together the garlic, parmesan and herbs. Set aside.
2.  Spray the inside of each coddler with non-stick spray or brush on melted butter.  Make certain that you cover the inside of the lid as well so that they egg won't stick.
3.  Carefully pour about 1/2 tsp. of cream or milk into each coddler.
4.  Gently break each egg, one at a time, into a coddler.  Unless you have an extra large coddler, one coddler should fit one egg.
5.  Divide the cheese mixture evenly among the  number of eggs you are making (3 or 4eggs) and sprinkle on top of each egg.
6.  Screw the lids on top of the coddlers.
7.  Put the coddlers into a medium sized pot and fill with water up to the silver rim but not over the lid.
8.  Remove the coddlers from the pot.  On high heat, heat the water until it comes to a boil.  Once it comes to a boil, put the coddlers back into the boiling water.
9.  Boil for 6 minutes and remove from heat.

NOTE:  This method will be quicker than the teacup method because, with the coddlers, you can cook the eggs on a higher heat.

Instructions (For Teacups)
1.  Butter the insides of 3-4 teacups with melted butter.
2.  Follow directions 3-5 from the recipe above.
3.  Cut a piece of parchment paper to fit just inside the skillet that you plan on using.  Skillet should also have a lid.
3.  Bring 1 inch of water to a gentle simmer in a large skillet. 
4.  Transfer teacups to the simmering water and cover with the piece of parchment paper you cut.  Reduce heat to medium, and steam, covered with skillet lid until whites are set but yolks are still soft, about 8 to 10 minutes.

Thick cut Bacon


Cook this however you normally would cook bacon.  I actually have a nifty handcrafted bacon mug that I got for Christmas last year that allows me to cook bacon in the microwave in 3-6 minutes.  This literally makes this brunch a 6 minute meal for me.
But you can pan fry it or cook it in the oven as well.


I am going to do a brunch an evening, starting with the easiest and ending with the hardest.  So please keep a look-out for the next three evenings.  On Saturday, I will get back to spring cleaning and show some more homemade cleaning supplies.