Showing posts with label recipes - chicken. Show all posts

Monday, December 12, 2016

Pan Cooked Chicken Breasts with Shallots, Simple Wild Rice Pilaf and Tossed Salad - Thursday, One Week Menu

Hello Everyone!
At this point, I am almost out of my leftovers.  About the only thing that I have left is the shallots.  The recipes that I am about to show in this post are super easy.  In fact, this is just another variation of the Chicken Breasts done six different ways that I posted earlier:
http://frugalfemmecarole.blogspot.com/2016/09/road-to-recovery-recipes-and-some-fema.html

Sorry I don't have alot of pictures for this post.

Pan Cooked Chicken Breasts with Shallots


Ingredients
1 chicken breast, cut into two equal portions
1 tsp. olive oil
1 tsp.  balsamic vinegar, or more to taste
1 tsp. Herb de Provence, or more to taste
3-4 shallots, sliced thinly
1/4 cup white wine or sherry
1/4 chicken broth
1 tbsp. butter
kosher salt (optional and to taste)

Instructions
1.  Heat oil in a non-stick omelette pan on medium heat.
2.  While oil is heating pound the halved breasts flat so they are each about 1 inch thick.  This will help the chicken cook uniformly when you put it in the pan so that both breasts will be done at the same time.
3.  Sprinkle the breasts with the Herb de Provence and kosher salt.  Rub into the breasts.
4. Once oil is heated, place the chicken in the pan and sprinkle 1/2 teaspoon balsamic vinegar on the chicken.
4.  Cook for 4 minutes and turn chicken.
5.  Sprinkle remaining 1/2 teaspoon balsamic vinegar on chicken breasts.  Move  breasts around the pan with prongs to try completely cover the breasts with the vinegar glaze.
6.  Cook for 4 more minutes.  Flip chicken once more and stir around for a few more seconds to try to completely cover with vinegar.
7. Remove chicken from pat, put on a warm plate and loosely cover with foil.
8.  Using your same pan and oil, put the shallots into the pan.  Cook until tender on medium high heat - about 3 to 4 minutes.
9.  Add white wine/sherry and chicken broth.  Turn heat up to high and cook until the liquid has mostly evaporated, continue cooking the shallots until they turn brown in color.
10.  Once shallots are brown, add butter.  Stir until butter melted.
11.  To serve, remove chicken from plate and put cooked shallots on top of chicken.

Simple Wild Rice Pilaf

Ingredients
2 tbsp. butter, divided
1/4 cup yellow onion, diced
1 cup wild rice
Kosher salt
1 tbsp. finely chopped scallions, white and green parts (about one scallion)
Freshly ground black pepper to taste
1 tsp. dried dill

Instructions
1.  In a small, nonstick pan, melt 1 tbsp. butter; add the yellow onion and cook over low heat for 5 to 10 minutes, until the onions are translucent.
2.  Place the wild rice and and water in a rice cooker according to your cookers directions.  I does two cups water to one cup wild rice.  (I like to do one cup water and one cup chicken broth, I find that it adds to the flavor.)  Add the cooked onions and a pinch of kosher salt.
3.  When your rice is cooked, add one tablespoon butter, the scallions, the dill, a pinch of salt and freshly ground pepper to your taste.  Stir to mix together and serve warm.

I'm going to leave you on your own for the tossed salad.


Sunday, October 30, 2016

Bat Wings Recipe (aka Buffalo Wings Recipe) and some more easy decorating ideas for indoors and outdoors

Hello Everyone!
I am a day behind on my posts as this was the post as this was the posting that I wanted to do yesterday.  However, as so often happens when you are helping to plan an event, I ran out of time to do everything I wanted to do in a day.  What was the event that put me behind you may ask?  The theatre where I work is doing a production of Rocky Horror and, last night, we threw a party with the cast for those who purchased tickets.  After that, we did a midnight run of the show.
At the party, I served the dish that I am going to show you how to make today.  For those who were brave enough to eat it, it was hit.  But these buffalo wings are not for the faint of heart.  Because of their color, they look like they are scorched.  But they are not!  They are wonderfully juicy and tender.

I am really sort of addicted to this whole scene.  I really have to find this movie and watch this.


To do these correctly, you should use a package of just chicken wings and then they will really look like bat wings rather than blackened buffalo wings, but I found a bag of over 60 wings at Costco and, since I was feeding alot of people, I went the more affordable route rather than the artistic route,

Bat Wings

I know, they look like they would taste terrible.  They are very good.

Ingredients
3/4 cups all purpose flour
1/2 tsp. cayenne pepper
1/2 tsp. garlic powder
1/2 tsp. salt
1/2 tsp. Creole seasoning
1/2 package Zesty Italian Dressing Mix
1/2 tsp. freshly ground pepper
20 chicken wings
1/2 cup melted butter
1/2 cup hot pepper sauce (I use Louisiana Hot Sauce, but you use what you like)
1 tsp. Worcestershire sauce
1/2 tbsp. Hoisin sauce
1/2 tsp black food gel (more if your sauce does not get black)

Instructions
1,  Line a baking sheet with parchment paper and heavily grease with cooking spray.


2.  Place the flour, cayenne pepper, garlic powder, salt, Zesty Italian Dressing Mix and freshly ground pepper into a resealable plastic bag and shake to mix.


3.  Add the chicken wings, about three or four at a time and toss until well coated with the flour mixture.  Place the wings onto the prepared baking sheet.  Repeat this for the rest of the chicken.


4.  Once all the chicken is coated and on the baking sheet, place in the refrigerator and refrigerate for at least 1 hour.
You can see how the flour has sort of gelled itself to the chicken

5.  After an hour has passed, preheat the oven to 400 degrees F.
6.  In a large liquid measuring cup, whisk together the butter, pepper sauce, worcestershire, hoisin sauce and black food gel.
7.  Dip the wings into the sauce mixture and place back on the baking sheet.
At the top, I made a batch of wings without the food dye so that you could see the difference.  They are the same recipe, one just looks more terrifying.

 (You will probably want to wear rubber gloves for this part.  I did not and I am still trying to get black dye out from under my nails.)


8.  Bake in the oven until the chicken is no longer pink in the center, about 45 minutes.
9.  Turn the wings over halfway during cooking so they cook evenly.

To serve, remove from oven and serve with Ranch Dressing or Blue Cheese Dressing, whichever is your preference.

So that was yesterday's post.

Today, I was going to show you how to make some outside decorations for the house.  I am no longer an 18 year old, however, and staying up until 3:30am finally pushed my body over the edge and allowed the illness that I have been fending off from my husband to win. 
Here is me in my Wonder Woman costume inspired by the outfit she had in 2005 when they re-imaged her look and they put her in pants.

So I woke up this morning ill and with strict instructions from my husband that I was to do as little as possible.
While I rested, my darling husband decorated the outside of our house.  So I don't have the craft project that I wanted to show you, but I do have some inspirational photos for decorating the outside of your home and one that you can use indoors.

Mouse Guardians on the Roof

I found some rubber rats that were $1.00 each at the dollar store.  I snapped up a dozen and told my husband I wanted to put them up on our roof so that we would like we were infested with them.  He put some up on the corners of our house and then stashed some around the front porch.

They look like two little rat gargoyles guarding my driveway.

Why is when you back light something it automatically makes it look creepier?

Cobwebs 

These are really a staple and a little goes a long way in Halloween decorating.  I bought two bags this year for two for $4.00 and we didn't even need to open the second bag.  So, we are saving that for next year and it is one less thing we have to worry about picking up.

In this picture you can see the cobwebs and you can sort of see the spooky lights we put in the bushes,

Right before Halloween I add the cobwebs and the eerie lights.  It helps to make actual Halloween a little more fun and special.

Hang cobwebs from anything you can think of, lamps, tables, fireplace mantles.  Just make certain, if you have pets, that you keep it out of their reach.

Creepy Lights and Creepy Crawlies

Ask any movie director and they will tell you that lighting sets the mood.  Get some Halloween lights and put them up in yard with cobwebs.  Instant spooky!
This is an ornamental pepper that I found at the Farmers Market.  I love the black leaves.  I thought it just looked super scary.  I was going to put some orange mums in with them, but never got the chance.  The double bonus is that the farmer that sold these to me assured me that the peppers were edible.

My husband added some rubber rats and snakes in with the ornamental pepper.

Sheets Over Furniture

This is one of the easiest things you can do to decorate.  Especially if you already own white sheets and tablecloths.  Drape them over your furniture, add some cobwebs and you instantly have an area that looks like an abandoned haunted house.

This is a picture from the theatre.  I put some white sheets over the chairs, a black tablecloth over the table and added cobwebs to the candlesticks and the mirror.  Dim the lights and add some battery operated candles to the candle holders and it sudden turns a little eerie,


So, I hope that you can use some of these ideas!  And, after Monday, we can start focusing on Thanksgiving and Christmas!


Wednesday, September 21, 2016

Road to Recovery Recipes and some FEMA advice

Hello Everyone!
Today's post was inspire by one of my friends who was deeply effected by the flood.  People are starting to move on with their lives and trying to repair their homes.  In the meantime, their houses are not safe to stay in and they are living with friends, family, or are in small apartments or rental houses that do not have the space that they are used to.  Also, they are going thru a rebuilding stage that most of us only experience when we leave home for the first time and we start renting our first apartment. 

This is my Frugal Femme wearing one of the LA strong shirts.  I am very proud of how my city has come together and helped each other.

This really didn't hit me until one of my friends and coworkers, knowing that I write this blog, asked me: "Okay Carole, you're frugal.  Come up with some menus for me that don't take up a lot of space, ingredients or cookware, because I am low on all of these items."
Right!
Mission accepted.
So, I thought back to my college days when I had a crap kitchen, virtually no cookware, and a refrigerator that didn't even go up to my waist and tried to think of some recipes that could be modified for my friend that would still be delicious and nutritious, but would (hopefully) not be boring and repetitious.


Costco Chicken Breasts (One omelette pan,  6 different Flavors)

If you have ready my blog, you already know that I tend to purchase my chicken breasts from Costco where they must have mutant chickens because, you split the breast in half and you have enough protein for two people.  The following recipes are for one chicken breast, usually the bag will contain 12 mutant chicken breasts.  This means that you have enough chicken, for two people, to last you for 12 days if you use one chicken breast per day.  Chicken can get boring if it is all made the same way, but I am going to show you how you can make the same dish and have it taste different every night just by changing out the herbs and liquids that you cook it with.  This dish also does not take very long, so you can cook this and have the protein for your dinner ready in under 10 minutes.

Chicken Provencal with Balsamic Vinegar


Ingredients
1 chicken breasts, cut into two equal portions
1 tsp. olive oil
1 tsp.  balsamic vinegar, or more to taste
1 tsp. Herb de Provence, or more to taste
kosher salt (optional and to taste)

Instructions
1.  Heat oil in a non-stick omelette pan on medium heat.
2.  While oil is heating pound the halved breasts flat so they are each about 1 inch thick.  This will help the chicken cook uniformly when you put it in the pan so that both breasts will be done at the same time.
3.  Sprinkle the breasts with the Herb de Provence and kosher salt.  Rub into the breasts.
4. Once oil is heated, place the chicken in the pan and sprinkle 1/2 teaspoon balsamic vinegar on the chicken.
4.  Cook for 4 minutes and turn chicken.
5.  Sprinkle remaining 1/2 teaspoon balsamic vinegar on chicken breasts.  Move  breasts around the pan with prongs to try completely cover the breasts with the vinegar glaze.
6.  Cook for 4 more minutes.  Flip chicken once more and stir around for a few more seconds to try to completely cover with vinegar.

Remove from pan and serve warm with side of choice.  (I will give you some options a little further down this blog.)
I recommend the French onion Ramen with this recipe.

For the other recipes listed below,  ingredients are listed in the same order they were listed in the recipe above, and follow the same steps following the same order and instructions unless otherwise specified.
For example, in the Italian recipe, tomato paste replaces the balsamic vinegar in the recipe.


Italian Chicken Breasts

Ingredients
1 chicken breast, cut into two equal portions
1 tsp. olive oil
1 tbsp. tomato paste, halved *
1 tsp. Italian season mix
Creole Seasoning mix (Optional)

* If you want your "glaze" slightly thinner for this recipe, add one tbsp. water when you add the tomato paste.
Goes well with the garlic angel hair pasta recipe.

Mexican Chicken Breasts

Ingredients
1 chicken breast, cut into two equal portions
1 tsp. olive oil
1 tsp. lime juice, or more to personal taste (can also use malt vinegar)
1/2 tsp. cumin
1/2 tsp. garlic powder
Creole seasoning mix (Optional), to taste

Rub all spices into the chicken breast before placing in the omelette pan.
Serve with the spicy Ramen mac and cheese

Indian Chicken Breasts

Ingredients
1 chicken breast, cut into two equal portions
1 tsp. olive oil
1 tbsp. plain yogurt, halved
1/2 tsp. curry, (more or less to your personal taste)
1/4 tsp. cinnamon
Creole season, optional, to taste

This recipe is great with the yogurt, but if you are afraid to try the yogurt, you can skip the yogurt step.
Serve with the Indian style Ramen


Asian Chicken Breasts

Ingredients
1 chicken breast, cut into two equal portions
1 tsp. olive oil
2 tsp. soy sauce
2 tsp. garlic rice wine vinegar
1 tsp. garlic powder
Creole seasoning, to taste

Serve with Asian style Ramen Noodle recipe


Lemon Pepper Chicken Breasts

Ingredients
1 chicken breast, cut into two equal portions
1 tsp. olive oil
1 tsp. lemon juice  (If you really like lemon you can add more per your personal taste)
1 tsp. freshly ground garlic
Creaole seasoning, optional, to taste


This recipe actually goes well with any of the Ramen sides mentioned above.

Next we move on to side dishes using once of the scariest yet least expensive ingredients known to the modern shopper:  Instant Ramen Noodles.
On their own these things are too salty and gross, modified and cooked differently than the directions on the package,  these noodles can be an inexpensive way to add a side to your dinner.  It will also only take one medium sized pot so, in theory, you can cook your dinner and own only one omelette pan and one medium sized pot.  If you truly do not want to use instant Ramen noodles, these recipes work just as well with angel hair pasta.  I like to get the pasta in "nests"  each of these recipes would take two "nests".  Just remember, the cooking time for the pasta is going to take longer, so check the package for cooking instructions.


Ramen noodles aren't very retro.  So I thought I would give you a picture of a lady and a leopard.

Ramen Noodle Recipes you can Stomach

French Onion Ramen

Ingredients
1 1/2 tsp. butter or margarine
1/4 cup thinly sliced onion
1 cup low sodium beef broth, divided
1 cup water
1 package of instant Ramen noodles
1/4 cup freshly shredded gruyere or freshly shredded mozzarella or freshly grated parmesan

Instructions
1.  Melt butter in medium soup pot. 
2.  Add onion.  Stir to coat with butter.  Add 1/4 cup beef broth and cook, stirring constantly until broth is mostly absorbed, about two to three minutes.
3.  Stir in remaining 3/4 cups broth and 1 cup water and bring to a boil.
4.  Add uncooked Ramen noodles.  DO NOT ADD THE SEASONING PACKET!
5.  Cook,uncovered, stirring occasional for 2 to 3 minutes.
6.  Season with salt and pepper if you desire.
7.  Pour soup into a bowl and sprinkle with the cheese and cover with a small plate until the cheese melts, about one minute.


Garlic Ramen or Angel Hair Pasta

Ingredients
1 pckg.  instant Ramen Noodles
1 tbsp. olive oil
2 cloves garlic, minced
Kosher salt, to taste
Parmesan Cheese, freshly grated, to taste

Instructions
1.  Bring water to a boil in medium pot.
2.  Add the uncooked instant Ramen noodles.  DO NOT ADD SEASONING PACKET!
3.  Cook 2 to 3 minutes until pasta is softened and separated with a fork.  Drain and set aside.
4.  In the same pot, heat olive oil on medium heat until oil is heated all the way through.  Once oil is heated, lower heat to the lowest possible setting for your burner, wait 2 minutes and add your garlic.  Cook 15 minutes stirring constantly until garlic is a golden brown.  Do not do this on high heat!  The garlic will burn and the dish will taste bitter.
5.  After garlic has cooked about 15 minutes add the noodles and salt to taste.  Toss the pasta so the noodles are completed covered in oil and garlic.  Cook for about 2 to 3 minutes on low heat to warm up pasta.
6.  Serve in a bowl and sprinkle with freshly grated parmesan cheese.

Spicy Ramen and Cheese

Ingredients
1 pckg. instant Ramen Noodles
1 tbsp. butter
1 tbsp. flour
1/4 cup milk
1/2 cup shredded pepperjack or mozzarella cheese
1 tsp. Siracha Sauce, can add more if you like it spicier
Kosher salt to taste

Instructions
1.  In medium soup pot bring water to a boil and add instant Ramen noodles.  DO NOT ADD SEASOING PACKET!  Boil 1 minute or 1 minute 15 seconds.  Do NOT cook longer, if you do the noodles in this one get mushy and disgusting.
2.  Drain Ramen in a colander and rinse with cold water.
3.  In the same pot, heat butter on medium heat and add the flour to make a quick roux.  (For those of you who are Cajun, this is not our idea of a roux as you do not cook it until it is brown.  But you do cook it enough to get the raw flour flavor out.)  Cook about one minute, stirring constantly.
4. Pour in the milk and cook until it becomes frothy and thick, stir semi-constantly.
5.  Reduce heat to low and gradually add cheese a little at a time.  Making sure the cheese has melted before you add more.
6.  In the final batch of cheese, add Siracha and stir until cheese is melted.  Taste.  Add salt at this time if so desired.
7.  Increase heat to medium and toss in cooked Ramen noodles, cook until heated through about 1-2 minutes.
At this point you can add a little milk to the recipe if you prefer your sauce to be thinner.

Indian Style Ramen Noodles

Ingredients
1 pckg. instant Ramen noodles
1 small onion, finely diced
1 small tomato, diced
1/2 tsp. curry  (Garam Masala actually tastes better, but if you don't cook a lot of Indian its not worth buying.)
1/2 tsp. red chili powder or Cayenne pepper or paprika (which ever you prefer)
1 tbsp. olive oil

Instructions
1.  In medium pot, heat the oil over medium heat.  Add onions and cook until they start turning color.  Once onions have changed colors, add the tomatoes.
2.  Into the onion and tomato mixture add the curry (masala) and chili powder (Cayenne pepper or Paprika).  Simmer until tomato has softened slightly.
3.  Add about 1 cup water and bring to a boil.  Once it starts boiling, add the noodles and cook for two minutes.

Asian Style Ramen Noodles

Ingredients
1 tbsp. olive oil
1/4 cup red onion, diced
1/4 cup celery, diced
1/4 cup green bell pepper diced  (You can use the trinity combos that are already cut for you in the grocery store, if you do this, you only want to use about a half a cup of the mixture)
1/4 cup carrot, diced
1 tbsp. garlic rice wine vinegar
1 tsp. soy sauce
1/4 tsp. Siracha sauce, optional
1 pckg. instant Ramen noodles

Instructions
1.  In a medium sized pot, boil water.  Put package of instant Ramen noodles in water.  DO NOT ADD SEASONING PACKAGE!  Cook for 2 minutes.
2.  Drain in colander and rinse with cool water.  Set aside
3.  In same medium pot, heat oil over medium heat.  Once oil is heated add onion, celery, bell pepper and carrot.  Saute for about five minutes, stirring constantly. 
4.  Add garlic rice wine vinegar, soy sauce and Siracha.  Cook for another two minutes stirring constantly.
5.  Add cooked Ramen noodles and toss until thoroughly coated.

Serve warm.


Since I am sort of on the topic of the flood and people who have suffered from it, I have these pieces of advice that I have learned from FEMA.  Every Friday, almost since the day of the disaster FEMA has sent Darrell Habisch to Classic Hits 103.3 to be on the Jeff and Company morning show so that he can answer questions that people may have concerning the help that FEMA provides. 

I know this isn't FEMA, but I thought it fits the attitude that most Louisianans in Baton Rouge and the surrounding areas have right.

The advice below is the advice that I find he gives out the most on the show.

1.  Even if you don't think you qualify, go ahead and apply for help.  Even people who haven't been flooded have been effected and may be eligible for assistance.  Also, very often, FEMA is also going to send you to the SBA to fill out a loan with them as they have assistance they can offer that FEMA cannot.
2.  Denied does not necessarily mean DENIED.  FEMA does not have a status of: PENDING due to lack of documentation. Read through your denial thoroughly, you may just need to provide more documentation.
3.  If you believe you were denied and that is incorrect, APPEAL the decision.
4.  The squeaky wheel gets the attention.  FEMA is helping ALOT of people, don't be afraid to follow up so that you do not have to wait longer than necessary.
5.  Make sure that you also apply for state assistance. If you applied for FEMA you did not apply for state and vice versa.
5.  If your house is flooded and you are currently living at two addresses, make certain that FEMA has both of those addresses.
6.  If you are renting an apartment and thought that you would be safe because you were on the second floor, but now you are finding out that you have to move because of structural damage to the apartments below you, you are eligible for assistance.
7.  FEMA is here to help and they have lots of resources they try to provide to help you to do so. Check out www.disasterassistance.gov
This sight has links to TONS of useful information.  In the news sections is a specific section on replacing lost documents and several other helpful tips.


The next post we get crafty and we start some Frugal Femme decorating crafts for Halloween!!!!

Thursday, September 15, 2016

Chicken Soup for the 'Bers.

Hello Everyone!
Its September and its time to start settling in and blogging again.  I don't know about you, but with the beginning of the fall, I get more industrious and want to start crafting and writing- maybe because these are activities that I like to do outside when the weather is cool.  Best of all, the holidays are just around the corner!  For me, that means gearing up for the holiday season with preparing for Halloween by doing several spooky crafts.  But first, I promised Jeff Johnson from Jeff and Company on Classic Hits 103.3 that I would give my two chicken noodle soup recipes for the onset of the time of year the he likes to call "the Bers".
Last week we were discussing that a Yale study scientifically proved the old adage "feed a cold and starve a fever".  This is a phrase that I have known all of my life and is a practice that I live by.  So I was very gratified to know that it is not just an old wives tale.
Scientific studies are verifying a lot of "wives tales", one that I had been aware of was about chicken noodle soup. I had read a few years ago that some scientists have been running tests on homemade chicken noodle soup and how it may be just as effective in curing cold symptoms as over the counter medicine.  Below is a link to the New York Times that shows that talks about the science of Chicken soup:
http://well.blogs.nytimes.com/2007/10/12/the-science-of-chicken-soup/?_r=0

I don't know if this works for canned chicken noodle soup, but I do remember that it worked with homemade chicken noodle soup, so below are my two best recipes.  Sorry I don't have pictures for these, but I haven't had the need to make soup yet this year.
I have a soup tureen that looks just like the one the lady in this ad is holding.  Mine is white, but I love to break it out for the holidays and serve a soup before the main meal.

"Homemade" Chicken Noodle Soup

This recipe is homemade insomuch as it does not come from a can, however any real "old fashioned" grandmother would not call this recipe homemade. I like to make this recipe when I have leftover chicken from a roast chicken and I am feeling lazy.  This recipe also works great for any leftover turkey you may have after Thanksgiving.

Ingredients
1/2 cup onion, diced
1 medium carrot, diced
1 stalk celery, diced
1 tbsp. olive oil
2 cans (14 oz. each) low sodium chicken broth, or 2 cups homemade chicken broth
2 cups water
1 envelope Good Seasonings Zesty Italian Salad Dressing
2 cups cubed cooked chicken or turkey
1/2 cup bite sized pasta, uncooked

Instructions
1.  Heat oil in a large, heavy bottomed saucepan on medium high heat.  Once oil is hot, cook onion, carrot and celery for three to five minutes or until tender, stirring occasionally.
2.  Slowly stir in chicken broth, water and dressing mix.
3. Add turkey and pasta; cover.  Reduce heat to medium-low and simmer 10 to 12 minutes or until pasta is tender.

Serve warm with oyster crackers.


Major Homemade Chicken Soup

This soup recipe is not for the weak of heart.  It takes some time.  So, you may ask, unless I am making it for someone who is ill and I, myself, am not ill, why would I make this recipe?  Good question.  The answer is, if you do not cook the pasta in the last ten minutes of cooking time, this soup freezes extremely well.  Which is good thing because, unlike most Frugal Femme recipes, this recipes makes enough to feed a small army.  I like to make some at the beginning of the "Bers." and freeze it in single serving sizes.  At the end of this recipe, I will give instructions on how to freeze and then defrost the soup when you are ready to eat it.

Ingredients
1 whole chicken (I usually use a fryer chicken)
3 quarts low- sodium chicken broth or 3 quarts homemade chicken broth
6 carrots
4 stalks celery
3 medium onions
5 black peppercorns
1 clove garlic
10 sprigs parsley
2 sprig thyme
1 bay leaf
2 tbsp. unsalted butter
4 leeks
1 tsp. fresh-ground pepper
Kosher salt to taste
1 tsp. dried Herbs de Provence, (optional, this depends on how flavorful your broth turns out)
1-2 tsp. dried dill
3 cups medium egg noodles or pasta of your choice

Instructions
1.  Place the chicken and the chicken broth in a VERY large stock pot and set it over medium heat. 
2.  Roughly chop 2 carrots, 2 celery ribs, and one onion and add to broth.
3.  Add the peppercorns, garlic, 2 sprigs of parsley, 2 sprigs of thyme, 1 bay leaf and enough water to just cover the chicken.
4.  Bring the broth to a boil.  Once you have brought the broth to a boil, reduce heat to med-low (or whatever heat is simmer on your stove) and simmer until the chicken is tender- about 1 1/4 hours.  While the chicken is cooking some fat can rise to the surface, skim the surface when this appears.
5.  Remove the chicken and place in a large bowl.
6. Strain the broth through a fine sieve into a large bowl.  Discard the vegetables and the bay leaf.

Now that you have done all of this, you can actually start with the whole "making soup" part of this recipe.

7.  Skim any fat off the top of the strained broth and discard.
8.  Prepare the remaining carrots, celery, onions and leeks .  I like to dice my vegetables because I do not like them large, others I know prefer to cut their vegetables into 1/4 inch pieces. Once you are done chopping, set the vegetables to the side.
9.  Once the chicken is cool enough for you to handle, remove and discard the skin and bones from the chicken.  Cut meat into 1/2 inch pieces and set to the side.
10.  Chop the remaining parsley leaves and set aside.
11.  Melt the butter in a large Dutch oven over medium heat. Add the vegetables and cook until the onions are translucent - about 7 minutes.
12.  Add the chicken pieces, the reserved broth, dried dill, salt and pepper.  Taste.  If you feel the soup needs it, add some Herb de Provence or you can wait and taste it in step 14 after you have added the parsley.
13.  Simmer the soup until the vegetables are tender -- about one (1) hour.
14.  Stir in the egg noodles and parsley and cook until the noodles are tender - about 10more minutes. *
Serve hot with oyster crackers.

*  If you are planning on freezing the soup, do not add the noodles in step 14.  Just add the parsley and simmer for 10 minutes.  After cook time is complete, remove the pot from the heated burner and allow to cool for about 30 minutes to an hour -  or however long it takes for the soup to get to be about room temperature.  Once the soup has cooled, put in freezer proof containers.  I like to use restaurant style plastic containers that you can get in restaurant supply stores in the individual sizes.
When I am ready to eat, I just take one out of the freezer, cook in a pot on the oven and, once the soup begins to simmer again, I add about a handful of dry pasta and let that cook for 10 minutes.   Not too much harder than opening a can and soooooooo much more delicious!


Oyster Cracker Snacks

There are several different recipes for oyster crackers, this is one that was given to me by a lady I work with.   She thinks her mother got it from a Better Homes and Gardens Magazine from the fifties, but who knows.  As the Christmas holiday approaches, my mother-in-law also makes oyster cracker snacks.  They never last more than three days in my house. I will include her recipe closer to Christmas.  But I digress.  I am including this recipe so that you will have flavored oyster crackers to add to your soup.  You can use plain oyster crackers.  But the question that I have to ask is; with a recipe this easy, why would you eat them plain?

Ingredients
2 packages oyster crackers
1 package Hidden Valley Ranch Salad dressing Mix
1 cup oil
1 tsp. onion powder
1 tsp. lemon pepper
1 tsp. dill

Instructions
1.  In a medium, microwave-safe bowl mix all of the spices together.  (I use a fork to mix them.)
2.  Add the oil to the spice mixture.  Put bowl in the microwave and cook on high for one (1) minute.
3.  In a large bowl, pour the oyster crackers.  Pour the spiced oil mixture over the crackers and toss to coat all of the crackers.

Store in an airtight container. 

Well, that is it for this post.  I will have more shortly!


Thursday, June 30, 2016

Summer Time Flu

Hello Everyone.
Oh my goodness, it has been so long since I have done a post!  I volunteered to work as a backstage crew member, for a show this summer, at the theatre where I work.  Fortunately, it was a hit, but that meant that I was pulling 13-14 hour days for a whole month. Needless to say, I just did not have the energy or the brain power left to do any posts.  But I am back and have four days off for the holiday week-end, so I plan on making up for it by trying to do at least three posts this week-end.  We'll see how that goes.  To top it off, as seems to be usual for me when I don't get a lot of sleep, I got sick during the middle of the show. 
Ugh.  I hate being sick during the middle of summer, but that often seems to be the case, not only for me but for a lot of people that I know.  So this  post is going to contain some homemade remedies for how to take care of yourself when you are feeling ill - inspired by my recent illness.  It is also going to include remedies that I find are more my summertime illness recipes.  Next time that I am feeling down and out, I will share my fall/winter recipes.


Because, even when you're feeling down a lady should always have an up-do and red lipstick.
 

My illness started with a fever and then quickly turned into a mean upper respiratory infection/bronchitis.  Because of this, this post is going to focus on things that make you fell better when you have a cough. 

Lemon Ginger Honey Syrup

This syrup can be used by the teaspoonful if you use brandy instead of water.  If you use the water, it works better added to water as a hot beverage.  These ingredients are also said to help boost your immune system.  This syrup also is very nice when you have a sore throat.

Ingredients
1  1/2 cups brandy or water  (I like the brandy, but water works just as well)
2 large lemons, zested and juiced
1 cup grated ginger  (Ginger can be very potent, if you are afraid that the ginger will be too strong, start with half a cup and work your way up.)
1 cup honey  (I know this seems like a lot of honey, again if you are afraid it will be too sweet, try with half a cup first.)

Instructions
1.  Heat the brandy to a boil.
2.  Add the honey, ginger and grated lemon zest.
3.  Bring to medium heat and cook for 15 minutes, stirring occasionally.
4.  Remove from heat and stir in the juice of the two lemons.
5. Strain the mixture through a fine sieve over a bowl.  Press hard on the solids to extract all of the liquid.
6.  Let cool and pour into little bottles (if you have them, I don't) or mason jars.

NOTE: Keep chilled in the fridge.  The syrup keeps for about 1-2 weeks.  To use as a hot beverage, use one part syrup to 4 parts water.  To use as a cough syrup, use two tea spoons.

I would like to have this outfit.  I mean, come on, look at the shoes!  But don't you just love this get well card from WWII?

Homemade Vapor Rub


I don't know about you, but I don't use the Vapor Rub that you can buy in stores quick enough before it goes bad in my medicine cabinet.  That is why I researched and fine tuned until I could make my own.  (To be fair, you may not have these ingredients in your home, but they are easy to get and I use them in things like my homemade shaving cream and bath bombs. So I don't just use them for just the vapor rub - you know how much I love the things I buy to work double and triple duty.  And I will be putting recipes for those things I just mentioned in later posts.) I like to whip my vapor rub because I like the way it feels.

Ingredients
3 tbsp. shea butter  (You can also use cocoa butter if you don't have or can't find shea butter.)
7 tbsp. coconut oil
20 drops eucalyptus essential oil
10 drops lavender essential oil or peppermint essential oil
10 drops lemon essential oil

Instructions
1.  Place all ingredients in a mixing bowl.  Beat on high speed until all of the ingredients are blended together and are the consistency of whipped cream.

NOTE:  Store in an air-tight container.  It will keep for about 1 month, however, you may have to shake it to get it to gel back together.


Semi-Homemade Chicken Soup

I read somewhere that chicken soup really does help a person get better--like for provable, scientific reasons--but I don't remember what they are anymore.  What I do know is that nothing beats chicken soup when you are sick.  (Although I am also very fond of sushi rice and miso soup when I feel ill.) 
This recipe works great with leftover roast chicken but is also AMAZING with leftover turkey.  

Ingredients
1/2 cup onion, diced
1 medium carrot, diced
1 stalk celery, diced
1 tbsp. oil
2 cans (14.5 oz. each) low sodium chicken broth
2 cups water
1 envelope Good Seasonings Zesty Italian Salad Dressing
2 cups chicken, cooked and cubed
1/2 cup bite sized pasta, uncooked

Instructions
1.  In a large saucepan heat oil.  Add onion, carrot and celery and cook over medium heat for 3-5 minutes or until vegetables are tender, stirring occasionally.
2.  Stir in the chicken broth, water and dressing mix. Turn up the heat to high and bring to a boil.
3.  Add chicken and pasta, cover with lid.
4.  Reduce heat to medium-low and simmer 10-12 minutes until pasta is tender.

Serve warm.

Well, that's it for this post.  I hope you find some of this useful and I will post more very soon!


Thursday, April 14, 2016

Frugal Femme Two Week Menu #2: Week Two, Wednesday: Basic Grilled Chicken, Curried Carrot Soup, Creole Scallion "Pancakes and Mock Strawberries Romanov


Hello Everyone!
I'm going to be completely upfront here and let you know that I did not make grilled chicken tonight.  I still had chicken left over from the roast chicken that I made on Sunday, so I just reheated that with a little chicken broth, in a frying pan on the stove. Since all of my dinner only took me less than 30 minutes to prepare, and then I couldn't do anything more until about 30 minutes before my husband was scheduled to arrive home,  I decided that I would look at some retro/vintage kitchen ideas.

I want to look like this when I am in the kitchen.  I am constantly looking at retro aprons.  Somewhere, there is a picture that my husband took of me in our apartment taking a bundt cake, in a powder pink pan, out of the oven while wearing my black and pink polka dot apron with the ruffles. I also like retro looking kitchen appliances I think this pot looks snazzy.

When we bought our 1965 house we loved almost everything about the structure of the house......  Except for the kitchen. We had looked at several houses for sale on this street and all of them had double ovens. Imagine my dismay when I realized that the one we fell in love with, only had one oven.  My darling husband promised me that, if got the house, that I could update the kitchen after two years.  The two years is here and I am now starting to look into renovating my kitchen.
The plan was actually going to be very simple, take out the cabinets and the range only stove, and replace it with an all in one double oven.  The wall oven was just going away to be replaced by shelves.  It seemed simple.....easy.


I was so tickled when I found this picture!  With a few minor adjustments, this is my kitchen layout!


This is the picture that was posted in the listing of the house.  You can see how much alike the kitchens are!!!!  I have updated the kitchen a little since then, but I've really been in sort of a holding pattern.

Then, we looked at ovens and realized that modern ovens are bigger than mine. If I put one in my kitchen, I wouldn't be able to open the cabinet door to the sink.  Ummmmmmm...... This means I either have to order a custom made oven, find a renovated, vintage oven in my budget, or hire a contractor to change the cabinets and come up with a solution.  We're going to try the contractor first.  So, I am enjoying researching what other people are doing in there kitchens. Most of the ideas are far beyond my budget, but its nice to look.
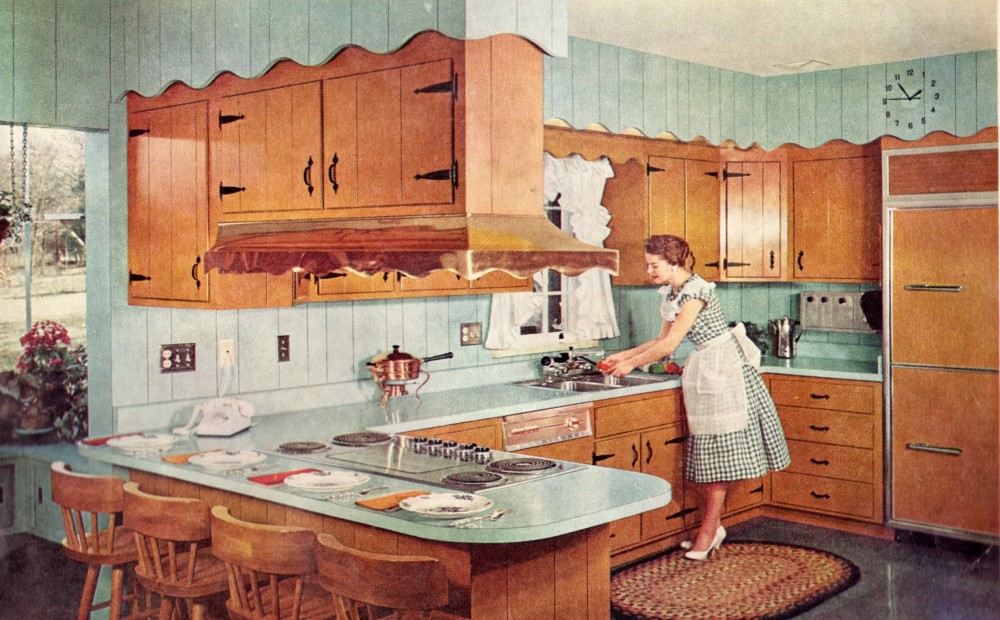
Isn't this one pretty?

I like the turquoise blue around the sites of the cabinets.  But I don't think that I could do turquoise appliances. But I do like it.

I will keep you updated in this blog about how we handle this kitchen renovation since, if we can, most of it we will try to do ourselves on a teeny, tiny budget!!! 

Now on to the meal.

Grilled Chicken

I did not make grilled chicken tonight.  So I have no pictures to go along with this recipe.  You may be like me and still have enough roast chicken to make another meal. If you do still have some roast chicken, I encourage you to have it with this meal, rather than grilling up more chicken.  For those of you who may be eating larger portions of their roast chicken, or are taking the leftovers to work in chicken sandwiches, here is a quick easy recipe for grilled chicken.
Since I did not make grilled chicken, I am not going to give you one of my fancy, grilled chicken recipes.  This is going to bare bones grilled chicken as the soup and "pancakes" are both very flavorful on their own.
Before we begin, below is a link from Cook's Country giving you basic tips on how to grill chicken.  This is just good general knowledge to have in your back pocket.
https://www.cookscountry.com/101/grilled-chicken-101.HowTo_feature_11


Basic Grilled Chicken

Ingredients
1 large (mutant) chicken breast, sliced in half
Creole seasoning, to taste
1 tbsp. olive oil

Instructions
1.  Slice a large chicken breast in half to make a normal size, healthy portion of meat.
2.  Pat both pieces of chicken dry with a  paper towel.
3.  Sprinkle chicken with Creole seasoning and  rub into chicken breasts.
4.  Let sit for about 15 minutes to allow seasoning to work into the chicken.
5.  Grill the chicken for about 5-7 minutes per side.  Check it with a meat thermometer and make certain that it reads 165 degrees before you take it off the grill.

Note:  You can grill the chicken in whatever manner you want to grill it.  I personally don't have the time to light up a grill on a week night, that's something magical that I leave for week-ends and my husband, so I do my week-night grilling on a stove-top grill pan.  It works just as well and you don't have to take the time to heat up the grill.

Curried Carrot Soup

Ingredients
1 small onion, minced  (Or you can use half of one medium onion if you have one already started.)
2-3 cloves garlic, minced
1 tbsp. butter
1 tsp. curry
1 tsp. ground ginger  (If you are using fresh ginger, put in about two tablespoons.)
2 cups low sodium chicken broth  (Or you can use the broth you made in your slow cooker.)
1 cup 2% milk (Don't use skim!!!)
1/2 tsp. dried dill weed
pepper to taste (optional)

Instructions
1.  In a large sauce pan, sauté the onion and garlic in butter until the onion becomes translucent over medium heat.


2.  Stir in the curry and the ginger.
3.  Add the carrots and the broth.


4.  Turn the heat up to high and bring to a boil.
5.  Reduce heat and simmer, uncovered, for 10-15 minutes or until the carrots are tender.
6.  After the carrots are tender, remove the pan from the heat and allow to cool slightly.
7.  In a blender or a food processor, process  the soup in batches until smooth.

Even if you are using a bigger blender, you should still blend the soup in batches.  If you don't, it doesn't come out creamy enough.

Once everything is blended, it looks ALOT like baby food.

8.  Return the carrot mixture to the sauce pan.  Add the milk, dill and pepper (optional).  Cook until heated through.


Creole Scallion "Pancakes"


Ingredients
1/2 cup water
1/2 tbsp.  plus 1 tbsp. canola oil, split
1 cup and 1/4 cup flour
1/2 tsp. Creole seasoning or more to taste
1 tbsp. toasted sesame seed oil
1/2 cup green onion, minced,  green part only
1 pinch kosher salt

Instructions
1.  In a small sauce pan, heat water and vegetable oil over high heat and bring to a boil.  Remove from heat source and cool for 5 minutes.  (You will be amazed at how fast a 1/2 cup of water with oil comes to a boil. DO NOT step away from kitchen this process will take mere moments.)

Ooooo.  Water boiling.

2.  Mix flour and Creole seasoning in a large bowl. 


3.  Pour the water and oil mixture over the flour.  Mix with a non-metal spoon until most combined and then finish kneading with your hands.  This dough will be warm and sticky and will feel very weird.
This is what it looks like when you first pour the water and oil mixture into the flour.


4.  Cover with plastic wrap and put in the fridge to chill.  I like it to chill for at least one hour as it makes the dough easier to work with.

I like wrapping the dough in plastic wrap so it takes up less room in the fridge.  You could just cover the bowl with plastic wrap.

5.  In a small bowl, mix the sesame oil, pinch of salt and green onions.  Set aside.


6.  Once dough has cooled, put it on a flat working surface and cut the dough into 6 even pieces.  Flatten these pieces into small discs about 3 inches in diameter for each disc.

I obviously can count and split them one two many times.  But it good.  Just cook a smaller pancake.  Its easier than trying to put the dough back together.

6. Roll the coated disc in the green onion mixture and form a small ball.  Flatten each ball back into a 3 inch disc.


7.  In a medium size heavy frying pan, put remaining 1 tbsp. spoon canola oil and heat on high heat.  You will know the oil is ready when cold water flicked onto the pan sizzles and "dances".
8.  Fry the pancakes in batches until they are "crispy".  (They are crispy when they are a dark golden brown color.) 

9. Drain on paper towels and serve warm.

Note:  Dip this in the curried carrot soup.  Your mouth will thank you.


BONUS RECIPE!!!!

We still have some strawberries left over from the strawberry salad with the poppy seed dressing. They are in your fridge, so now is your chance to make a simple and delicious dessert.

Mock Strawberries Romanov

Ingredients
2 cups strawberries, cut into quarters
1 tsp. Splenda
3 tsp. Grand Marnier, split
1 vanilla greek yogurt (I used Chobani individual cups, the kind that you eat for breakfast.)

Instructions
1.  In a small bowl, combine the strawberries, Splenda, and 2 tsp. Grand Marnier.  Stir until the strawberries are coated.
2.  Cover bowl with plastic wrap and place in the refrigerate.  Chill for at least one hour,  (But is better the longer you chill up to about 4 hours then, the strawberries start to get squishy.)
3.  About a half hour before you are ready to serve, mix the final teaspoon of Grand Marnier into the vanilla yogurt.  ( I actually mix it in the cup that it comes in.)
4. Layer a quarter of the strawberries in a small glass or custard bowl.  Cover with a quarter of the yogurt mixture.  Repeat these steps until all of the strawberries and yogurt are gone.

This is one serving of half of the strawberries and the yogurt mixture.  I did the same thing in another glass for my husband.

5.  Serve cold and enjoy.