
Friday we had a holiday miracle in Southern Louisiana and we got snow!

Not just snow flurries but the real deal. It snowed for about seven hours and, for slightly less than a
day, Louisiana actually look like a winter wonderland. (Or about as close as Southern Louisiana can look to a winter wonderland.) I love snow and it is one of the things that I dearly miss around Christmas time. Needless to say, I was thrilled! So I could have my snow memories for other winters when it is 86 degrees outside, I went around a bit like a crazy person taking videos and photos of my back and front yards. This is the first time that it has snowed since we got the house, so this was my first chance to do so.
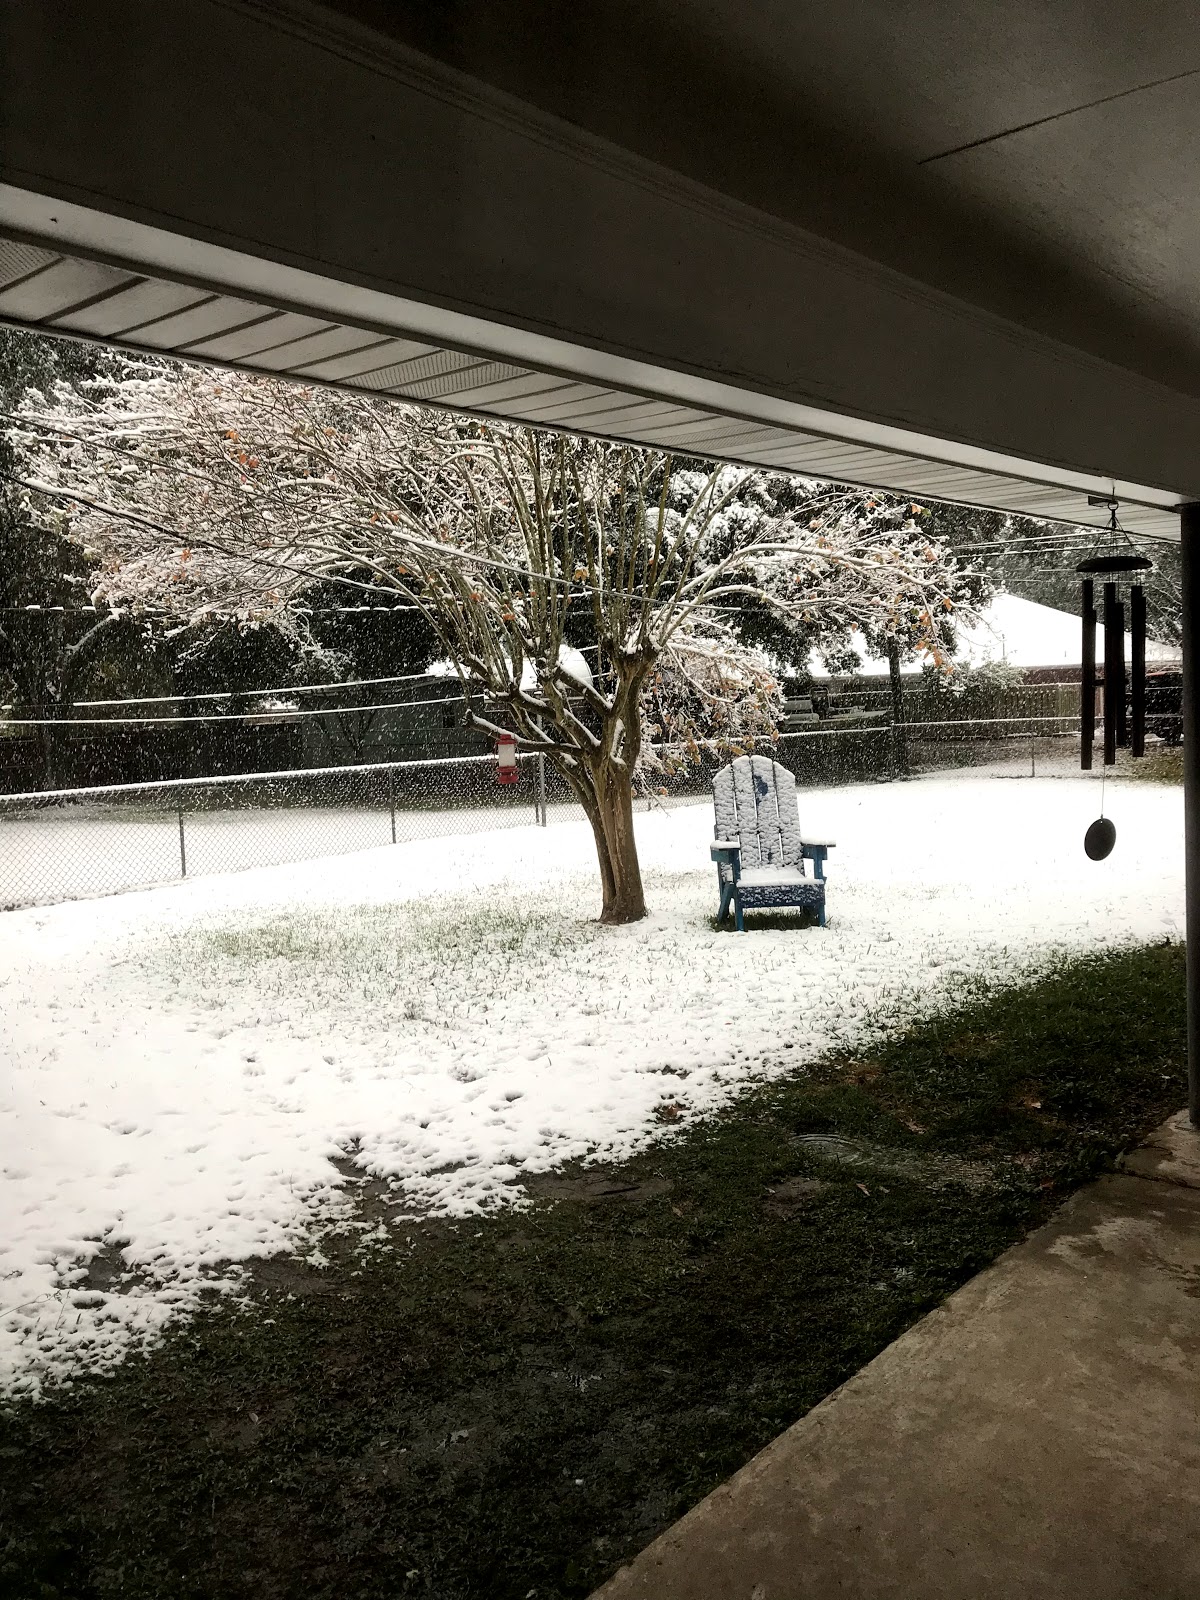 |
| This is the tree in my back yard. You can see the snow wasn't sticking to the ground as well as I would have like, but I thought the tree looked beautiful. |
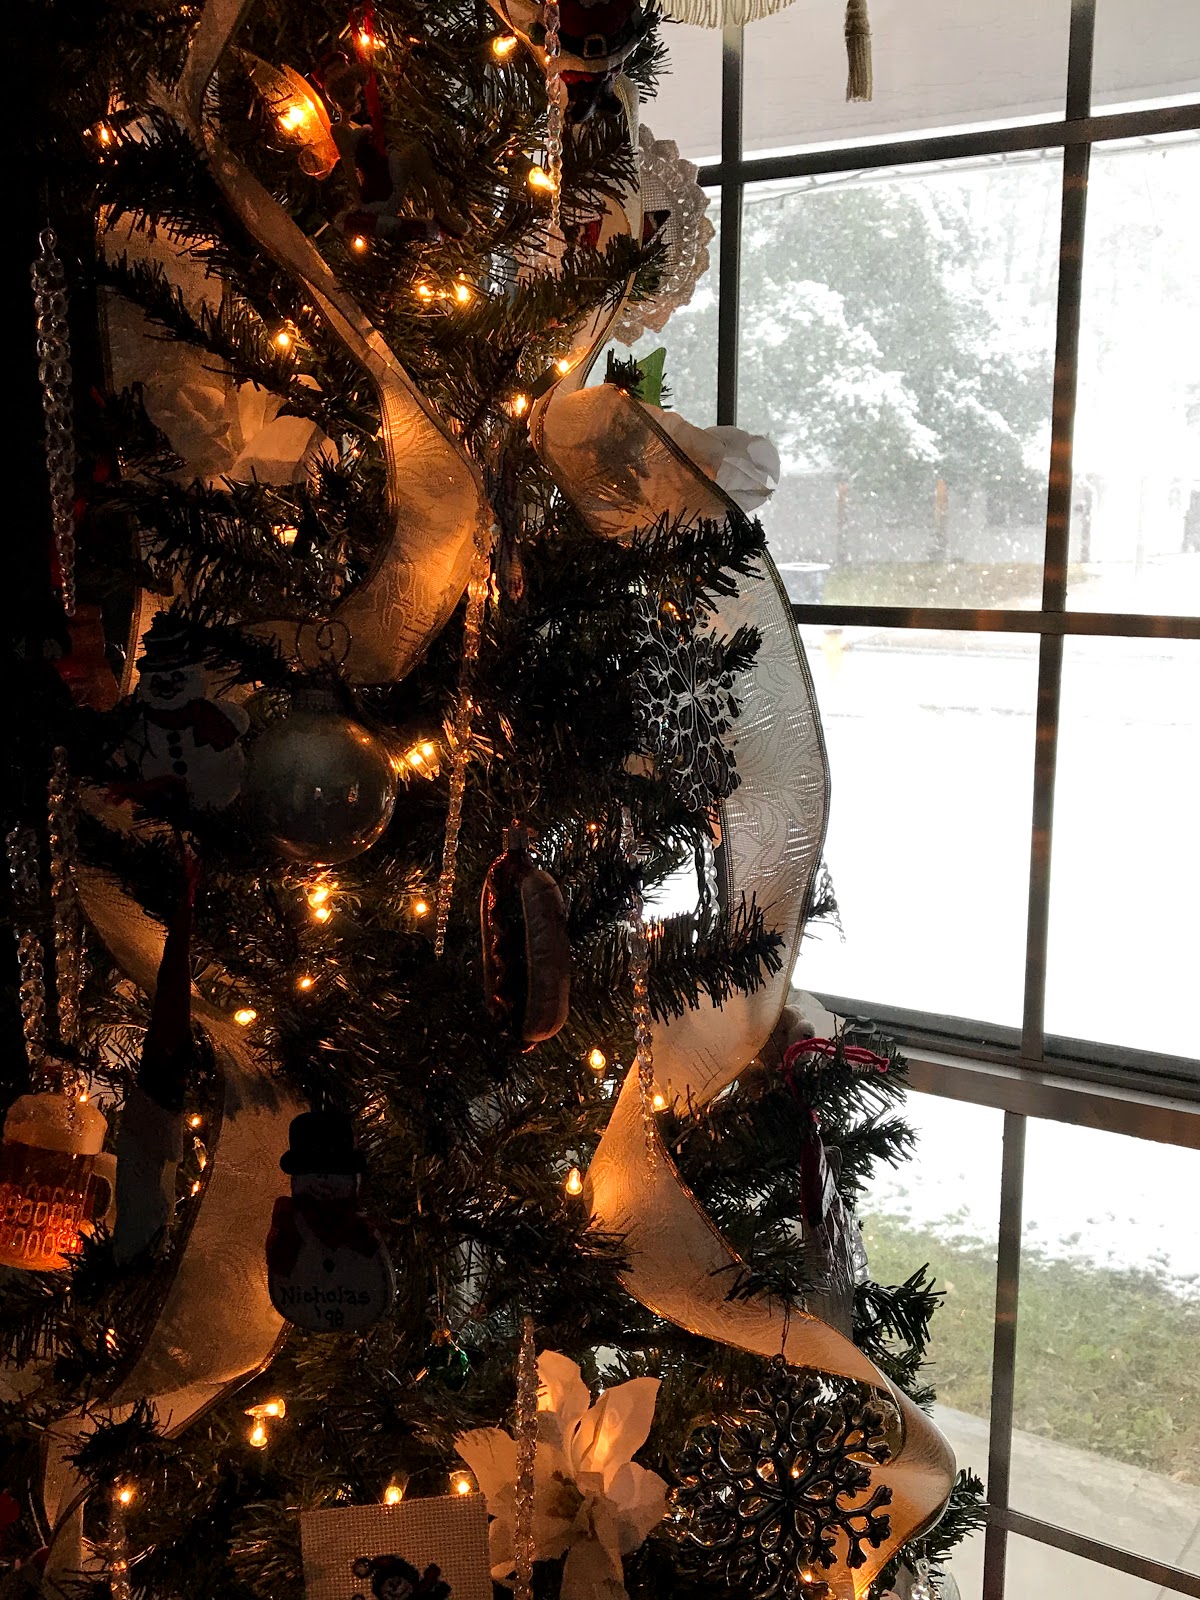 |
| My artsy picture of one of the ugly Christmas trees in the pub next to the snowy window. |
Once the snow died down a little, the birds came out of hiding. Naturally I had to record their actions for posterity and I got one of the most wintery - Christmasy videos ever!!!
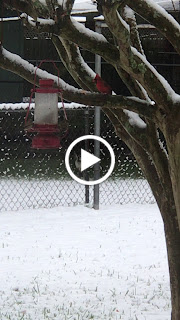 |
| How 'tis the season is that?!?!?!?! A Christmas cardinal in the snow! |
But, as I said, by the following day, the snow was mostly gone and we were back to looking like regular plain old Louisiana. Since I was already missing the snow, I decided that I wanted to bring some of that snow indoors and I decided to make snow ornaments for two of the Christmas trees. (Yes you read that correctly, two of the trees. I have five trees in total.)
There are actually two very cool ways of making snow ornaments. For this post I am going to show you how to make Cookie Dough Ornaments and Toilet Tissue Rolls Snow Ornaments.
Toilet Tissue Roll Snow Ornaments
I actually started a post for how to make these around Christmas time last year, but I ran out of time and it never made it into a post. These are super easy to make, they just take a little time. So if you plan on making a set of them for your Christmas tree, I would advise that you work on them throughout the year so that it doesn't get too tedious. (Plus it gives you all the time you need to collect all the toilet paper rolls you will need.)
Items Needed
2 Toilet paper rolls per ornament
Ruler
Glitter
Glue (I used both hot glue and Elmer's Craft glue but you can use any glue you are comfortable using)
Scissors
Small Paint Brush
Sparkle button
Instructions
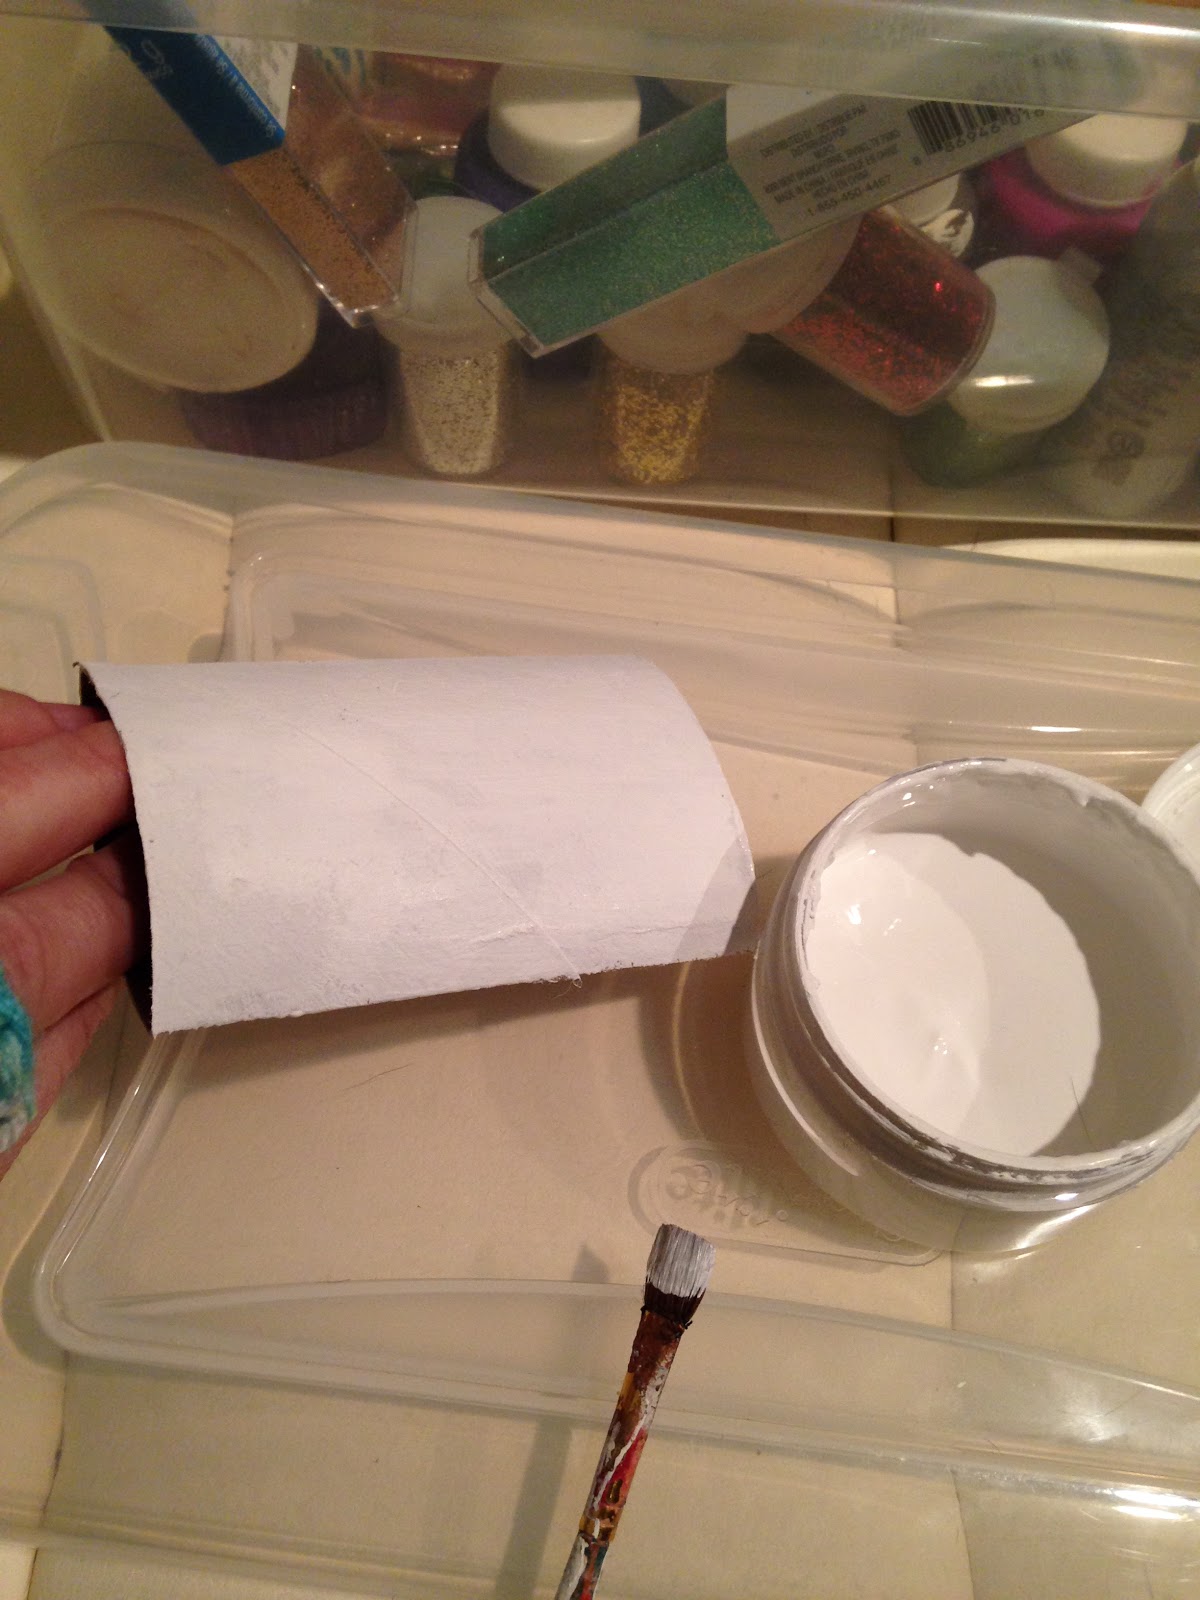
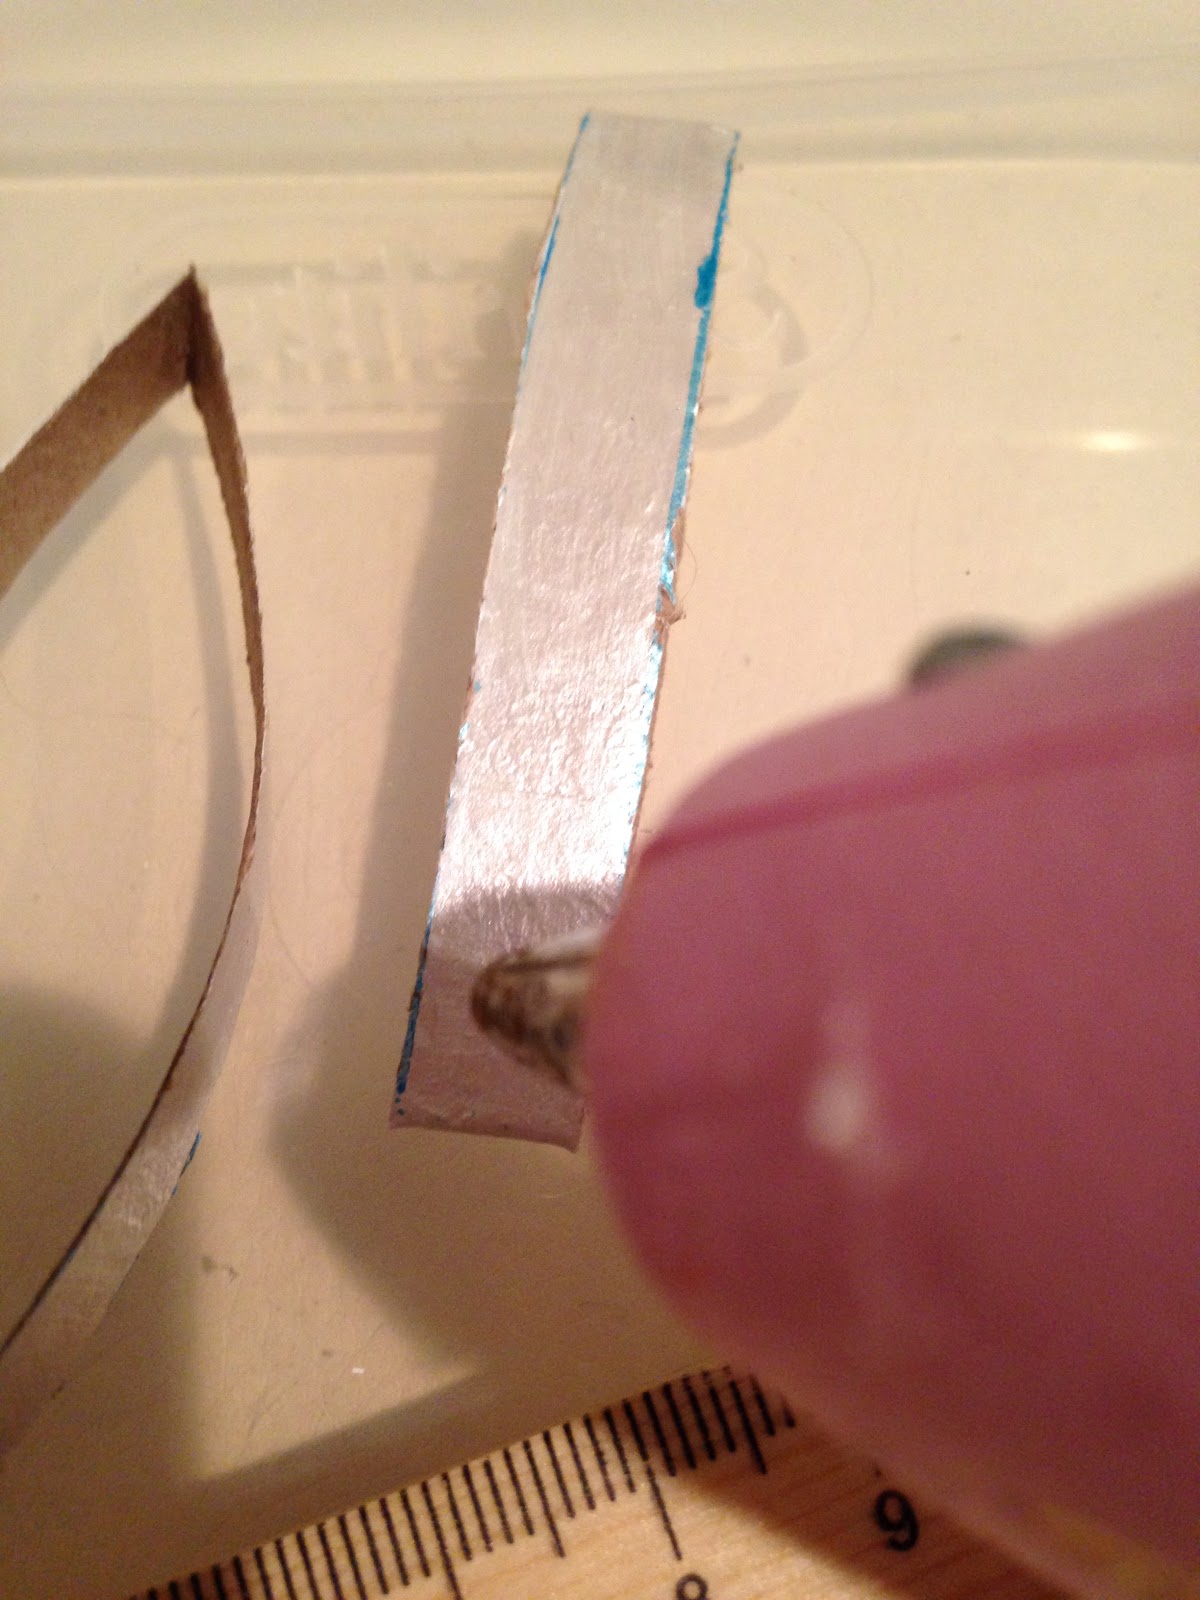
1. Take a used toilet paper roll and squash it so that it is flat.

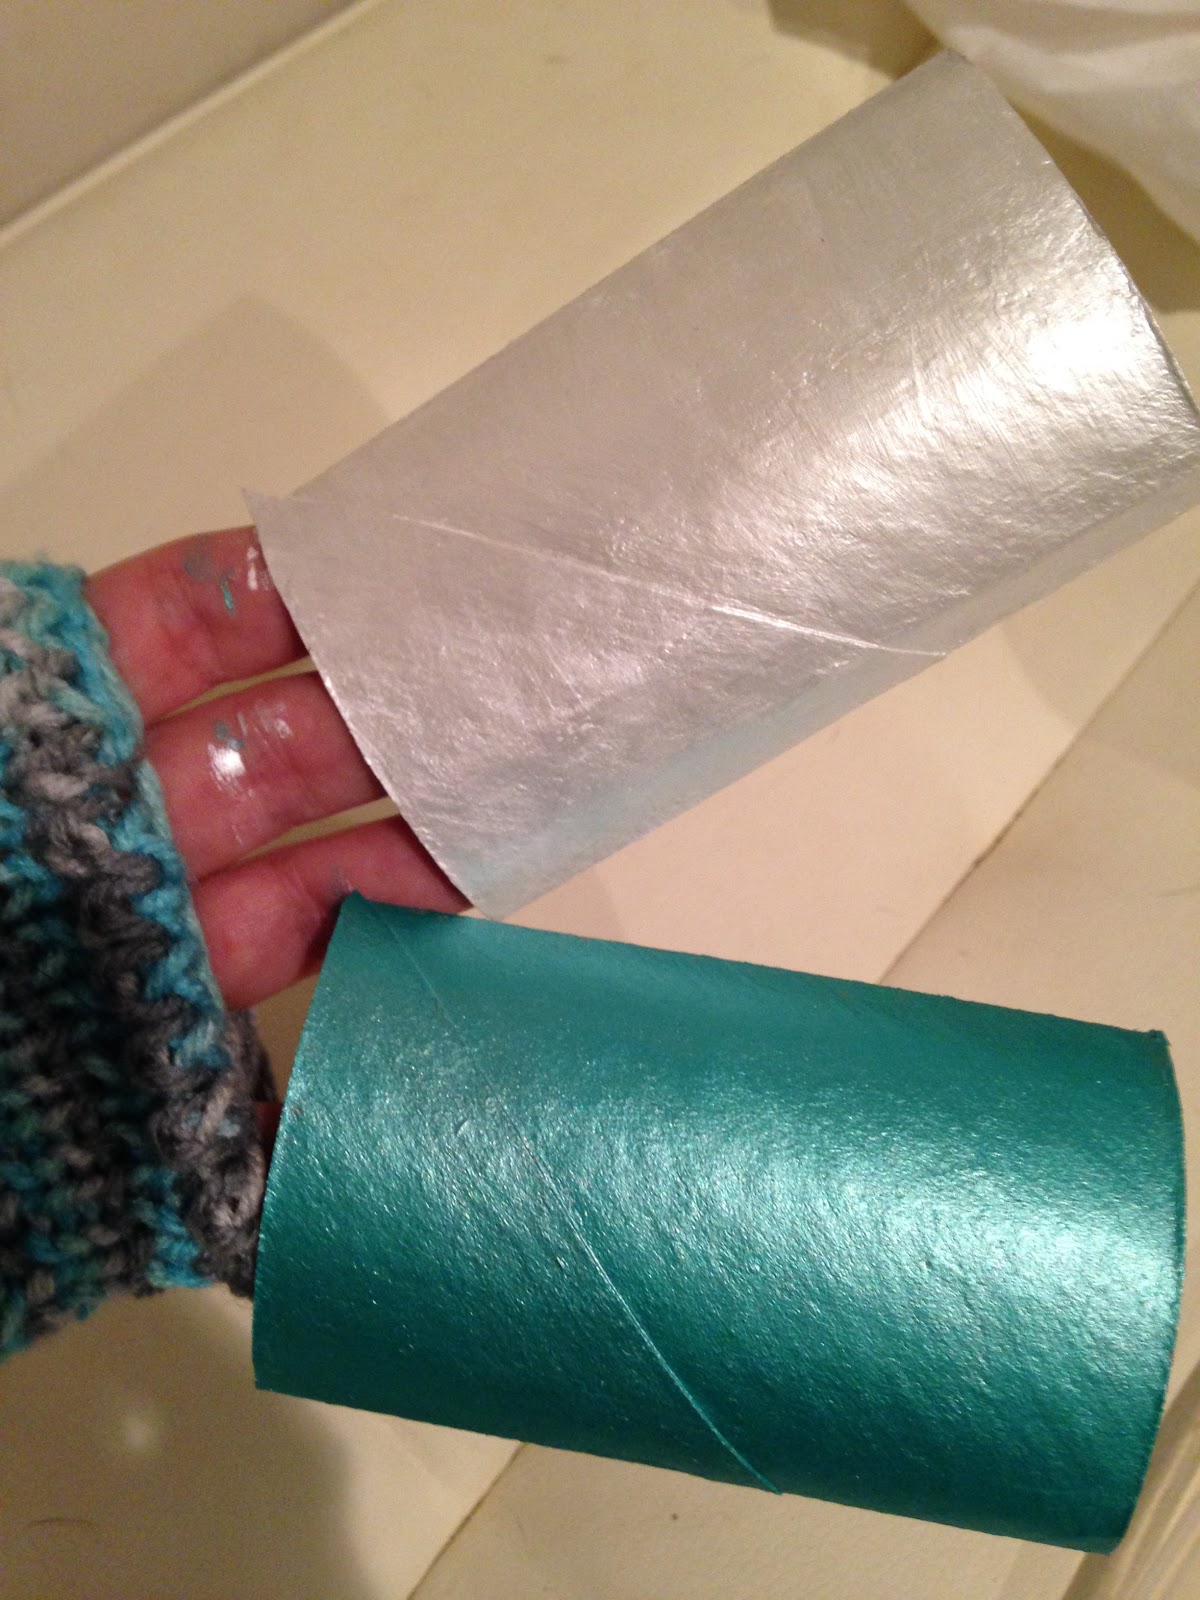
2. Paint the toilet paper roll your main snow flake color of choice. For this demonstration I painted one toilet paper roll white and the other turquoise. You can do any color that you would like. Metallic paints such as gold and silver are always pretty, as are the traditional colors of red and green, but you do whatever colors will work for your Christmas tree. At this point only paint the outside of the roll. (A word of advice. If you are doing white snowflakes, pearlescent is gorgeous, but it will add a step to your snowflake. You will want to paint the roll with regular white acrylic paint first and then, after it dries, paint over the white with your pearl white paint.)
 |
| This is just plain white paint. As you can see, it lacks the sparkle of a snowflake. |


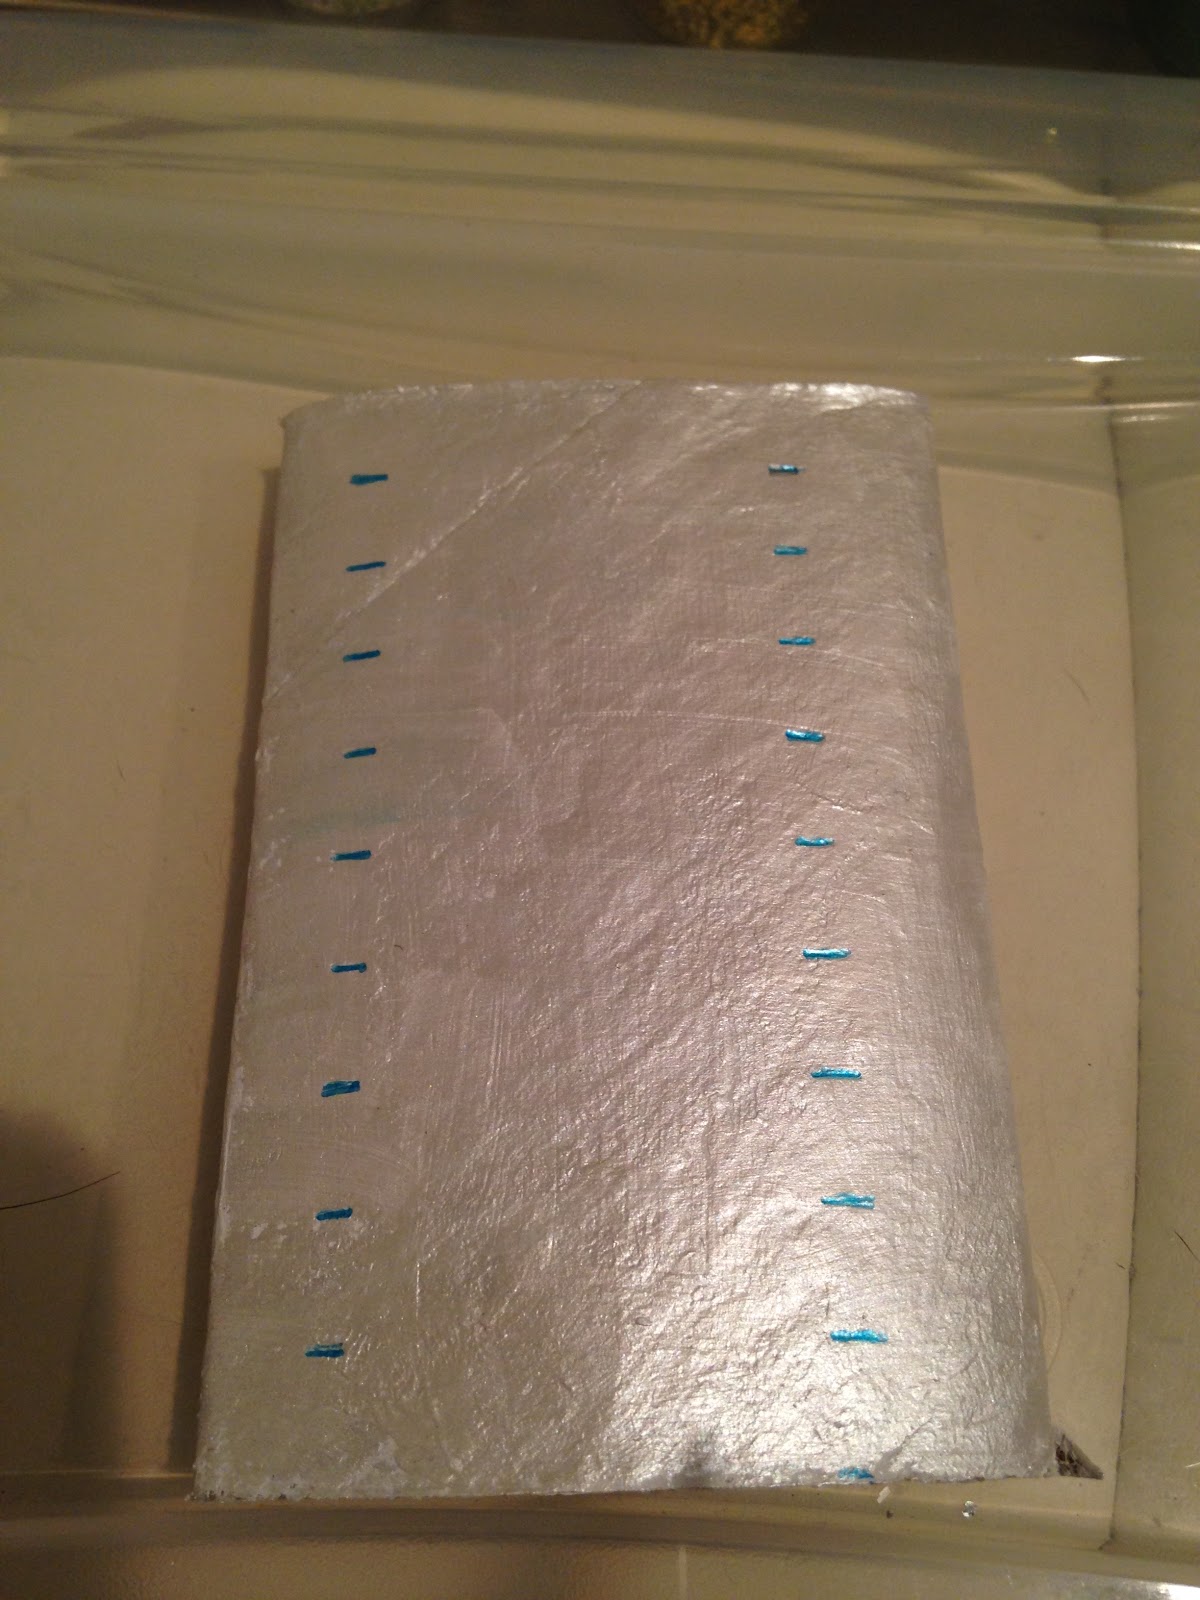
4. Using your ruler or a straight edge follow your marks to create one centimeter thick horizontal lines down the length of the toilet paper roll.
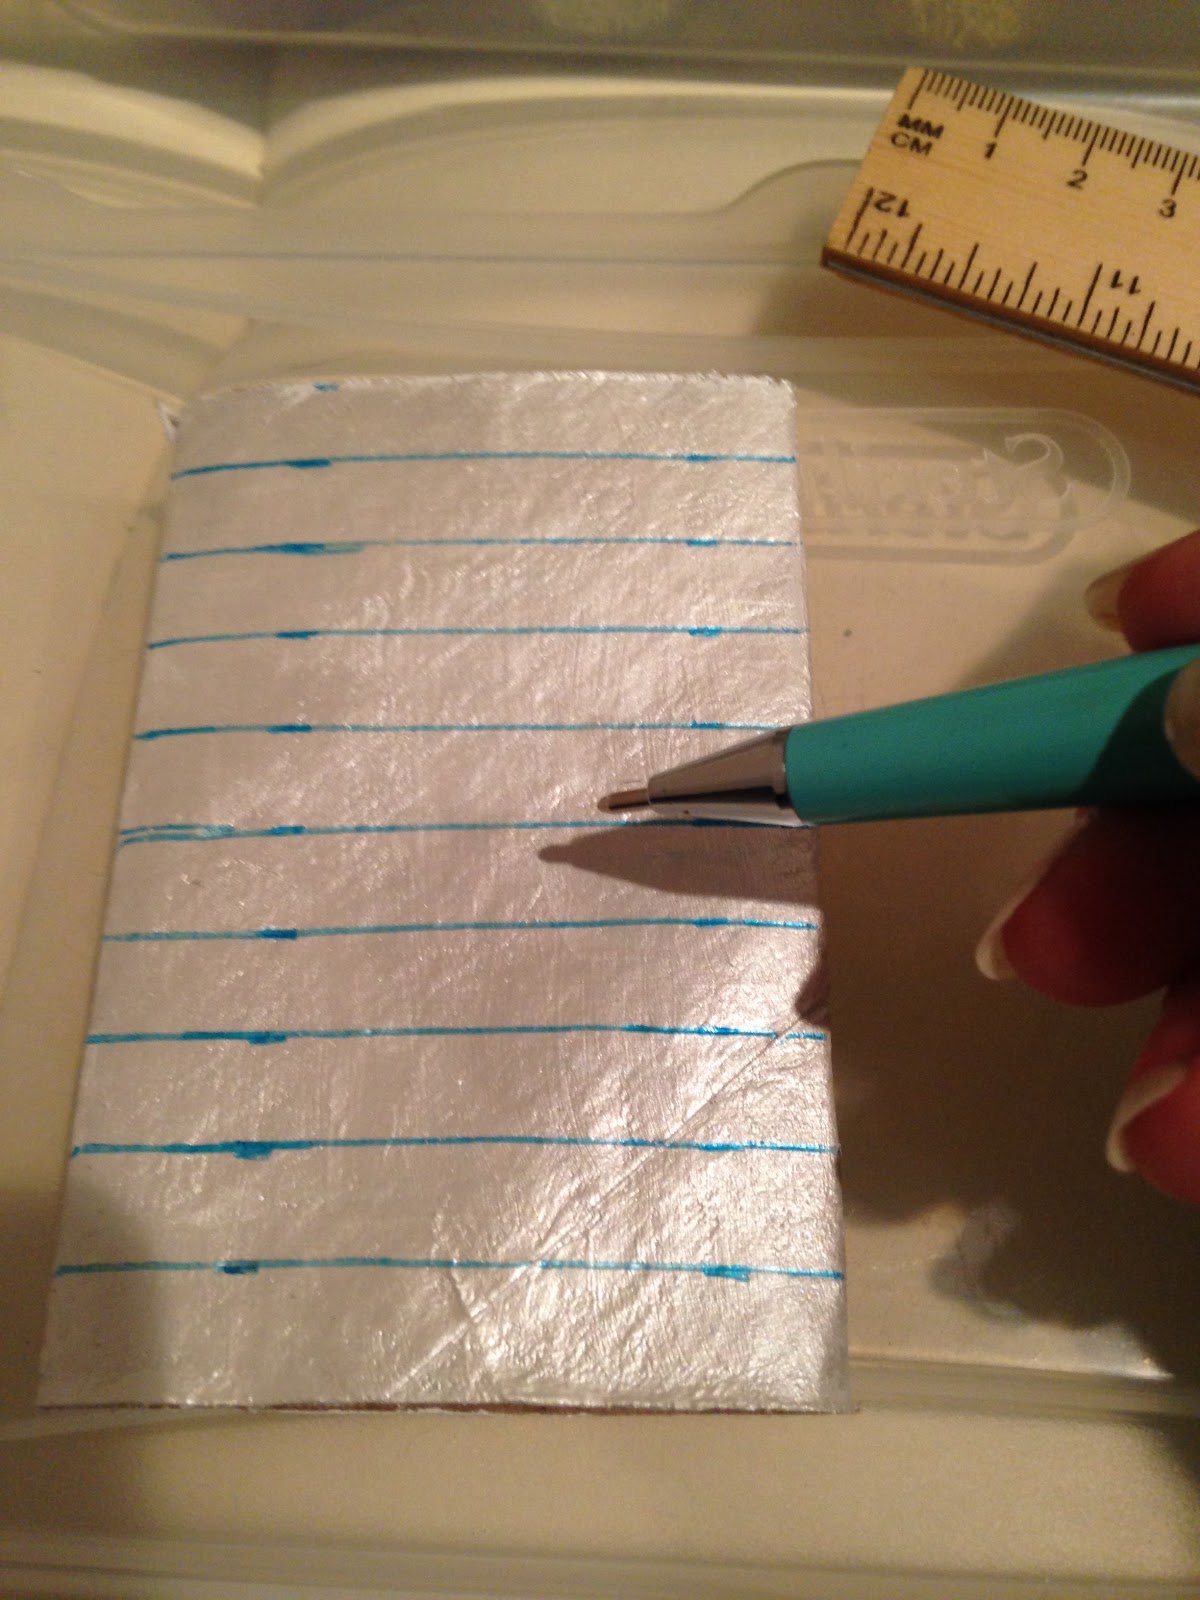
5. Using scissors or a razor, cut along the lines you created, being careful to keep the lines straight and even. If you measured correctly, this should give you ten strips. Once they are done, they sort of look like hollow petals from a flower.

6. Paint the inside of the strips. You can paint them the same color as the outside of the snowflake, but it also looks really pretty if you paint the inside of the snowflake a contrasting color.
Sorry, I did not take a picture of this step.
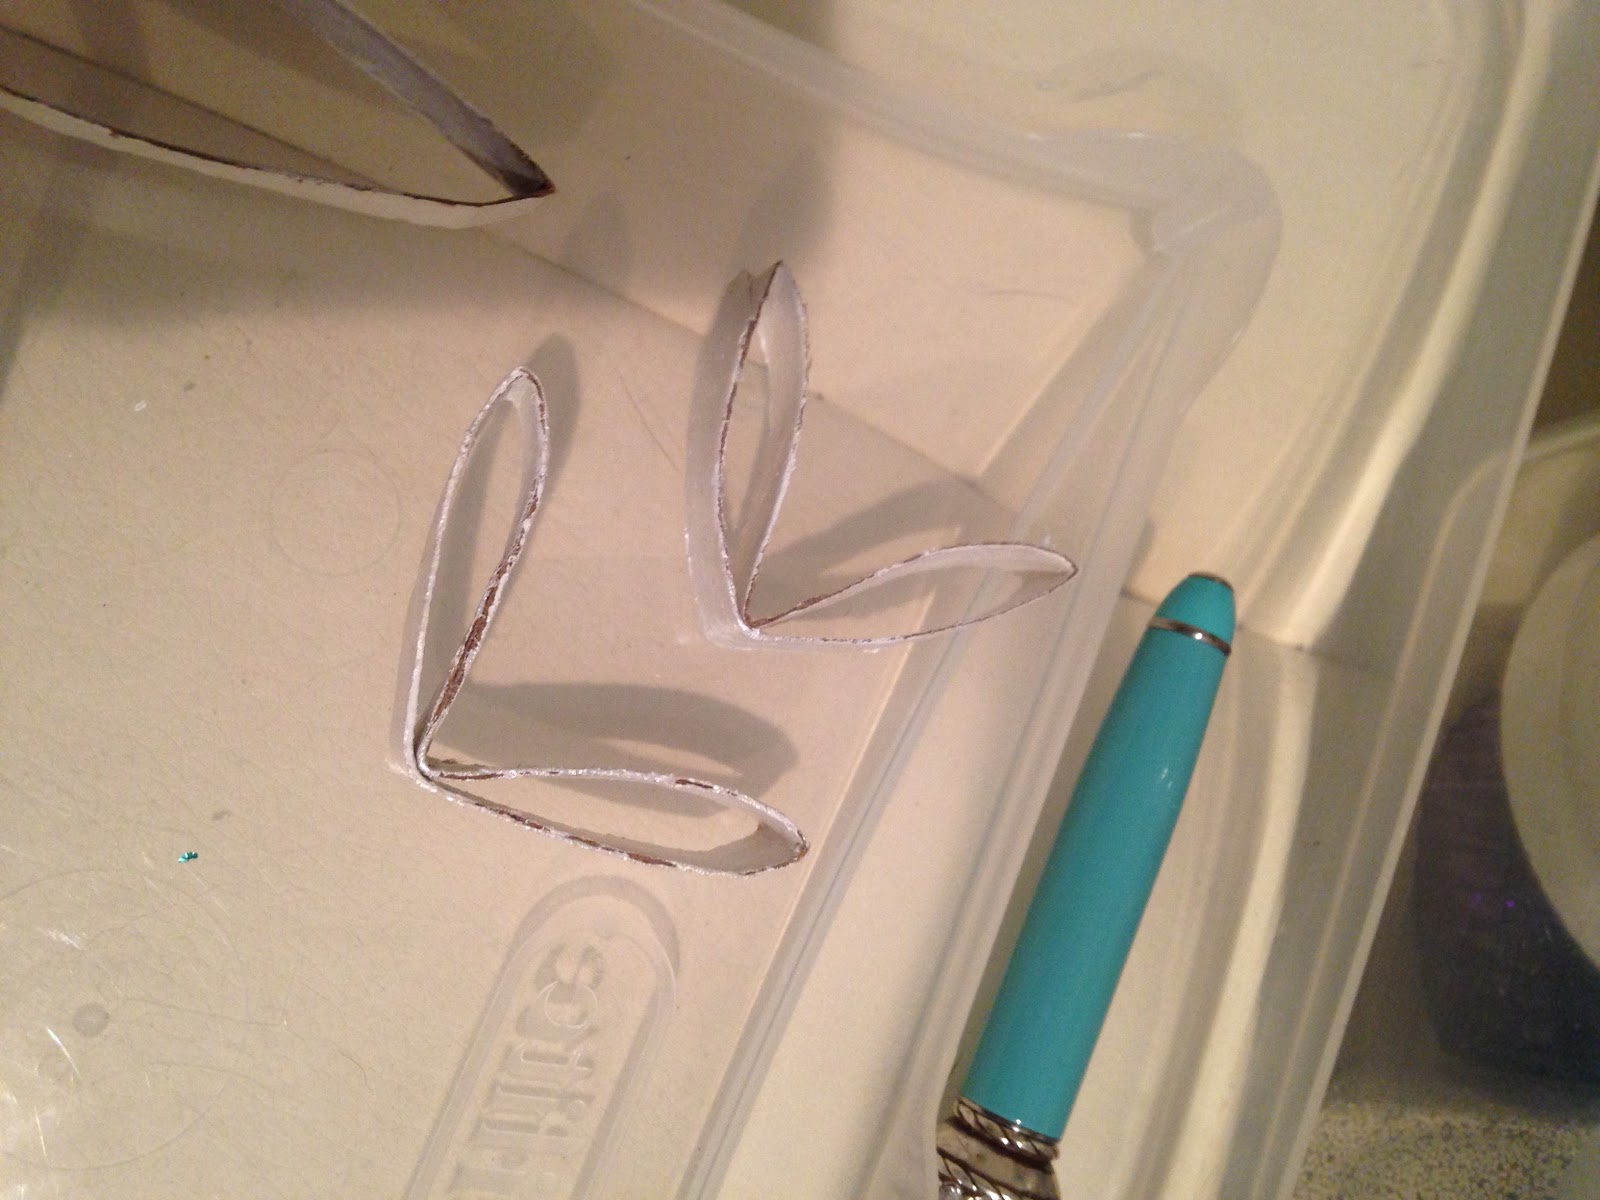
7. Using a hot glue gun, glue the outside bottom of one of the centimeter strips and attach two of your loops/petals together.

Repeat this process until you have six of the loops glued together. It will already look like a flower or a very basic snowflake once you reach this point.
8. Bend two of your centimeter strips in half.
Using a hot glue gun, put glue on the bottom of the outside of each bent half. Gently nestle the fold piece between two of the snowflake "petals". Press together until dry.
Take the other folded centimeter strip and glue the bottom outside on each side of the fold. Gently nestle this folded piece between the folded piece you just placed. Hold together until the glue is dry.
Put a drop of glue in between the two loops of the folded piece you just placed so they will hold together.
Repeat this process around the petals of the snow flake.
I know this step sounds confusing, but look at the picture below, as you can see, the folded halves are nestled between the petals.
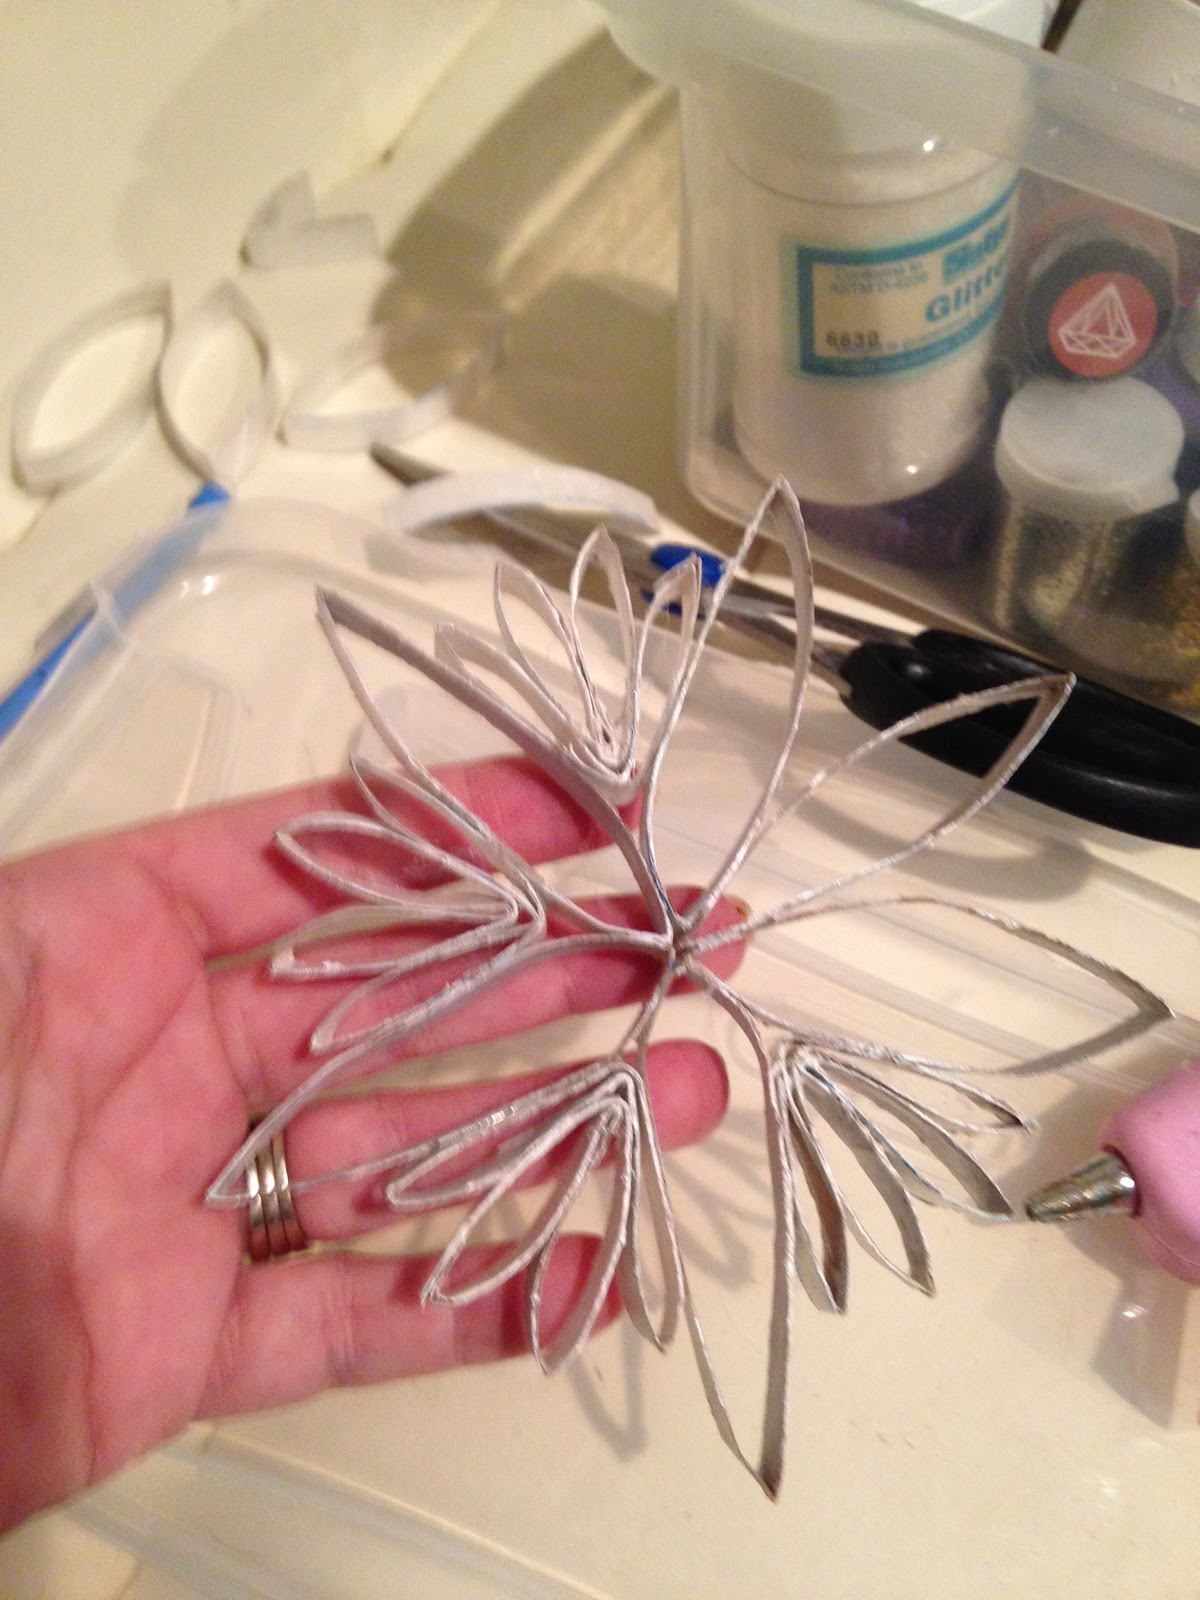 |
| In this picture we are slightly more than halfway through. |
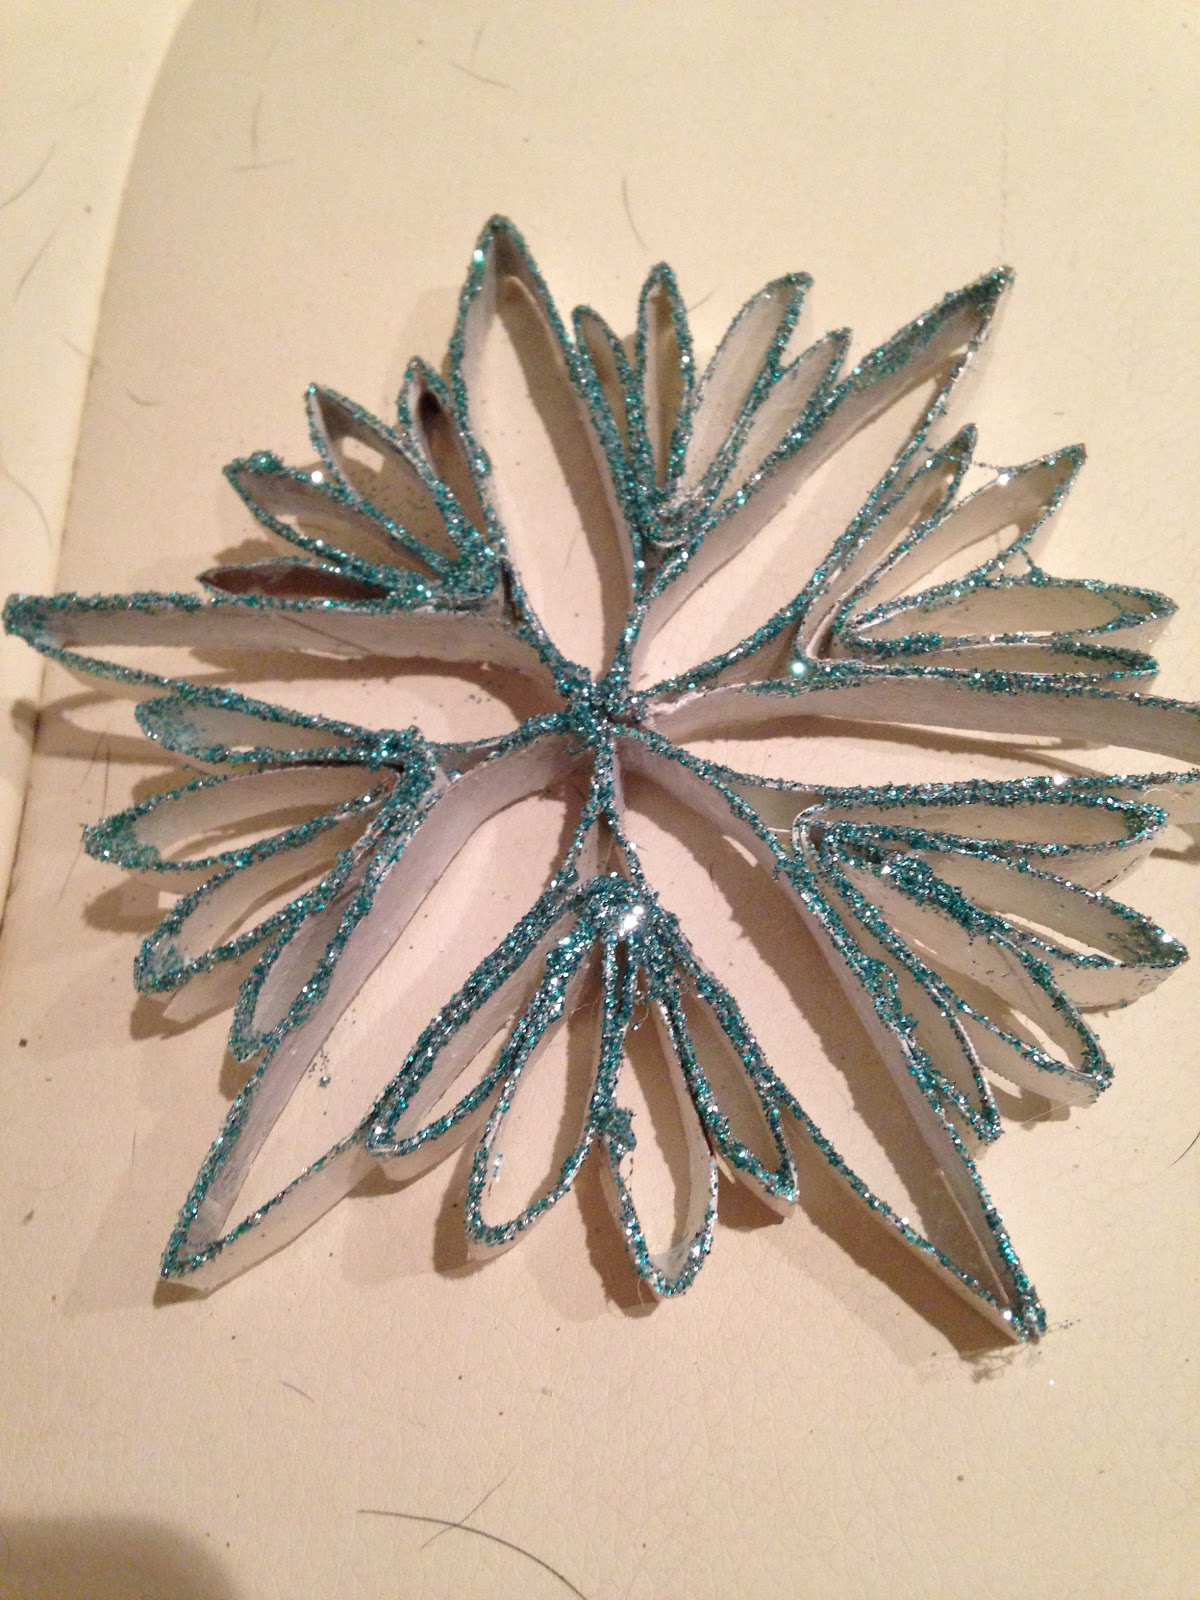
Once you have done all of your petals, your snow flake should look like this:
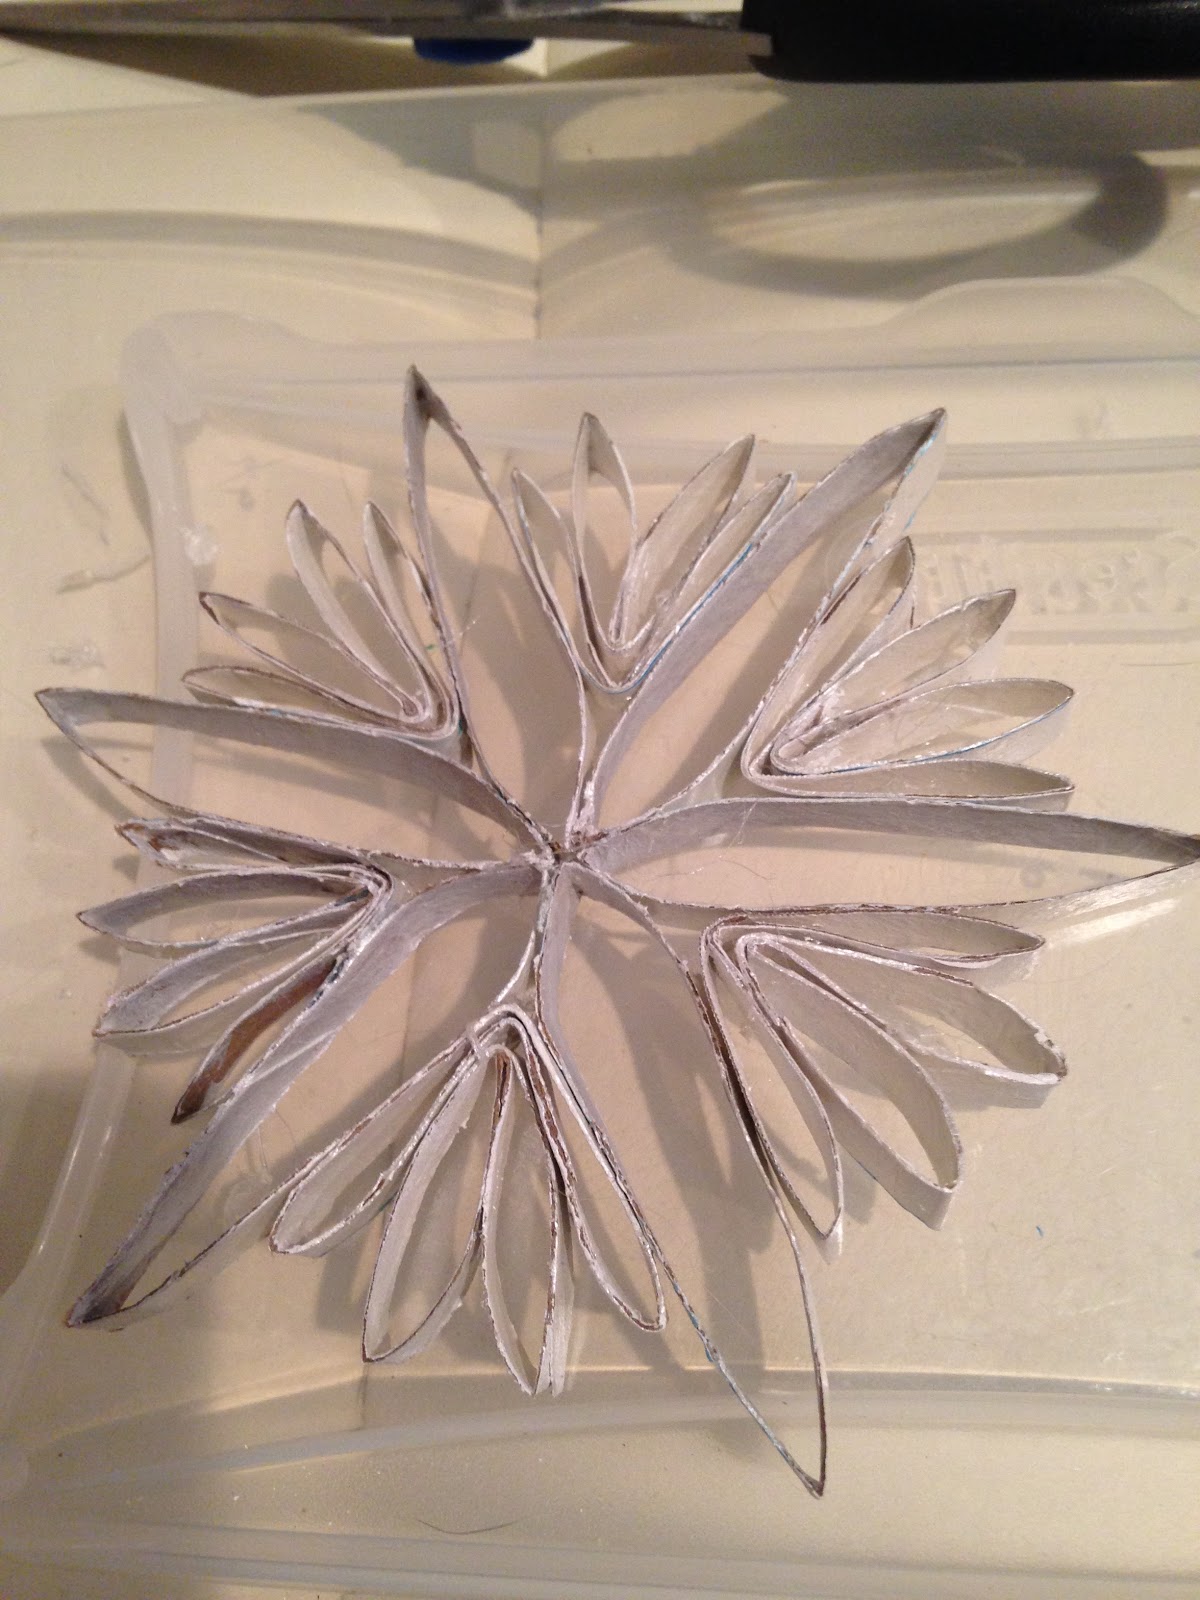
As you can see, it already looks very much like a snow flake, but we want to give it some sparkle and bling.
9. Using a paint brush, paint Elmer's Glue along the edges of the snowflake. There are two ways that you can go about putting the glitter on the glue:
A. Put the snowflake on a piece of paper and pour the glitter over the glued edges.
B. Put glitter on a paper plate and dip the glued side of the snow flake into the glitter.
If you notice any bare spots, add more glue and then sprinkle on the glitter.
Once the glue has dried, repeat this process on the other side of the snowflake.
10. Using a hot glue gun, put glue in the center of a sparkly button and press the sparkly button into the center of the snowflake.
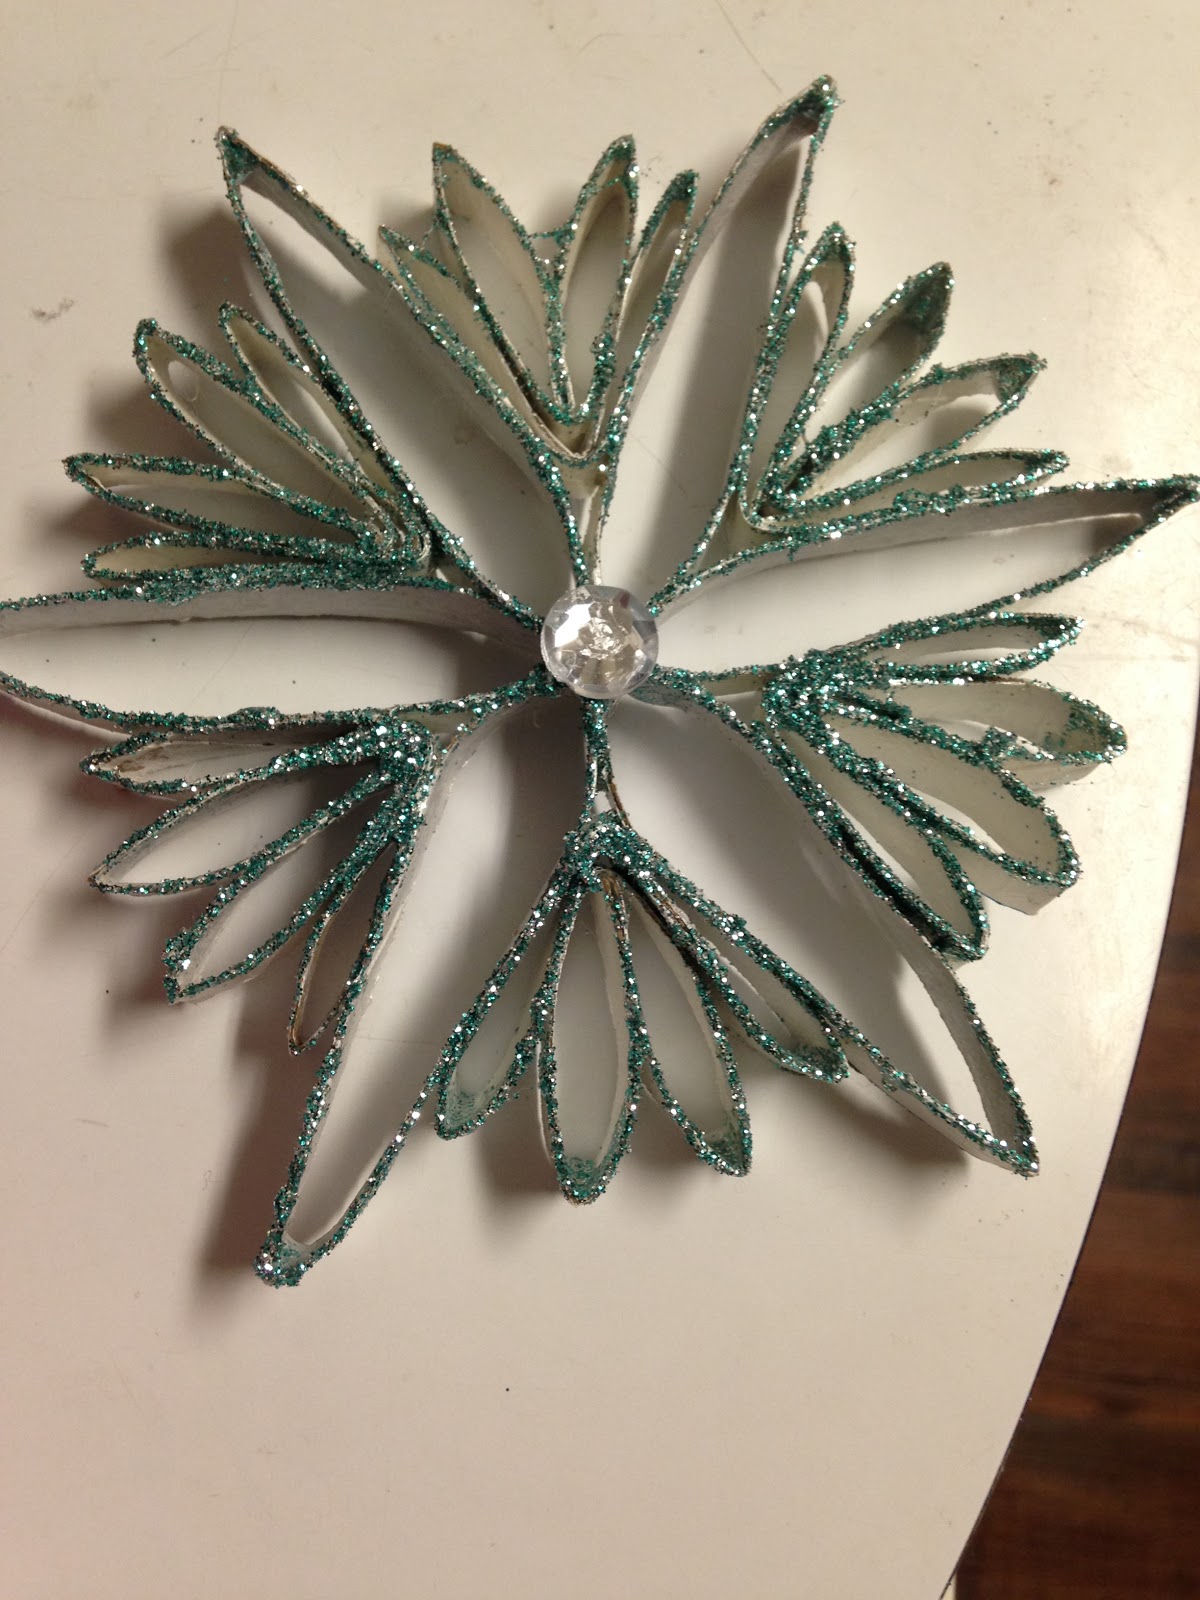
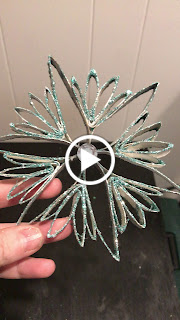
Let the glue dry. To hang it on the tree, just wrap some thread around one of the main large petals and then hang.
Cookie Dough Ornaments

This is not a new recipe. In fact, if you have ever been a Girl Scout, you have have probably already made these before. I have not changed the recipe, I just want to show you that you can make them look much fancier than the Santa's, Christmas trees, stockings and Christmas presents you may remember having made as a child.
Ingredients
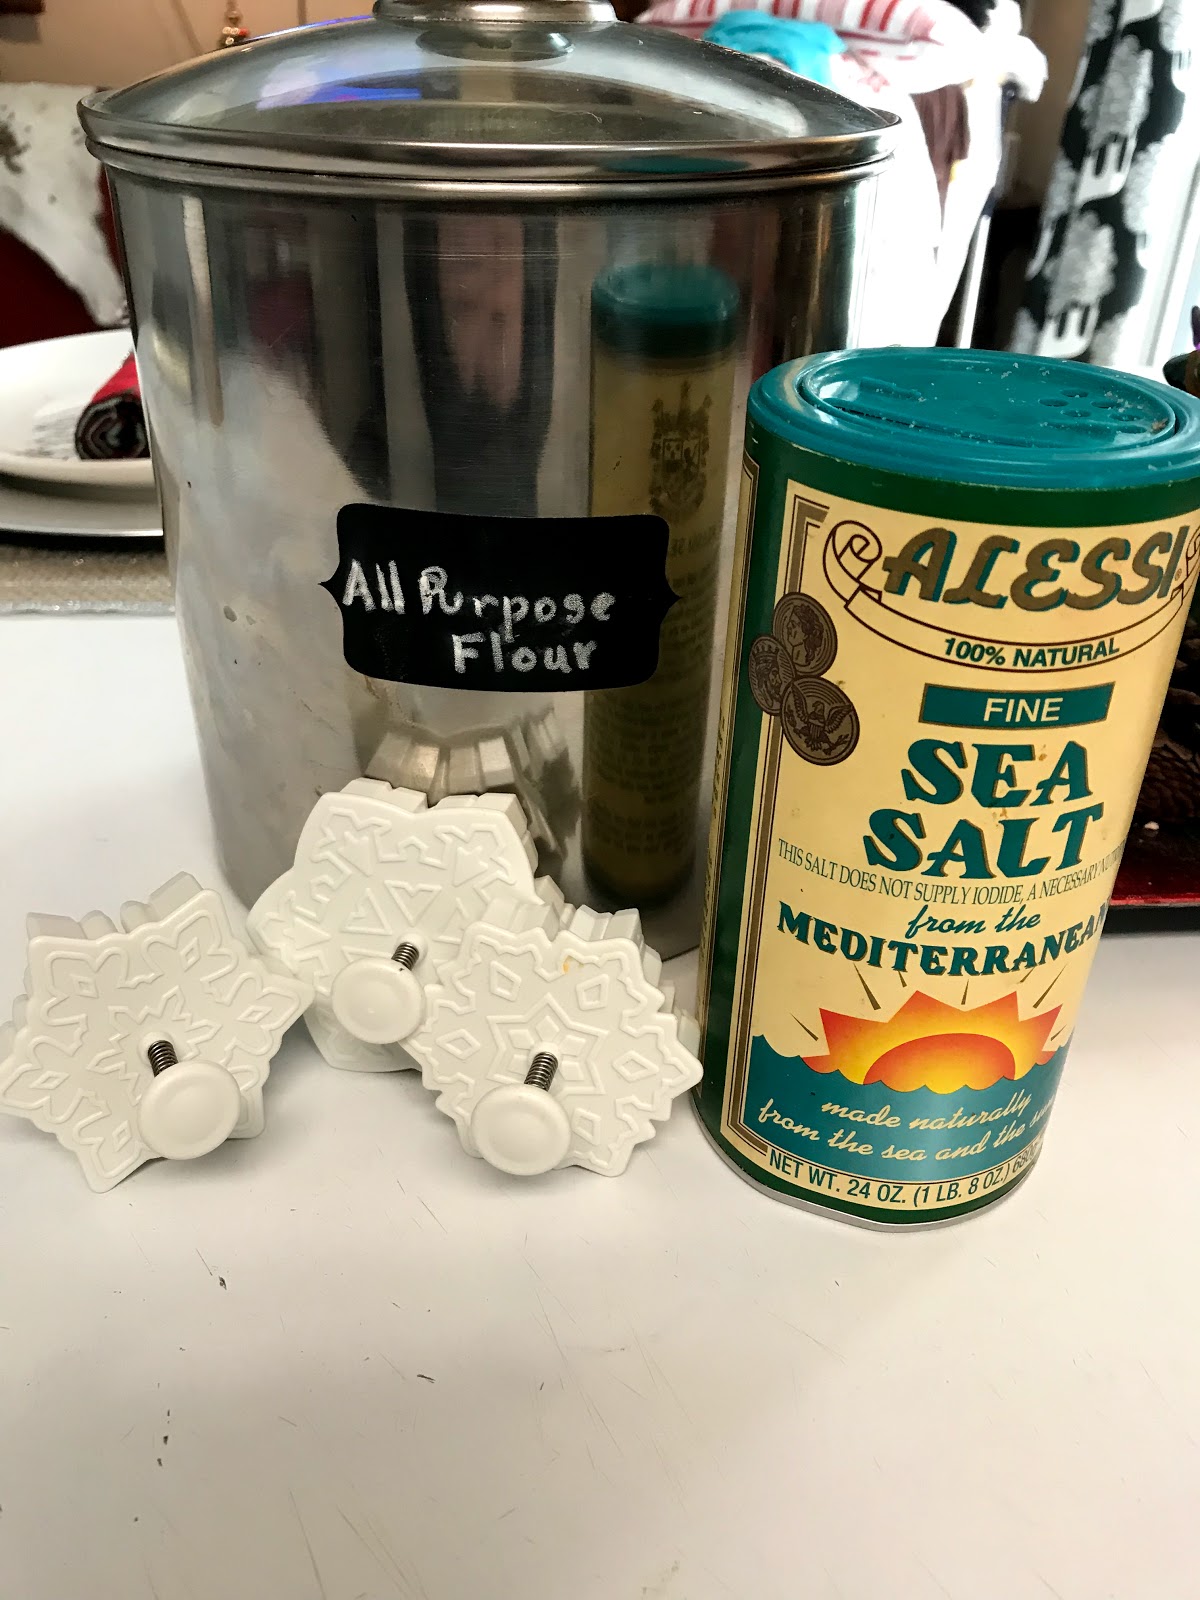 |
| You don't have to use sea salt. In fact I normally use regular salt. This is just what I happened to have on hand. |
1 cup all purpose flour (can use more if needed) Note: Do not use self rising flour.
1/2 cup salt
1/2 cup warm water
Items Needed
Rolling pin
Cookie Cutters (I used snow flakes, but you can use whatever you want)
Bamboo Skewer or Toothpick
Cookie Sheet
Acrylic Paint
Paint brush
Instructions
1. Preheat oven to 325 degrees.
2. In a large mixing bowl combine the flour, salt and water.

3. Start the mixing process with a spoon and then use your hands to complete the mixing process. Once everything is combined the dough should have a similar consistency to play dough. If your dough is too wet and sticky, add more flour until you get the right consistency. (This batch I actually used my half cup and then add about another 1/4 cup flour to get the right consistency.)
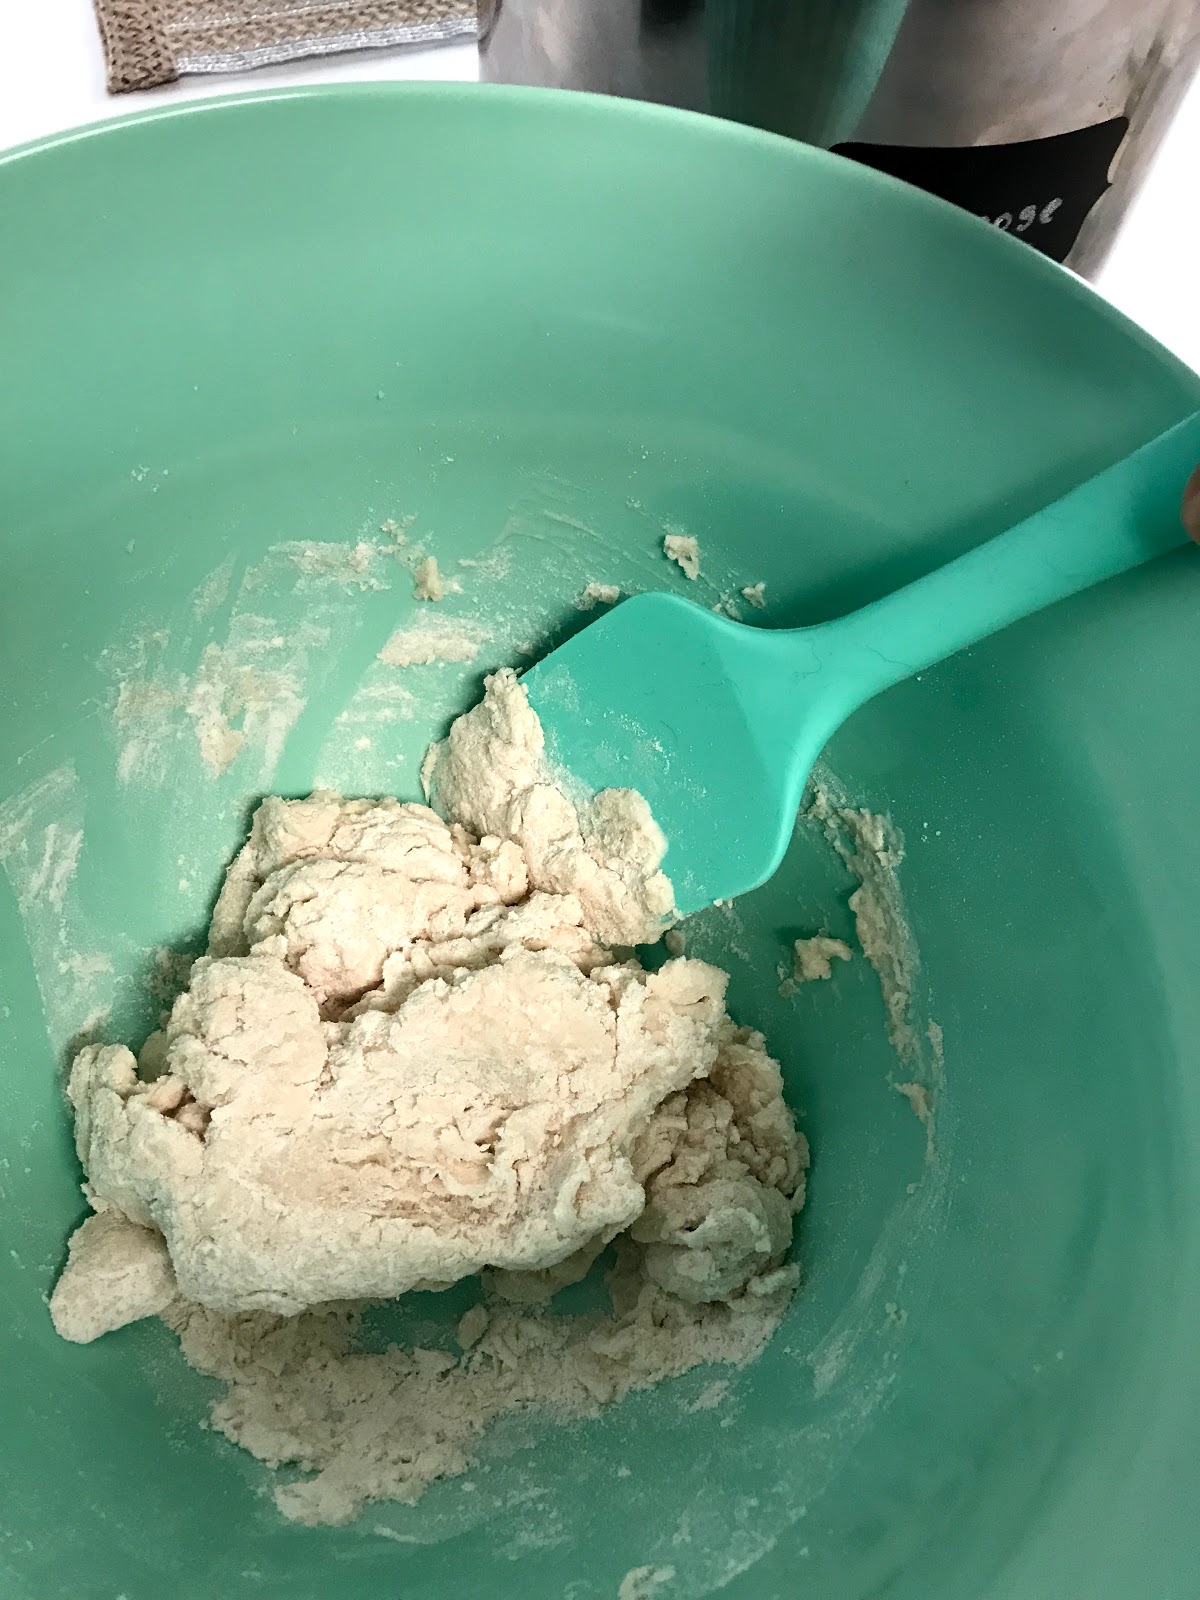
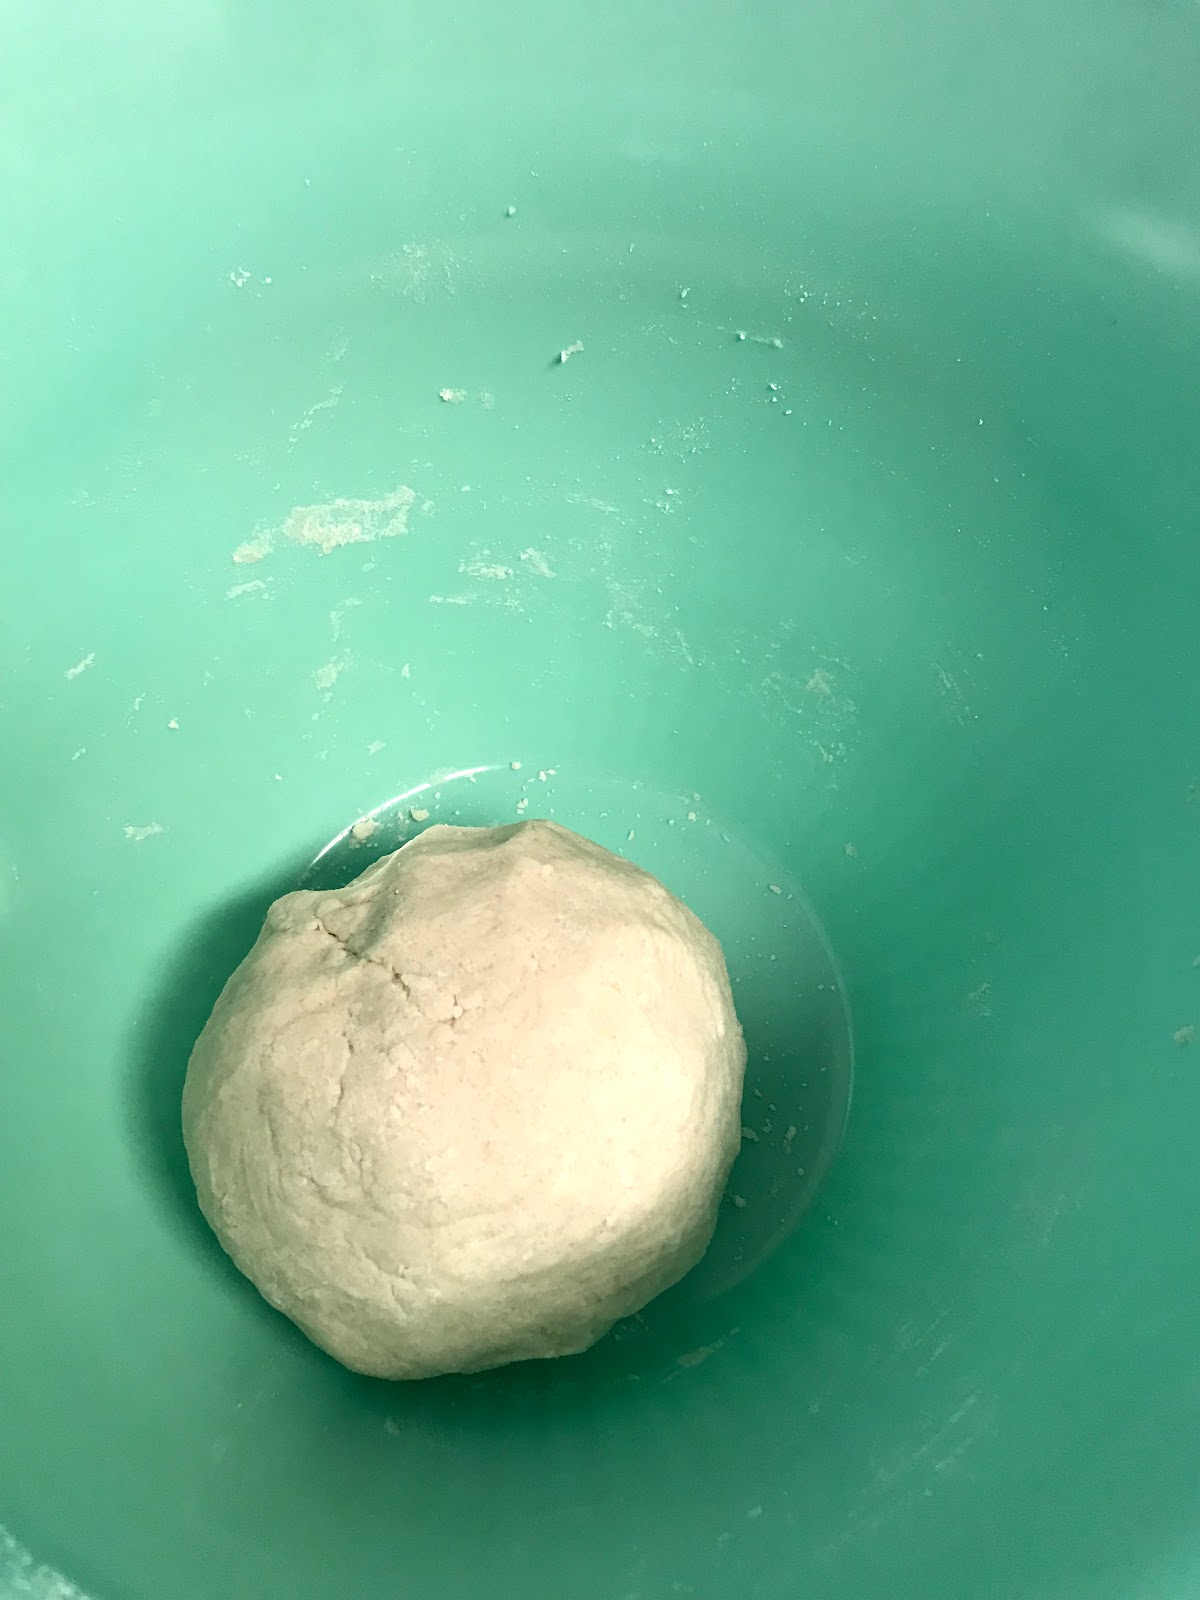 |
| Your dough should look like this and feel like play dough. |
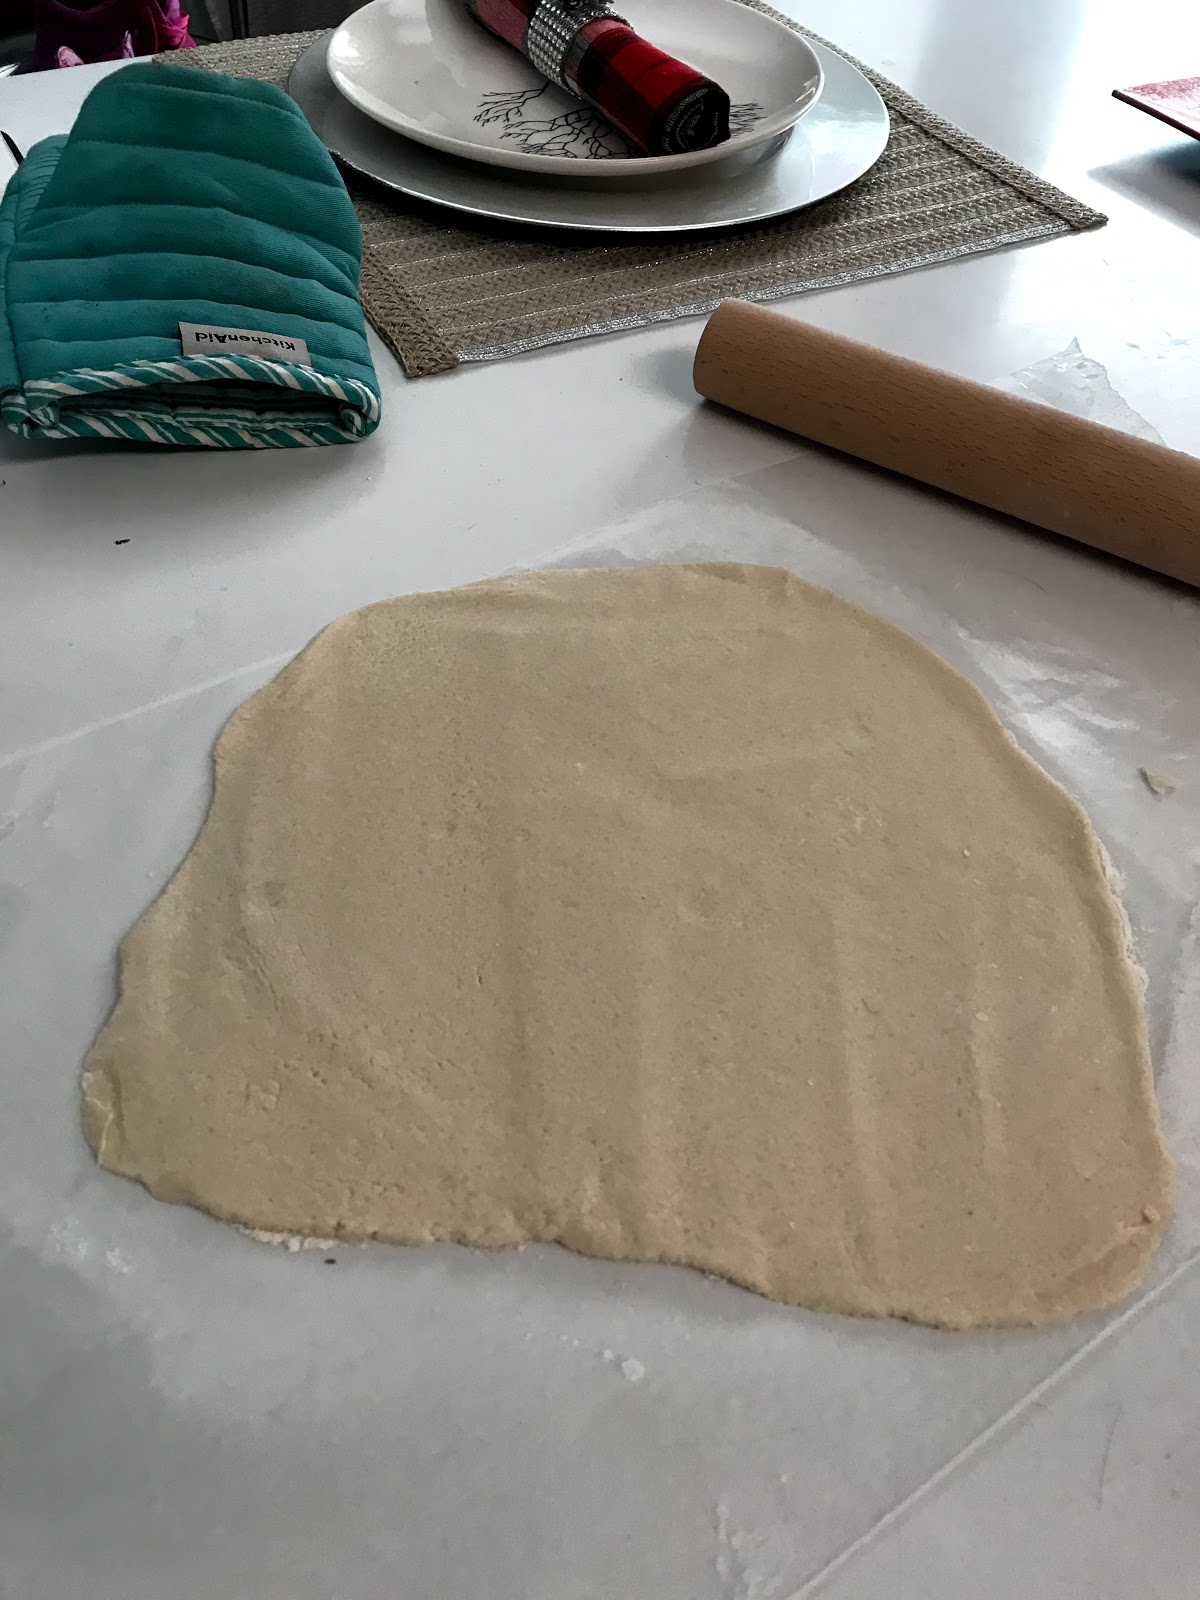
4. Place a piece of wax paper on a counter top. (Use a few drops of water on the bottom side of the wax paper to keep the wax paper in place.) Using a rolling pin roll the dough until it is 1/4 inch or 1/8 inch thick.
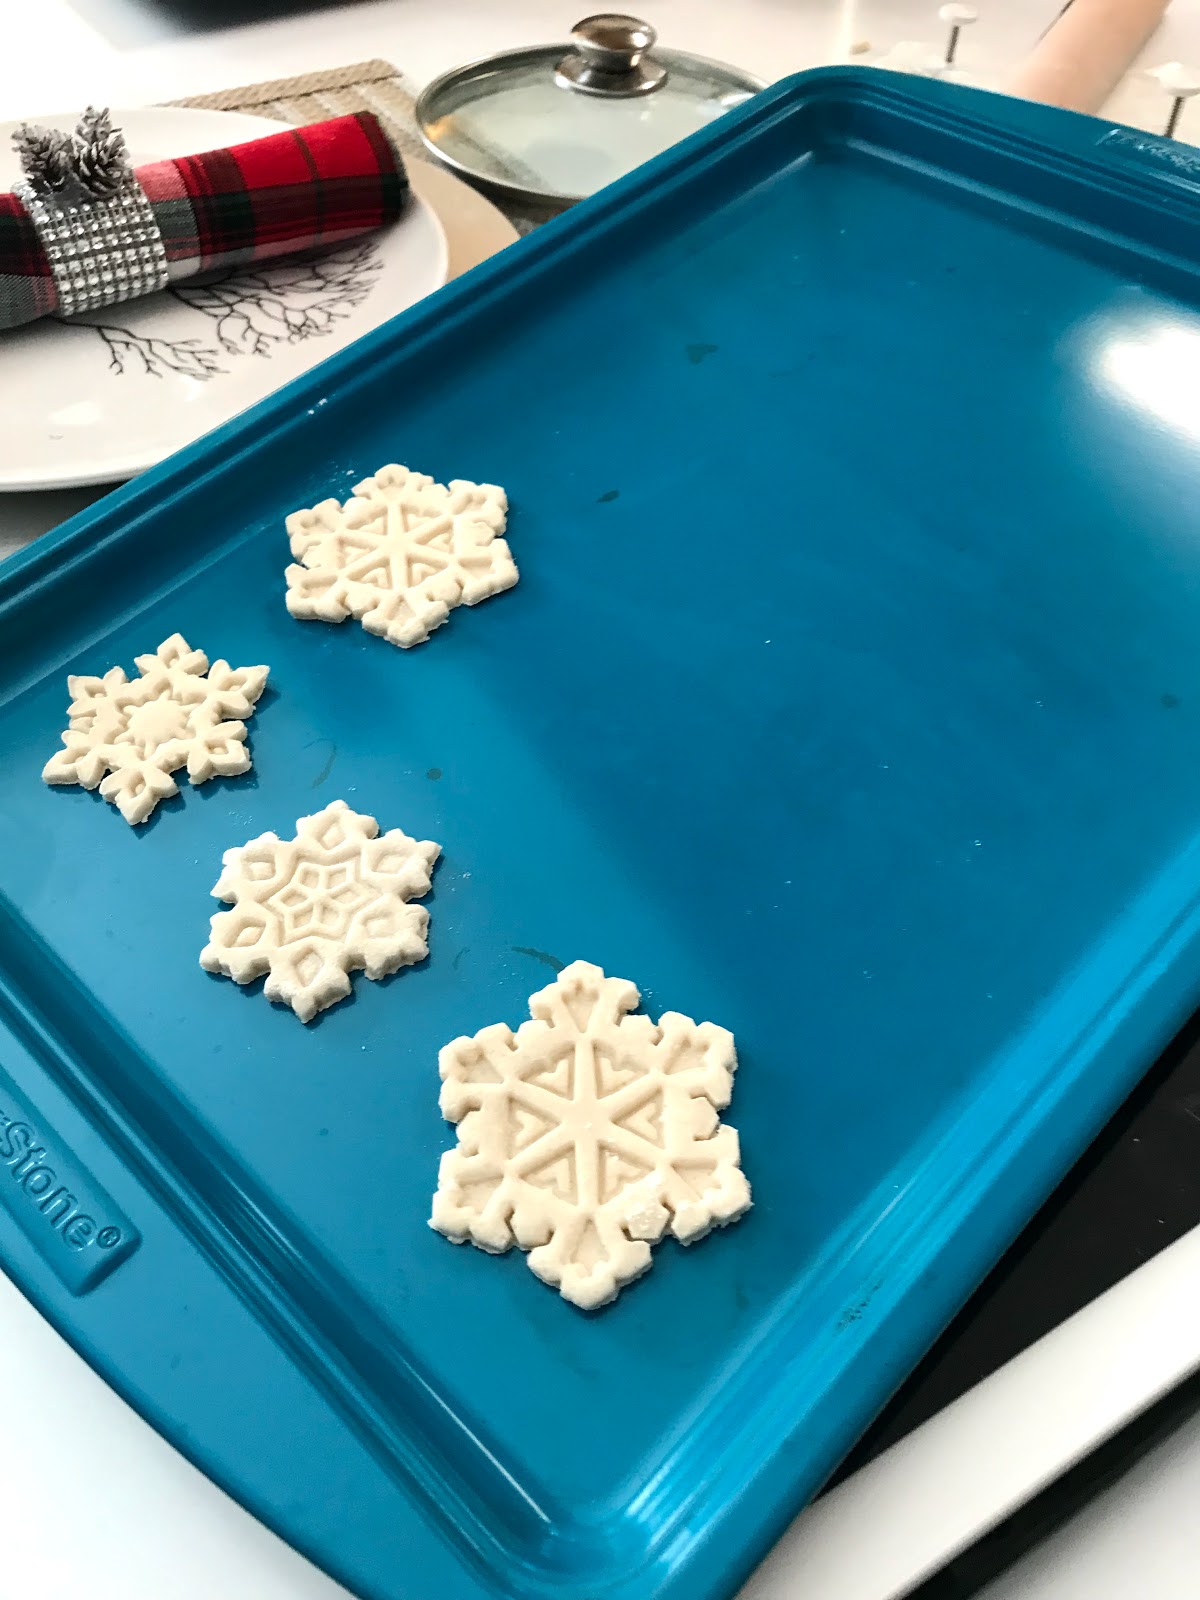
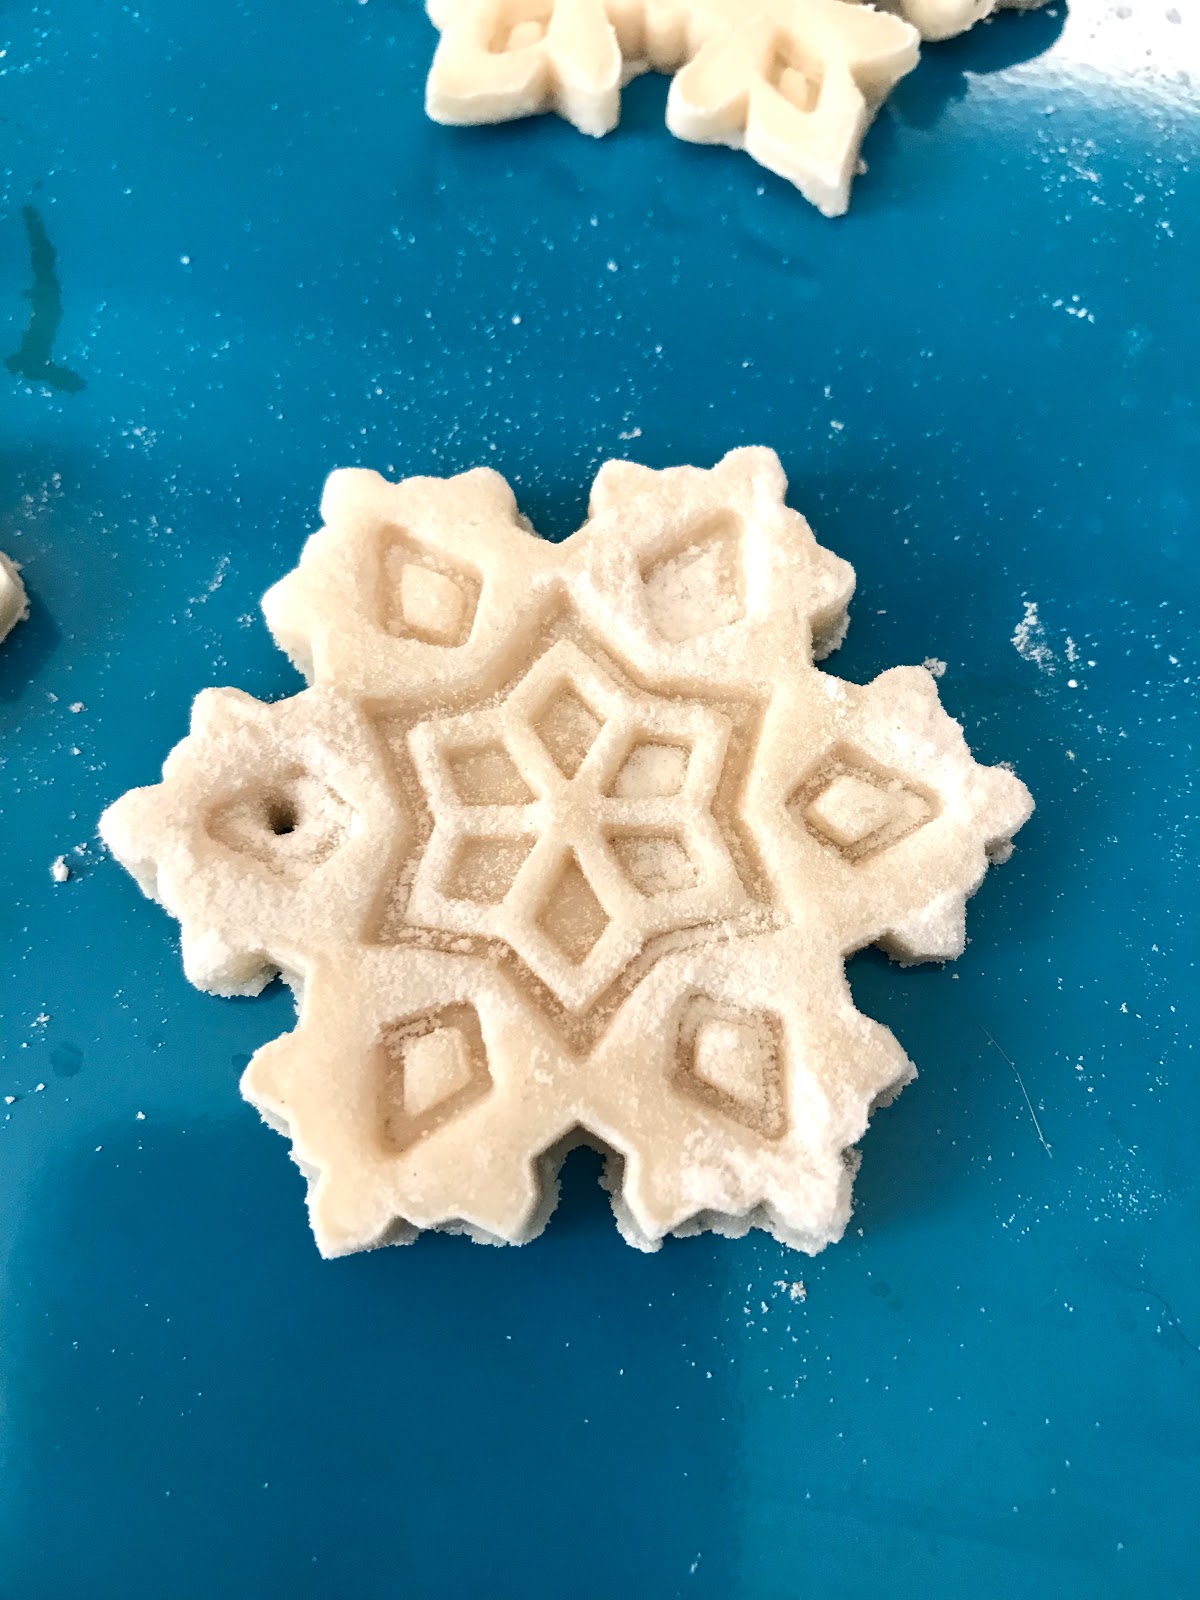
5. Cut out the ornaments using your cookie dough cutters. I used some snow flake cookie cutters that I got as a stocking stuffer for Christmas last year. I believe that mine were actually pie dough cutters from William Sonoma, but you can use any holiday cookie cutters that fit your tree decor. You can do very simple and get the cookie cutters that just cut out the outside of the dough but, for fancier ornaments, I suggest you use the cookie cutters that make impressions in the dough as they cut out the shape. If the dough is sticking to your cookie cutters, just dip your cutters in some all purpose flour
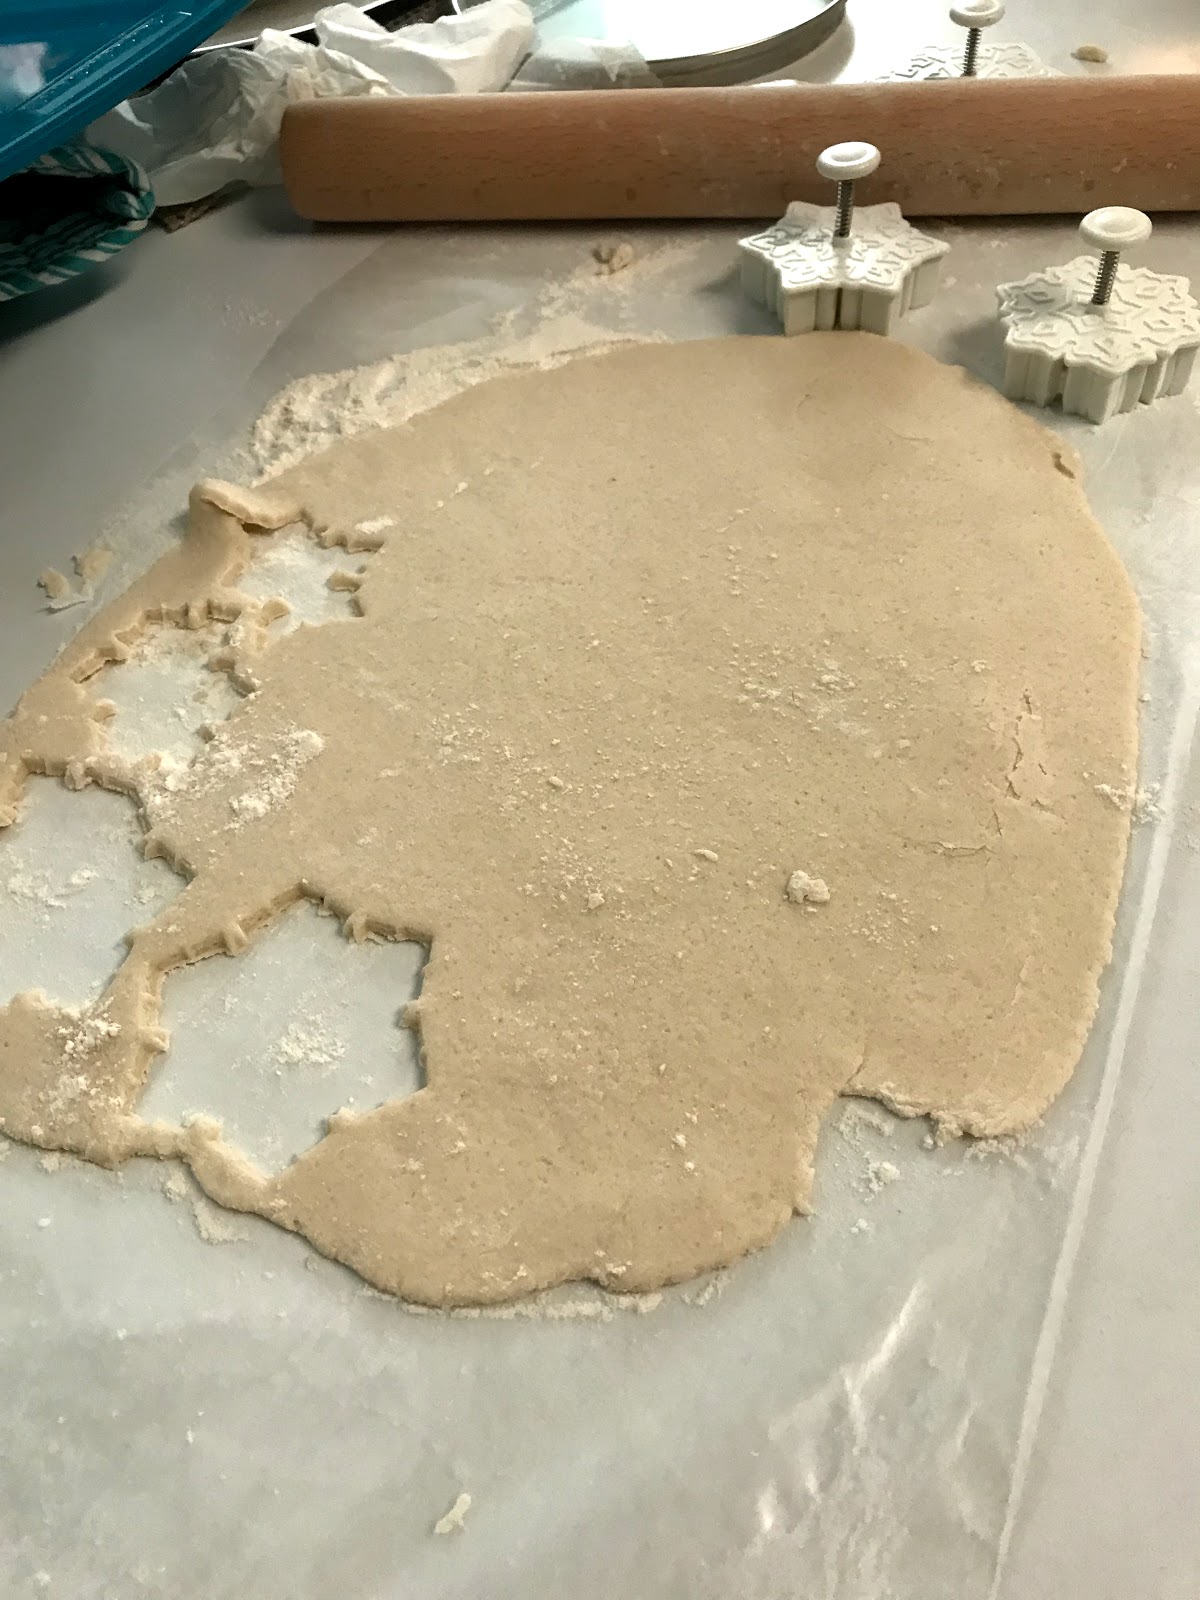
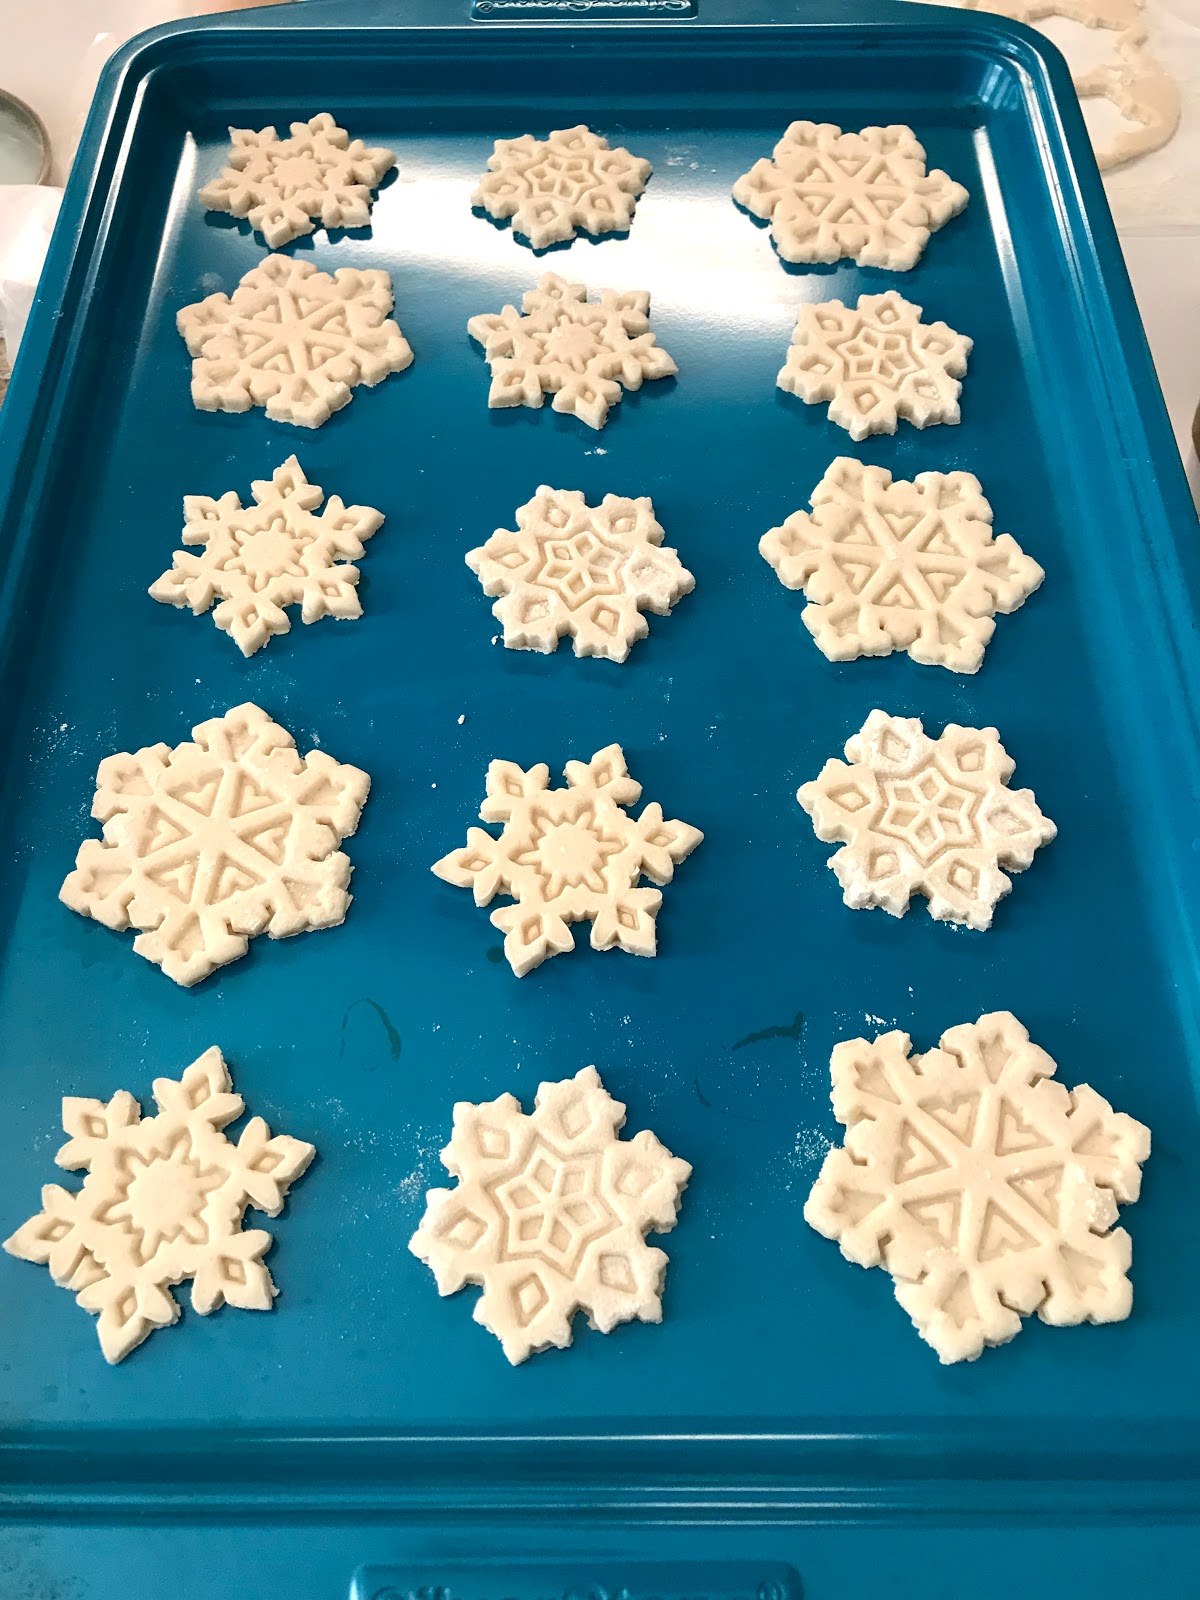 |
| Don't they look pretty? And they're not even baked or painted yet! |
7. Using a bamboo skewer or a toothpick, poke a whole in the top of the cookie ornament. This creates the hole string so that the ornament can be hung.
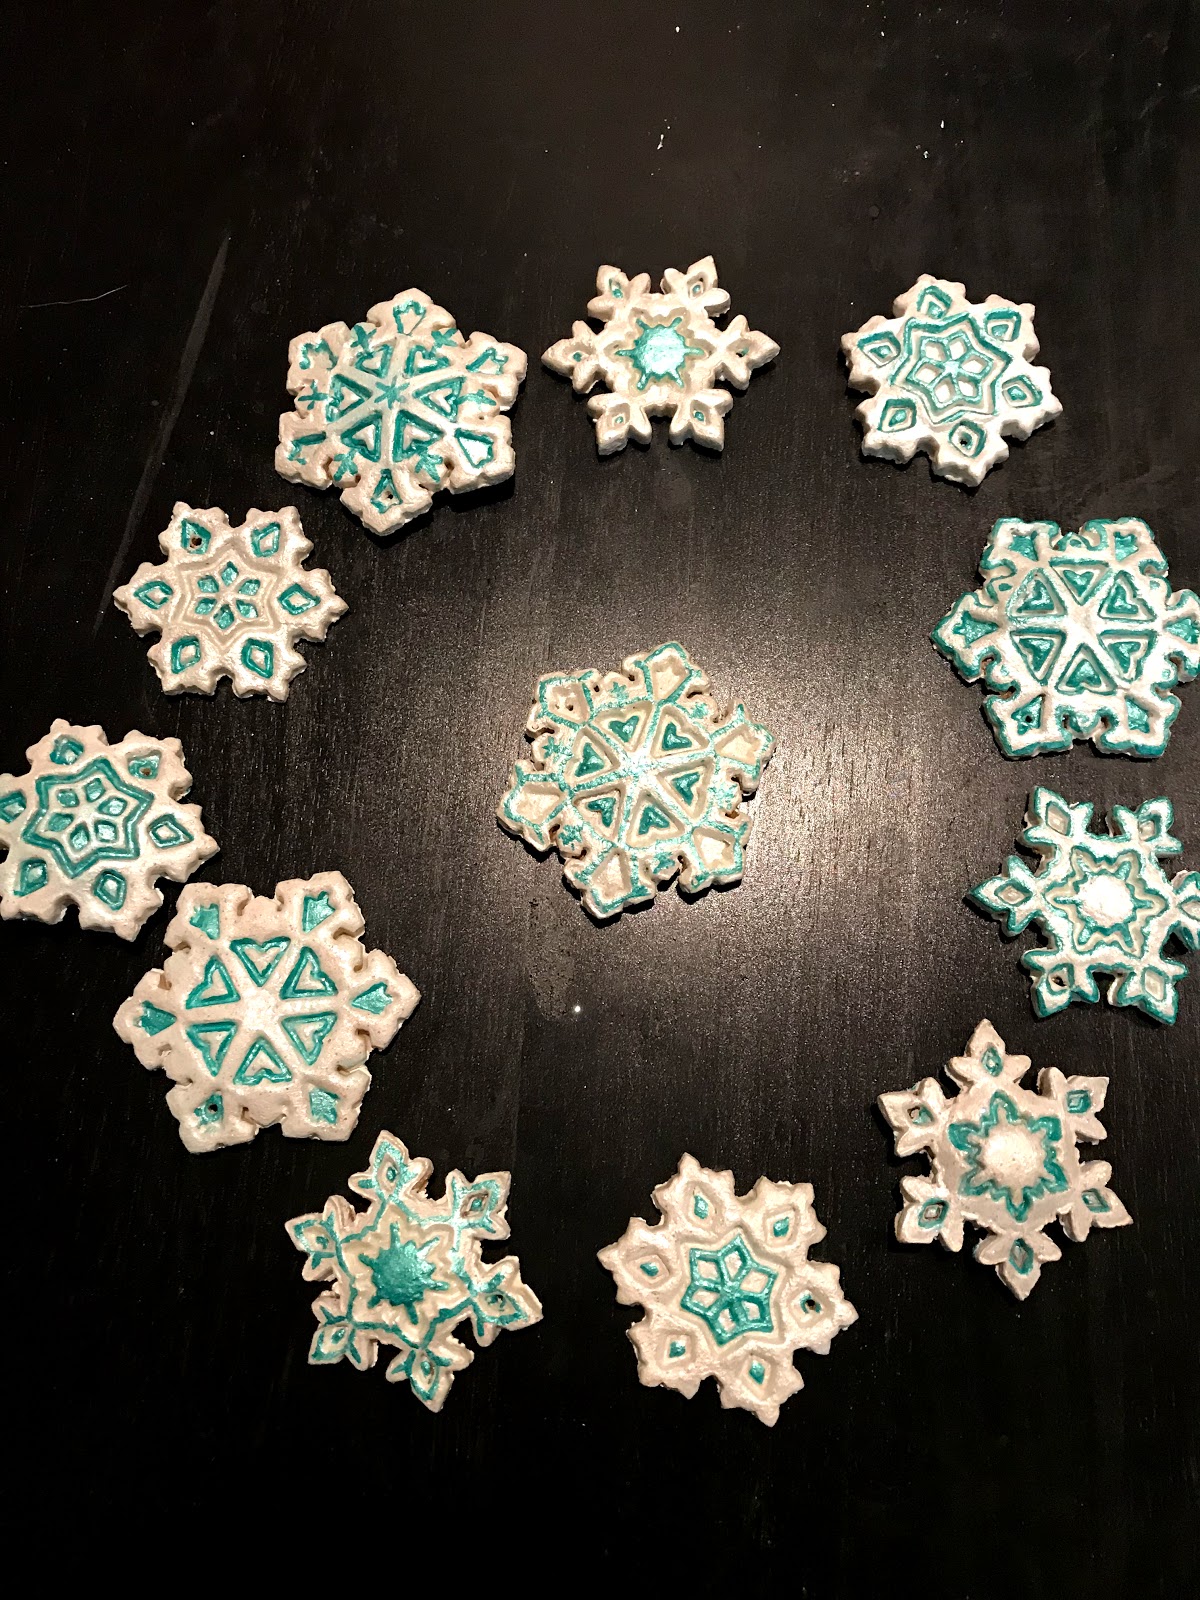
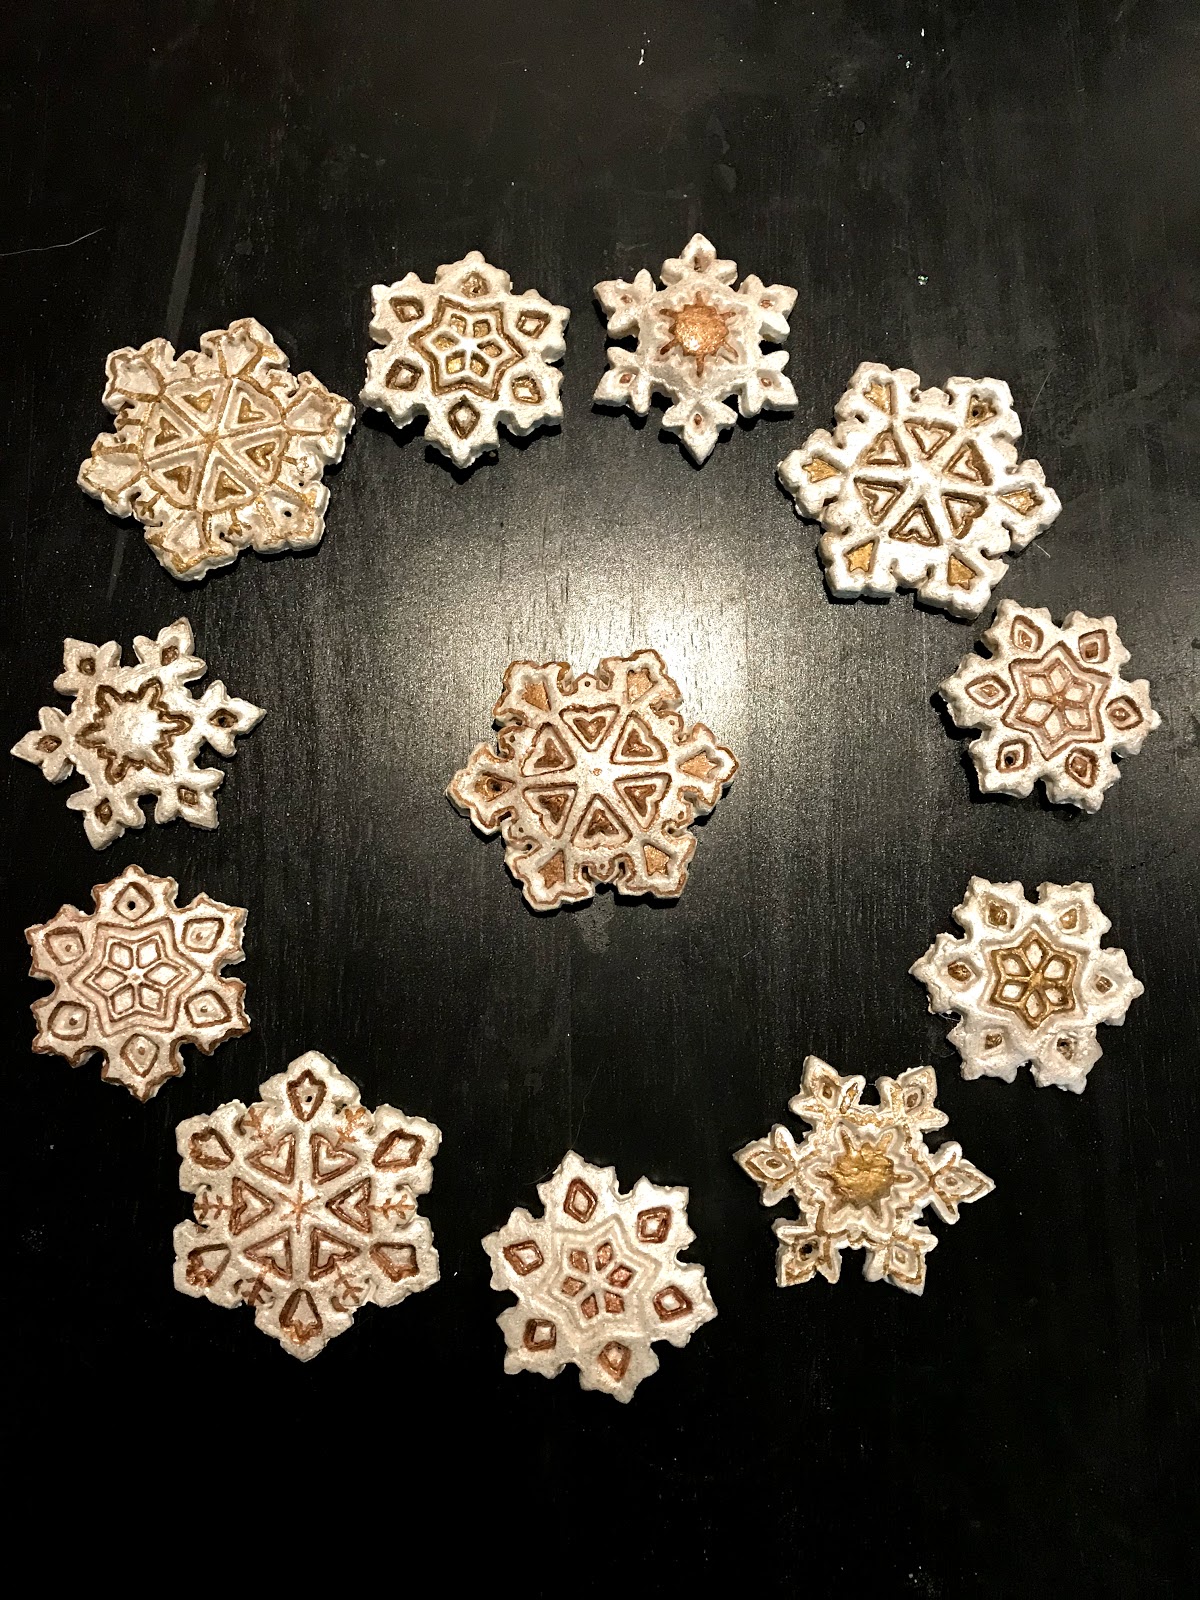
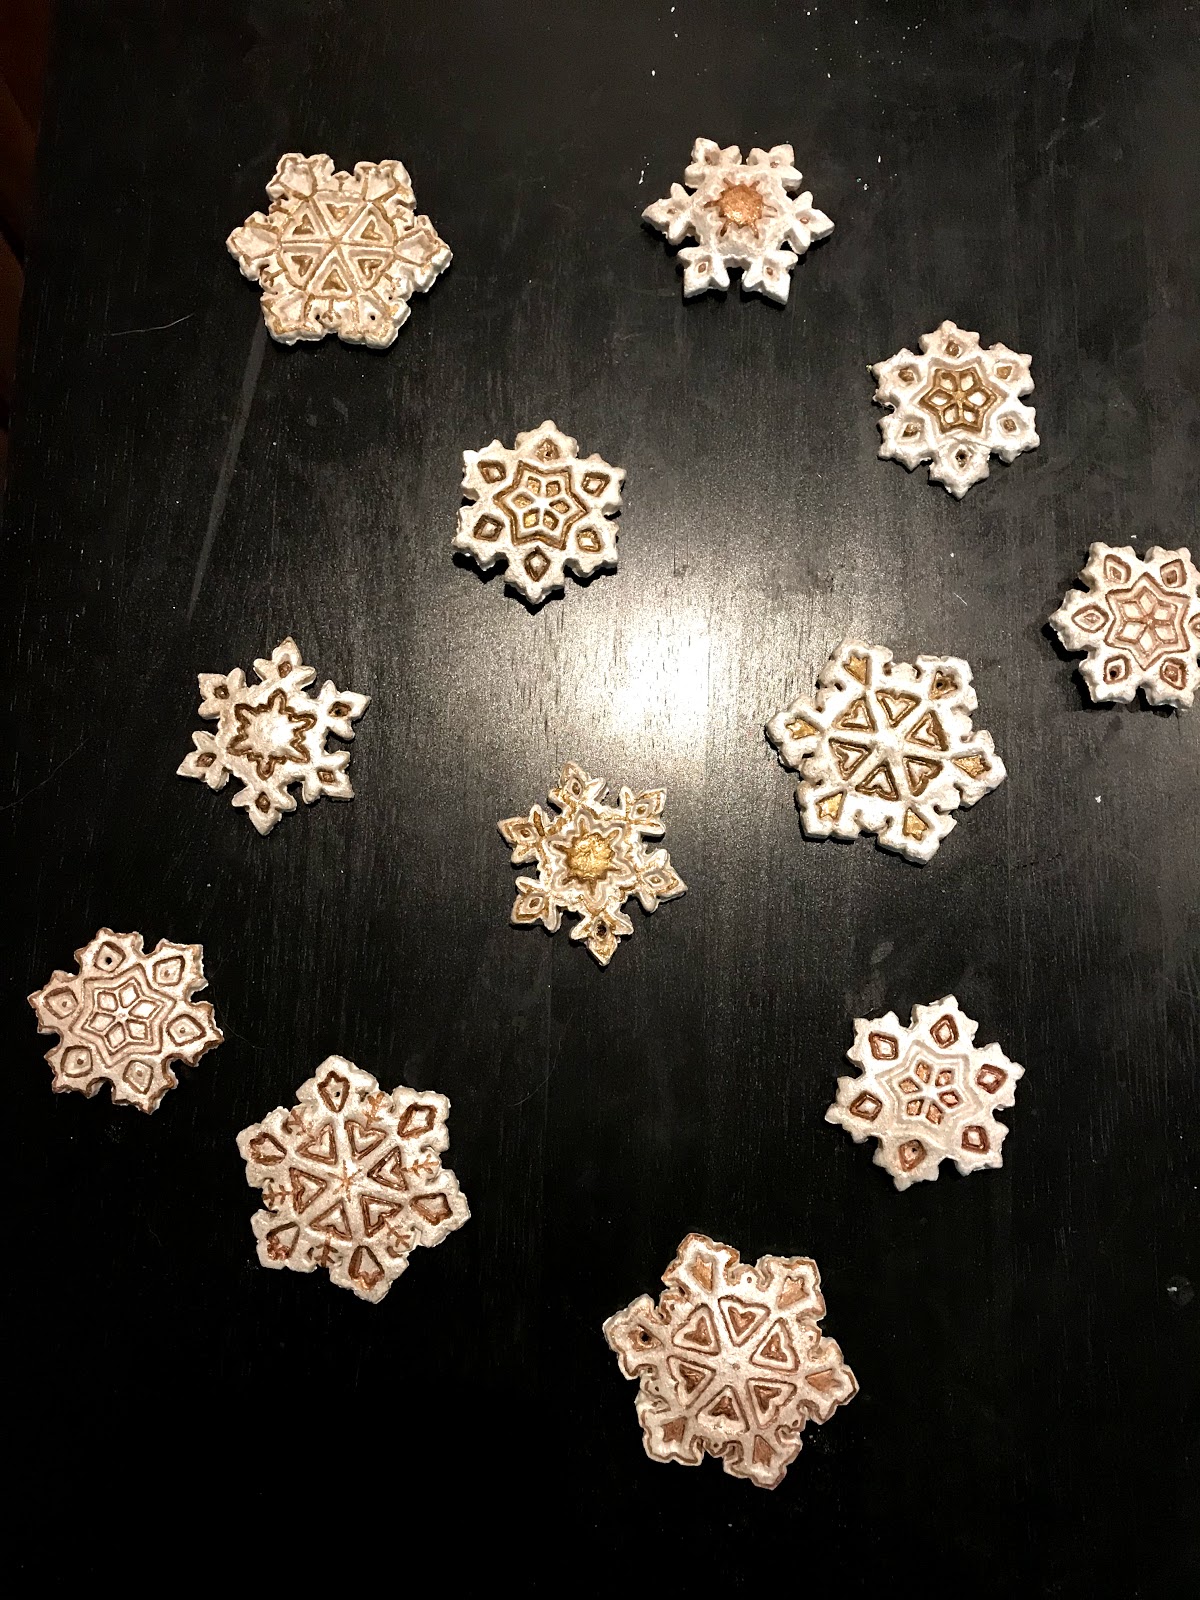
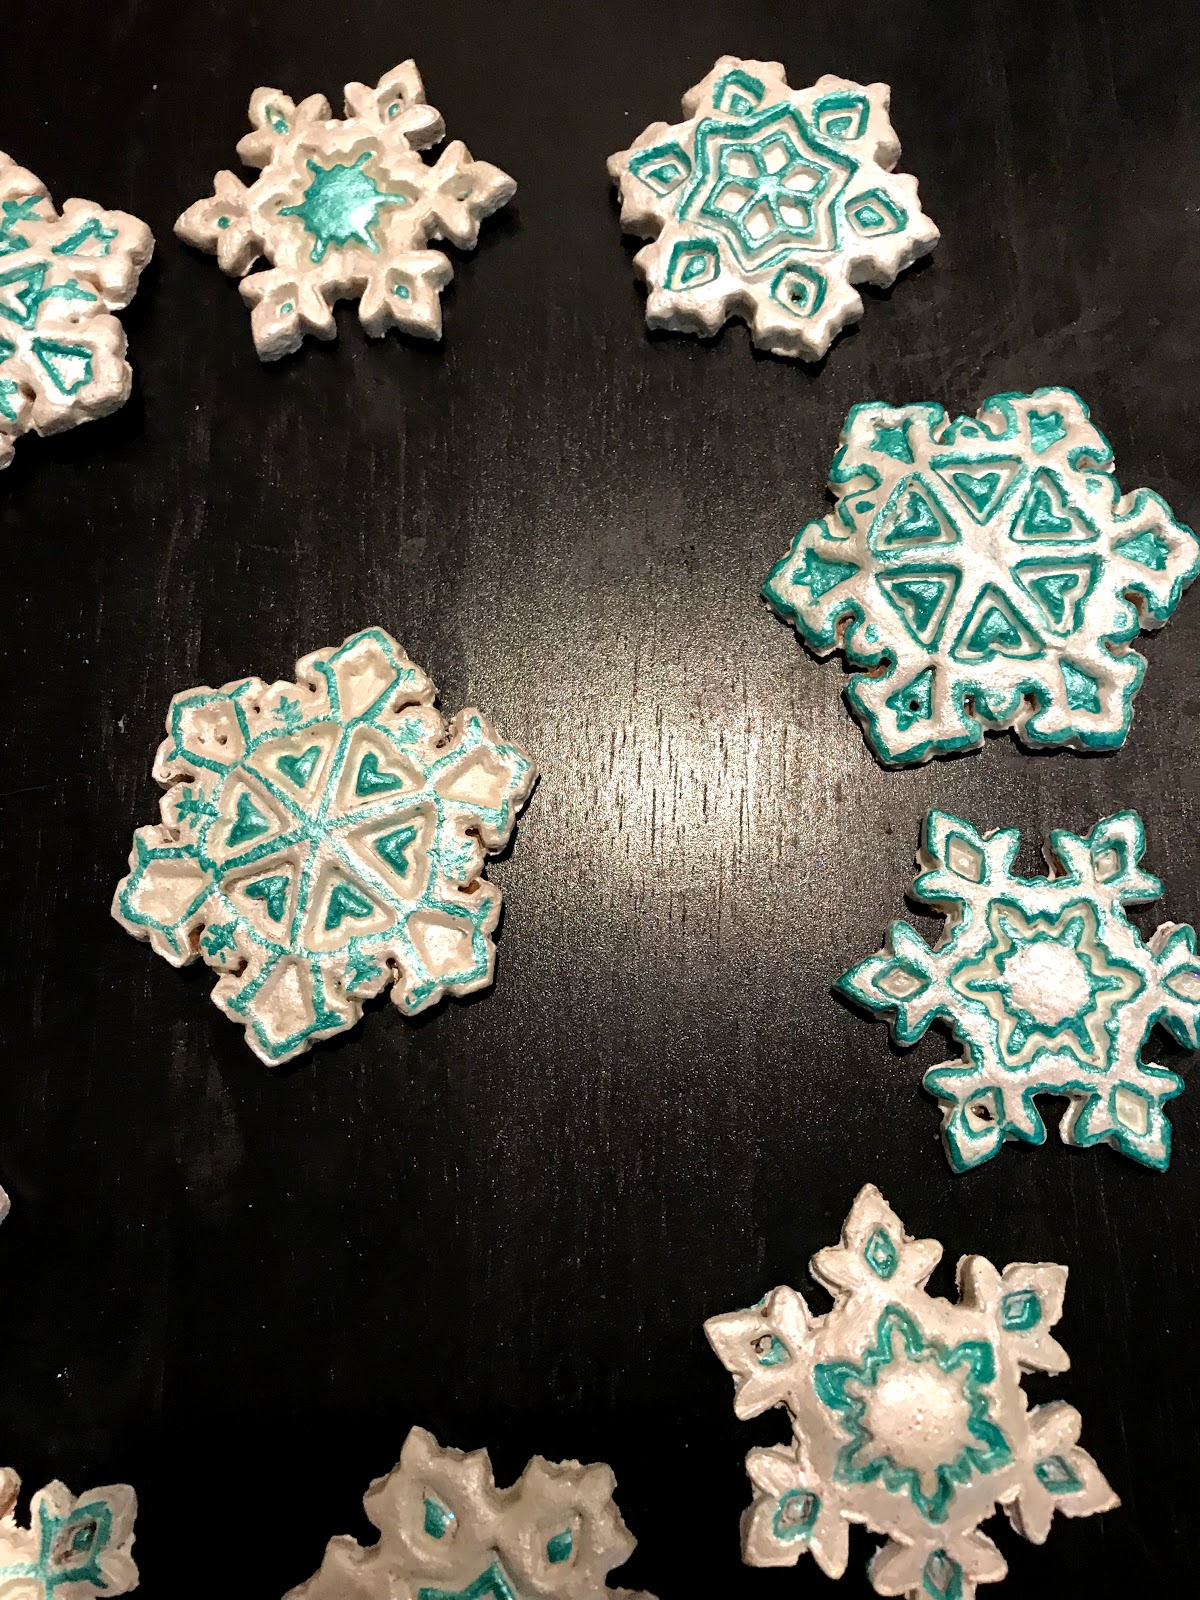
9. Let the ornaments cool completely and then start painting your ornaments. I don't have pictures of this. I think that painting your ornaments should be a personal thing. You do what you find to be beautiful. Since I had two dozen ornaments, I made two different sets of snowflake ornaments, one in gold and one in turquoise.
Note: If you are going to paint the snowflakes white, paint the ornament with plain white paint and then do a coat of pearl white paint or glitter paint. I wanted my ornaments to be super fancy so I did a pearl paint and a then I finished my snowflake with a glitter paint.
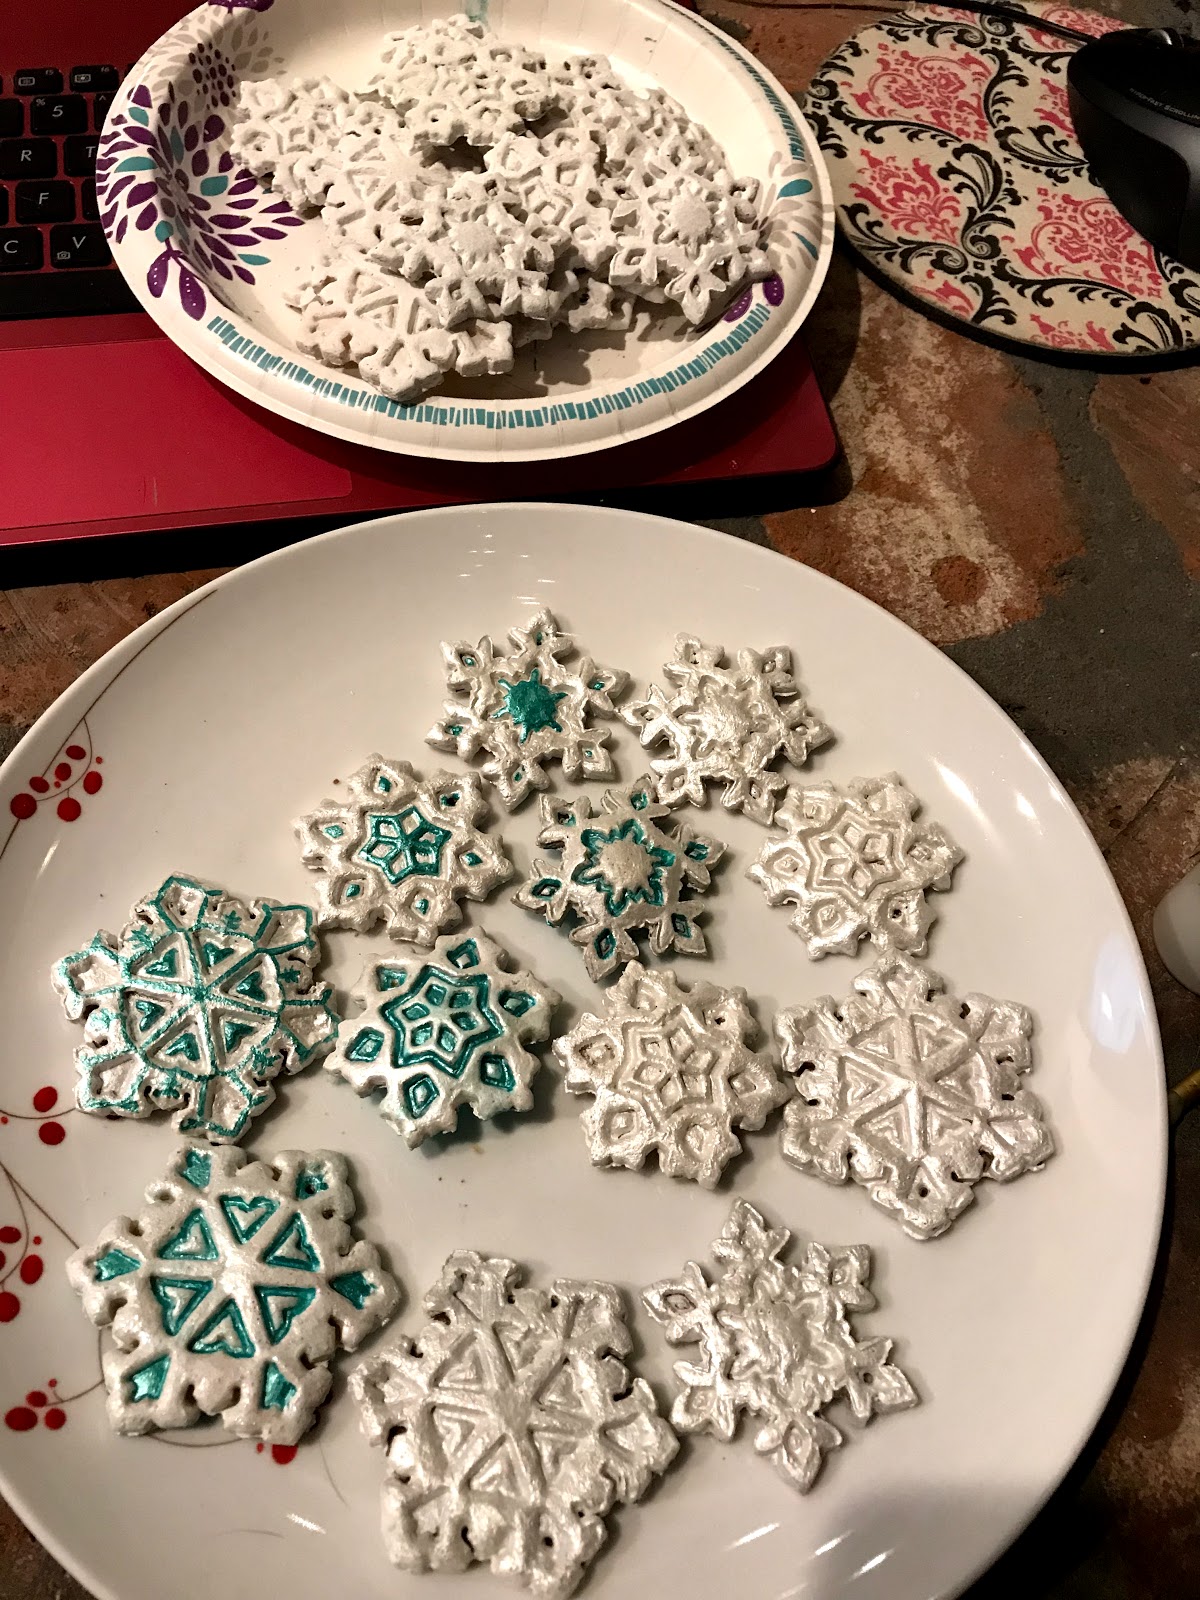 |
| This picture shows you the ornaments in various stages of production. The cookies on the plate at the top of the picture have just been painted with white acrylic paint. The white cookies on the bottom plate have had a pearl white coat added to them. The ornaments are actually gorgeous just painted white, but I wanted mine to be even fancier, so I painted each snow flake with a metallic turquoise paint. |
11. Once the varnish has dried, thread some thread through the hole you created and hang on the tree.
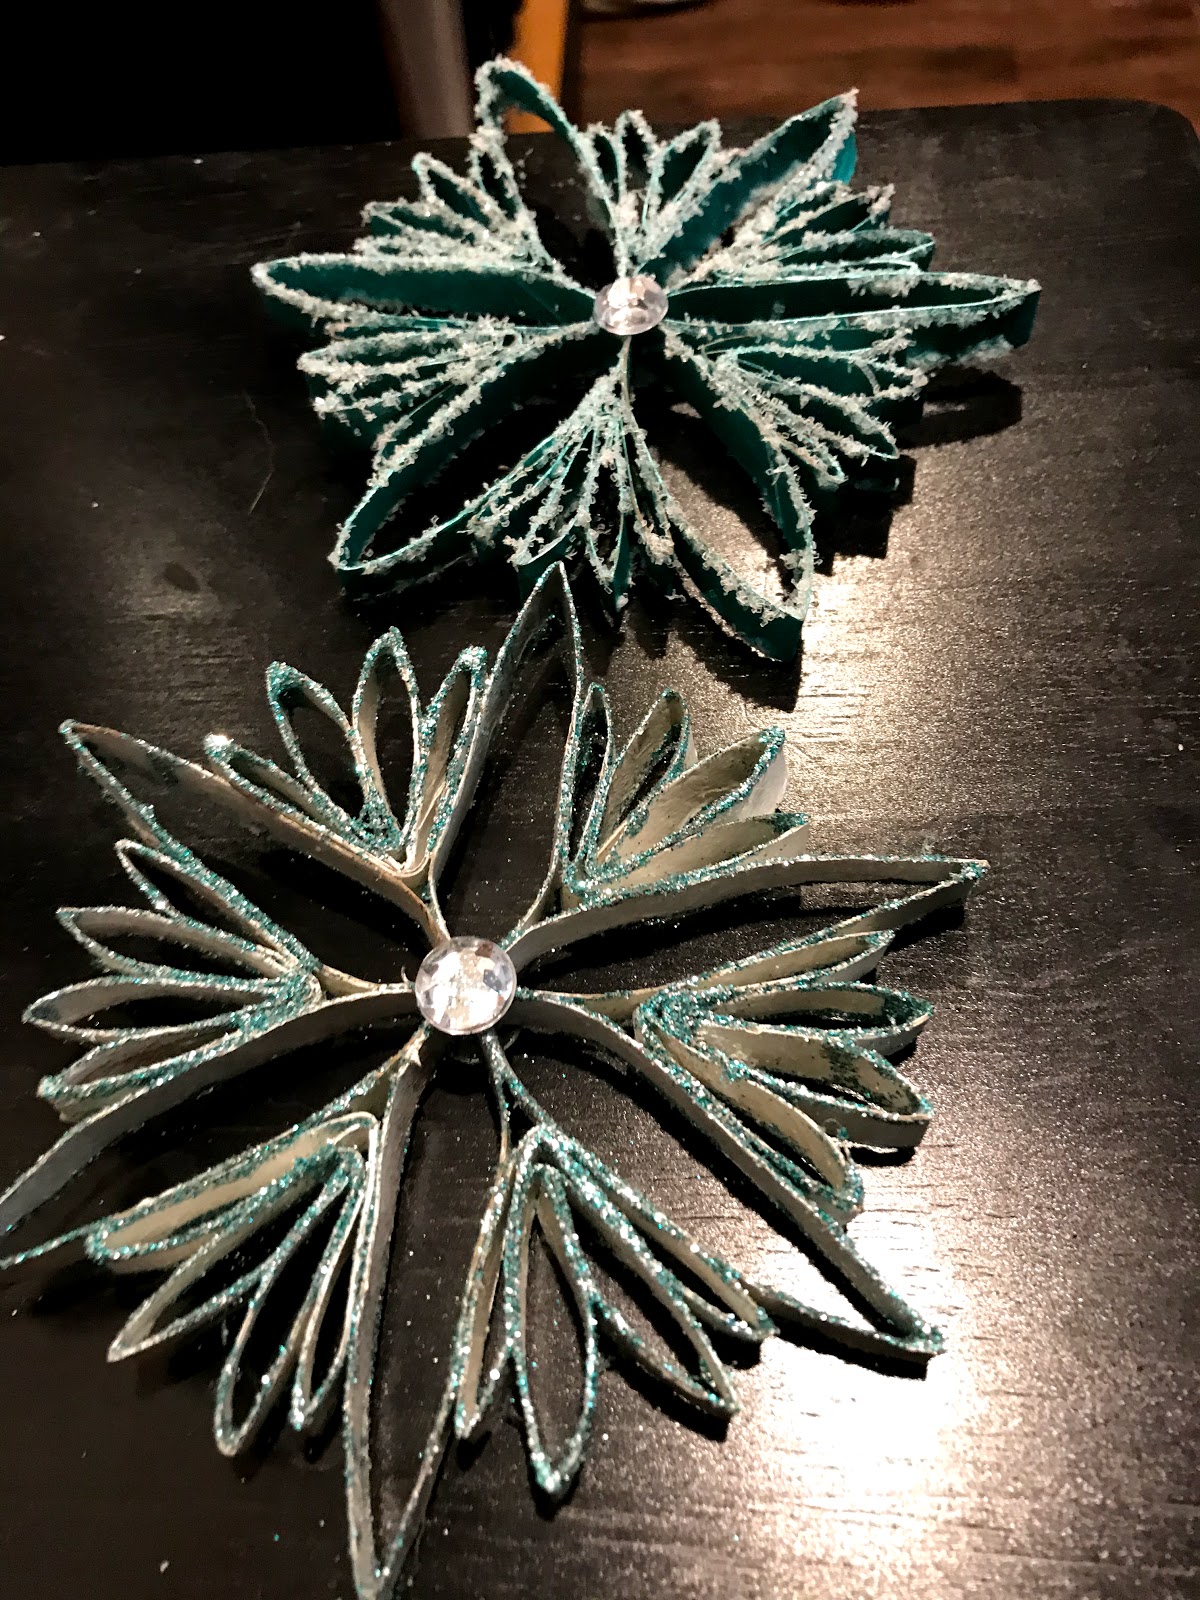
Here are some pictures on how my ornaments turned out. For each color batch, I did not paint any of the snow flakes the same so that each snowflake could be unique. (As we know, no two snowflakes are ever alike.)

Well, I hope you enjoyed my celebration of snow. I have ALOT more Christmas crafts and recipes coming ahead so please keep an eye out.
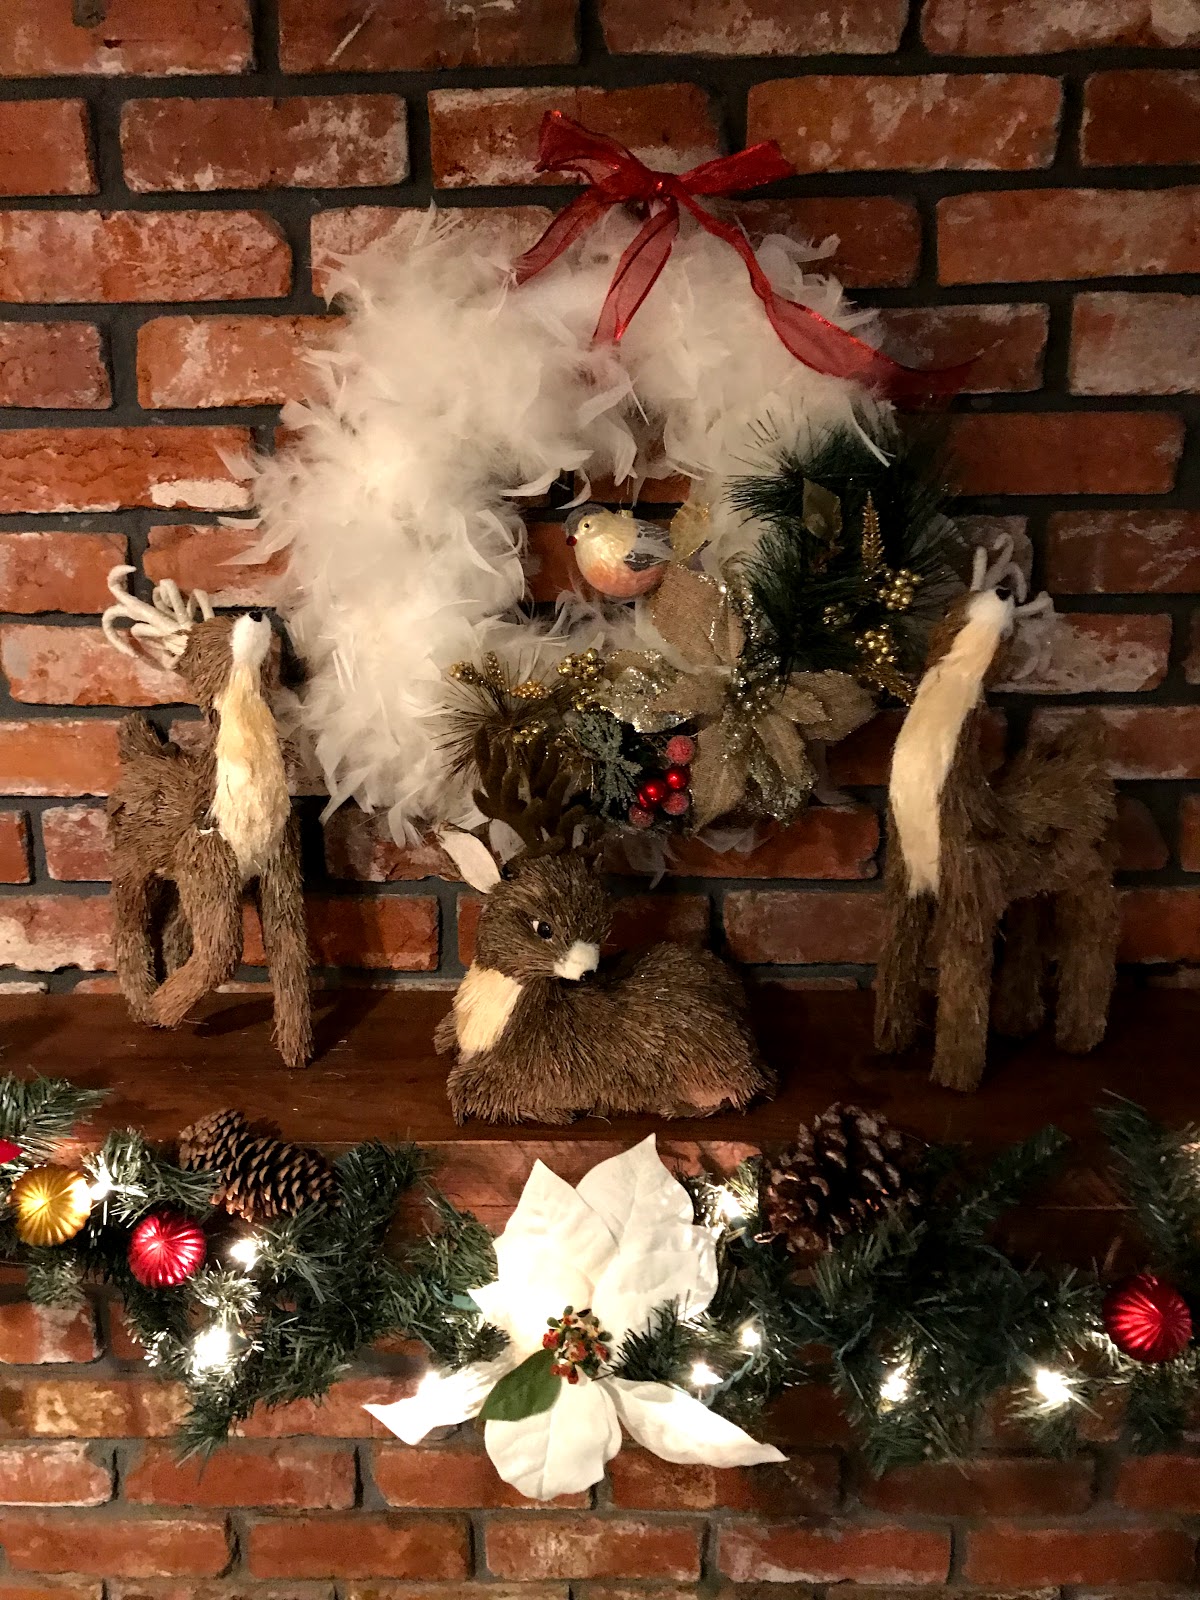 |
| A closeup of my mantle. I went with a woodland critters Christmas theme this year. |
Happy Holidays!!!!
No comments:
Post a Comment