
Hello Everyone!
I don't know if it is because it is an election year, or if it is because 2016 has, in general, been beating everyone up - but the entire nation seems to already be ready for Christmas and we haven't even had Thanksgiving yet! If you go into Walmart or Micheal's you will find the entire store dedicated to Christmas and NOTHING for Fall and Thanksgiving. Now, I love Christmas. And I do mean LOVE Christmas. But I believe each holiday has their own time and that we should let them have their moments and Thanksgiving is no exception. So, I have decided, for those of you who would still like to decorate for Thanksgiving and Fall before we get into the Christmas spirit, that I will dedicate the next few posts to helping you achieve a frugal and elegant Thanksgiving season.
 |
This picture is how I like my Thanksgiving's to be. An occasion. A reason to dress nicely and eat wonderful food on your grandmother's good china. And this is the motif that we will be striving for in the upcoming month. |
To start off the season, I am going to show you how to make an elegant wreath for your front door or mantle.
Harvest Gold Bird Wreath
I have better shots of this further down in the post. This, so far, has been the hardest thing I have photographed for the blog yet.
Sometimes, the best laid plans just get ruined.
I went to Michael's today with a plan for a wreath in my head. I was going to use a styrofoam wreath form, a brown feather boa, some orange leaves and the acorn made out of pine cone and rope that I had purchased there a couple of weeks before for $1.50 and make myself a wreath for the mantle.
Only one of those things happened.
When I got there, ALL of the fall items were gone and Christmas was everywhere, but I was not deterred.
I found the boas and was appalled to find out that they were $10 a piece for the ones that I wanted and I would need two. Strike that idea.
The styrofoam wreath form was $15. That, literally, would have only left me $5.00 for the rest of items to go on my wreath. Strike that idea too.
Therefore, I had to rethink my plan. So I roamed the store looking for inspiration.
First, I had to find a wreath base. I lucked out and found a straw wreath base for $3.59. It seemed a little country, but I thought I could fix that by making sure my other decorations were sparkly and elegant rather than country. Not a problem since the decrease in the cost of the wreath base left $16.50 for decorations.
Near the straw wreath I found some little life-like birds for $2.50 a piece. I bought two.
To replace the feather boa, I found some ribbon that was burlap with some gold accent down the center. Although this was in the Christmas stuff, it looked fall-ish to me and could help to hide the straw in my wreath base. Cost $2.50.
I decided that I wanted the color theme for my Thanksgiving to be rose gold or copper. I love these colors and, it just so happens, that Michael's had some rose gold colored "greenery". I picked up two rose gold glitter branches for $3.00. And then found one with gold leaves and copper and gold acorns for $2.00.
(This rose gold/copper is a theme that is going to continue throughout the month in the projects that I show you.)
And, with my treasures in hand, I went to create a completely different wreath than the one that I had first imagined.
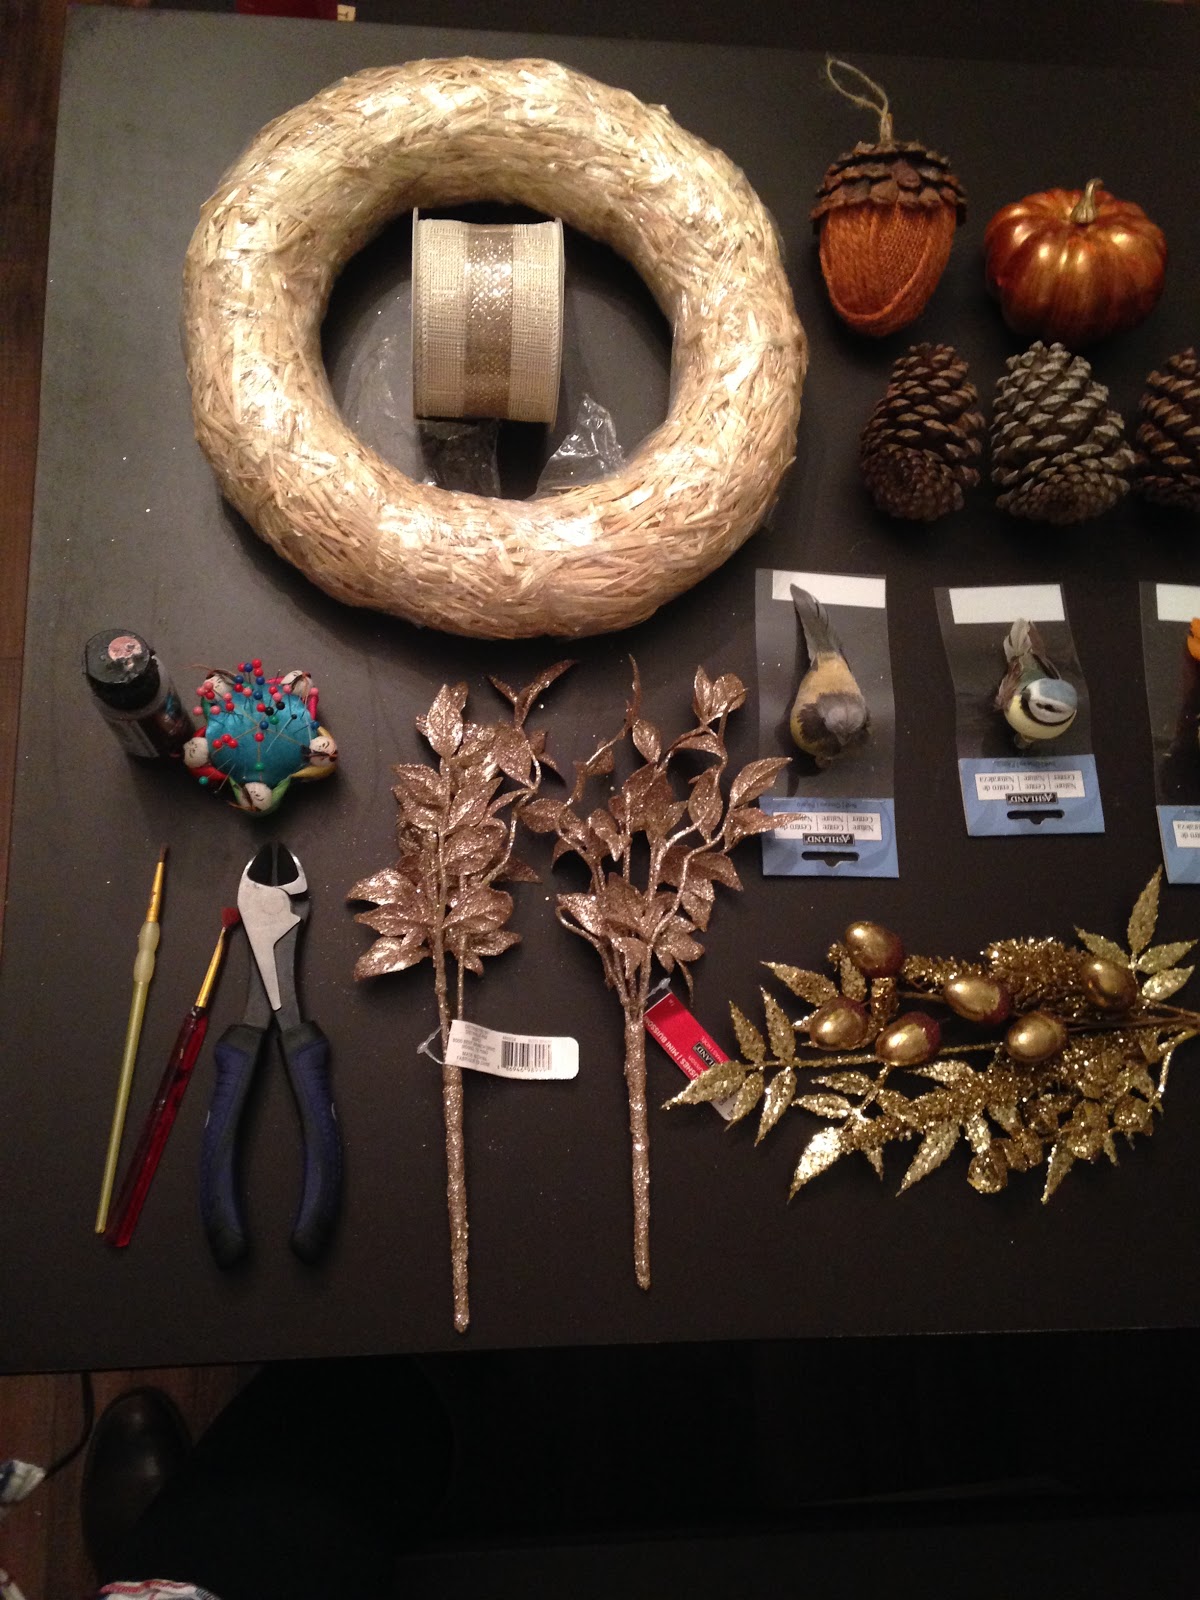 |
| This picture also has more items than I actually used in the wreath. I had thought to paint the tips of some pine cones that I had gathered from the yard with copper paint and add those to the wreath. I was also thinking of adding the pumpkin. But once I had the floral and birds on the wreath, I decided that was plenty. But use your imagination. If you wanted to add painted pine cones, go for it. |
Tools
Scissors
Wire Cutters
Items
1 Straw Wreath Form
1 roll of ribbon
2 rose gold glitter floral branches
1 gold branch with acorns
2 clip on feather birds
1 pinecone and rope acorn. (Since you can get these at Michael's anymore, a good substitute would be to hang a pine from the center. Try painting the tips with copper or gold paint to make it "gilded"
Several straight sewing pins
Twine
Instructions
1. Unwrap the wreath from plastic wrap. (You may want to do this outdoors because the straw gets everywhere. )
2. Starting at the back of the wreath in what you have deemed the center, put a straight pin in the back of the wreath and the folded ribbon end to attach the ribbon.
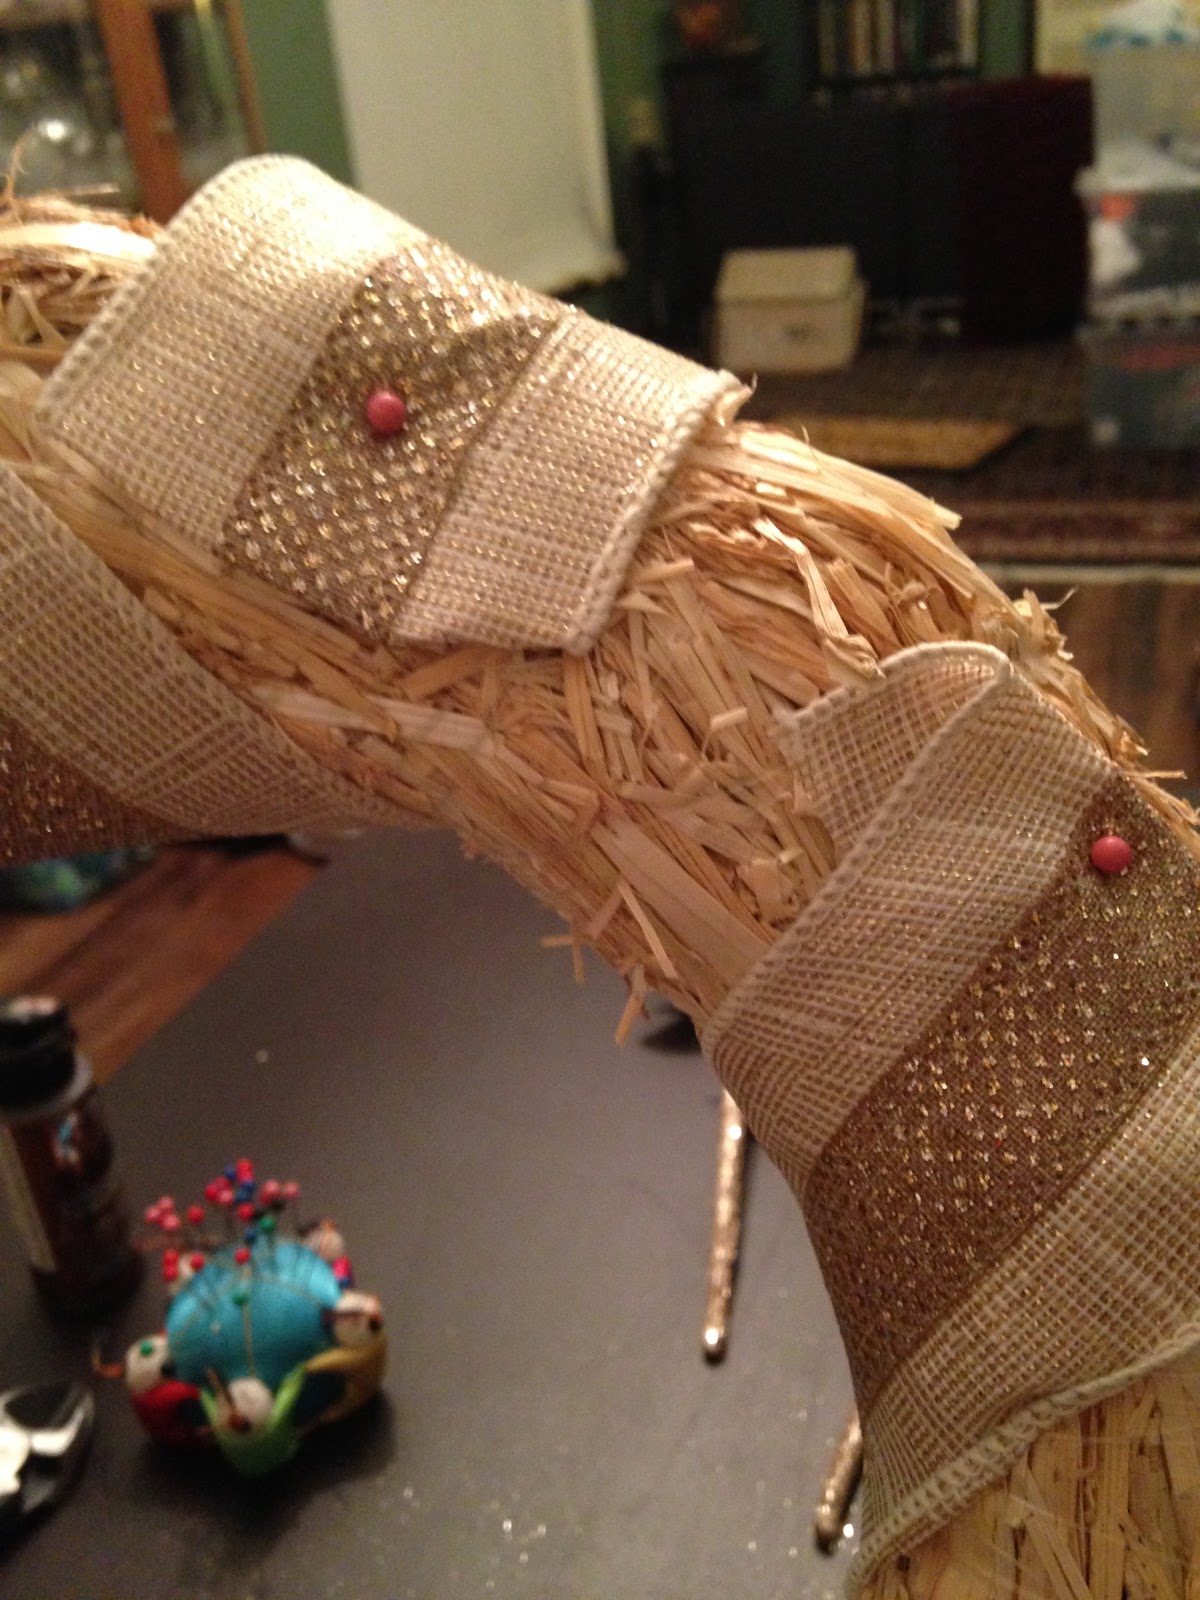 |
| This shows the ribbon at the beginning and end. As you can see, I fold over the ribbon and then put a pin through both the ribbon and the wreath. |
3. Wrap the ribbon around the wreath. You can cover the straw completely or you can leave some showing. My husband really liked the straw and thought that it looked very Fall. I kind of agreed with him, so I left about two inches of straw showing between each spiral of the ribbon near the center of the wreath.
Once the wreath is wrapped, fold the end of the ribbon and attach to the back of the wreath with a pin.
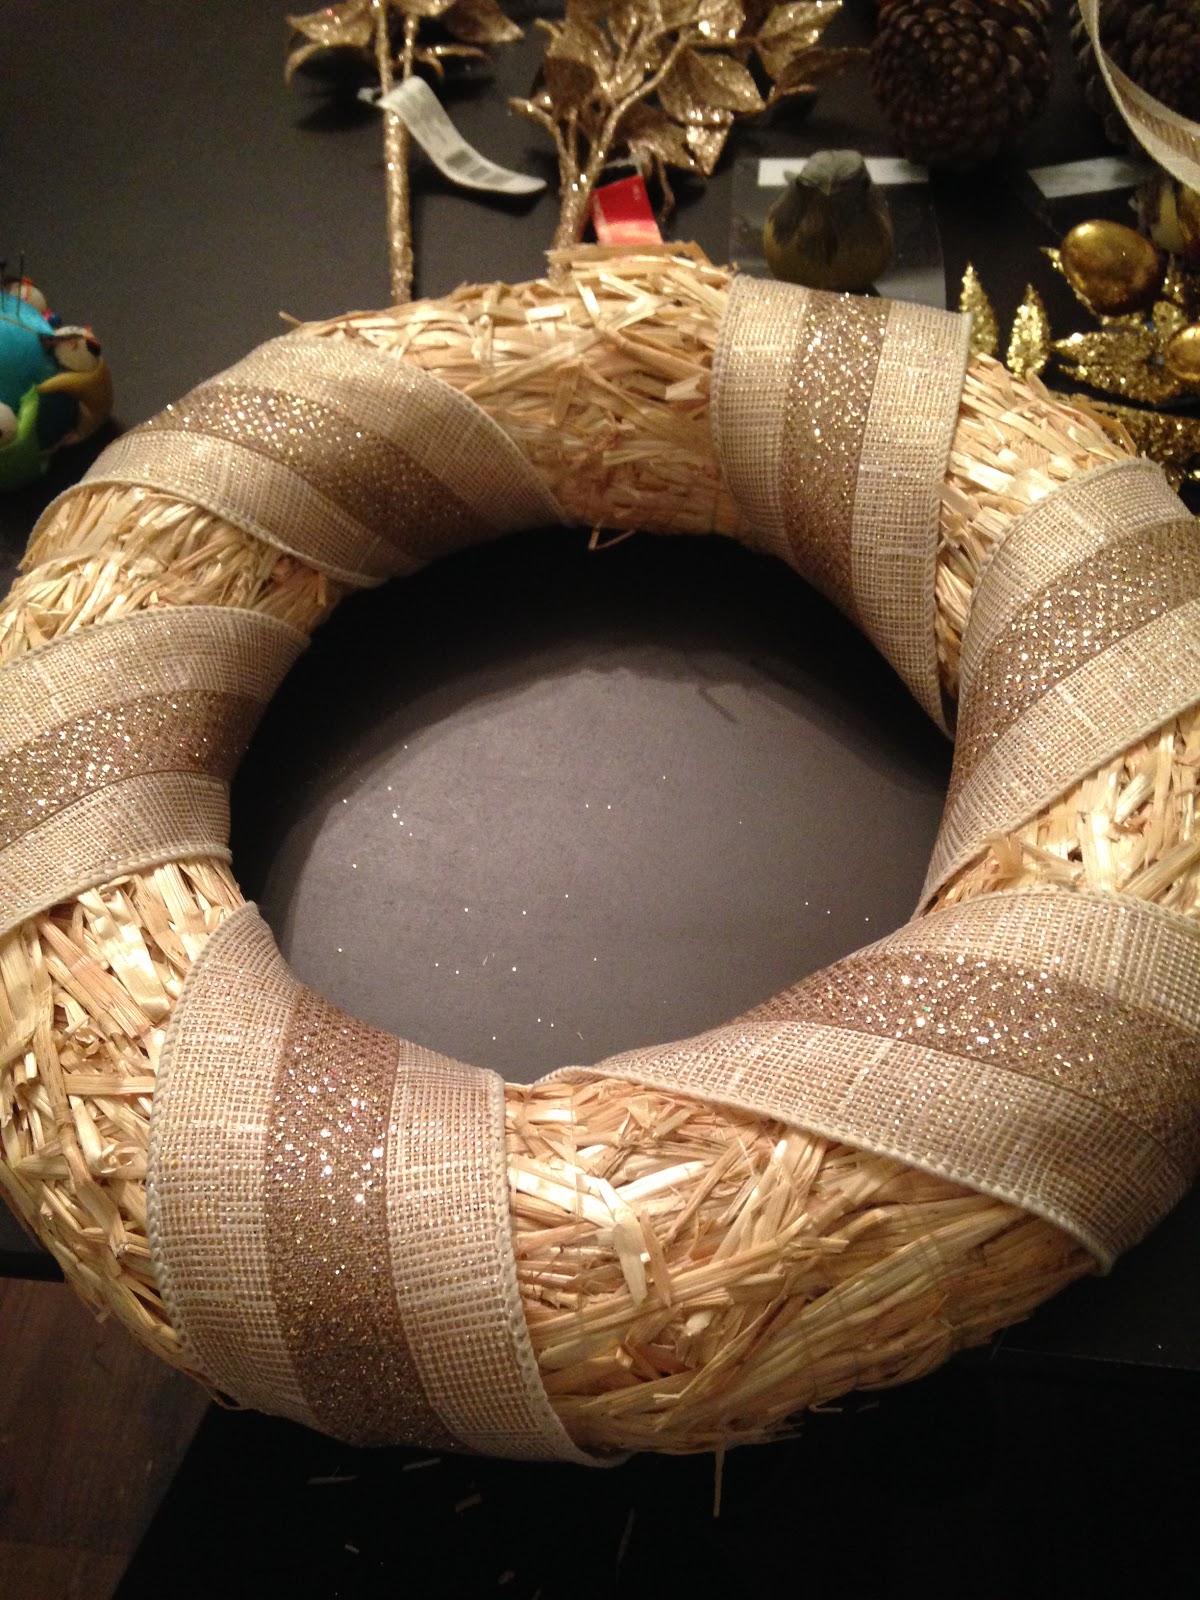
4. Turn your wreath to where you would like your top and bottom to be and start decorating. I will tell you what I did, but this isn't a science, you should do what moves you. If you want to cover the entire wreath with items, DO IT!!! This is your wreath and should make you happy.
5. Take one of the rose gold branches and stick it, base first into the left side of the wreath. (I didn't not cut this at all, I just put it in the wreath and then fiddled with it until it looked like I wanted it to.)
6. Using your wire cutters, cut the branches off of the other rose gold branch and put them down near the base of the wreath. (When you cut them, you should leave enough wire so that you can just "pin" them into the straw using their wires.)
Add some of the gold leaves attached to the acorn branch so that you get some color difference in your "greenery".
 |
| You can see, its already starting to come together |
7. Using the wire cutters cut away three of the acorns and put them in the rose gold branches wherever you think they would look good.
8. Using the clip, attach one of the birds to the ribbon at the bottom of the wreath. Do the same with the second bird at the top of the wreath. Place your remaining acorns around the birds as well as some of the gold leaf branches left from your acorn branch.
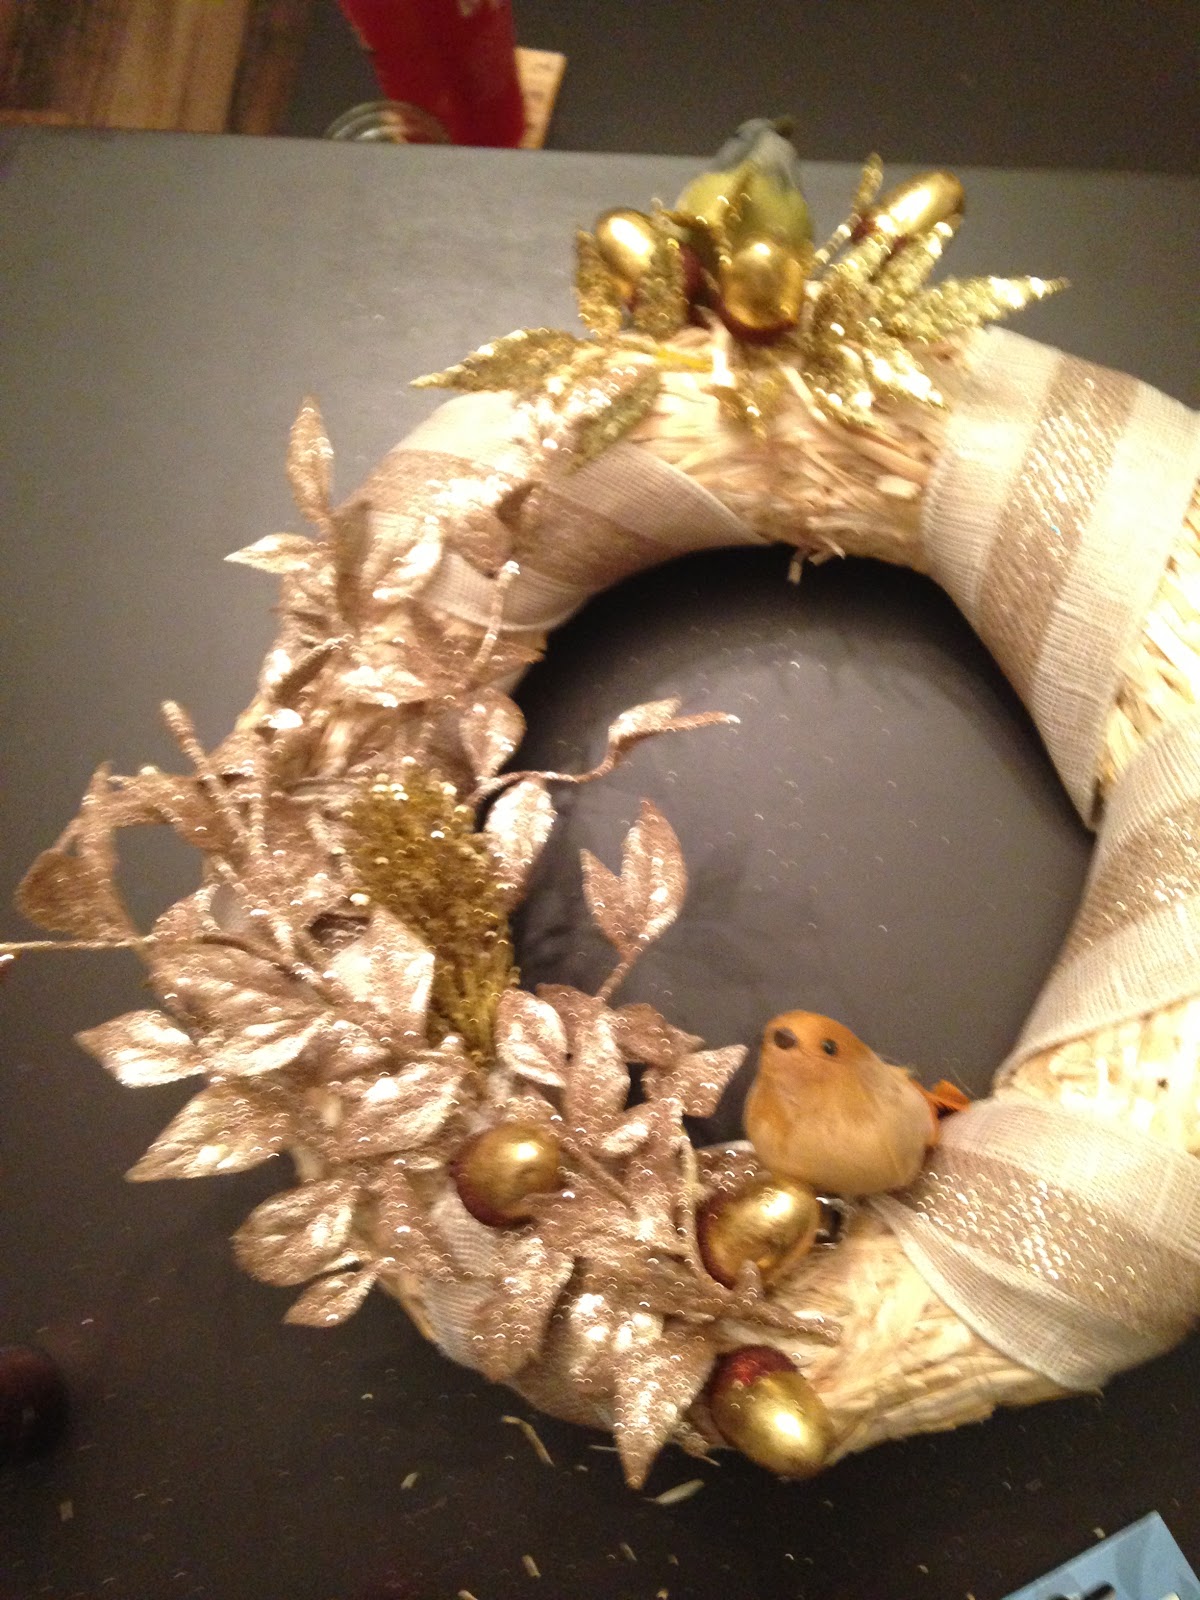 |
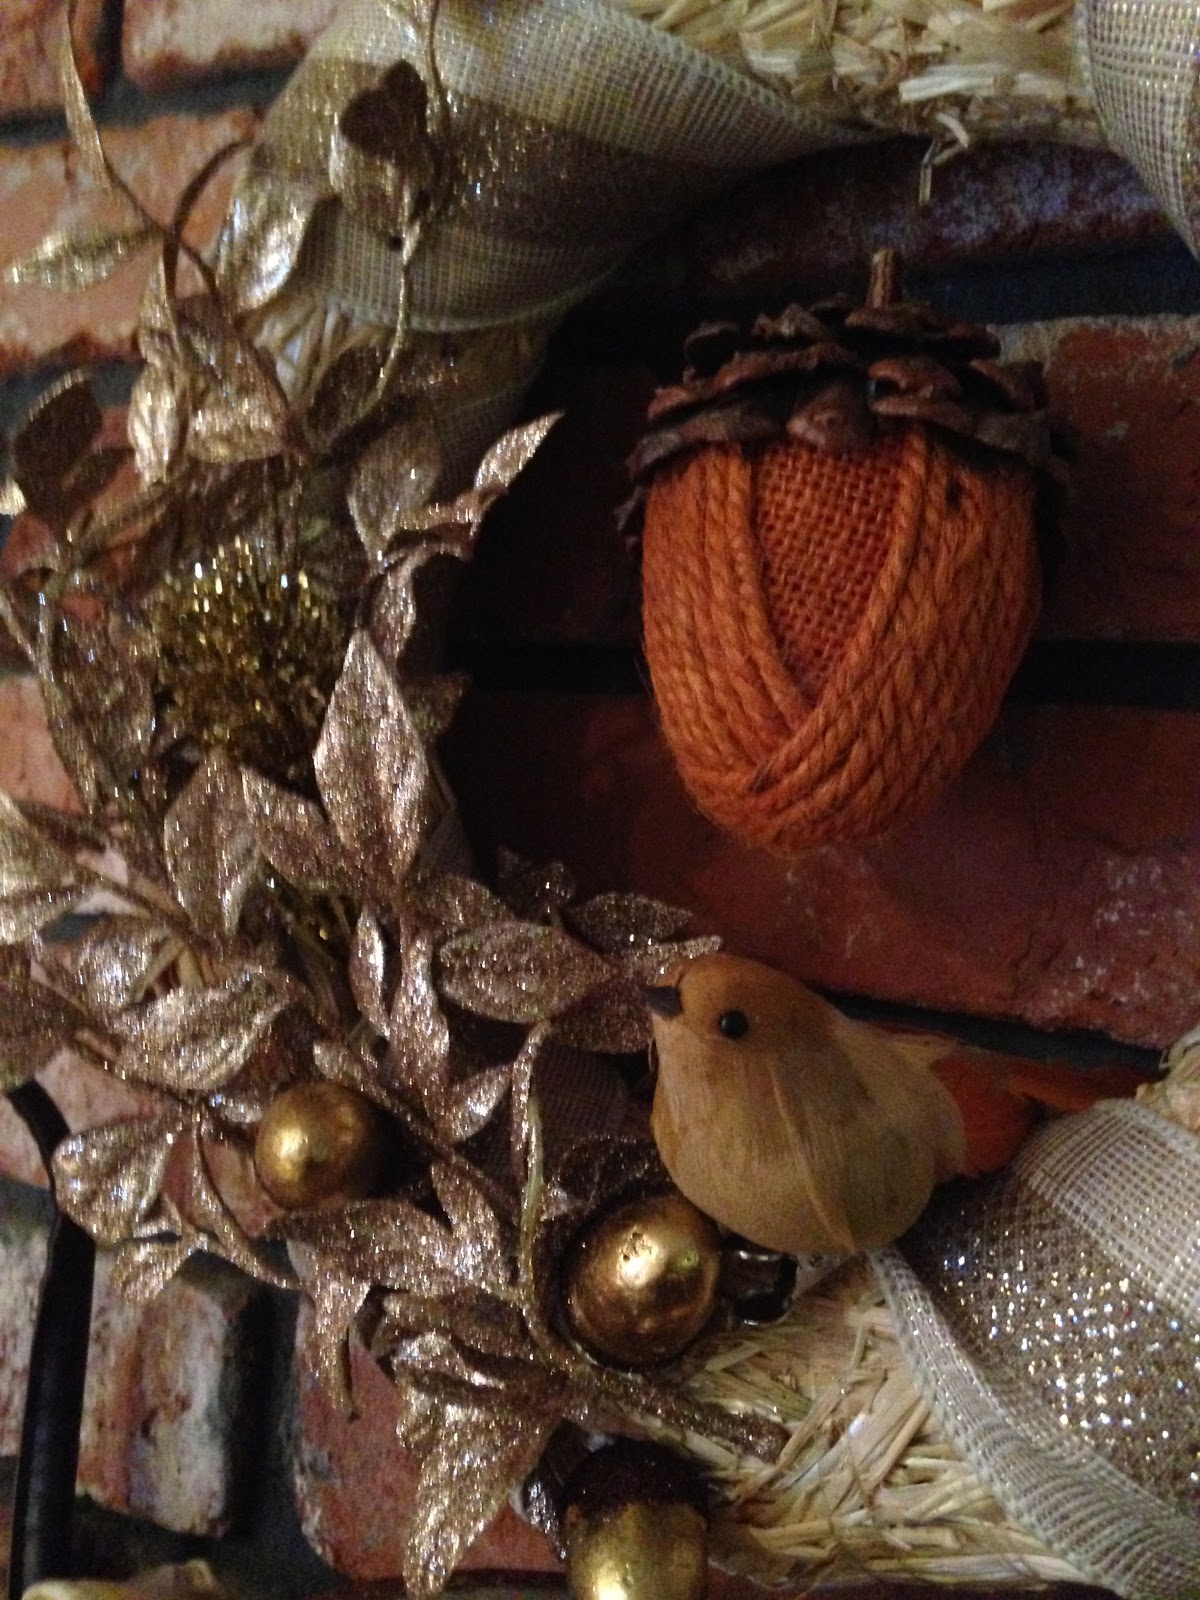
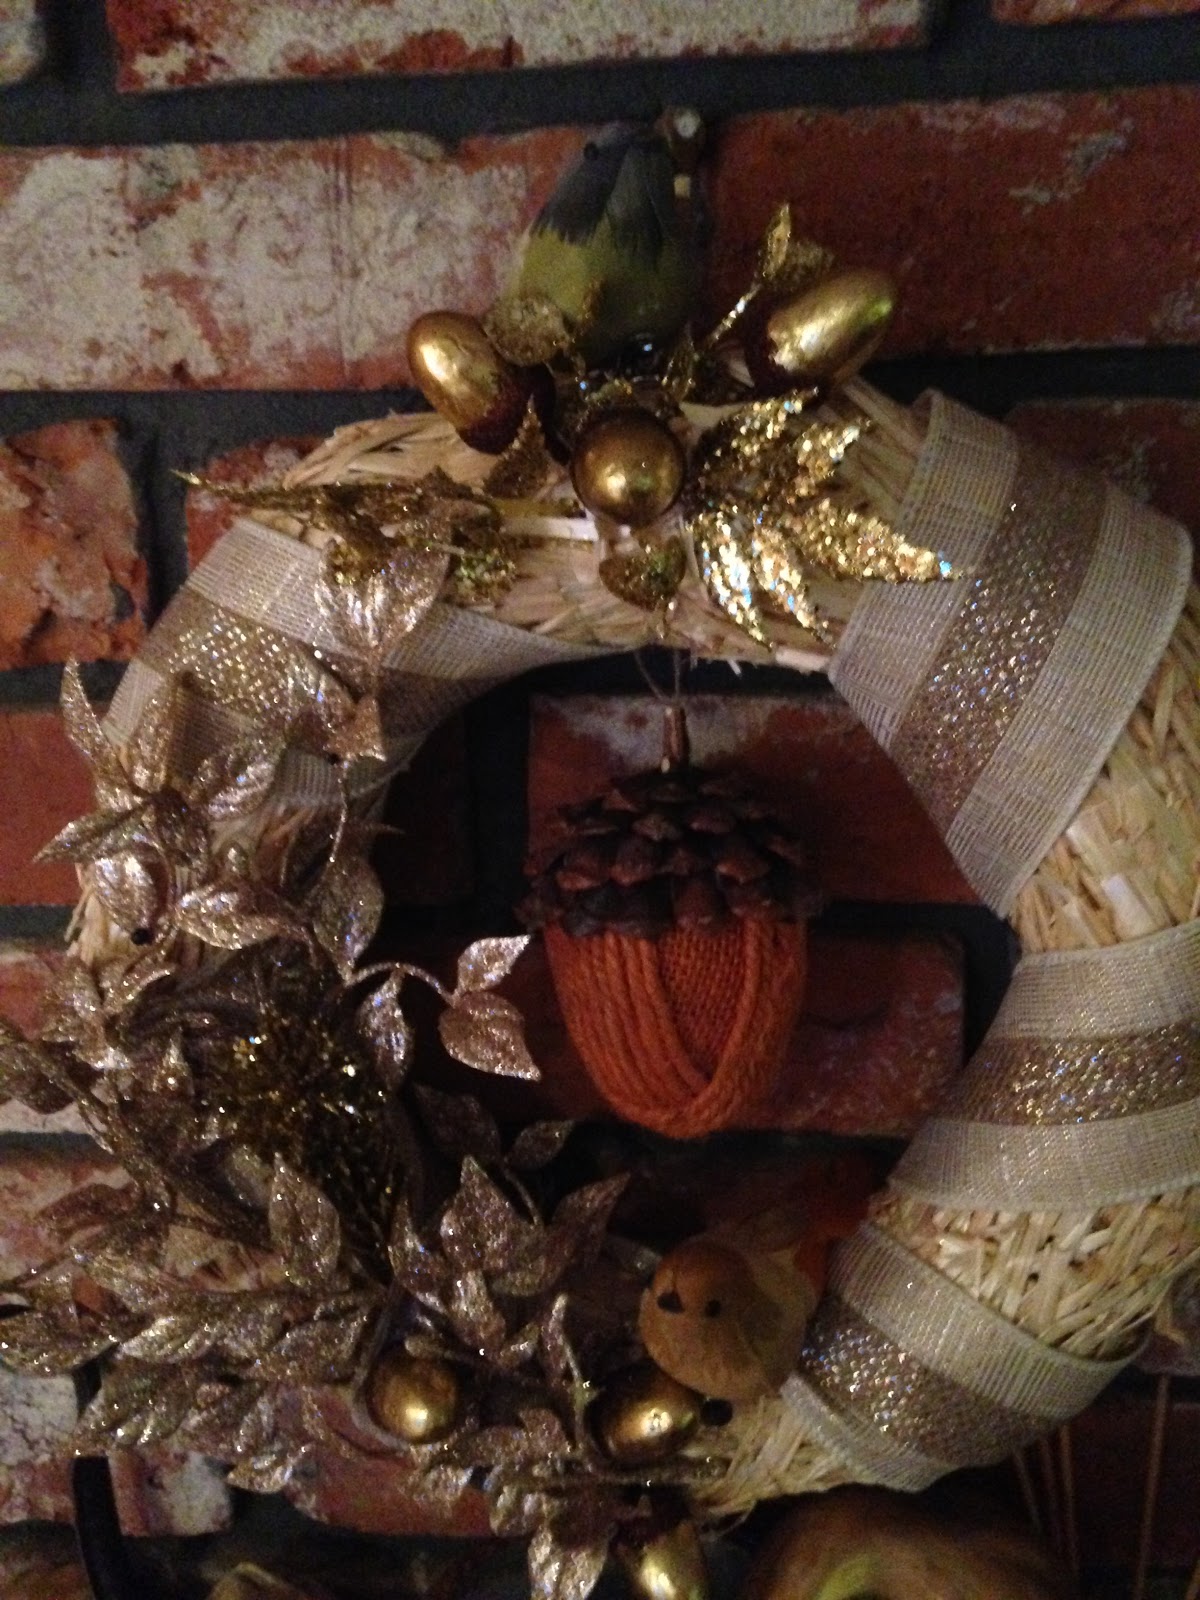
| I think these little birds are so much cuter than turkeys. |
 |
| This picture is a little blurry, but you can see the bird on top better. |
9. At this point, the wreath is almost completed. Now you have to make it hang-able. Take some twine and cut it at about six inches. Make a loop and tie together at the ends with a double knot.
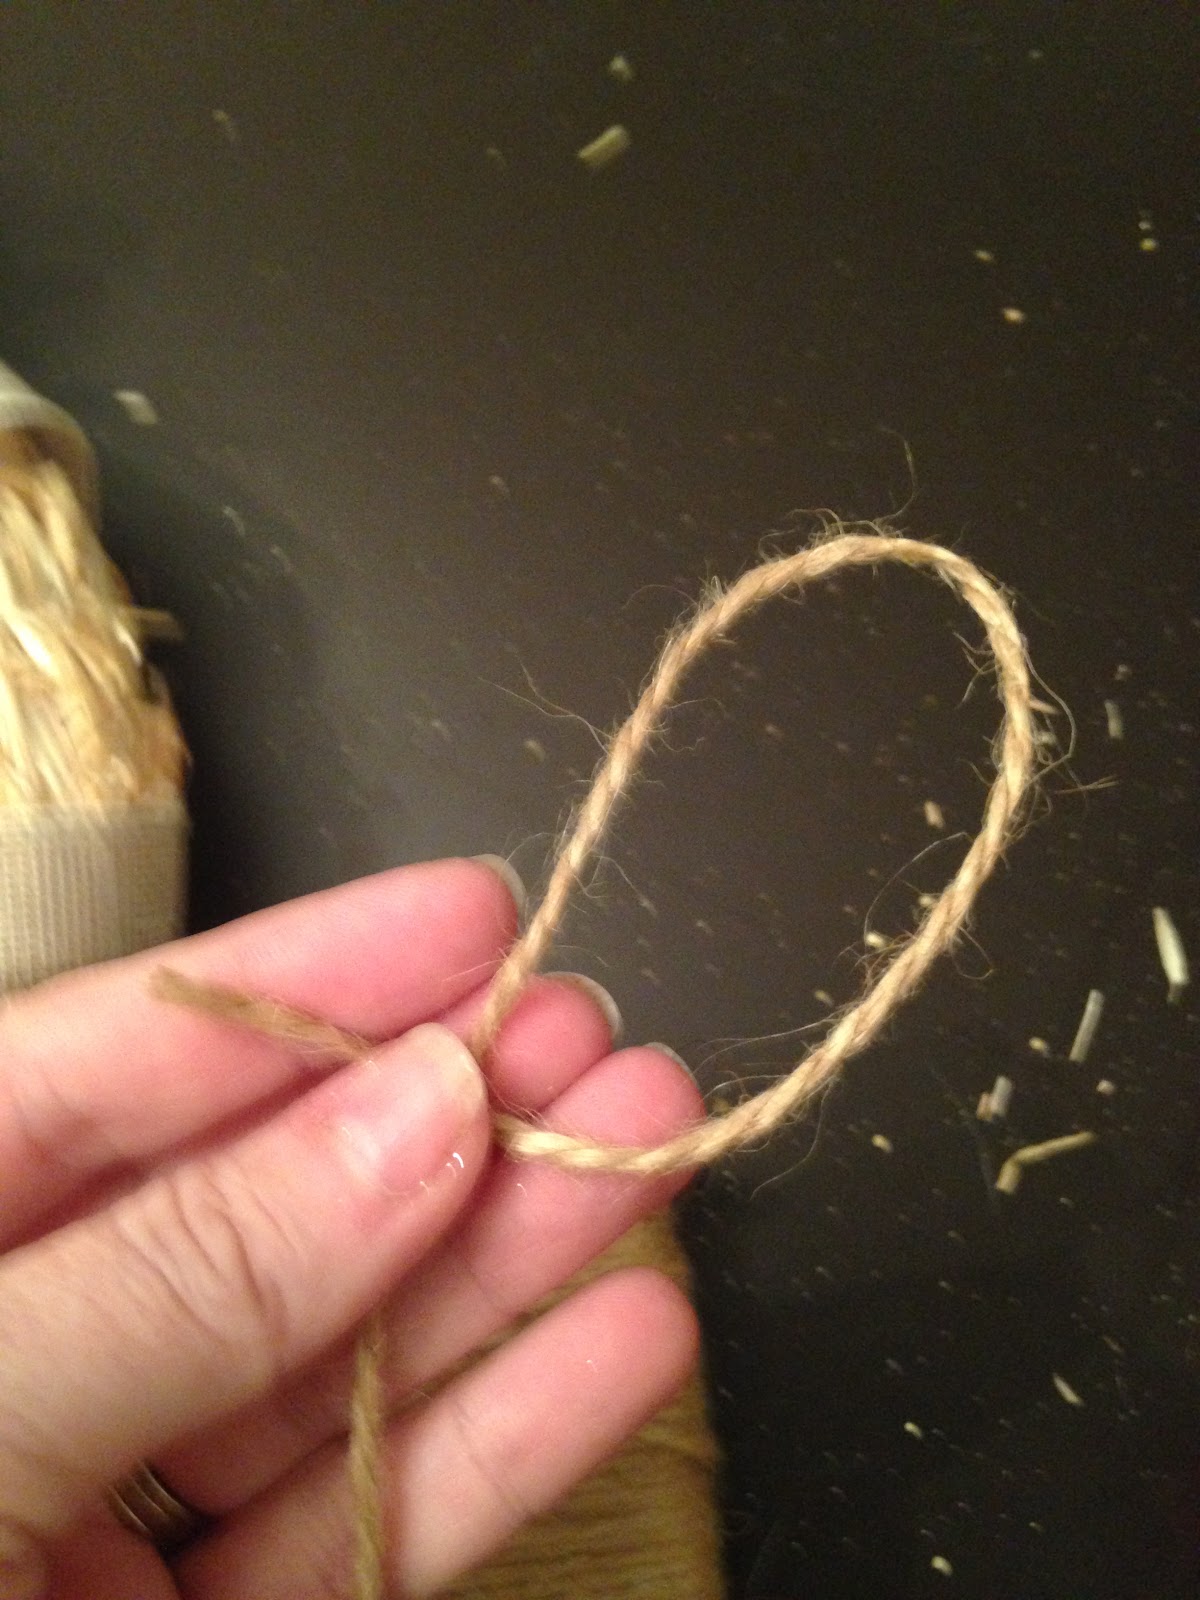
10. Attach the twine to the back, top, center of the wreath by placing a pin in the middle of the knot and the wreath.
 |
| Put the pin where my thumb is holding the knot. |

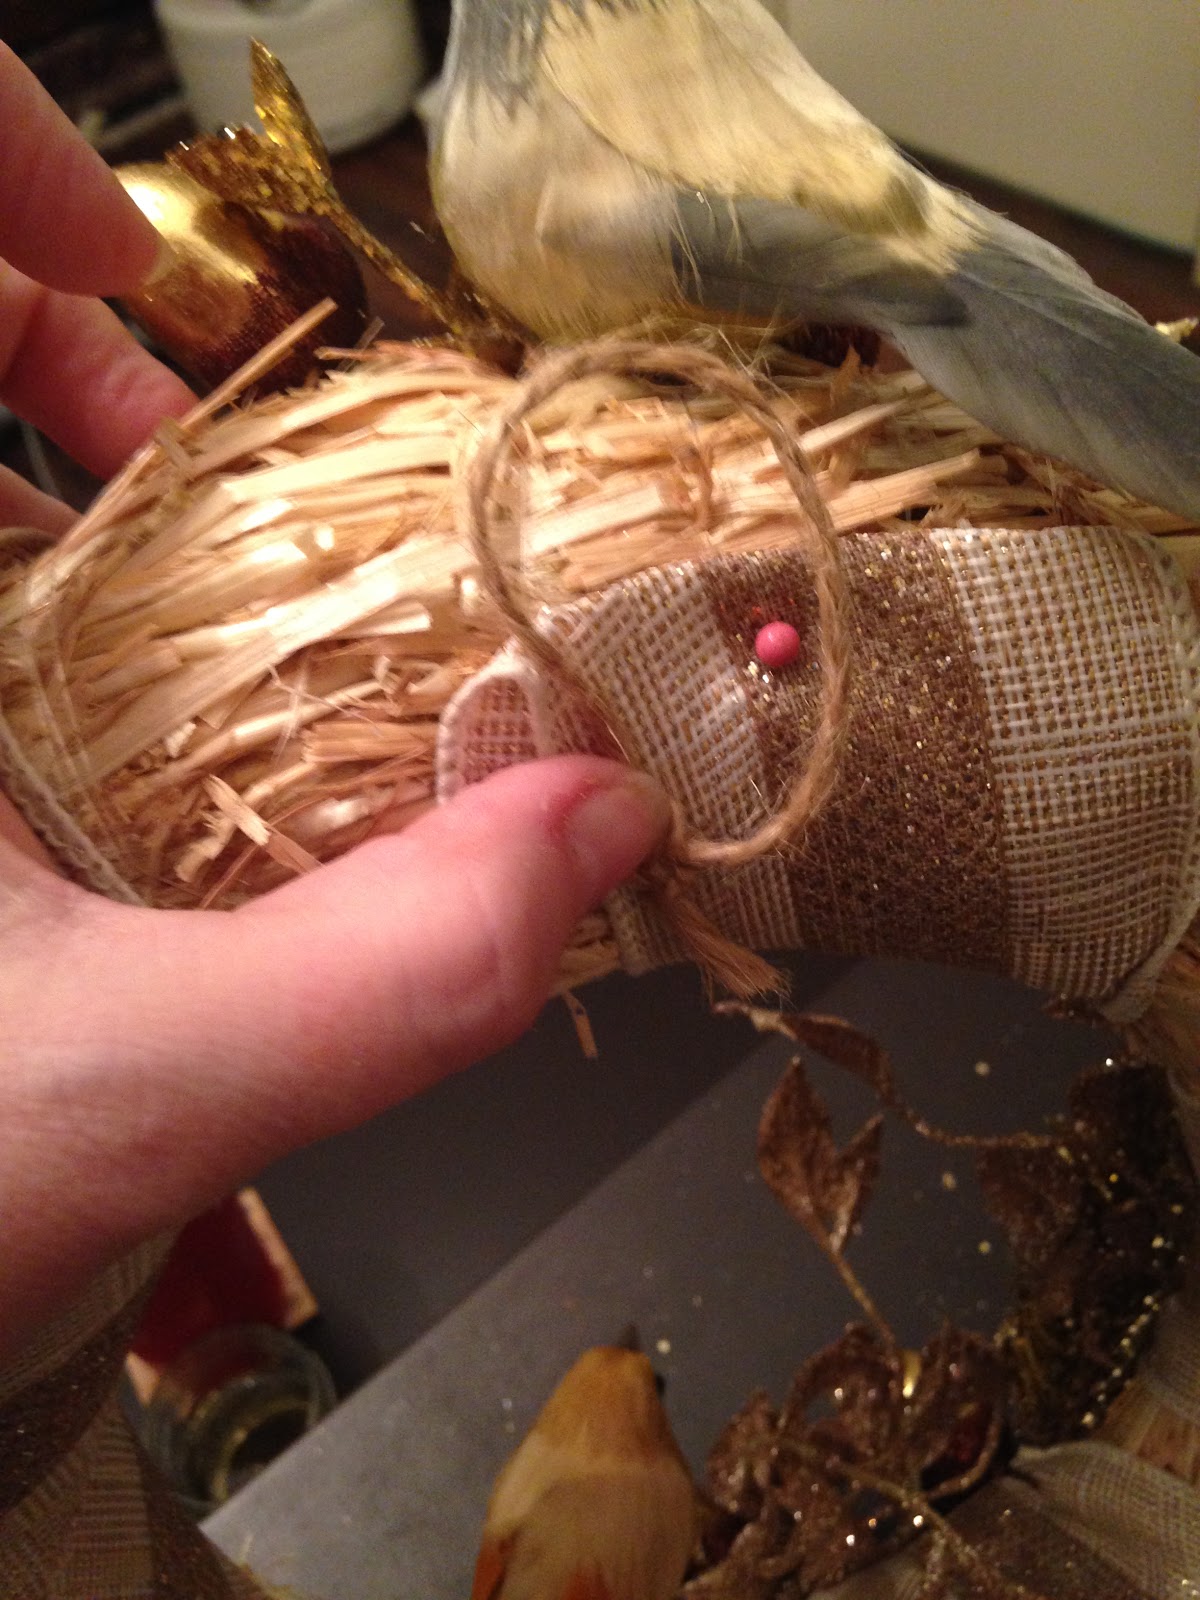
11. Use another straight pin and attach the yarn acorn or the pine cone you have painted to the back center of the wreath, making certain that it hangs where you would like it to hang in the center of the wreath. (If you are using a pine cone, you need to attach some twine to the stem of the pine cone and then pin that to the back of the wreath.)
12. Some of the leaves in your branches will not want to cooperate and lay exactly where you would like them to lay. This is an easy fix. Take your straight pins and pin your leaves where you would like them. For this instruction bit, I have used sewing pins but, to pin your leaves down where you want them for your project, use corsage pins so that the pins will not be visible.
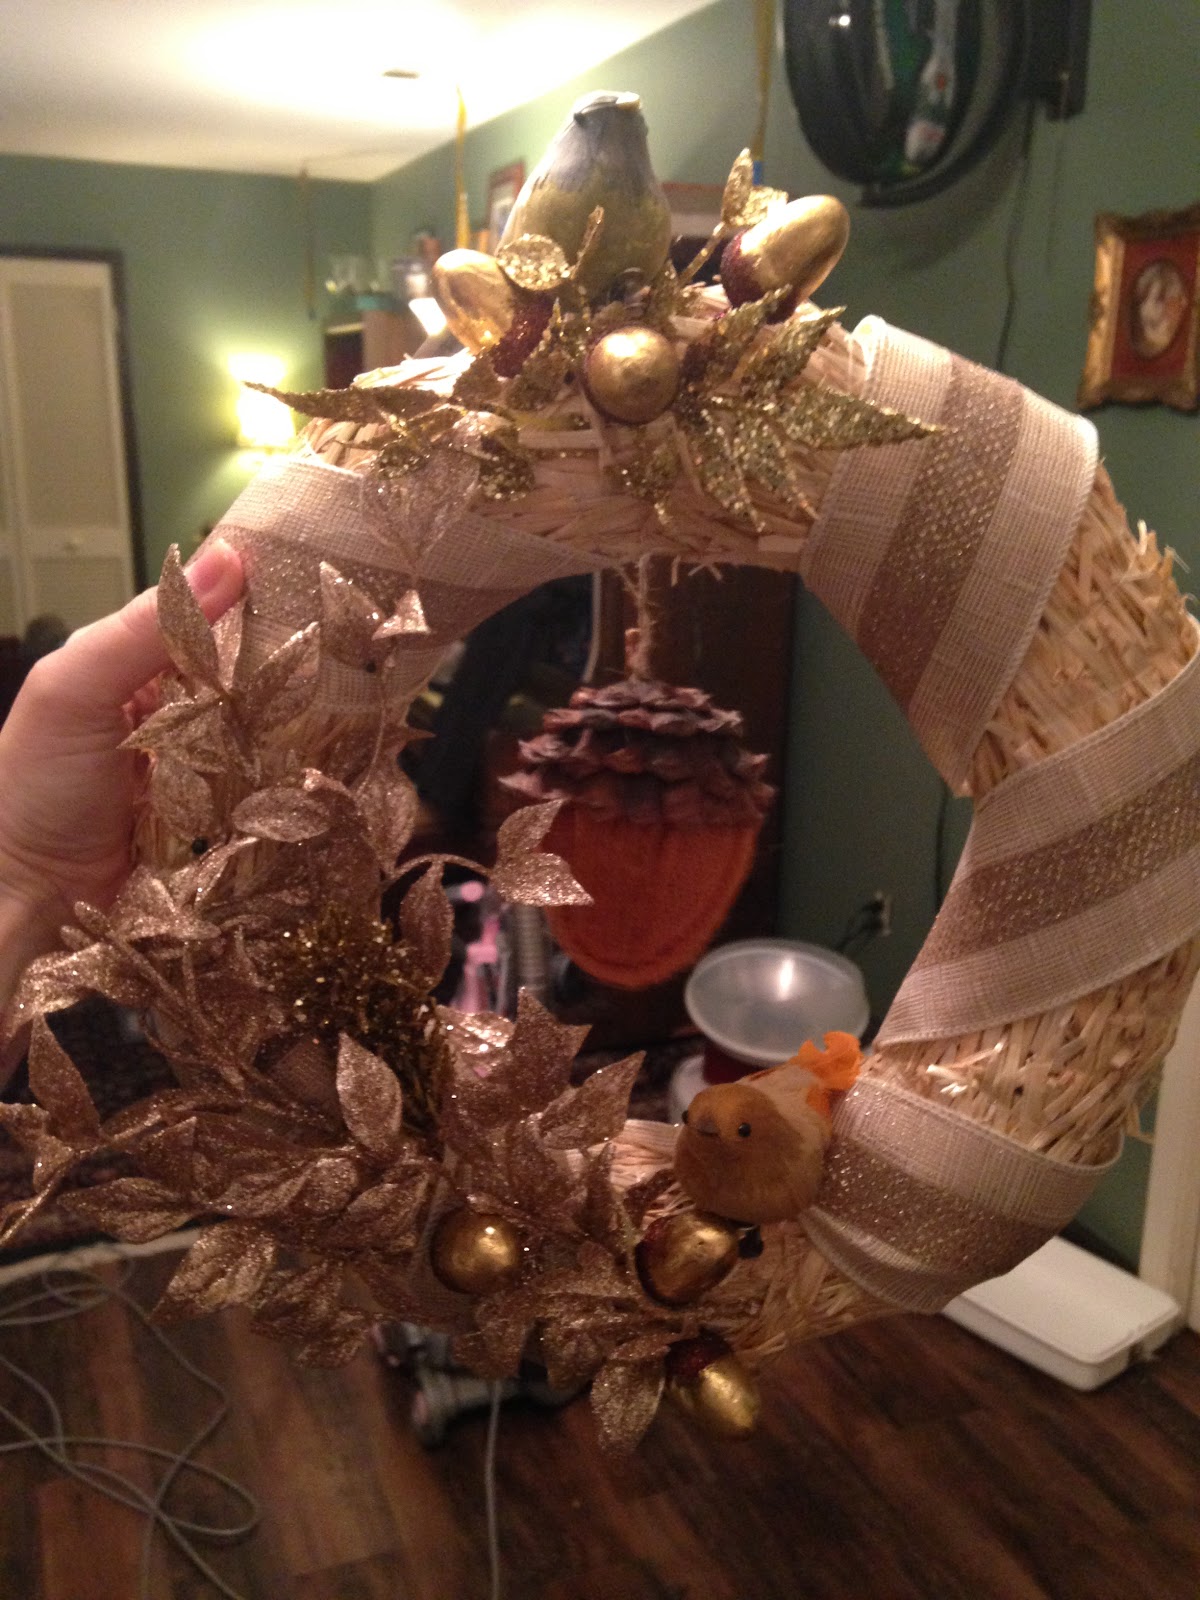
Hang on your mantle above the fireplace or on your door and enjoy!
 |
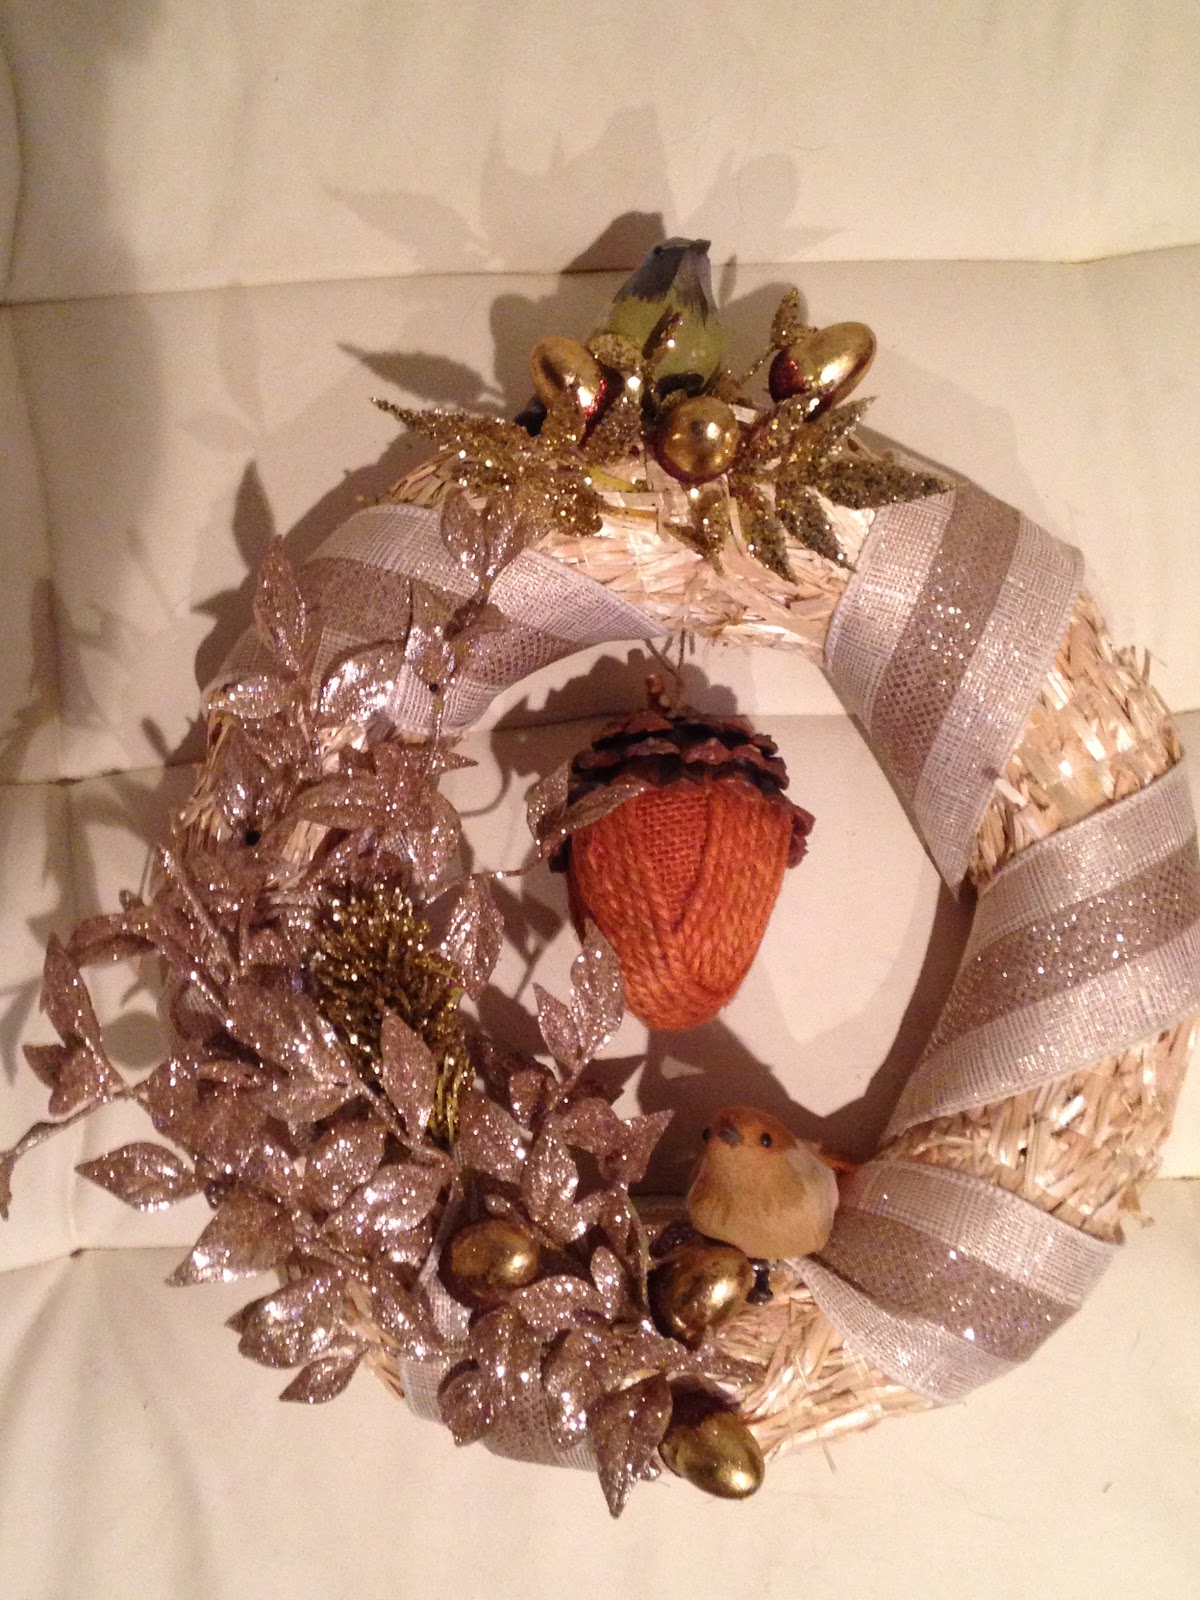
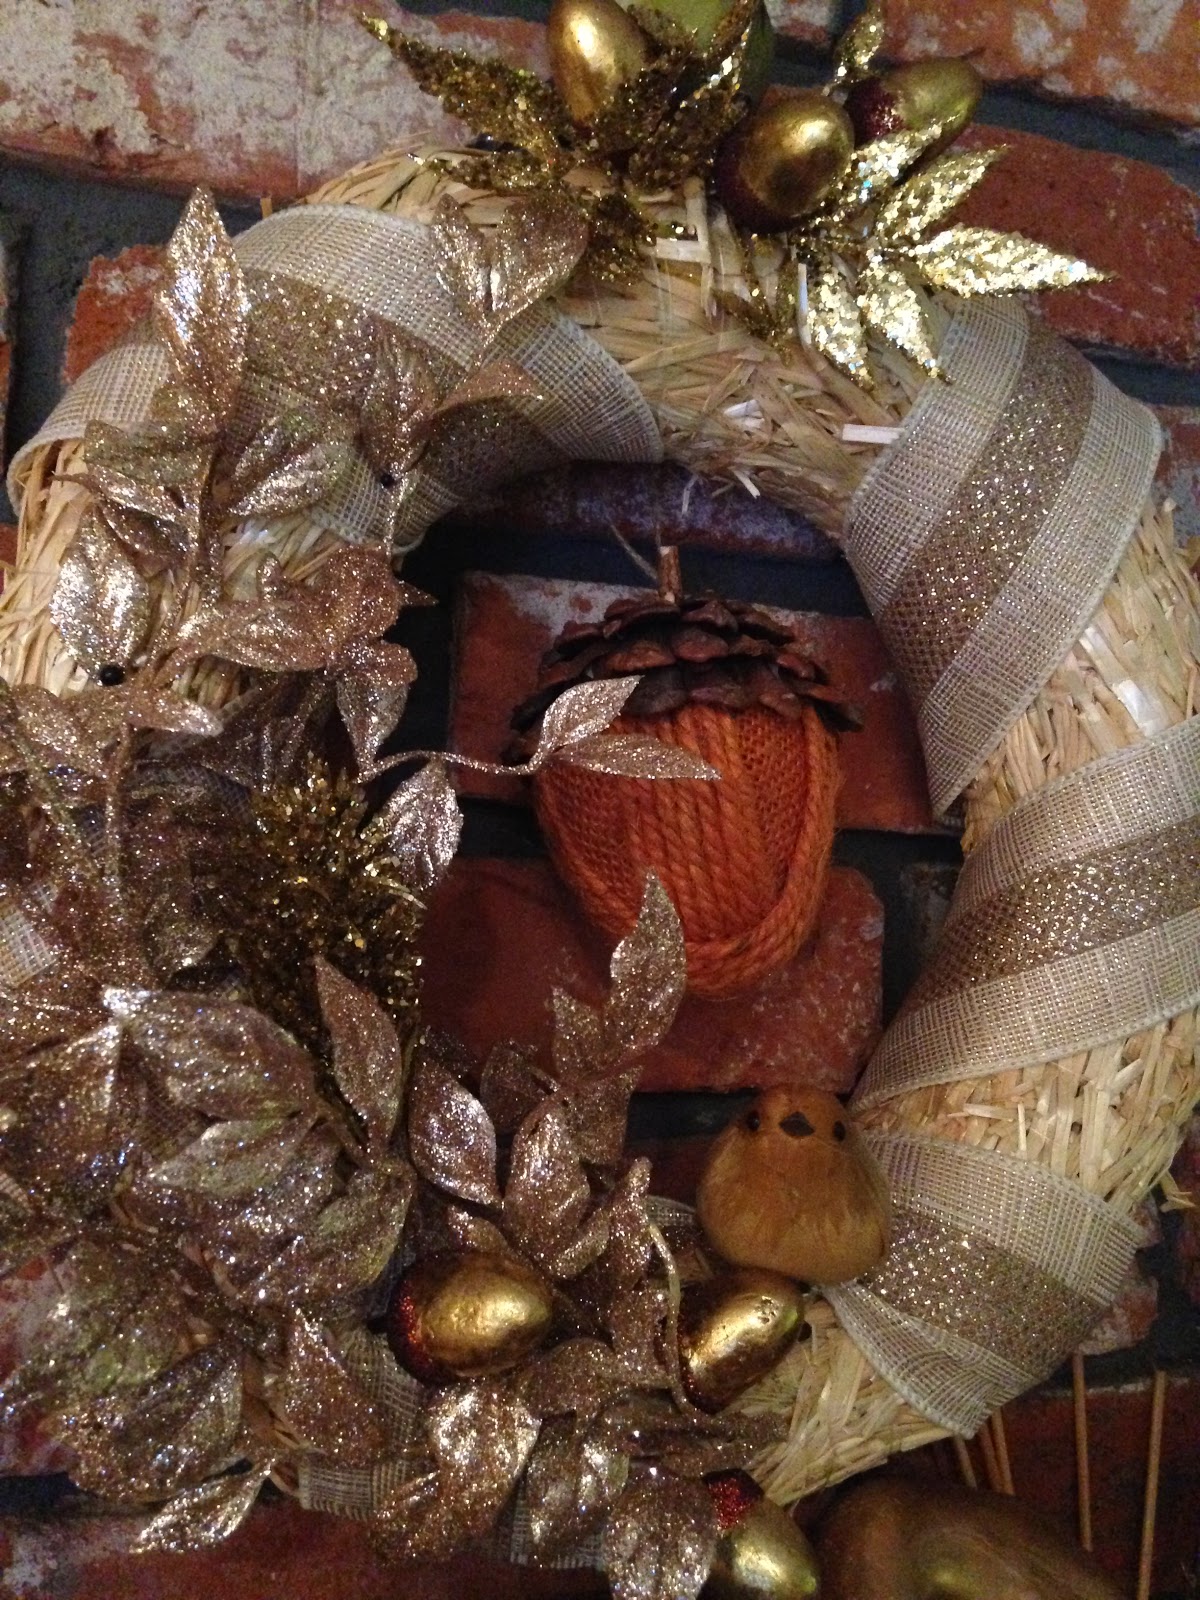
| The mantle, ready for fall. |
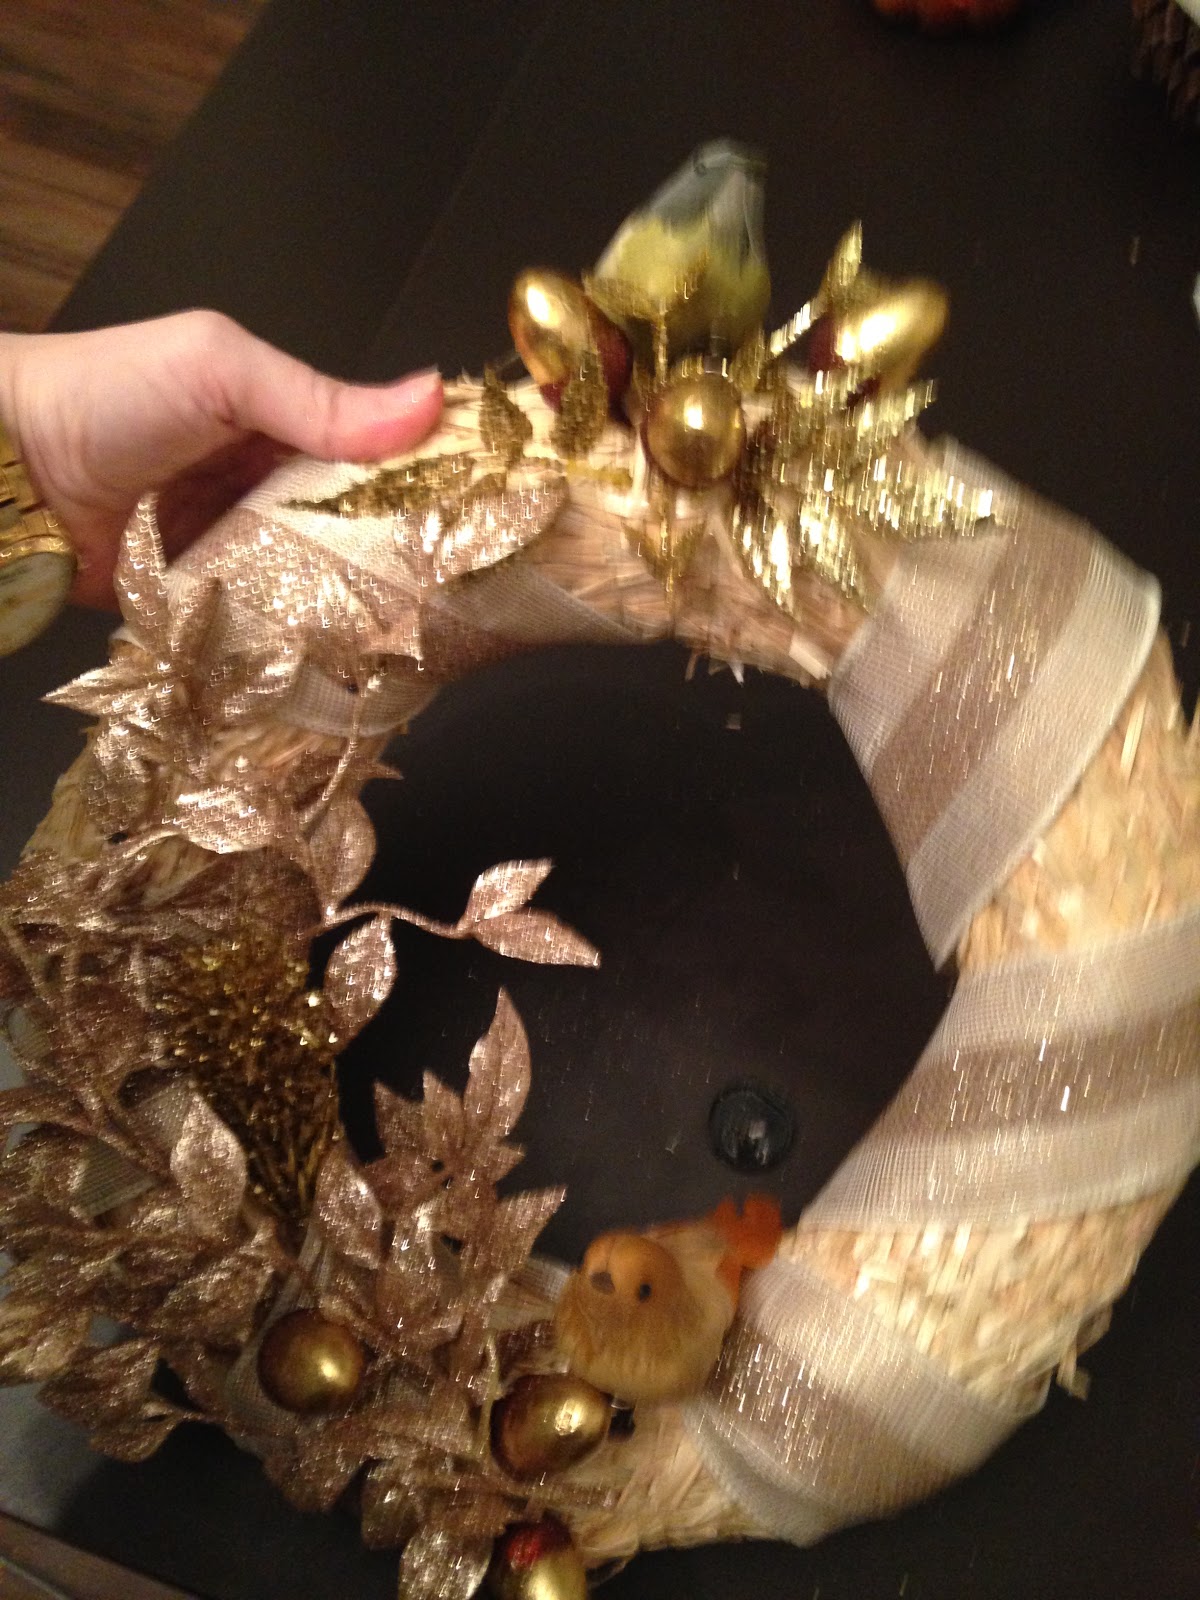
 |
| I tried to get a couple shots of the wreath. |
 |
| Getting a good picture of the bird on top was not easy. |
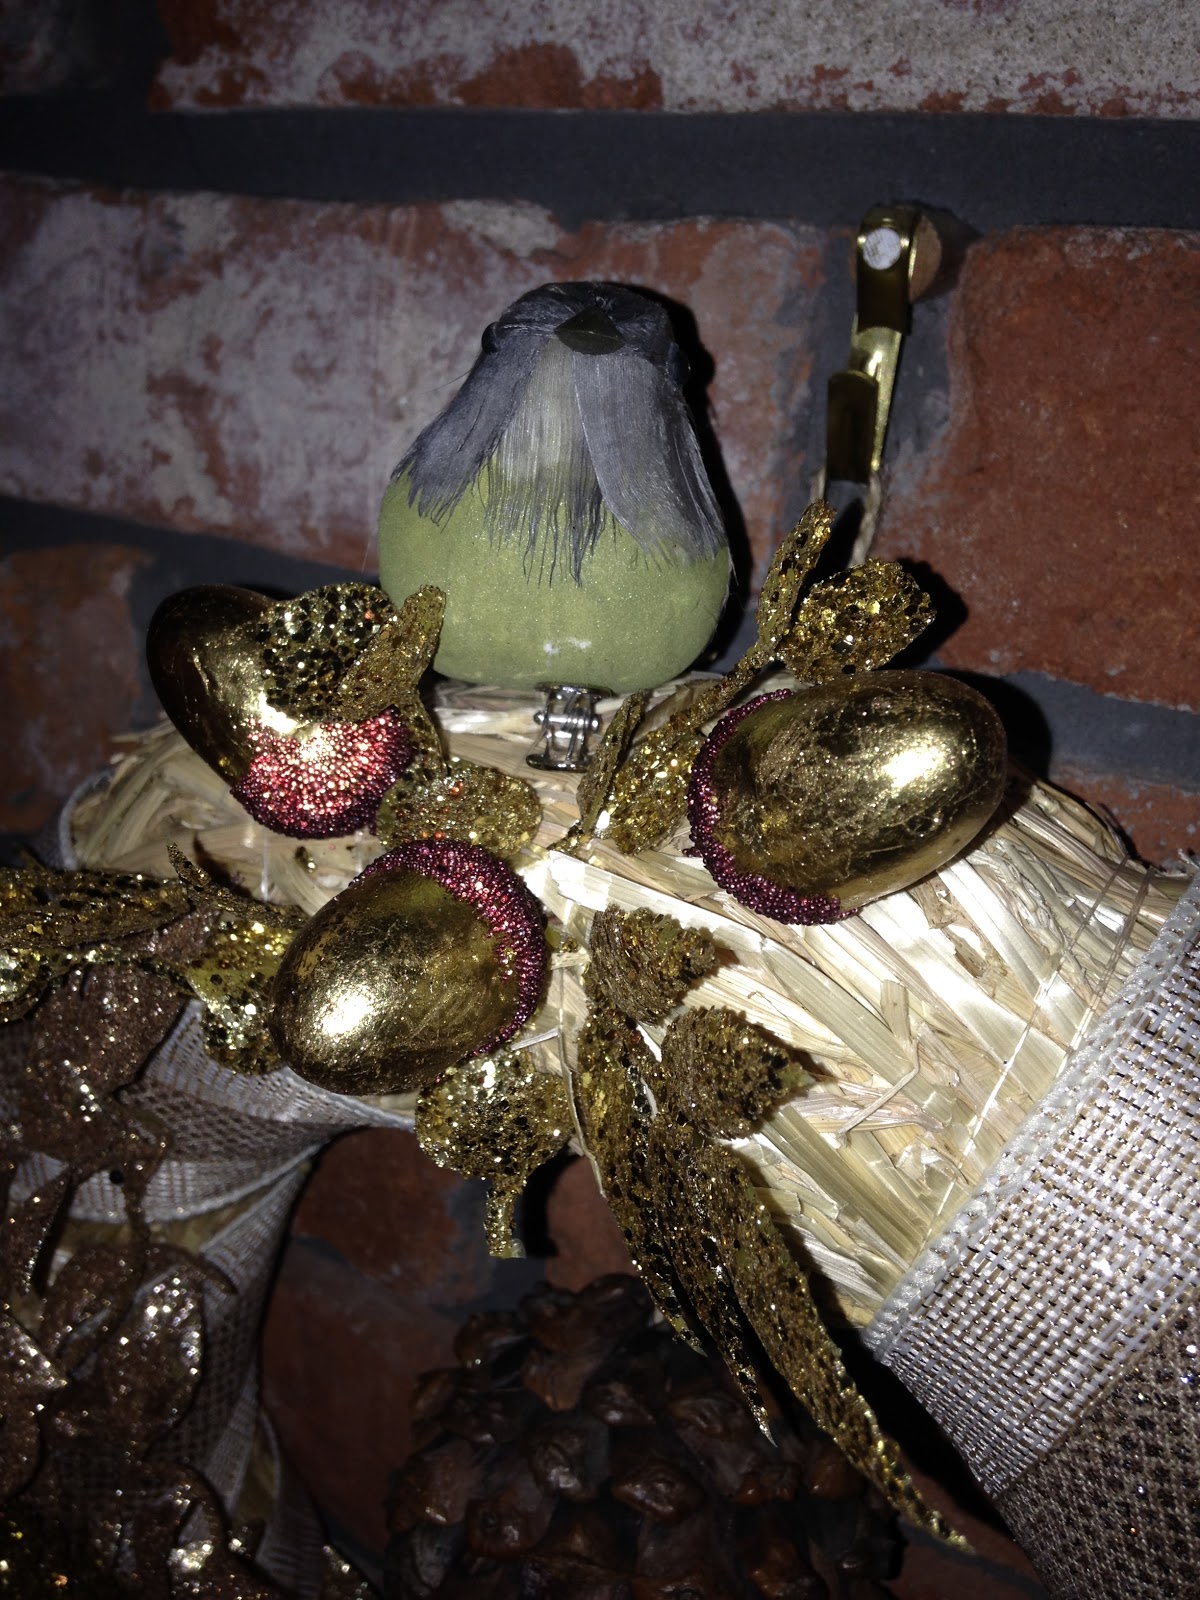 |
| So here's a picture of the top birdie, even though its not a great shot. |
Please let me know if there is anything that you would like to see for the Thanksgiving/November posts and I will see if I can't make it happen
No comments:
Post a Comment