Monday, August 15, 2016

The Final Steps for a Welcoming and "Luxurious" Guest Room

Hello Everyone!
Oh my goodness, it seems like my poor city just can't catch a break. First we have the unrest from a month ago and now so many are homeless with everything they own under flooding waters.  Again, this blog seems a little frivolous, but I was working on a series on how to treat a guest in a luxurious manner before this tragedy happened and, since there are so many displaced people in Baton Rouge  staying in other's homes, I thought it couldn't hurt to continue this series on how to pamper a guest when they are in your home.


In the previous posts, I gave craft projects on how to decorate a guest room to make it look a little less stark and uninviting.  I had my husband help me put up my "art" and, though I still think the walls are a little bare, it is definitely much better.
Here are my before pictures of the guest room:

These pictures are after we did some work.  Before, the walls in this room were all a institute beige sort of color.  I painted the walls a copper color and added some metallic paint so that, when the light is on, it almost seems to shine.  But, as you can see it is still very empty.

This is the few from the bed.  Televisions are nice, but a little art would make it better.

I use my guest room as my accessories closet.  These are some of my prettiest shoes, I am considering them to be "art".

The bedroom closet.  I had sliding doors, which all our bedrooms had, so I replaced them with curtains.

A friend of mine got me the Be Our Guest pillow when he went to Disney World and I love it.  But, it does nothing to liven up the walls.

And here are my after:

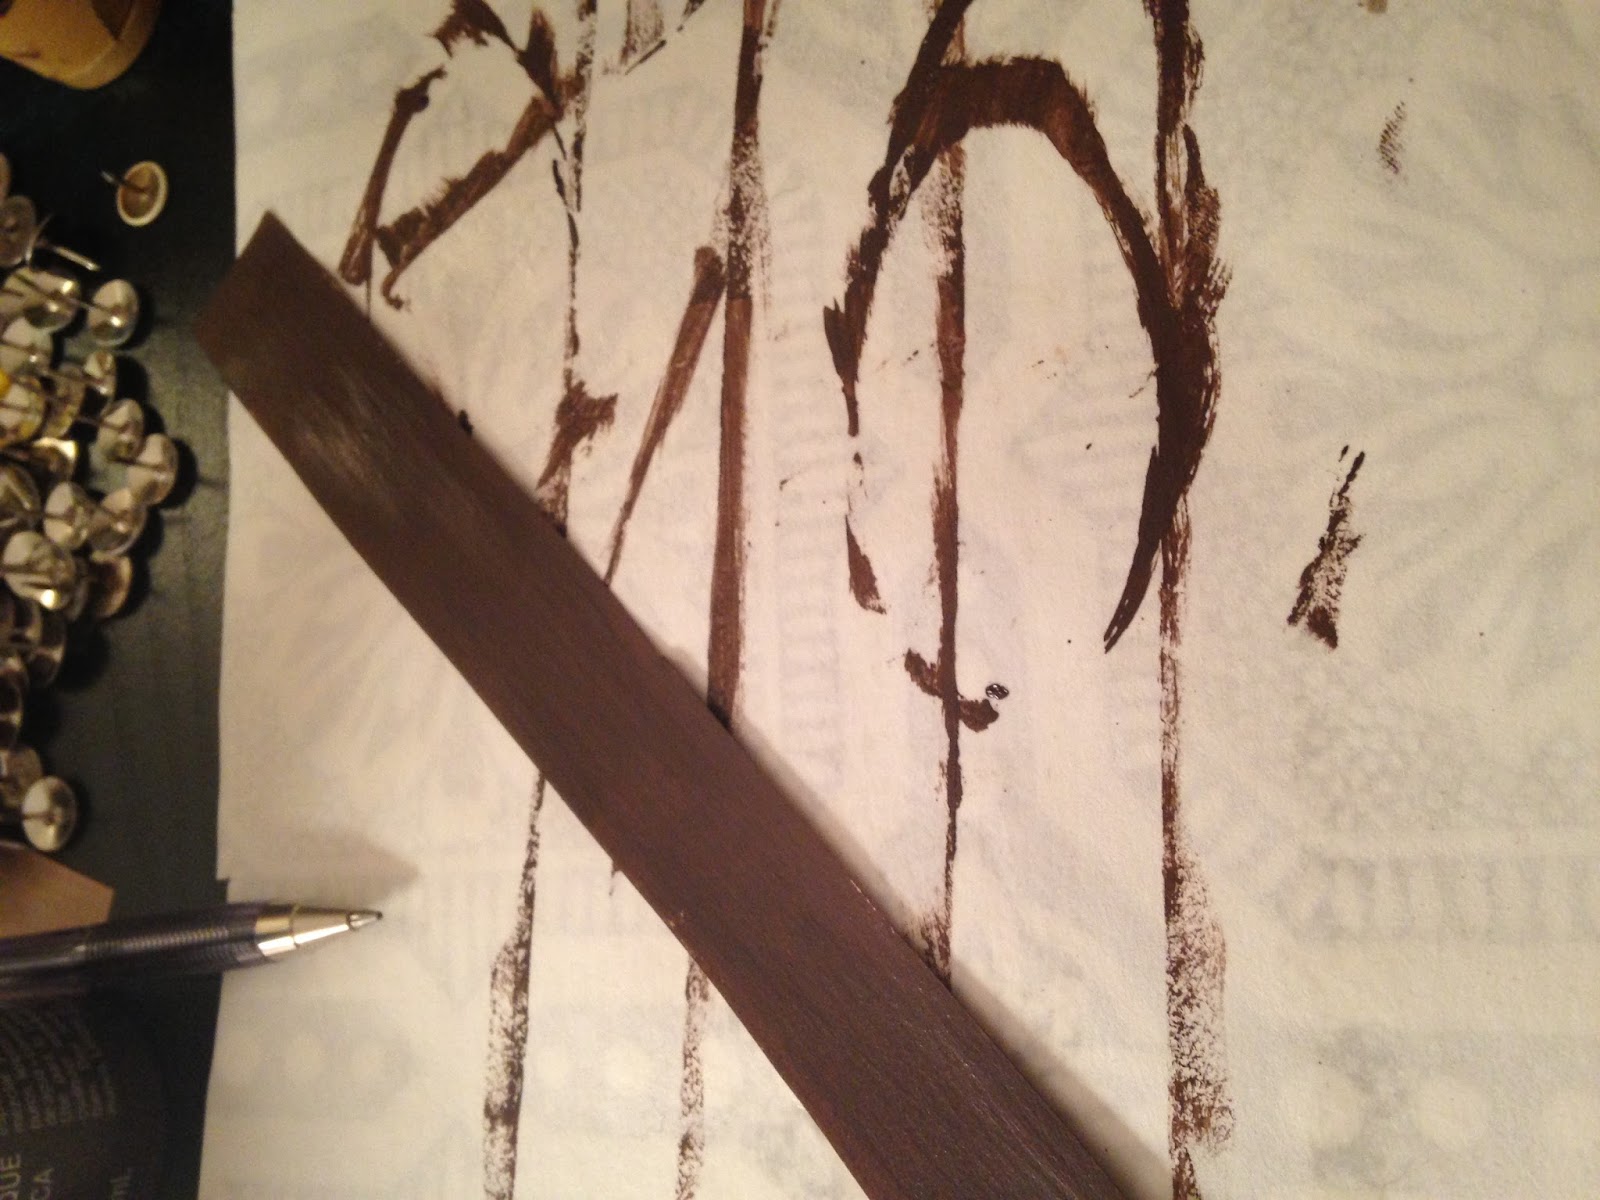
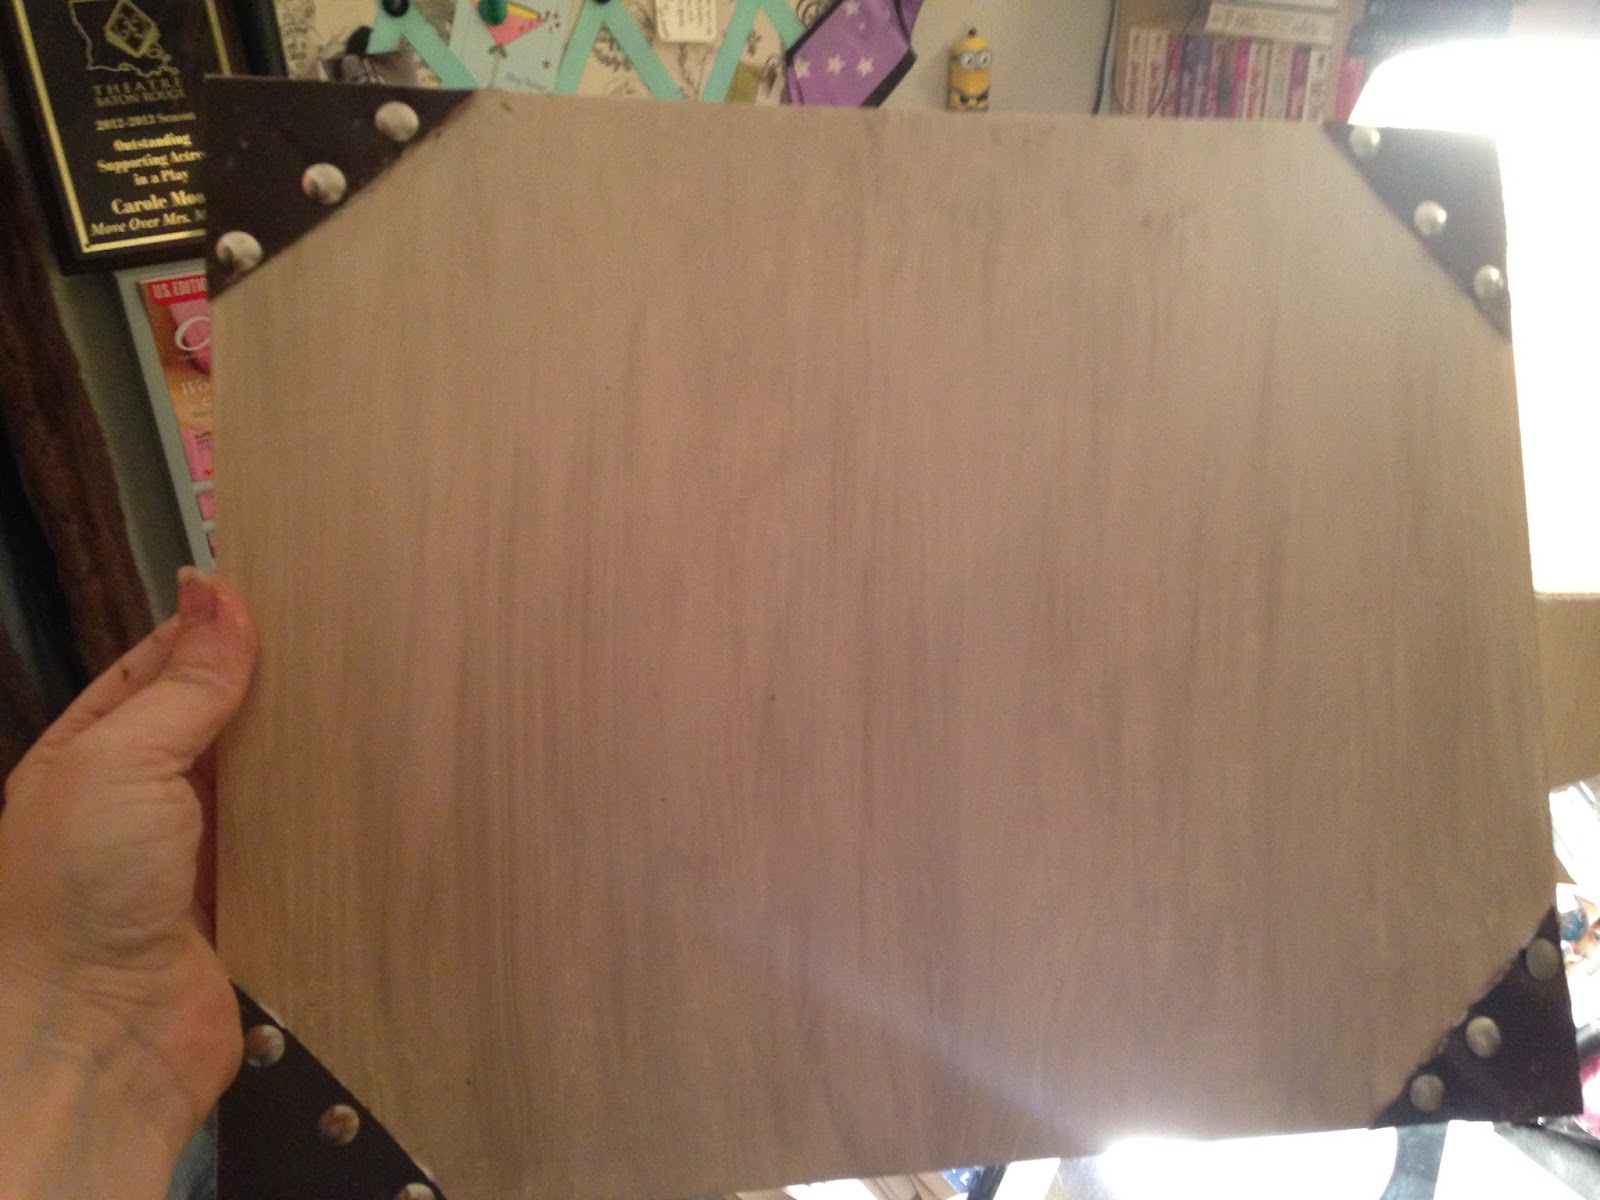
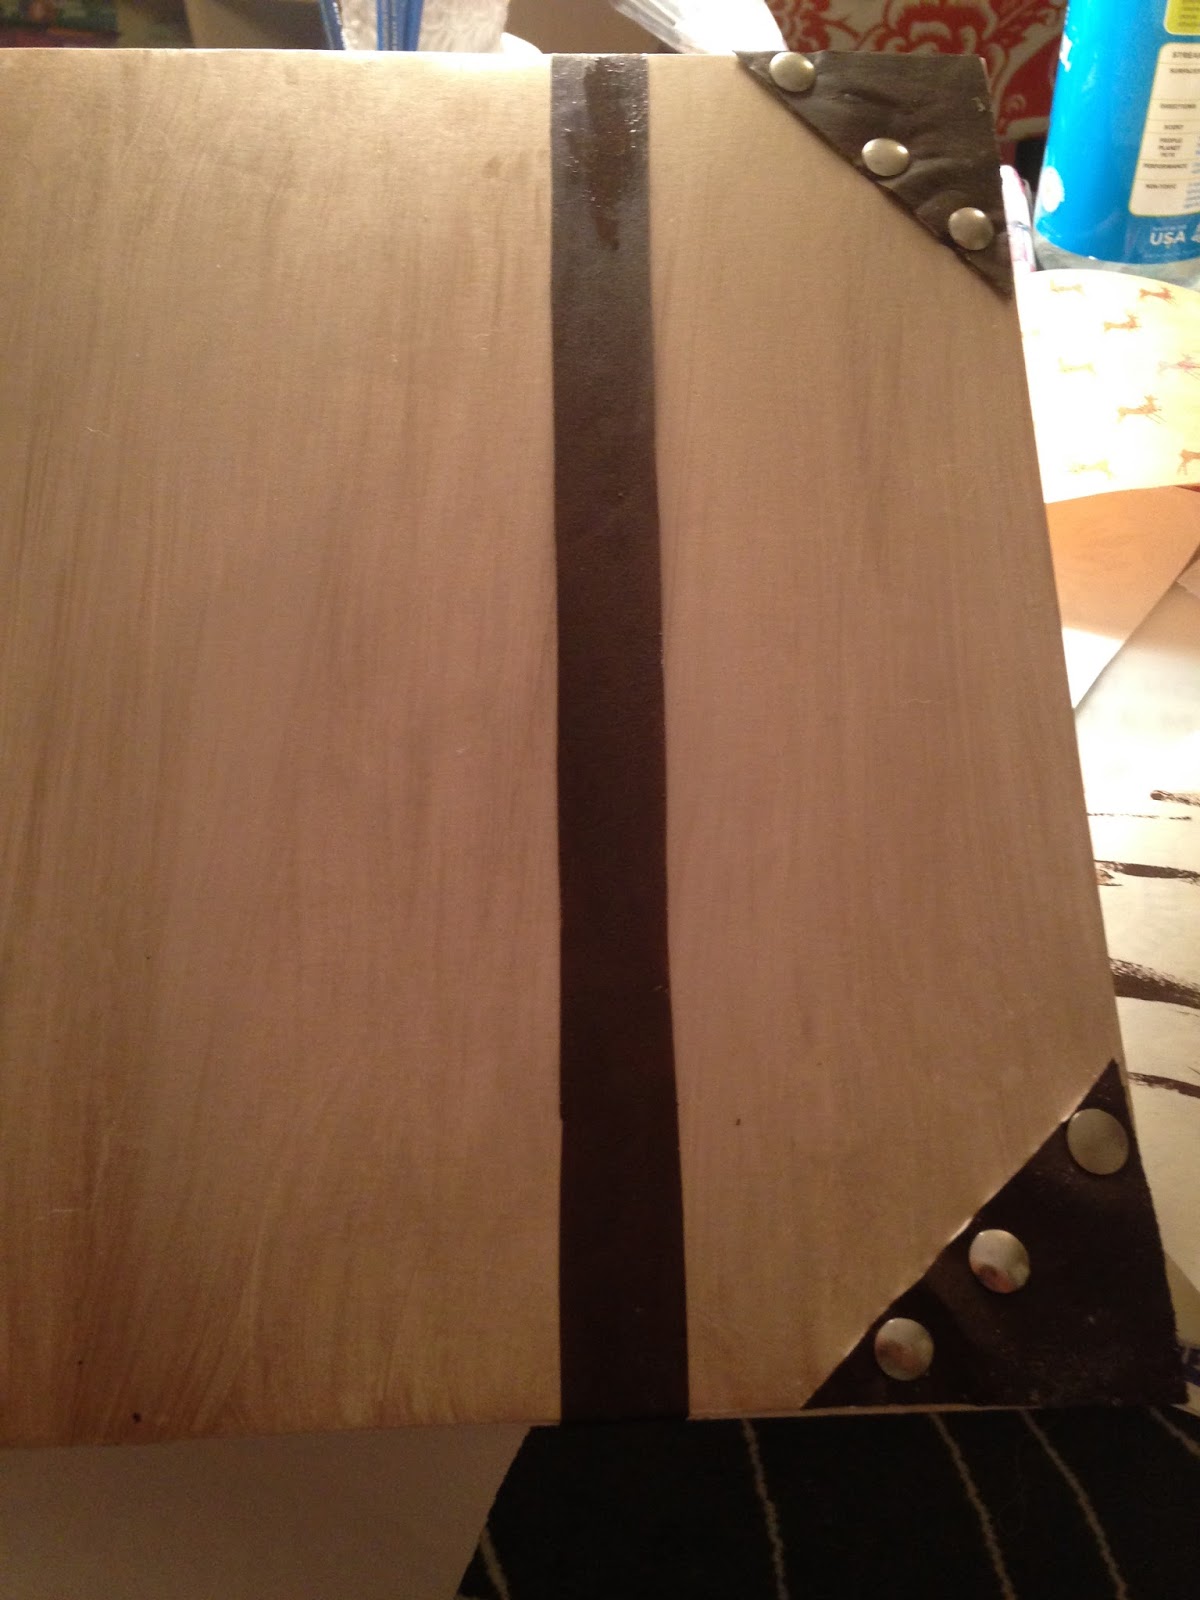
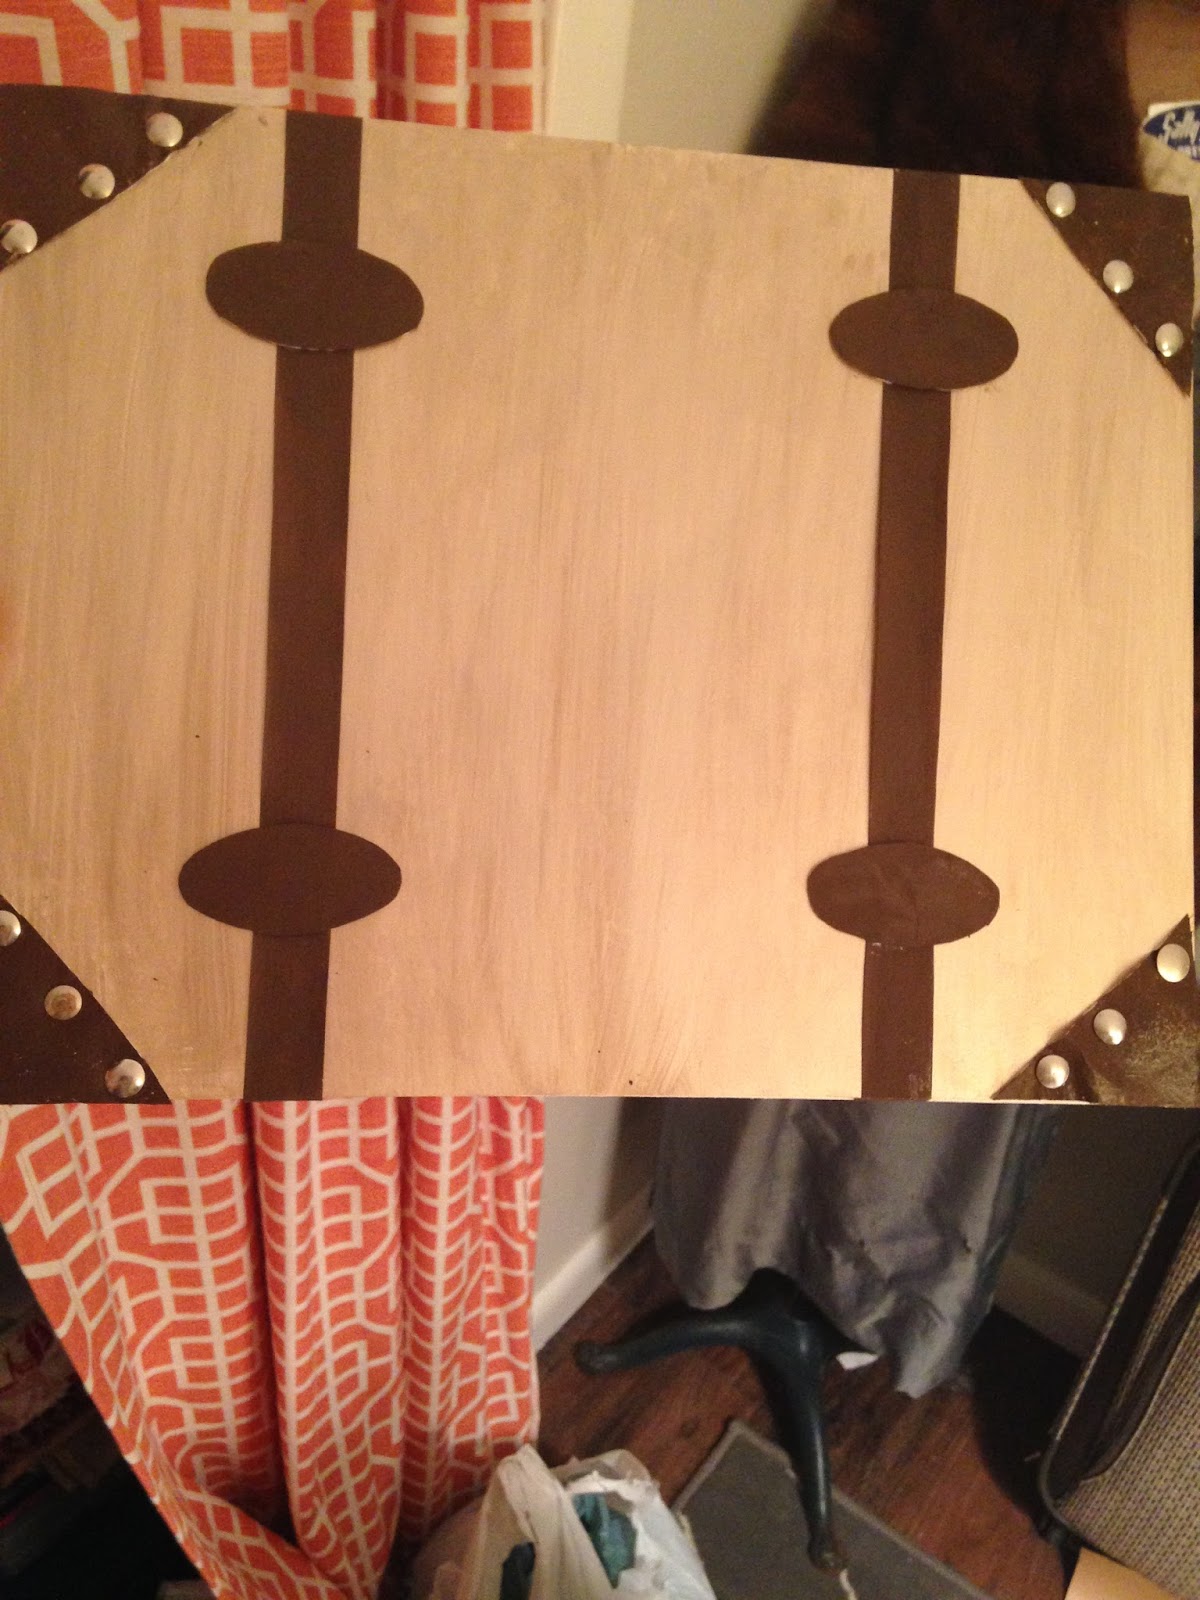
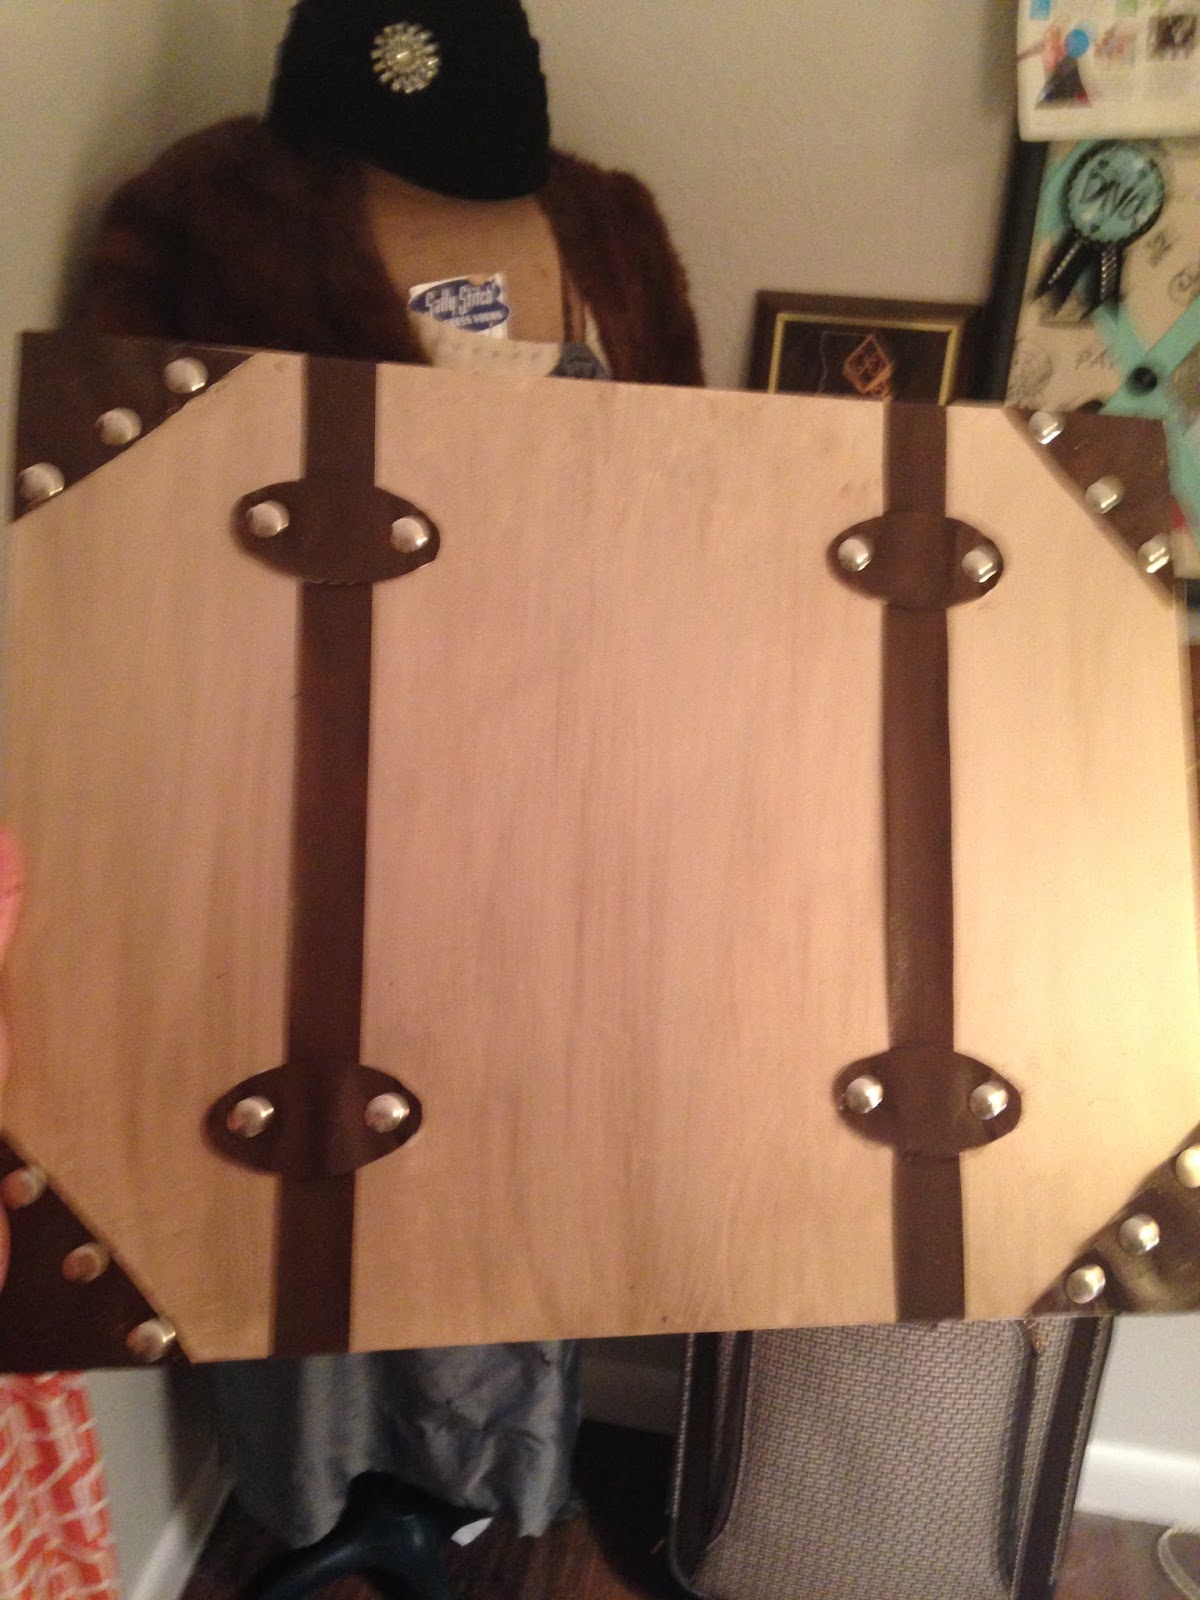
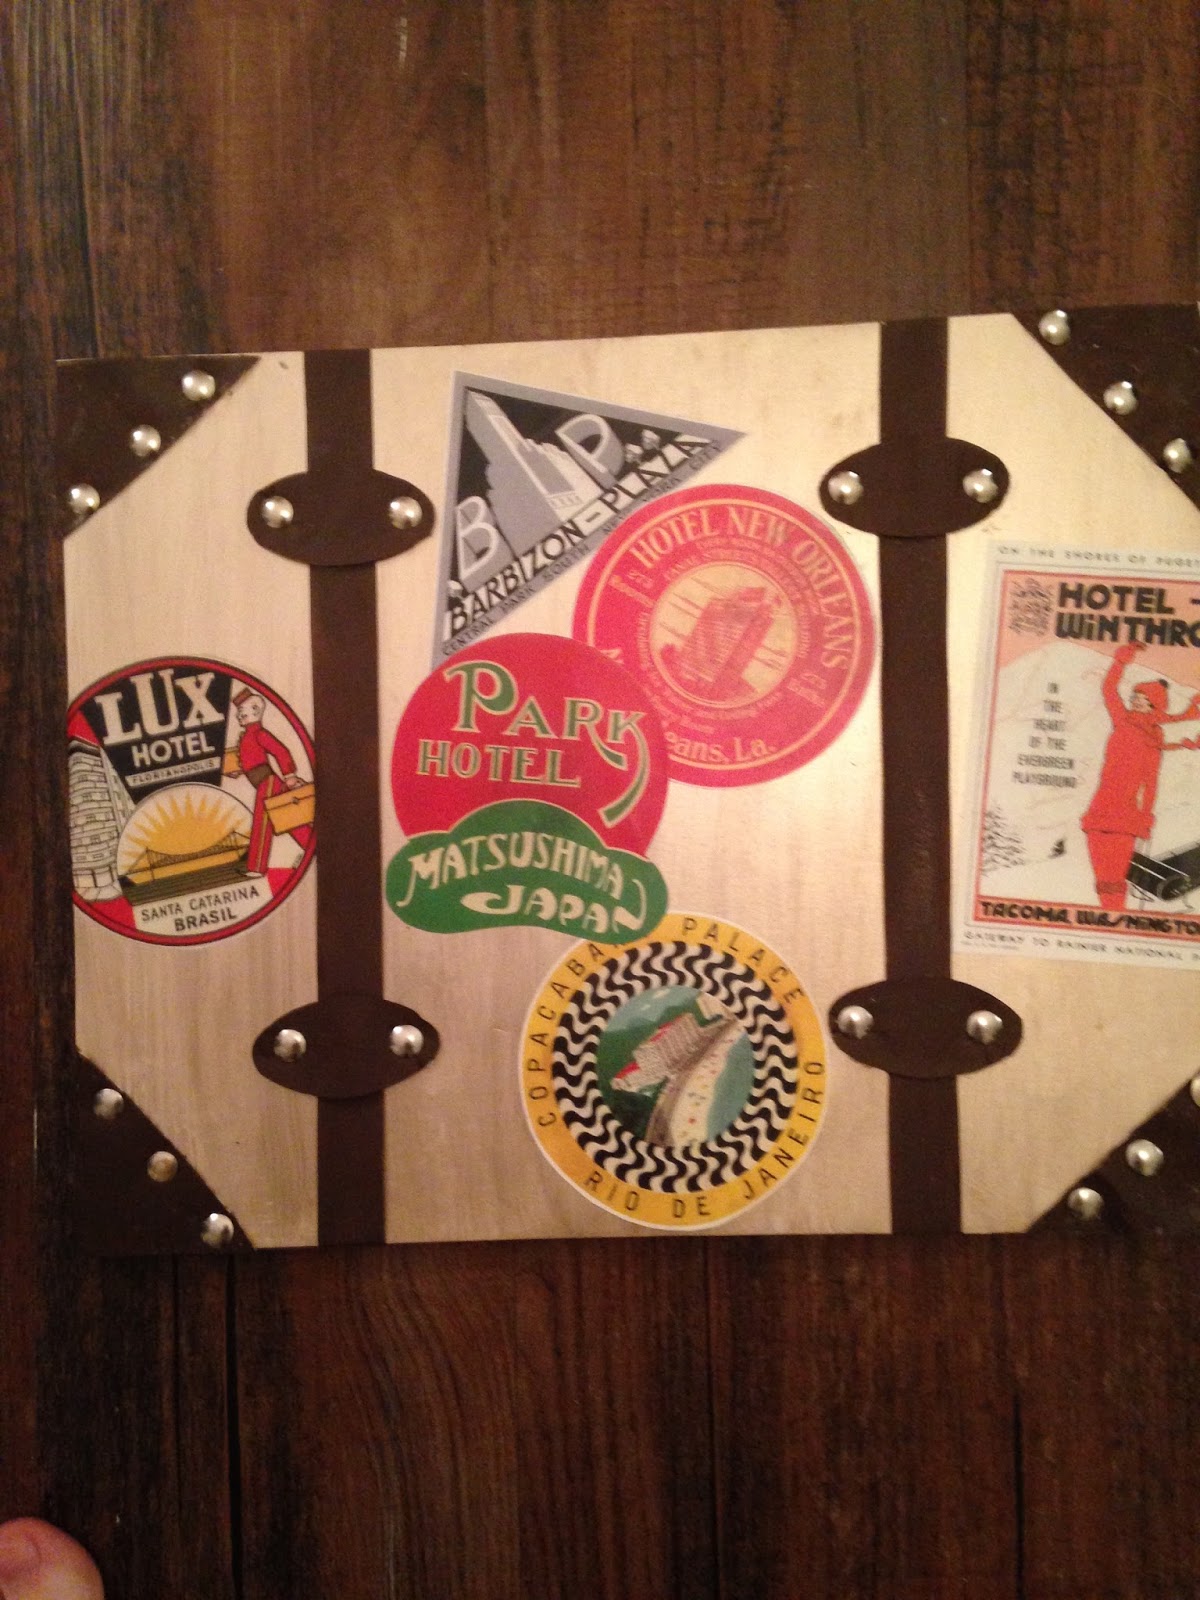
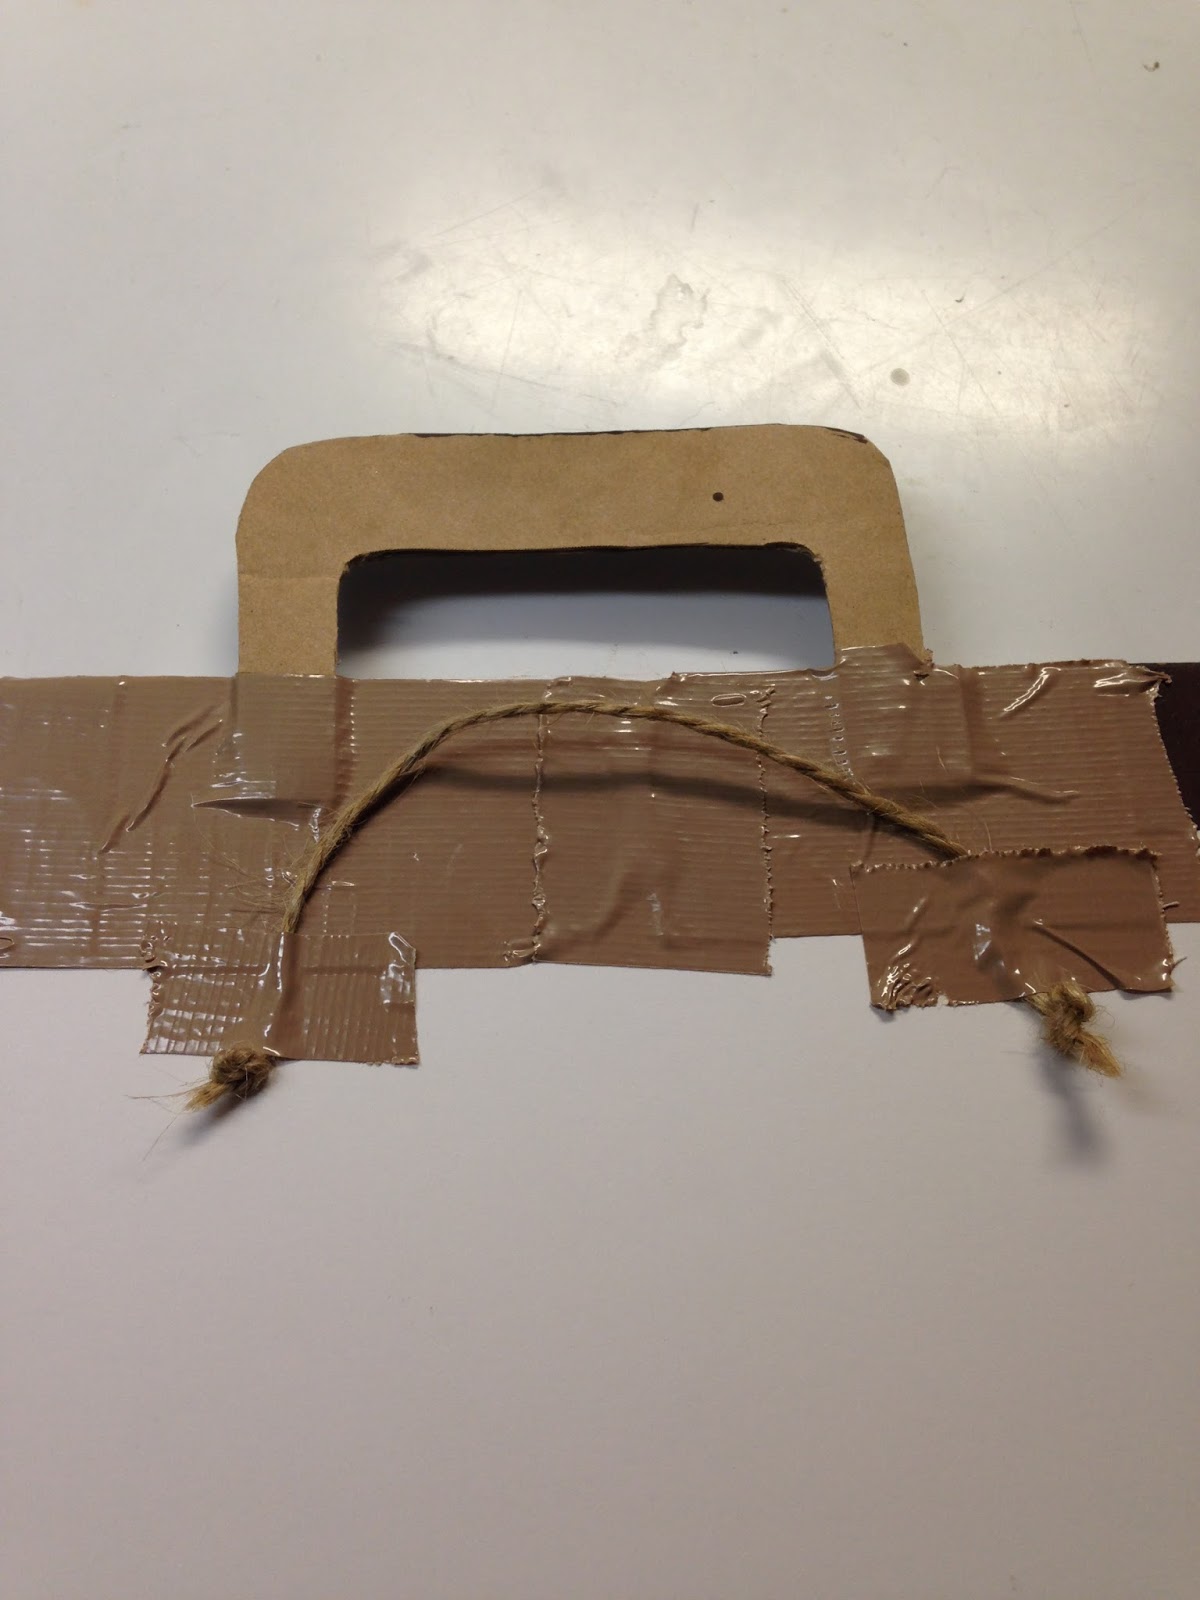
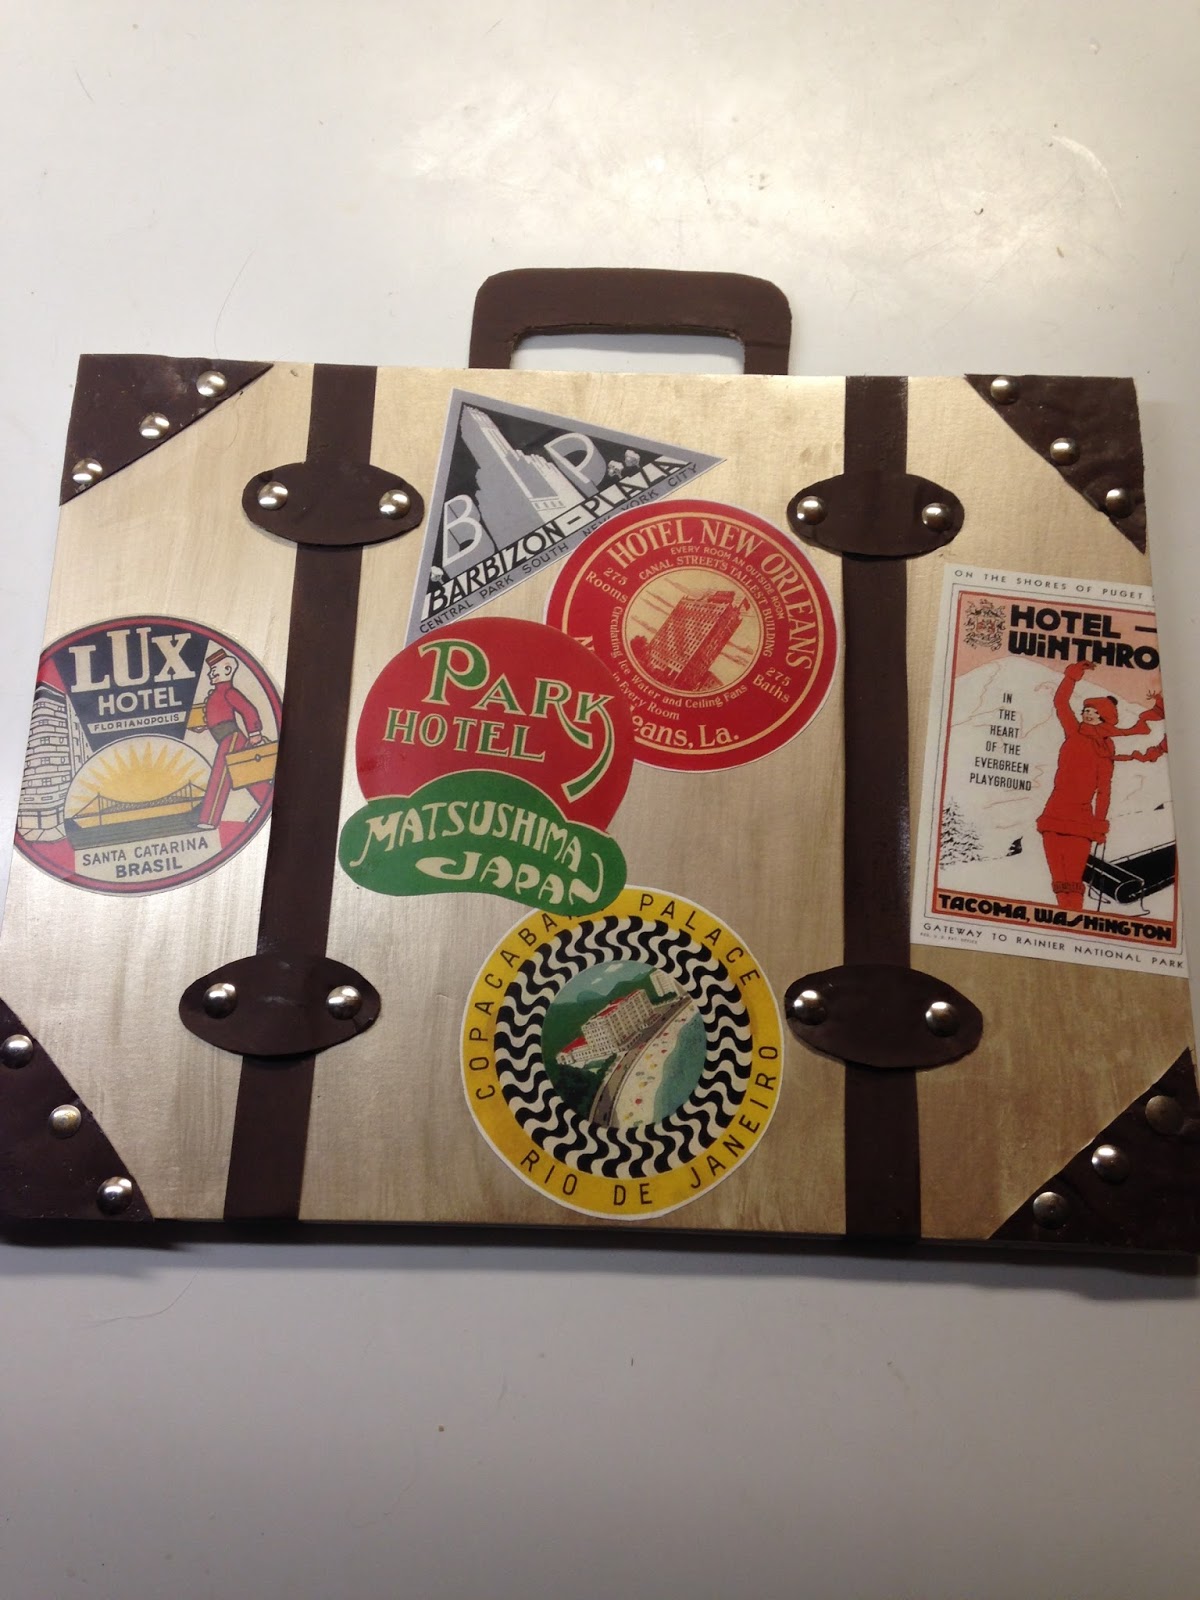
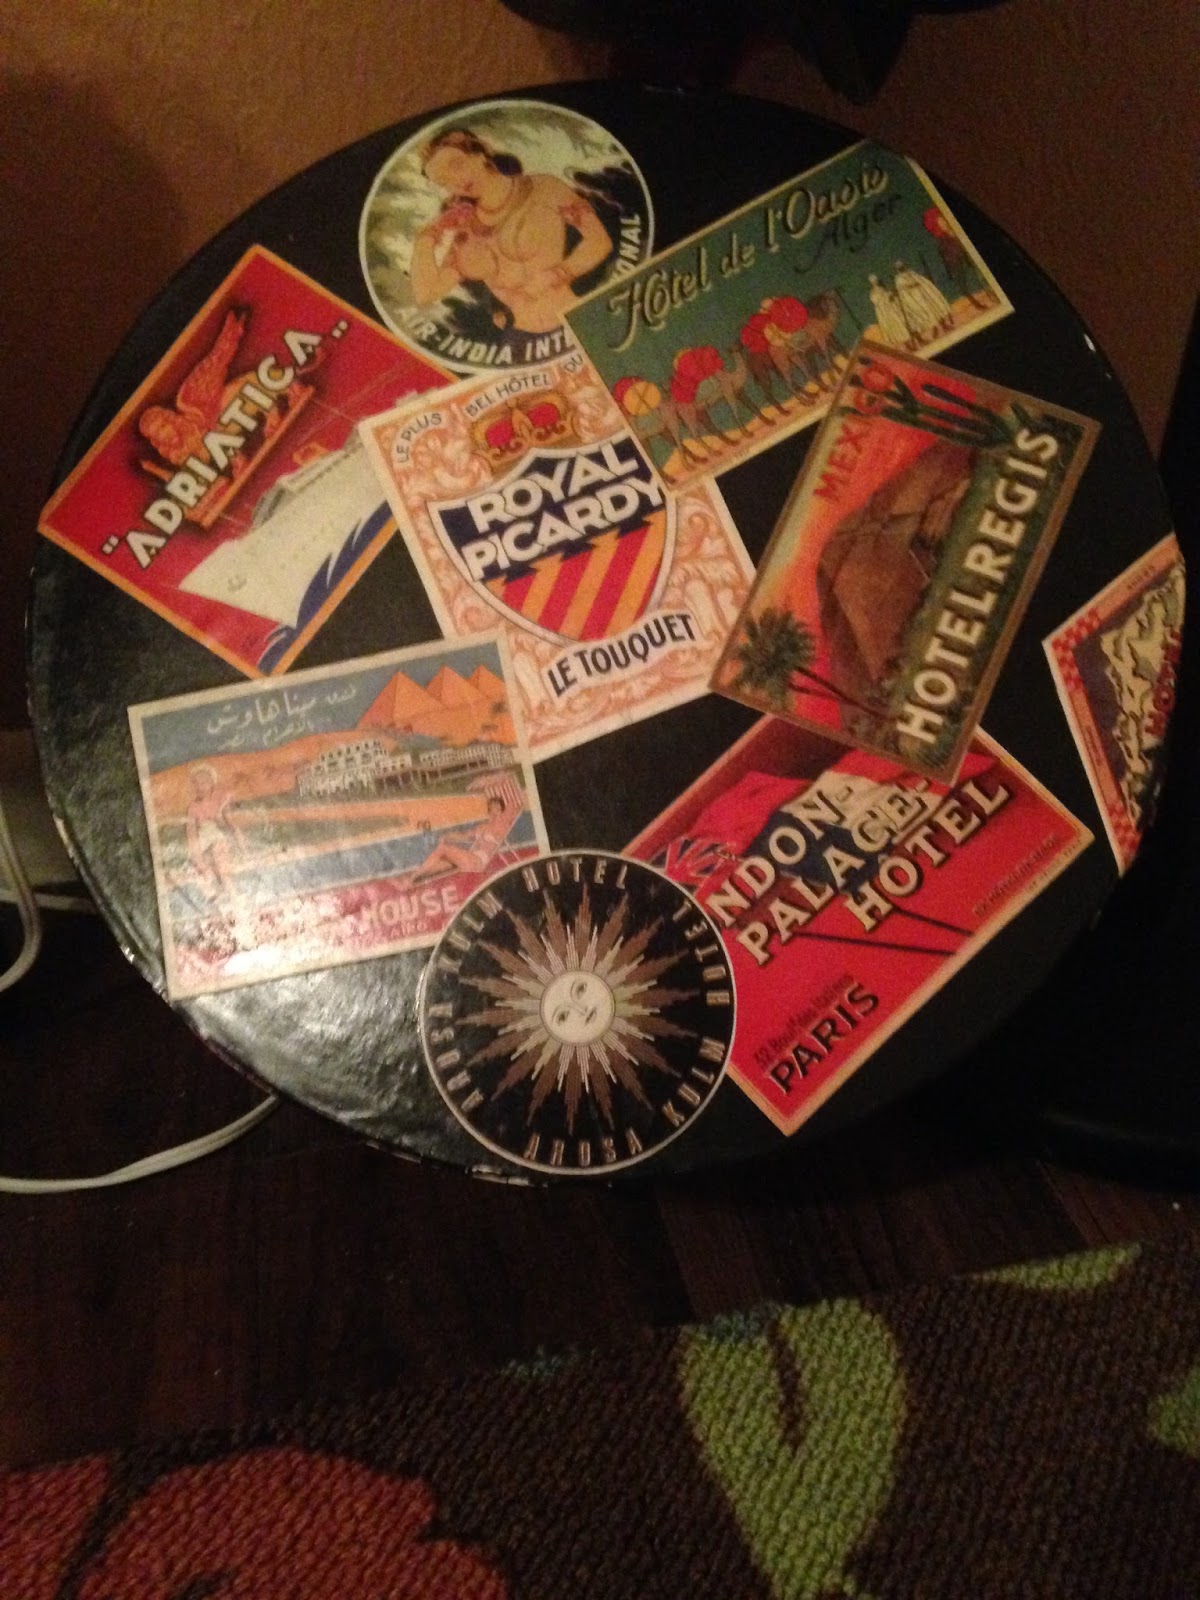
My "suitcase" and postcards size travel posters on the wall.

A closer view.

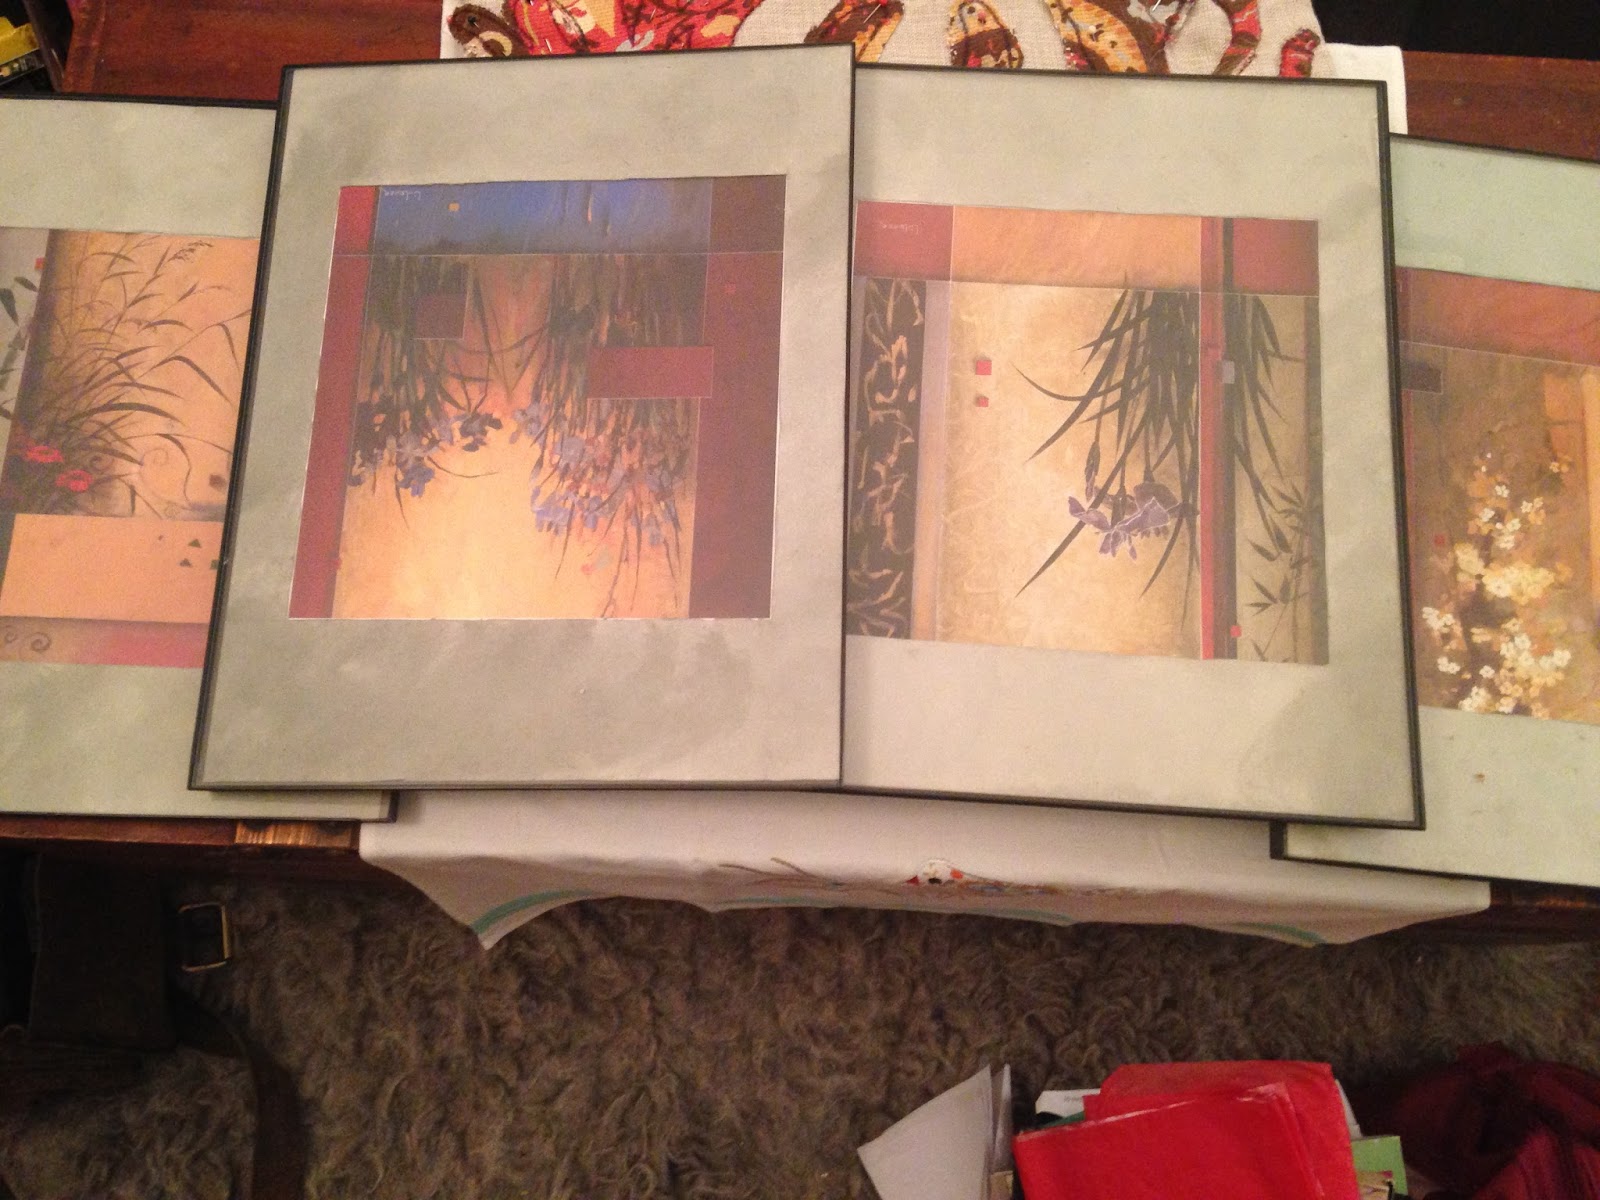
I actually think I want to add another column of pictures above the bed, but this is much better than nothing.

Much cozier and more welcoming than the blank wall.

But that is not all you need to make a guest feel comfortable- in truth, it is not even the most important thing.  Think of the nicest hotel room that you have ever stayed in. Have you got that image in your head?   You want you guest room to emulate that experience. 
Broken down to its bare essentials, a hotel room is a clean, blandly decorated room, full of amenities, with bathrooms stocked with fresh fluffy towels and free shampoo.  You should take this formula and make your guest room the "fanciest" hotel room that your budget will allow.

Rules of Hospitality

Rule Number 1: Do not make your guest have to look for anything.  Place items in the room so that your guest knows where they are and in a way that they know those items are there for them.

Rule Number 2: Put items in the guest room that will make your guest feel more welcome and comfortable. 

By now you may be asking "What type of items are you talking about?"
Well, I'm so glad you asked. 
In my guest rooms I like to make certain that the following items are placed in the room:
         Fresh Towels
         Snacks
         Amenities
         Entertainment Options
         Extra Blankets
         Small Personal Touches

Fresh Towels

I like to have towels expressly for guests. This way I can ensure that the towels remain nicer longer.  (Yes, I have to hide them from my husband or he uses them.) You can keep these towels in the linen closet and let your guest's know they are theirs and which ones are okay to use. Personally, I don't relish the idea of people going through my closets, so I try to make it so that my guest does not feel the need to go through my closets.   I fold the towels nicely and placing them in a prominent area in the guest bedroom. 
I love to fold my hand towels so that they make a little "pocket".  In this pocket I can put toiletry items or a folded wash cloth.


You can't really see my pocket because I have a washcloth folded like a fan and put in there. But, I promise it is there.  Along with a brand new bath sponge and two cupcake shaped bath fizzies.


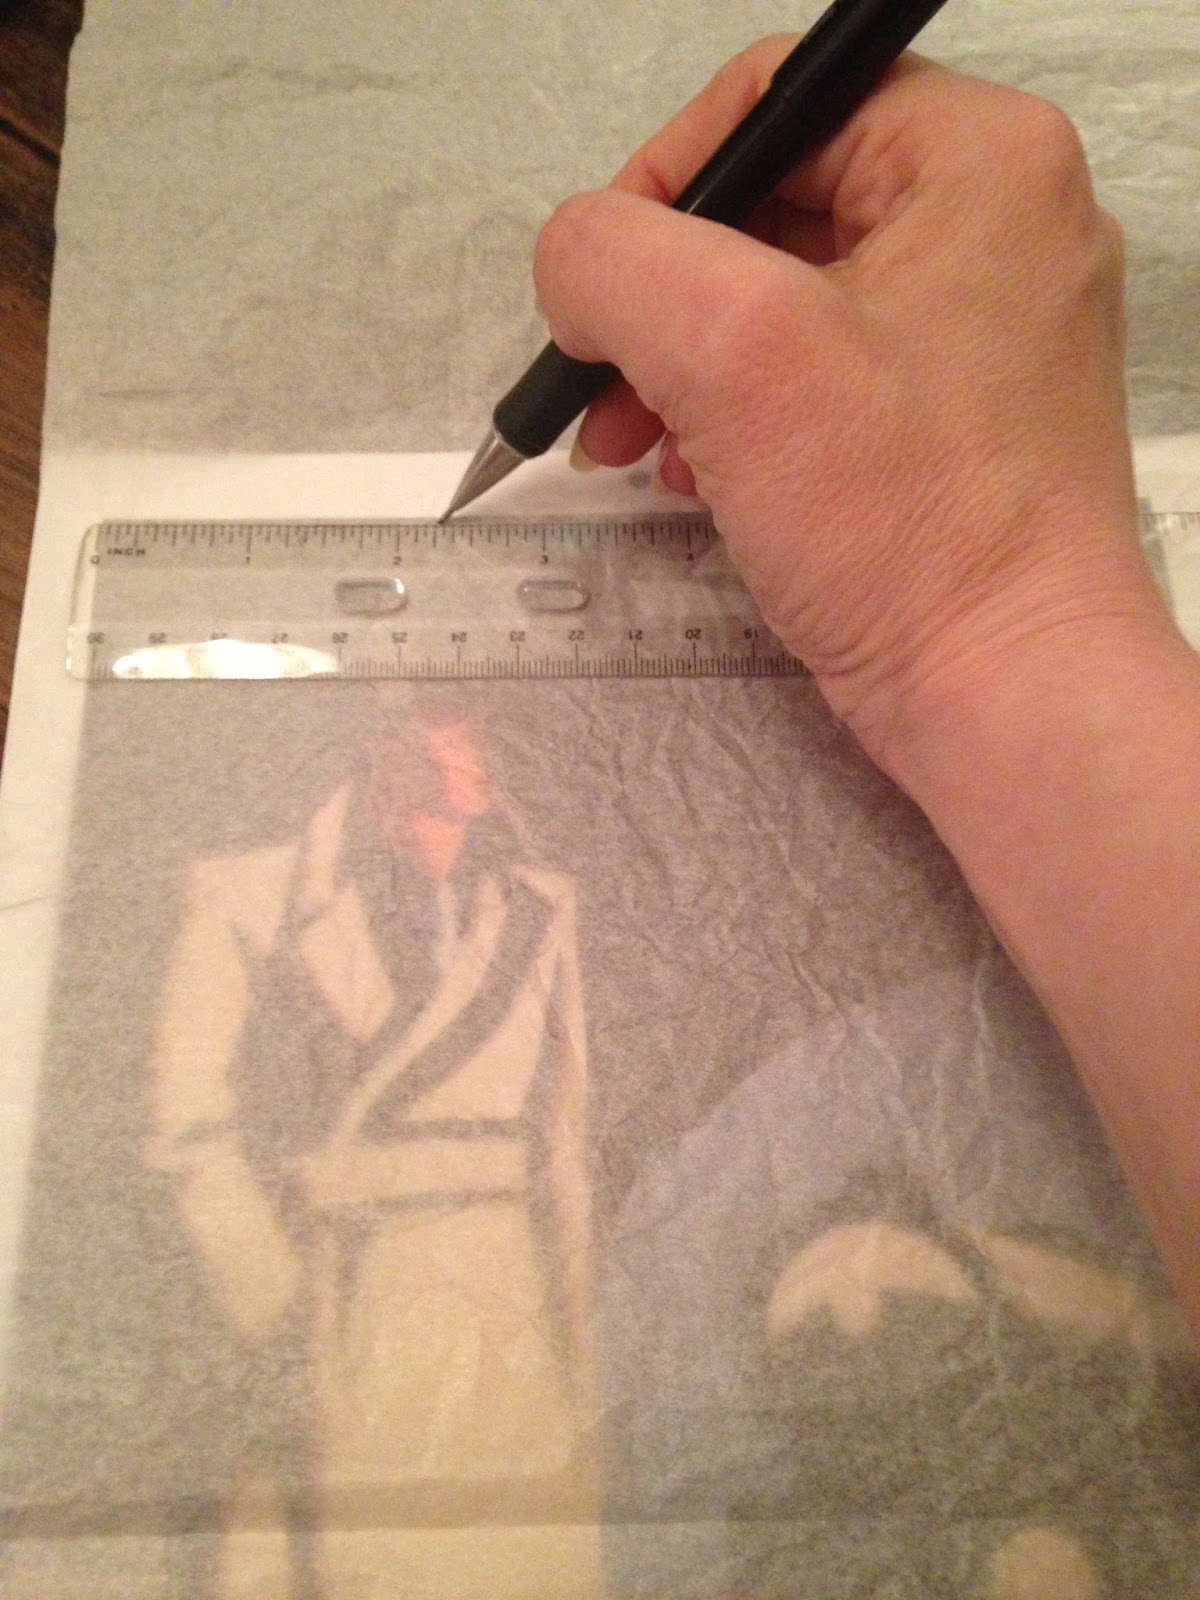
How to Fold a Hand Towel to Make a "Pocket"
1.  Place the towel so that the "back" side of the towel is facing up.


2.  Fold the towel from the bottom, toward the center, stopping once you are 1/4 of the way up the length of the towel.  This fold will make your "pocket".


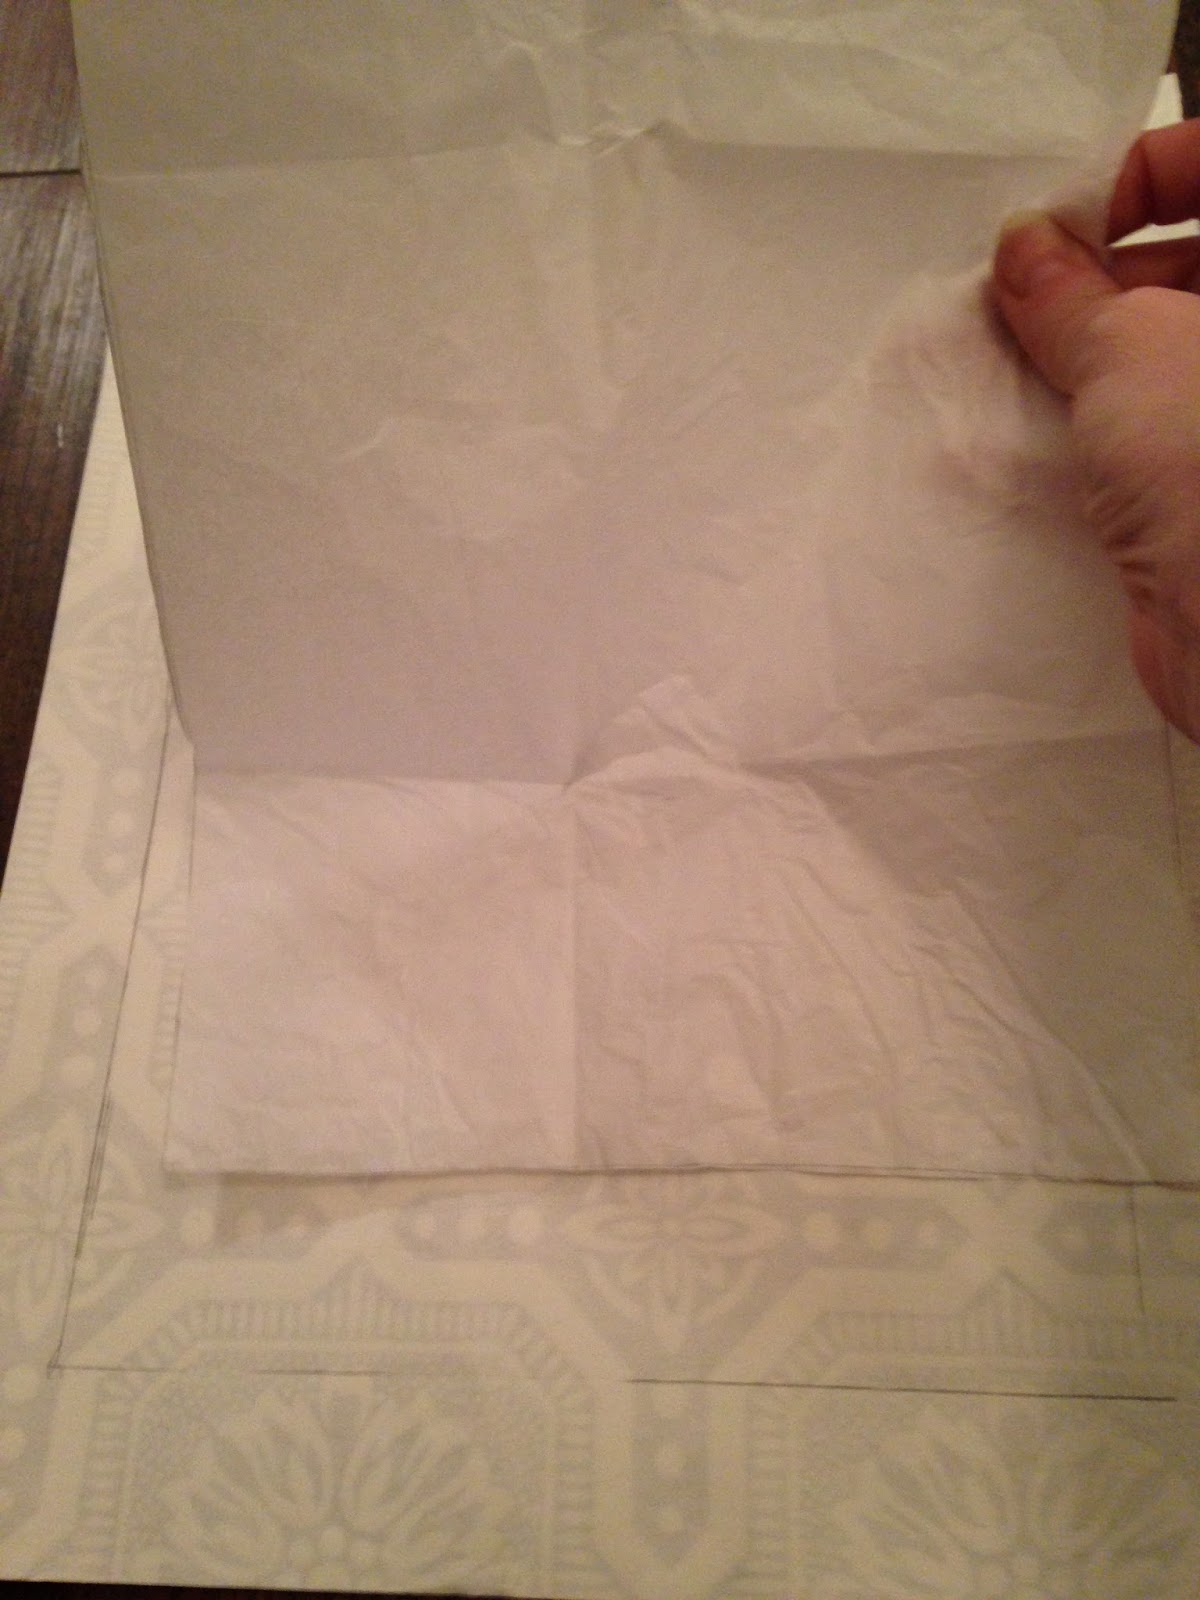
3.  Turn the towel so that the "pocket" you just folded is facing away from you.  Fold the towel, lengthwise, toward the center of the towel holding the "pocket" in place.

Notice I am gripping the fold so that the "pocket" stays in place.

4.  Fold the towel, lengthwise, basically folding the towel into thirds, making sure to hold on to the fold to keep your "pocket".

Remember, grip the fold.

I know it doesn't look like much now, but it will get better.  I promise!

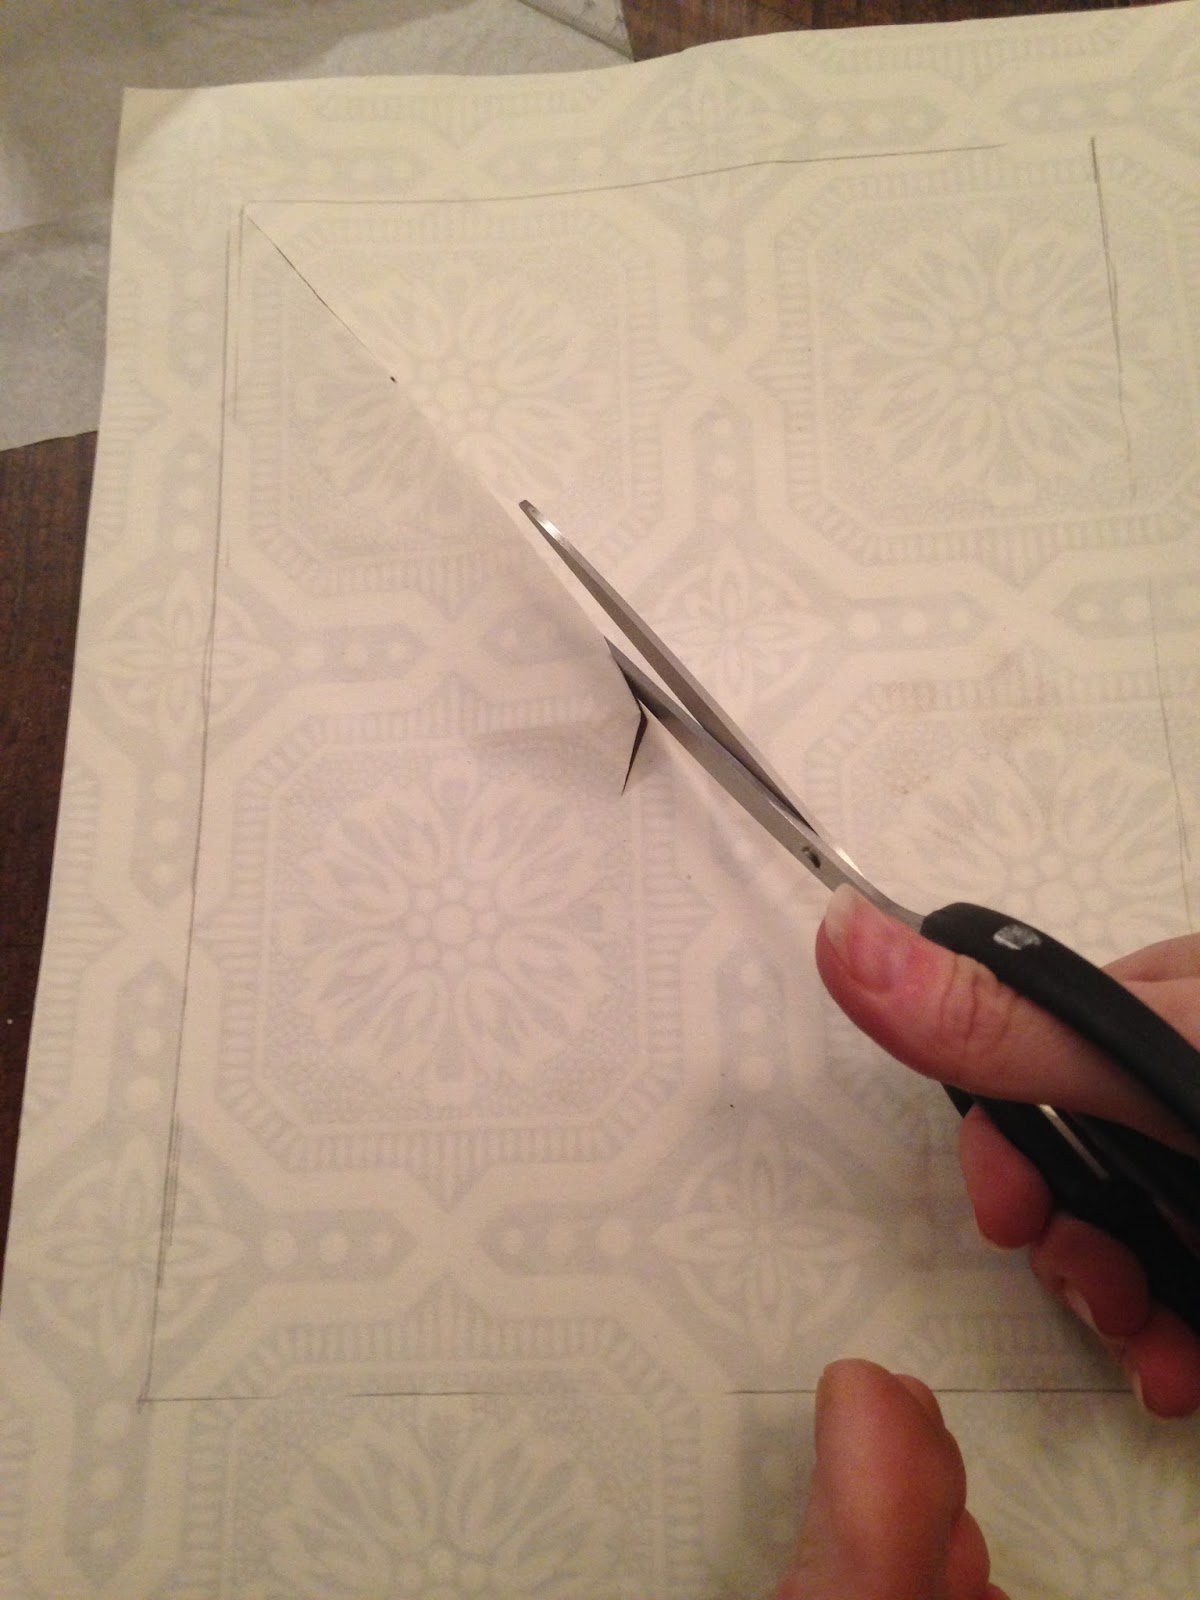
5.  Fold the towel in half with the "pocket" away from you.  This will ensure the "pocket" will remain on top once the folding is complete.


Back view of the towel after done folding.

 
Front of towel with "pocket" showing.


6.  Insert items into "pocket". 
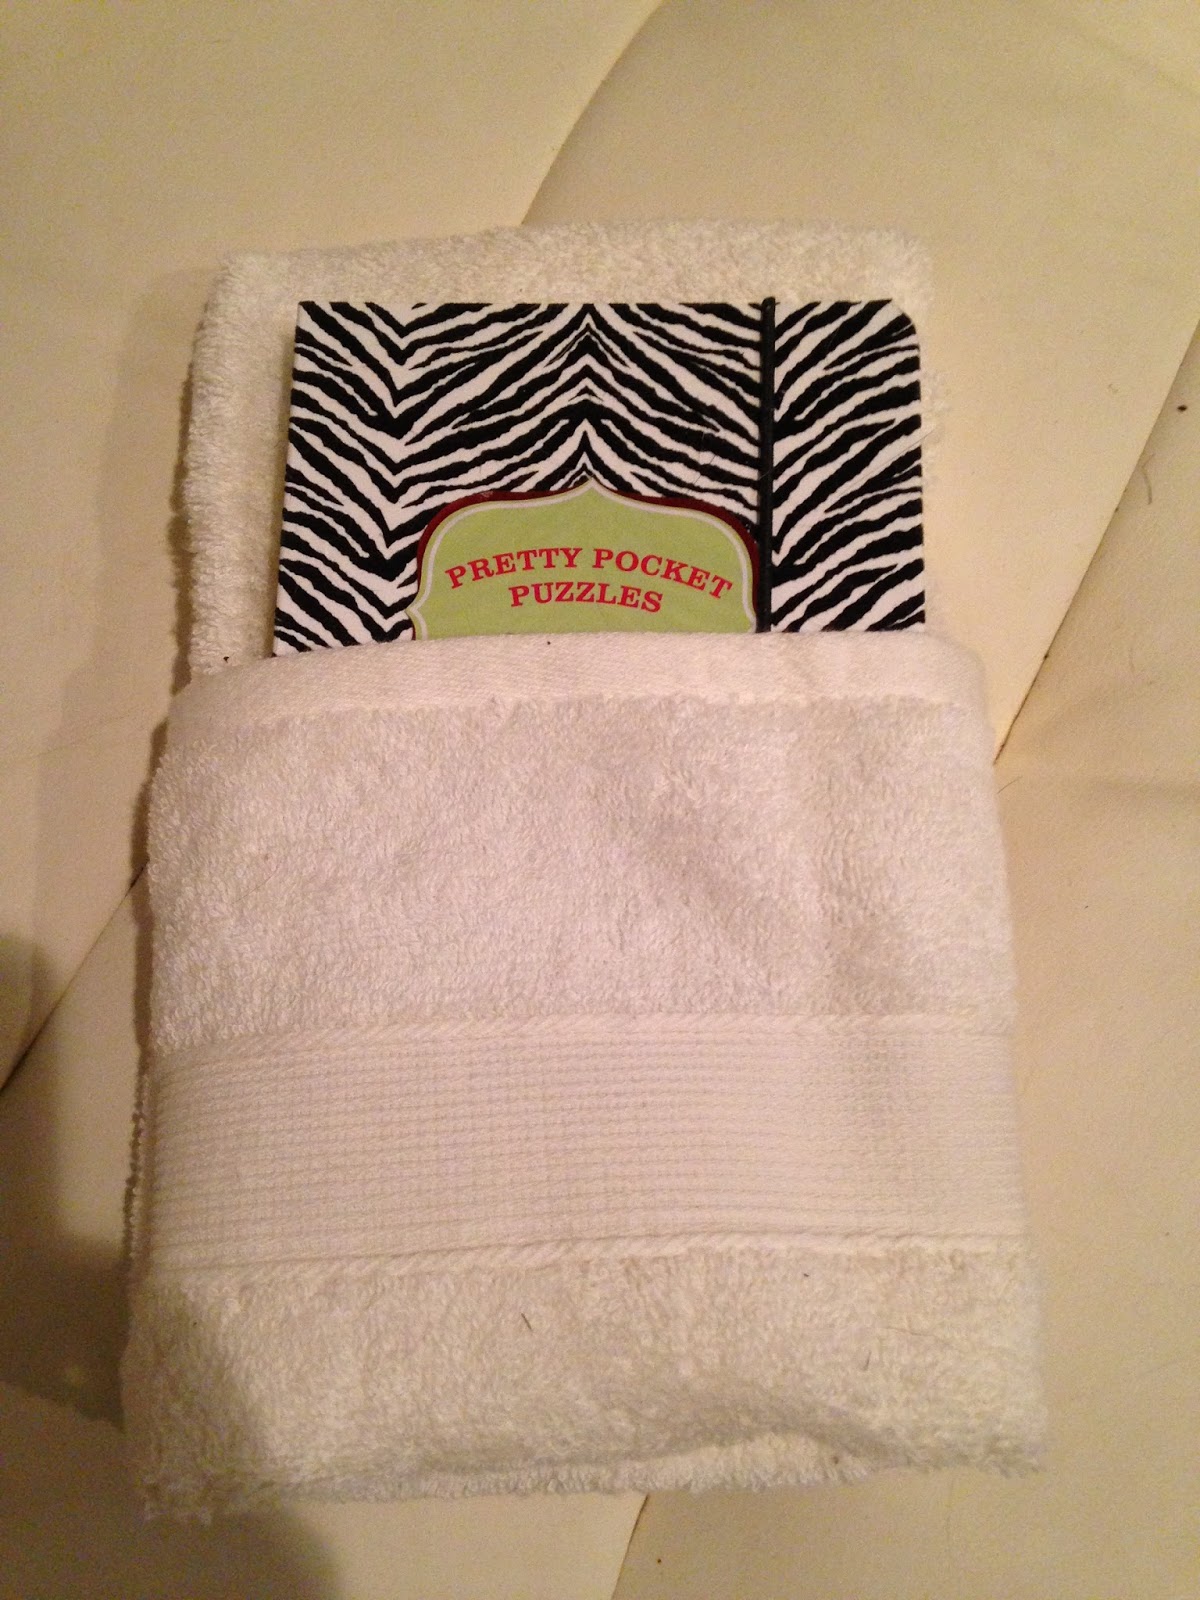
Isn't that cute?!?!


I put my towels on the guest bed.  (Although, for the pictures, I have it on the dresser so that it can be seen better.  Cream towels on a cream quilt don't stand out well in photos.)  This pretty much guarantees that the guest will see them and they will know they are there for their use.

Snacks

There are few things that I like less than being hungry when I am staying in someone's home.  Even when my host says that I may help myself freely to whatever they have in their cabinets, it makes me feel uncomfortable to actually go through those cabinets to find something to eat.  So, again, I have taken my example from hotel rooms and I create a snack basket for my guests which I place in the room. 

My basket got chewed by my dog before I took this picture, but you get the idea.  :-)

You can place anything that you want in this basket.  When in doubt, think of items that you have seen in food gift baskets.  Also, if you know them, think of the tastes of your guest.  If your guest is a vegetarian, they won't appreciate beef jerky in their basket but would probably love veggie chips.  Here are some "basics" that are, generally, safe to put in a snack basket:
        Bottled Water
        Flavor packets for the bottled water 
        Trail Mix  (Unless your guest is allergic to nuts.)
        Fresh Fruit (Such as apples, pears and bananas)
        Snack bars, such as granola bars or Rice Krispy squares
        Unpopped popcorn
You can make these baskets as elaborate or as simple as you would like.  Either way, even if they are not used, they will be appreciated by your guest.

Amenities

This may be my favorite part of getting ready for a guest -   preparing the amenities.  These are the items that are, frequently, forgotten by your guest and make their lives easier if they are provided for by you. I like to keep an amenities box in the closet of the bathroom which I go through twice a year (If I haven't had any guests to use the items.) to make certain that all of the items are fresh and appropriate for a guest use.  I like to get travel size versions of these items, that way my guest can feel free to take them home once they have used them.  Because they are in a box, I can easily take them out and they are ready for my guests to use without too much fuss and worry.

Below the toothbrush and other items is a box containing mini sample bottles of perfume and cologne.

Amenities I like to include are:
        Toothbrush
        Toothpaste
        Mouthwash
        Dental Floss
        Deodorant
        Contact Solution
        Contact Case
        Face Soap
        Face Toner
        Body Wash
        Shampoo
        Conditioner
        Shower Cap
        Bath Fizzies or Bath Salts (I make these myself and will give instructions how in another post.)
        Hair Spray
        Lotion
I even like to save trial size bottles of perfume/cologne that I receive as samples when I buy perfume and save them in a little box for my guests so that they may use them if they so choose.

  Entertainment Options

Ideally, you and your guest will spend most of your time together and that will be the main bulk of entertaining your guest.  However, at bed time, I know that I need to relax in bed before I ever go to sleep and I like to give my guests this option as well.
The type of entertainment that you provide for your guest depends entirely on your budget.  I have an old television in my guest bedroom.   This television used to be in the living room, but  was replaced due to the fact that my husband received a larger one as a gift.  I also have a VCR and a Play Station that plays dvds and video games.  All of these are items that my husband and I used to use on our living room but got replaced by newer versions when these items became obsolete.   They still worked perfectly well so I put them in the guest room.  In the dresser drawers underneath them I have placed movies and games that work with these systems.
If you don't have a television, you could put a book that you think your guest might enjoy on the night stand. Although, if it is a novel, do not expect it back as they may want to keep it so they may finish what they are reading.
Or you could do a relaxation coloring book with crayons or colored pencils.
Or a crossword puzzle.
Some other items you can put in the room to help entertain your guest are:
        A Deck of Cards
        The password to your Wi-Fi. (As most people now have smart phones or tablets.)
        Puzzles (Nothing too elaborate these could be mind puzzles or jigsaw puzzles.)
        Magazines  (This is a great use of last month's magazines.)
        Book of Quotations or Fun Facts


This book cracks me up.  It is called: The Natural Inferiority of Women-Outrageous Pronouncements by Misguided Males.  I often leave it on the night stand for my female guests to enjoy.


Extra Blankets

This one I don't feel I need to dwell on too much.
Keep an extra blanket at the foot of the bed, in the guest closet or in a drawer where guests know where to find it. Remember, what is comfortable to you, may be freezing cold for your guest.
It also doesn't hurt to have extra pillows in the closet.  If you can, make certain your pillows are a mixture of feather and foam.  That way your guest should be able to find a pillow that suits their likes.

Small Personal Touches

This one is totally up to you and is based on your knowledge of your guest.  My guest that I was preparing for is a baker.  She loves to bake elaborate cup cakes, cakes, macaroons, and other sweet desserts.
To give her some "personal" touches in her guest room, I put in a candle for her to light that smells like birthday cake.

Don't forget to give them something to light the candle with if you put a candle in the room.

I also know that she loves to take long baths.  So I put some bath fizzies in her room that were in the shape of cupcakes.  These fizzies were actually a gift to me from a dear friend, but I knew he wouldn't mind if I shared them, because he was also friends with my guest.
These were not expensive items, but they let my guest know that I was thinking about her when I was preparing the room.  You should do the same for your guest.

Finally, you should always write a welcome note to your guest.  This note should let them know that the snacks and amenities are there for them.  If you have a television and other electrical equipment in the room, you should also inform them how to access these items and give them any necessary instructions they may need.  (Such as television must be on channel 4 or in video mode, etc.)  You should also let them know that, if they should need anything you have not thought of, to let you know. 

Well, this is the end of this post.  I was going to start another two week menu this week, but I think I will postpone that until life gets to be a little more normal in Baton Rouge.  I will think about what may be a useful post to my friends that are currently waiting to get back into their houses and reclaim their lives out from under the water.  To those of my readers who live in Baton Rouge, please stay safe.
-- The Frugal Femme


Wednesday, July 27, 2016

Part II: The Guest Room Needs Some Help!

Hello Everyone!
We are going to continue on with decorating the guest bedroom.  In my previous post I had solved the problem for one wall – the wall above the bed – but I had not solved the problem for the wall directly across from the bed.  And I had decided with a travel poster theme for the art so, whatever I did had to stay in that theme.  Again, I had a budget of $0.00 and, again, I went into my craft room to see what scraps and remnants that I could dig up from previous projects.
I'm in love with this travel poster.  Notice the seagull with the wine glass. I also think I want that suit.
 
What I found were the leftover “travel stickers” that I had printed years ago for a hat box project.  I had printed way more of those than I needed.  But the remaining ones were still neat looking and I thought that I might be able to find another hat box and decorate it the same way so I had kept them.  I still have not found a hat box within my budget, but I did still have the “stickers” and I thought that I would use them to come up with an idea for the second wall.  For those of you who do not have stickers already printed, you can buy them.  But you can also get them online for free, if you have access to a color printer.  I just went to Google, Images, and typed in Travel Stickers and a plethora of options came up.  Quite a few of them you do have to pay for, but there are complimentary ones out there, so just keep looking until you find them.
I had the stickers, now I had to figure out how I would use them.  I thought of doing a collage and plastering them all over a large piece of canvas that I had, but that looked too jumbled to me.  So I kept digging.  Eventually, I came up with some foam board that I was planning to use on a project - that ended up not working for that project- that I had stashed way for another day.  I had two un-opened packs of four so I had plenty to use.  I also found 6 small stretched canvases that were about the size of postcards.  It was then that inspiration struck!  I decided that I would make a vintage looking “suitcase” out of the foam board and I would use the canvas as “shadow boxes” for some of the small travel posters that I had printed along with the travel stickers.

How I made a “Vintage Suitcase” out of Foam Board and Scraps

I used these suitcase as my inspiration for my "suitcase".
 
First, I had to decide what I wanted my suitcase to look like, so I did some research online.  I decided that I wanted it to be cream with leather straps.  I had the body of the suitcase – that I was going to make out the foam board – but I had to come up with “leather” corners, straps and hinges.  I still had scraps left over from the wall paper that I had used for the previous project.  (The white wall paper that was embossed to look like a tin ceiling.) To see this project in its entirety go click:  http://frugalfemmecarole.blogspot.com/2016/07/part-i-guest-room-needs-some-help.html
I decide that, if I used the flat side, it would be nice and flexible like leather and I could paint it brown.  I thought about making the straps of the same material, but decided that, to look realistic, I needed something smaller.  So, I had some Christmas wrapping paper from last Christmas that was nice and thick that had foil reindeers on one side but looked like a brown paper back on the other.  I thought this would make perfect straps!  To make the metal grommets that would keep the leather attached to the suitcase I thought of buttons at first.  But then I thought, foam board, use thumb tacks!  And VOILA I now had everything that I needed to make a “vintage suitcase” wall art piece.
 
Materials
Foam board
Wall paper scraps
Wrapping Paper or Brown Paper Bag
20 plain thumb tacks
Cardboard
Brown Paint (I used acrylic in Burnt Umber)
Cream/Tan Paint (I used acrylic and did Metallic taupe)
Scissors
Ruler
Glue  (Spray glue is good but a glue stick or Elmer’s Glue would work)
Duct Tape
Twine
 
Instructions
1.       Glue two of the foam boards together and let dry.  (I used clothes pins on the corners to clamp them together, but you can also put them somewhere flat and put something heavy on them.


I had Elmer's Foam Board Multi-Pack in 14 in. x 11in.  But you can use any size that you would like.

2.  Once the glue is dry, paint the foam boards your primary color.  In my case, this was Metallic Taupe.  I did not have a large enough paintbrush to make the effect that I liked, so I actually applied the paint with a wadded up paper towel.  Let the paint dry enough to handle and paint the sides of the boards.
3.  While your paint is drying, you can make your “leather” corners, straps and hinges.  I made the corners first, but which ones you do first really does not matter.  As I have told you in another post, I do not like to measure things.  So, to make the leather corners, I took a corner of my wallpaper and laid it over the corner of my foam board and eyeballed how much of the corner I wanted to cover.  I then drew a straight line to make a triangle and, using my scissors cut one of my corners.  I then used this triangle as a template for my other three corners. Paint all the corners burnt umber.
 
I used the flat side of the wallpaper.  You can see the shadow of the pattern on the white in the background.

To make the “hinges” I decided to go for an oval shape rather than the slightly figure eight shape you see on some luggage.  To get this shape, I traced around the bottom of my Elmer’s Glue bottle onto another scrap of wallpaper. The bottle was the exact shape and size I wanted.  After tracing, cut them out.  I painted all of my wallpaper triangles and hinges with the burnt umber acrylic paint.
 
I'm lazy when it comes to things like this.  If I can trace, I will. This is a full sized bottle of glue, not a mini size.
 
 
This is what the "hinges looked like before I cut them out and painted them.

For the straps, I laid my “hinges” over my wrapping paper to determine how wide I wanted my straps to be.  Fortunately for me, because it was wrapping paper, the side that I wanted to use had straight lines going down the paper. 
 
Backside of my wrapping paper.


Front Side of wrapping paper.
 
I had trouble seeing the lines when I started cutting the paper, so I traced along the line that I wanted to cut along to make it easier to see.
 
So all I had to determine was how many lines thick I wanted it to be and then cut with my scissors in as straight a line as possible. (I actually have a scrapbooking cutter that does straight lines for you, but, I thought, more people would have scissors and so that is what I used.)  Once the strips are cut, paint them with the brown umber acrylic paint. 
 
My paper strap painted brown to look like a leather strap.
 
(Again, I know I am not giving measurements, but this was not a precise project.  You can make your straps and hinges as big or as little as you want depending on the size of your foam board.)
Allow the paint to dry until you can handle the cut pieces without having paint stick on to your hands.
4.  Once everything is dry, start piecing together your suitcase.  Glue each of the triangles to a corner of the foam board.  Push three thumb tacks into the bottom of the triangle, as If you are pushing in your grommets.  Try to push down so the “leather” kind of dents around the thumbtack.  This will make it look more like leather.  Also, don’t worry if your triangle wrinkles a little.  This also makes it look more real.  Do this step for all of the triangles.
Here you can see how the metallic taupe paint looks on the board.  At this stage, it still looks nothing like a suitcase.

5.  Paint the sides of the corners of the foam board by the corners so that it looks like the “leather” goes over the sides of the “suitcase”.  Let the paint dry enough that you can start handling the board again without getting paint all over yourself.
6.  Glue the back of the “leather” straps and place them on the “suitcase”.  Again, where the straps are placed depends all on the type of vintage suitcase you want to make.  I wanted one where the leather straps go down each side and buckle in the front, but you may have something different in mind.  Make sure the straps are long enough so that that then can go around to the back of the “suitcase”.  This makes the straps look as if they are going over the top of the “suitcase”.   Let the straps dry.  (Spray adhesive is good for this because there is almost no drying time.)
 
I spray glued the strip to hold it to the board. But on the back side of the board, I also used duct tape to secure it.  I did not worry about making the back of the project look pretty.

7.  Once the straps are dry figure out where you want your “hinges” to be.  Again, this is all up to you.  Just make certain that, if there are two straps, the hinges line up with one another.  Glue the hinges on to the case over the straps.
 
It was at this point I thought: "This might not work.  This is still looking a little cheesy and nothing like a vintage suitcase."


8.  Let the glue dry for a few minutes, until it gets tacky and then add a thumbtack on the side of each “hinge”, to the side of the straps.
 
What a difference thumbtacks make!  This looks more like a suitcase.

9.  You should now have something that looks like a vintage suitcase without the handle.  This is where the fun part starts and you can start putting on your vintage travel stickers.  This truly is the most creative part of the project, so it truly is up to what type of stickers you have and where you want them to be.   Glue the stickers on to the “suitcase”.
 
At this point, I am starting to finally like this project and feel that it may turn out alright.
 
                 10.  I looked to see I had any old cabinet handles that I was no longer using that looked
                 like suitcase handles.  I did not.  So I decided to draw the handle onto cardboard.  Any
                 type of card board will do.
                 If you don’t have cardboard, you can use one of the leftover foam boards in your pack
                 of four.  I wanted to save mine for later projects, so I went with cardboard.  Again, the
                 type of handle that is drawn is dependent on the type of suitcase you chose.  Once
                 the handle is drawn, cut around it with scissors and glue to the back of the “suitcase” on
                 the top of “suitcase”.  If you are worried that glue won’t hold, use duct tape.

I used cardboard from an old shoe box. 
 
This is the back of the "suitcase".  I used duct tape to secure anything that I felt my glue might not be powerful enough to hold together.

                 11.  To hang the piece, simply attach string and hang to the wall in your normal fashion.

I cut a piece of twine about six inches long and knotted both ends.  I then put duct tape right over the knots to hold the twine in place.

 
 The final project should look something like this:
You can kind of see it in the picture, but because I used the wallpaper and it was a three dimensional wall paper, it caused my "leather" bits to have depth and make my "suitcase" look more genuine.

The “shadow boxes” with the mini travel posters were much easier.  I just painted the canvas and waited for it to dry.  Then I sprayed some glue on the back of one of the mini posters and centered it onto the canvas.  Done!  Instant art.  You can use Mod-Podge over it if you want to make it last longer, but I thought I might be reusing the canvas so I decided not to seal it.  I will show you those pictures when I show you the final project.
 
Again, I am not going to show the room pictures until after I am done. I still have a few more things up my sleeve to get ready for my guest

Tuesday, July 26, 2016

Part I: The Guest Room Needs Some Help!


Hello Everyone!
I am so sorry that it has been so long since I have made a post, but life has most definitely gotten in the way.  I was all set to start blogging again in July, after finishing a month long commitment to the theatre where I work, when all the awfulness began to happen in Baton Rouge.  I do not want to get political on my blog, that is not what this blog is for, but I will say that it felt frivolous to post about living a luxury lifestyle on a budget when people around me were violently dying.  Plus, with all the unrest going on around me, literally a block from my house, I didn't FEEL like writing about anything.  But, after weeks of debating with myself, I have decided that people NEED to have something in their lives right now that isn't political and I am back up and ready to blog.

Make yourselves a martini and get ready to live inexpensively yet luxuriously again.


I think, for the rest of this month, I am going to focus on hospitality and the art of graciously hosting a guest.  I will be sharing decorating tips as well as little tricks of the trade that I have learned from working for hotels for over a decade of my life that will make a guest feel as if they are staying in the lap of luxury when visiting your home.

Welcome!

The inspiration for this post began with - I have a house guest coming and staying for the week-end and I realized that the guest room could use a little more attention.  I have clean linens and a private space for her, but the room is rather drab and has very little character.  With only 4 days and no money, literally, I felt the urge to spruce up the guest bedroom. So with NOTHING in the budget to decorate the guest room, I proceeded to dig around the house to see what I had that might be able to be transformed into something else and change my drab guest room to something more appealing.
The first thing I found were four picture frames that had originally held pictures that I had up in the guest room in the apartment we lived in before my husband and I bought our house.  (The one that we bought two years ago and are still renovating.) The pictures were nice, but they no longer matched the decorating feel that I wanted to have in the guest room.  (If you don't have frames, these were ones that I purchased at Michael's during their buy one get one, so all four frames cost me about $20.00)


These were the original pictures.  They are nice, but they have a more Asian feel than I wanted this time around in the guest room.


So, as I so often do when I need ideas and stuff, I started cleaning up my craft room.  (Which can very quickly turn into the junk room and becomes the receptacle for all the items we may use again.)  While going through my items of things that I have kept to use for a rainy day, I came across these calendars:


Yes, I admit it.  If I really like a calendar, I will keep it.  But I have used them for decoration more than once, so its not as Hoarders as it sounds.
   
 
 Eureka!  Travel pictures in a guest bedroom seemed pretty darn perfect to me.  Plus, I already had a hat box in the room that holds my vintage hats that I had painted black and then plastered with travel "stamps". 


I did this years ago as, in my mind, I thought that's what a vintage hat box would look like. Now I used it as part of the inspiration to decorate the guest room.

Ah hah!  Now we're getting somewhere.  We're starting to get a theme.
Still having a budget of $0.00, I had to come up with matting for my "art" - because the matting that was good for the original pictures was not going to work for my calendar pictures.  Again I looked around and found the solution. I had some wall paper that I had purchased forever ago that was embossed like a tin ceiling. I had used this to turn glass windows in an entertainment system into tin windows so that we could hide all the unattractive electronics in the cabinet.  After the project, I still had plenty left over. (I found this paper in Lowes many moons ago and it cost me about $5.00 then.) Perfect!  With a ruler and a pair of scissors I could turn this into the perfect "matting". 
I briefly toyed with the thought of painting the"matting" but I soon decided that simpler was better, not to mention faster.
Now having all of my supplies I started to get to work.
First, let me say, I do not like measuring things.  I am the queen of eyeballing - which is why my husband hangs almost everything in our house.  And this project was no different. A good craftsman would have measured everything and then laid them out perfectly.  I am a lazy craftsman and did it this way:
1.  Pull your pages that you wish to use out of the calendar.
2.  Cut around the pictures leaving about one inch around the area of the picture that you wish to have seen.  This inch will hold your art in place.  I will explain more later.
1.  Unroll the wall paper onto a large, flat, clear surface.  For me, this was the floor.
2.  Take the glass and backing out of the frame and line the backing onto the wall paper so that all of your edges are straight.  Using a pencil, trace around the backing.   Then cut along the lines you just drafted with a pair of scissors.  You should now having "matting" that will fit perfectly inside of your frame.
3. Put a piece of tissue paper over the art that you chose.  Using a ruler, trace along the lines of the picture that you want showing from your matte.  In my case, I wanted the poster itself and the outline around the poster.


4.  Cut out the tissue paper.  Place your "measured" tissue paper on the back side of your wall paper.  Line up the edges until everything looks good.  Then, using a ruler, trace around your tissue paper.


5.  Pick up the wall paper and bend it slightly in half.  Using a pair of scissors, snip the middle of the paper and cut in a diagonal until you reach the corner of the inside of your matte.  Continuing cutting the inside of your matte until you have created a "frame" for your art.


6.  Put a piece of tape, sticky side up, on the cut out calendar art.  Carefully place your matte frame over the calendar art and line up.  When everything is lined the way you want it, press down on the tape.  Continue doing this for all four sides.
7. Put your backing and matte into the frame.  Place the glass onto the frame and snap back into place.
I love the texture that I get from using the wall paper.  This is a close up of  the calendar page behind glass.

VOILA! Instant art.

I genuinely love the way that these turned out.  Eventually, I want to get, or create, all original art, but this will do until I have the time or the money to do that.

I am not going to show you how they look in the guest room right now. I am going to wait and do a whole reveal thing near the end of the week.
Tomorrow, we continue preparing for a guest......