
I am so sorry that it has been so long since I have made a post, but life has most definitely gotten in the way. I was all set to start blogging again in July, after finishing a month long commitment to the theatre where I work, when all the awfulness began to happen in Baton Rouge. I do not want to get political on my blog, that is not what this blog is for, but I will say that it felt frivolous to post about living a luxury lifestyle on a budget when people around me were violently dying. Plus, with all the unrest going on around me, literally a block from my house, I didn't FEEL like writing about anything. But, after weeks of debating with myself, I have decided that people NEED to have something in their lives right now that isn't political and I am back up and ready to blog.
 |
| Make yourselves a martini and get ready to live inexpensively yet luxuriously again. |
I think, for the rest of this month, I am going to focus on hospitality and the art of graciously hosting a guest. I will be sharing decorating tips as well as little tricks of the trade that I have learned from working for hotels for over a decade of my life that will make a guest feel as if they are staying in the lap of luxury when visiting your home.
 |
| Welcome! |
The inspiration for this post began with - I have a house guest coming and staying for the week-end and I realized that the guest room could use a little more attention. I have clean linens and a private space for her, but the room is rather drab and has very little character. With only 4 days and no money, literally, I felt the urge to spruce up the guest bedroom. So with NOTHING in the budget to decorate the guest room, I proceeded to dig around the house to see what I had that might be able to be transformed into something else and change my drab guest room to something more appealing.
The first thing I found were four picture frames that had originally held pictures that I had up in the guest room in the apartment we lived in before my husband and I bought our house. (The one that we bought two years ago and are still renovating.) The pictures were nice, but they no longer matched the decorating feel that I wanted to have in the guest room. (If you don't have frames, these were ones that I purchased at Michael's during their buy one get one, so all four frames cost me about $20.00)
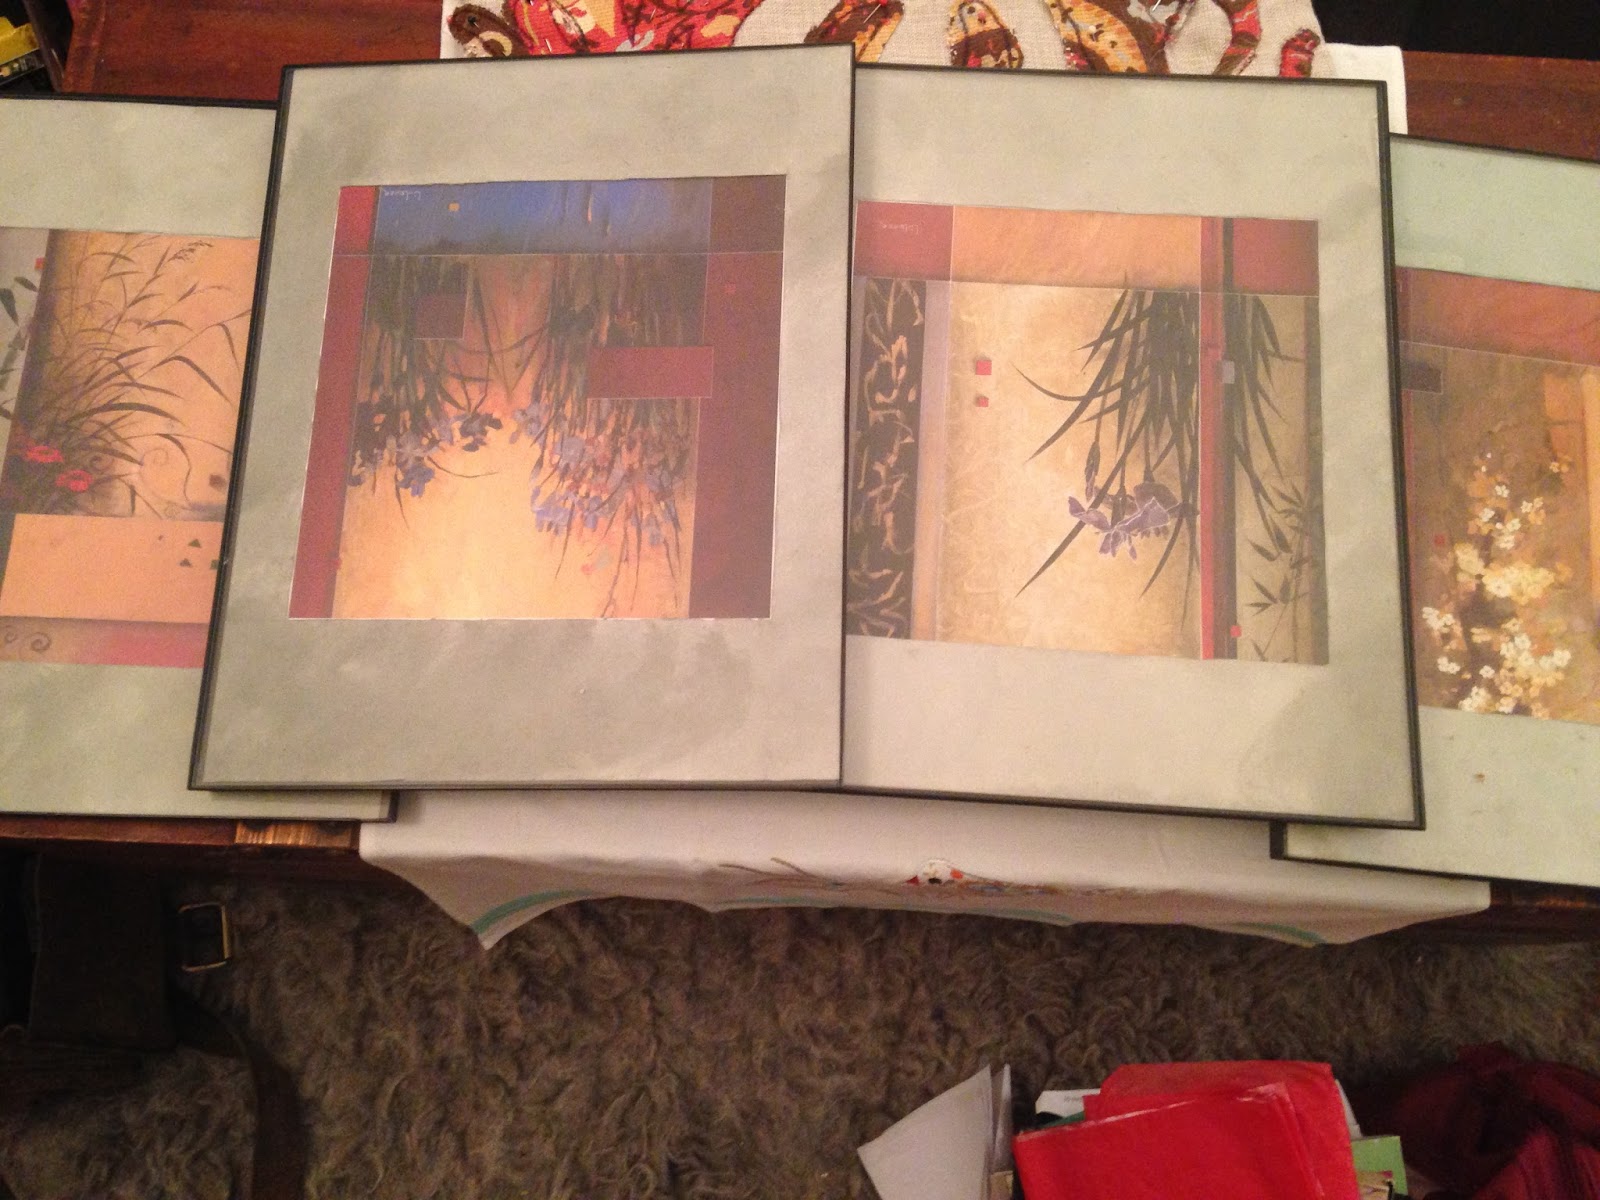 |
| These were the original pictures. They are nice, but they have a more Asian feel than I wanted this time around in the guest room. |
 |
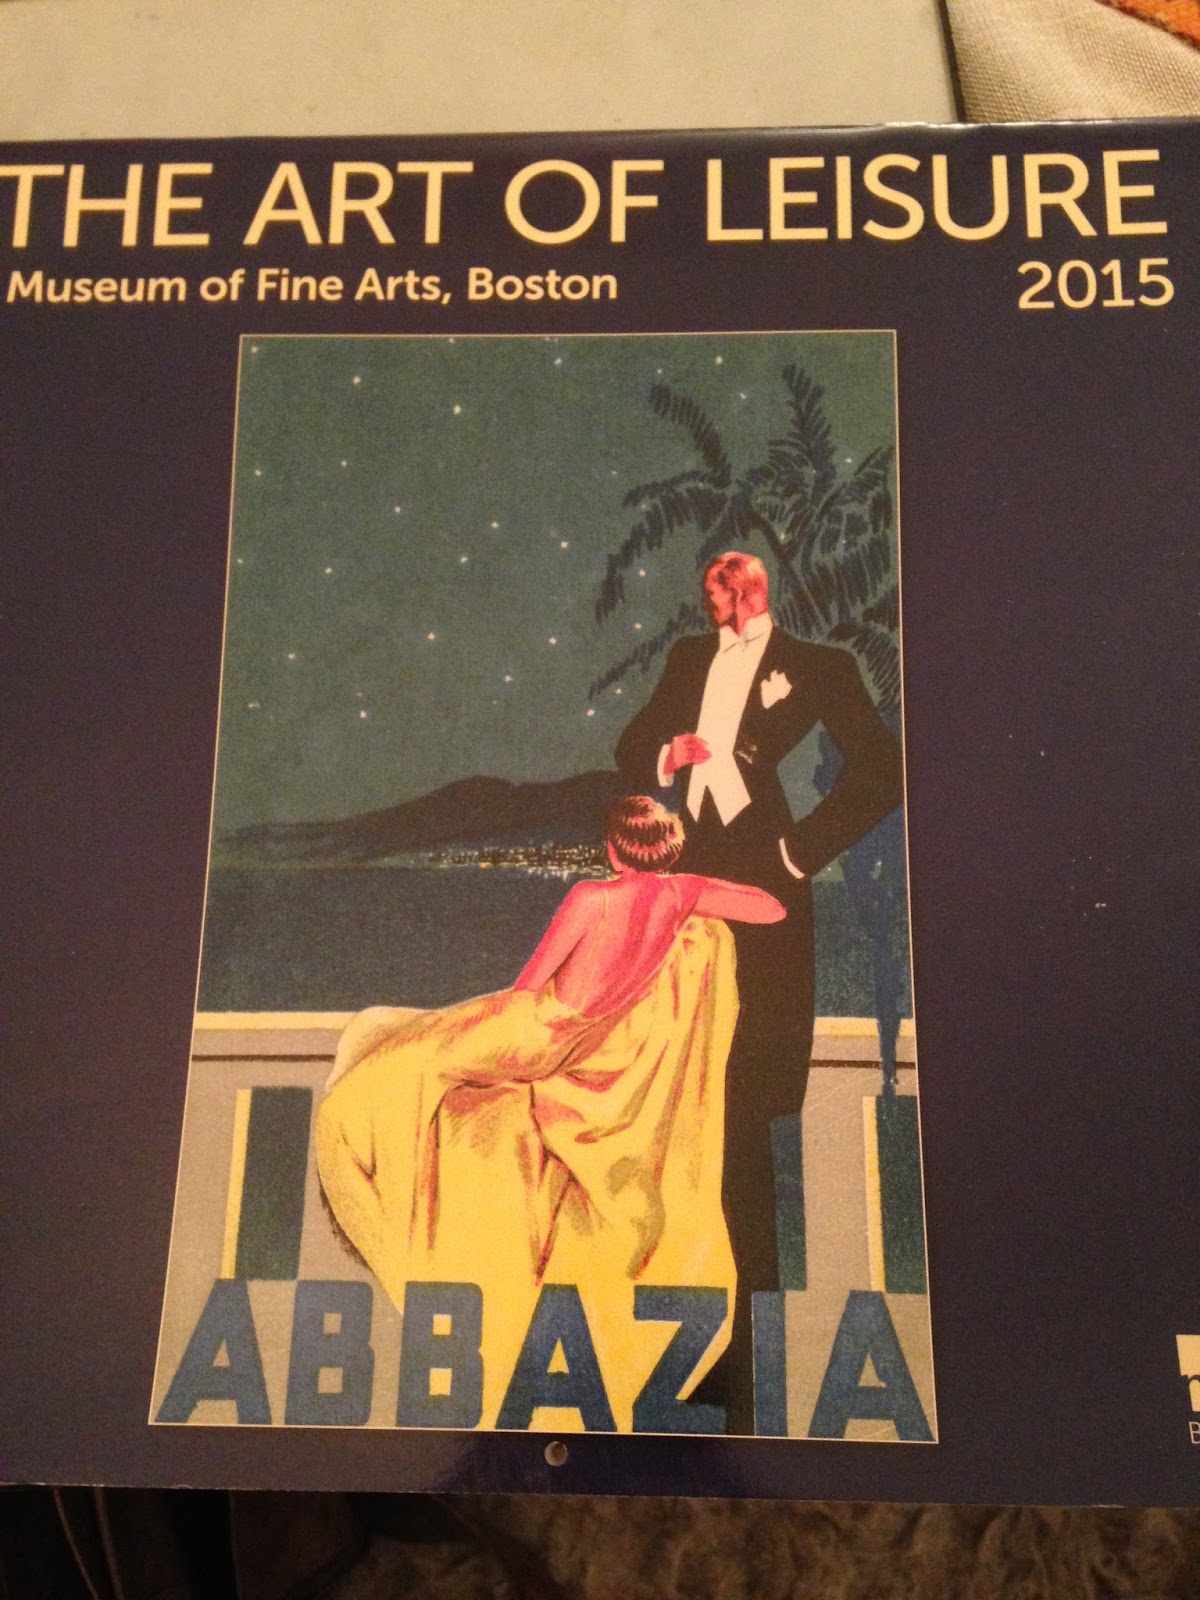
| Yes, I admit it. If I really like a calendar, I will keep it. But I have used them for decoration more than once, so its not as Hoarders as it sounds. |
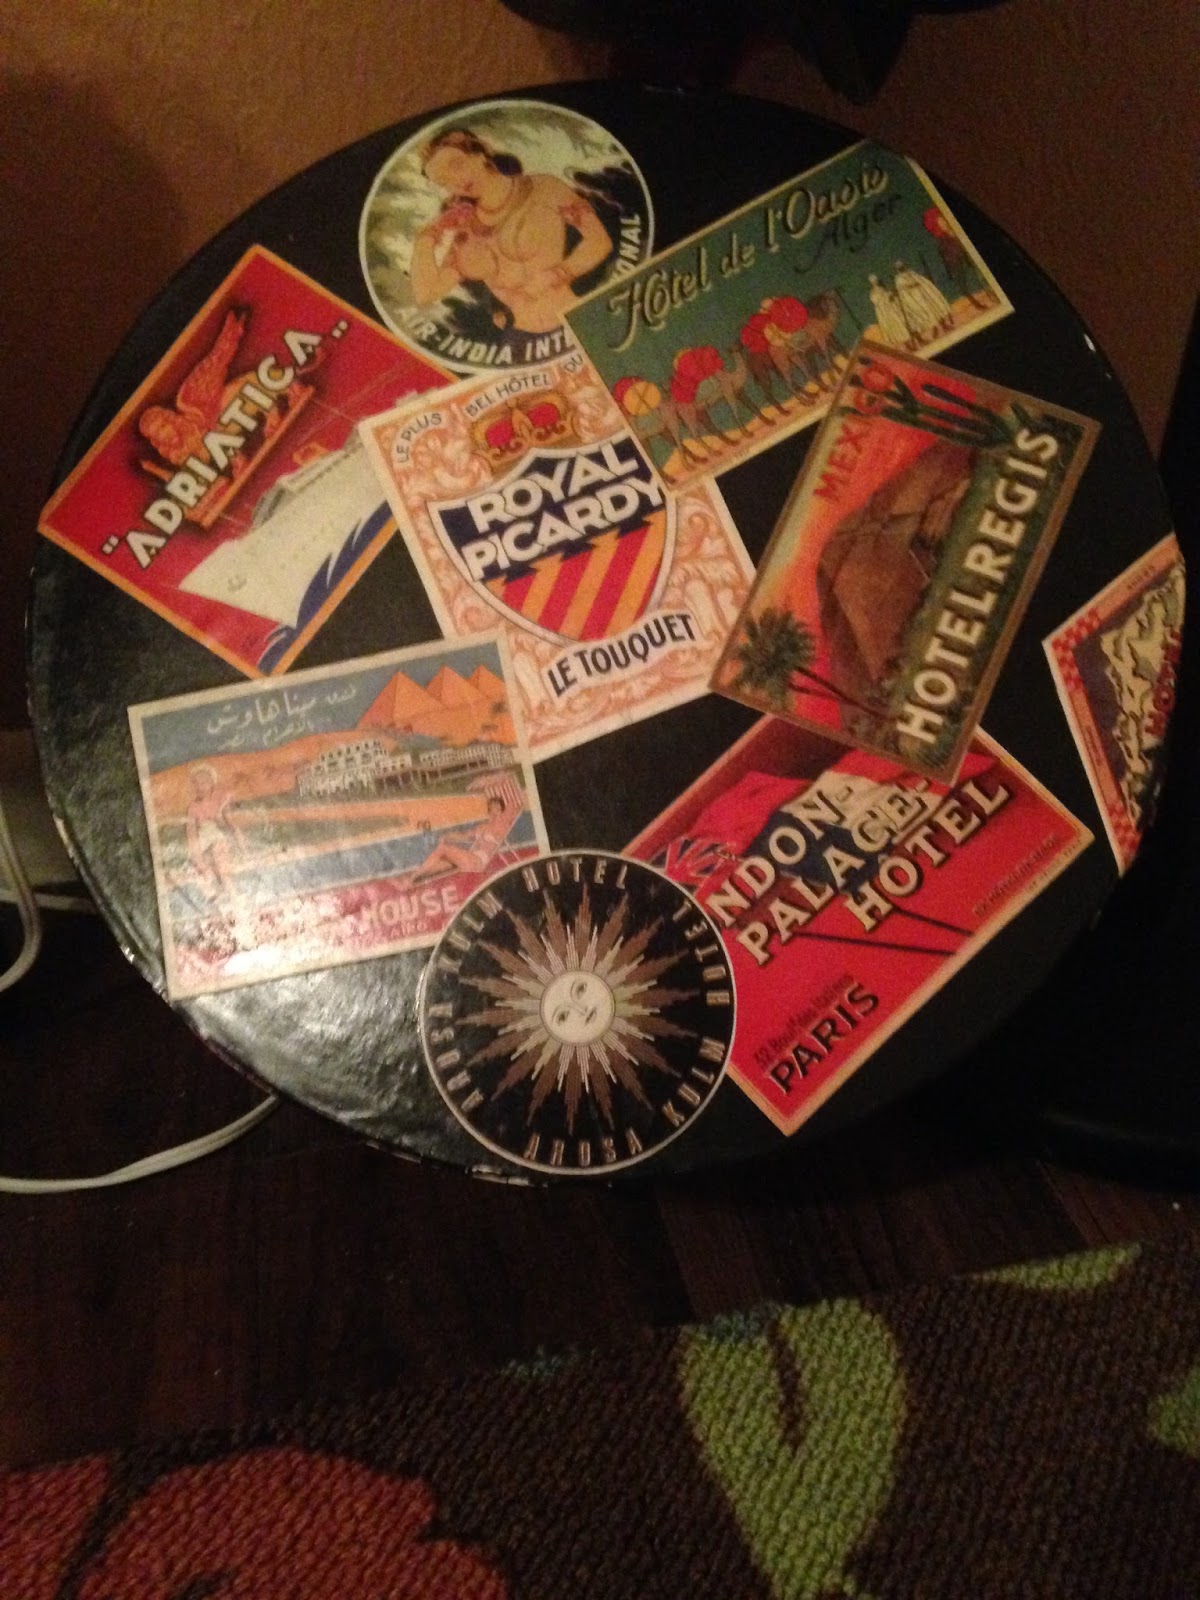 |
| I did this years ago as, in my mind, I thought that's what a vintage hat box would look like. Now I used it as part of the inspiration to decorate the guest room. |
Ah hah! Now we're getting somewhere. We're starting to get a theme.
Still having a budget of $0.00, I had to come up with matting for my "art" - because the matting that was good for the original pictures was not going to work for my calendar pictures. Again I looked around and found the solution. I had some wall paper that I had purchased forever ago that was embossed like a tin ceiling. I had used this to turn glass windows in an entertainment system into tin windows so that we could hide all the unattractive electronics in the cabinet. After the project, I still had plenty left over. (I found this paper in Lowes many moons ago and it cost me about $5.00 then.) Perfect! With a ruler and a pair of scissors I could turn this into the perfect "matting".
I briefly toyed with the thought of painting the"matting" but I soon decided that simpler was better, not to mention faster.
Now having all of my supplies I started to get to work.
First, let me say, I do not like measuring things. I am the queen of eyeballing - which is why my husband hangs almost everything in our house. And this project was no different. A good craftsman would have measured everything and then laid them out perfectly. I am a lazy craftsman and did it this way:
1. Pull your pages that you wish to use out of the calendar.
2. Cut around the pictures leaving about one inch around the area of the picture that you wish to have seen. This inch will hold your art in place. I will explain more later.
1. Unroll the wall paper onto a large, flat, clear surface. For me, this was the floor.
2. Take the glass and backing out of the frame and line the backing onto the wall paper so that all of your edges are straight. Using a pencil, trace around the backing. Then cut along the lines you just drafted with a pair of scissors. You should now having "matting" that will fit perfectly inside of your frame.
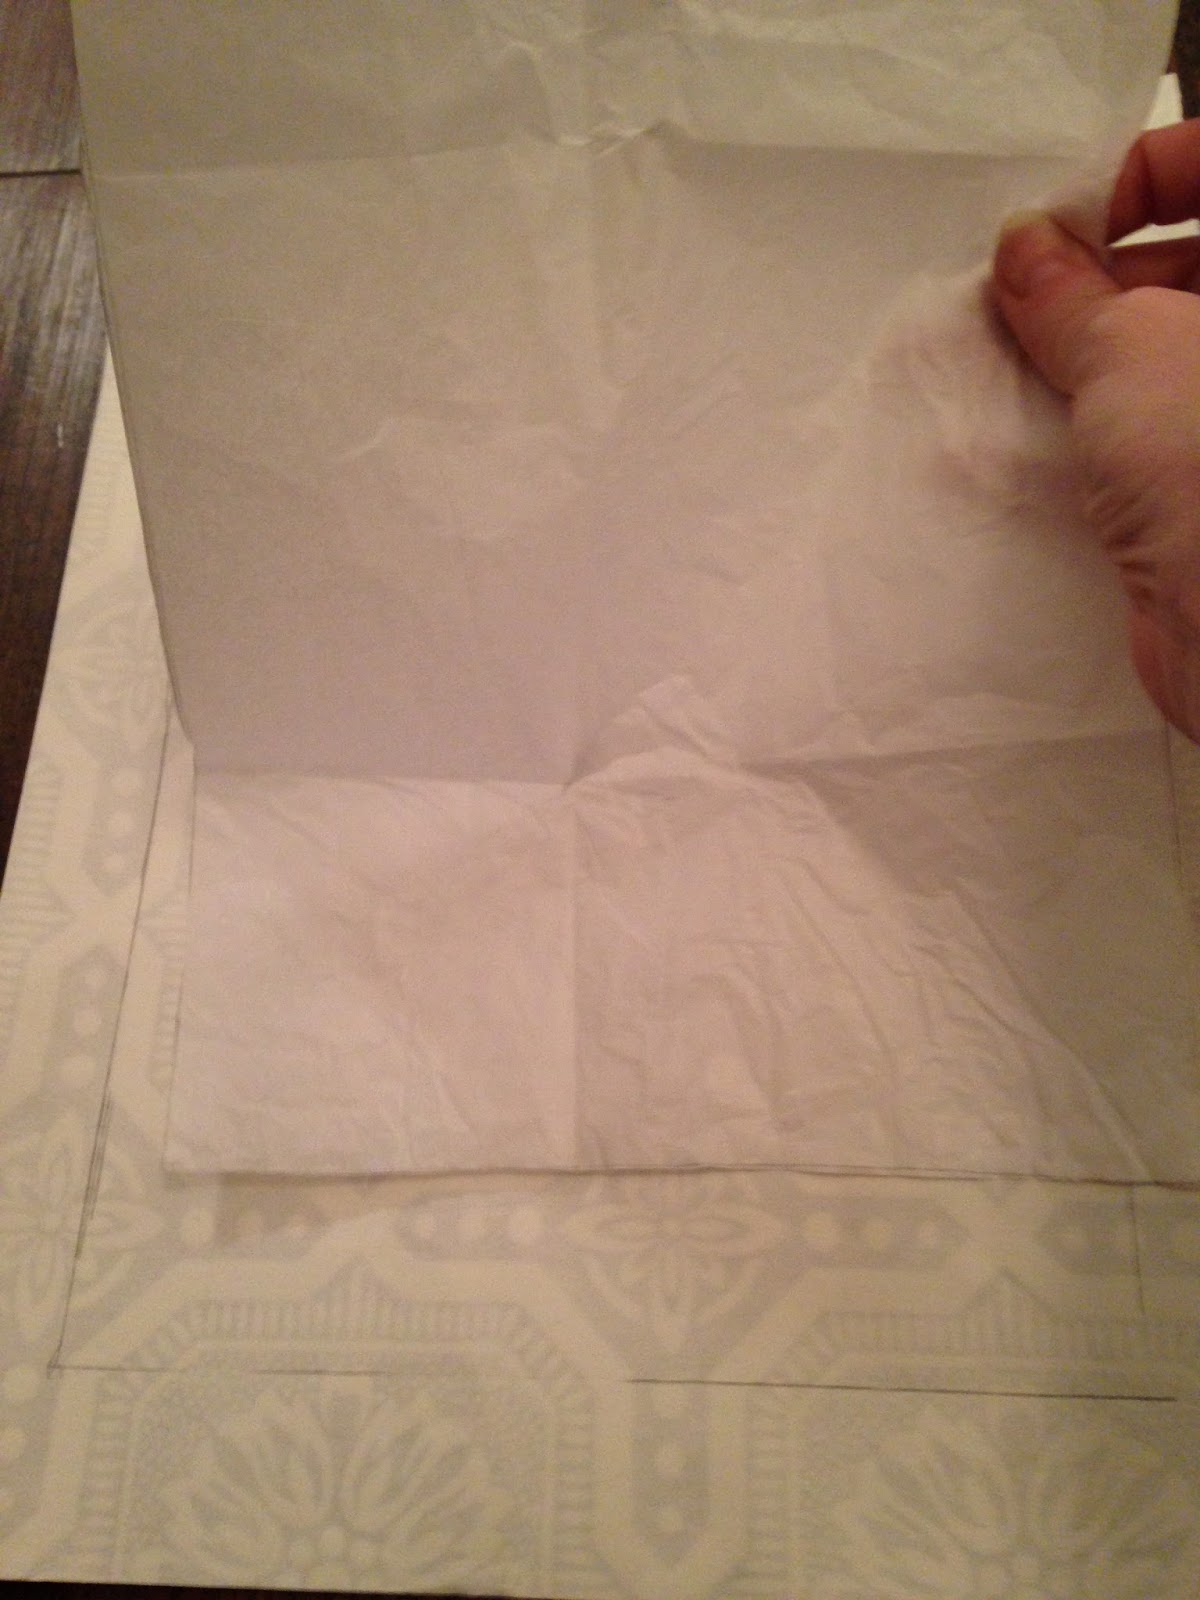
3. Put a piece of tissue paper over the art that you chose. Using a ruler, trace along the lines of the picture that you want showing from your matte. In my case, I wanted the poster itself and the outline around the poster.
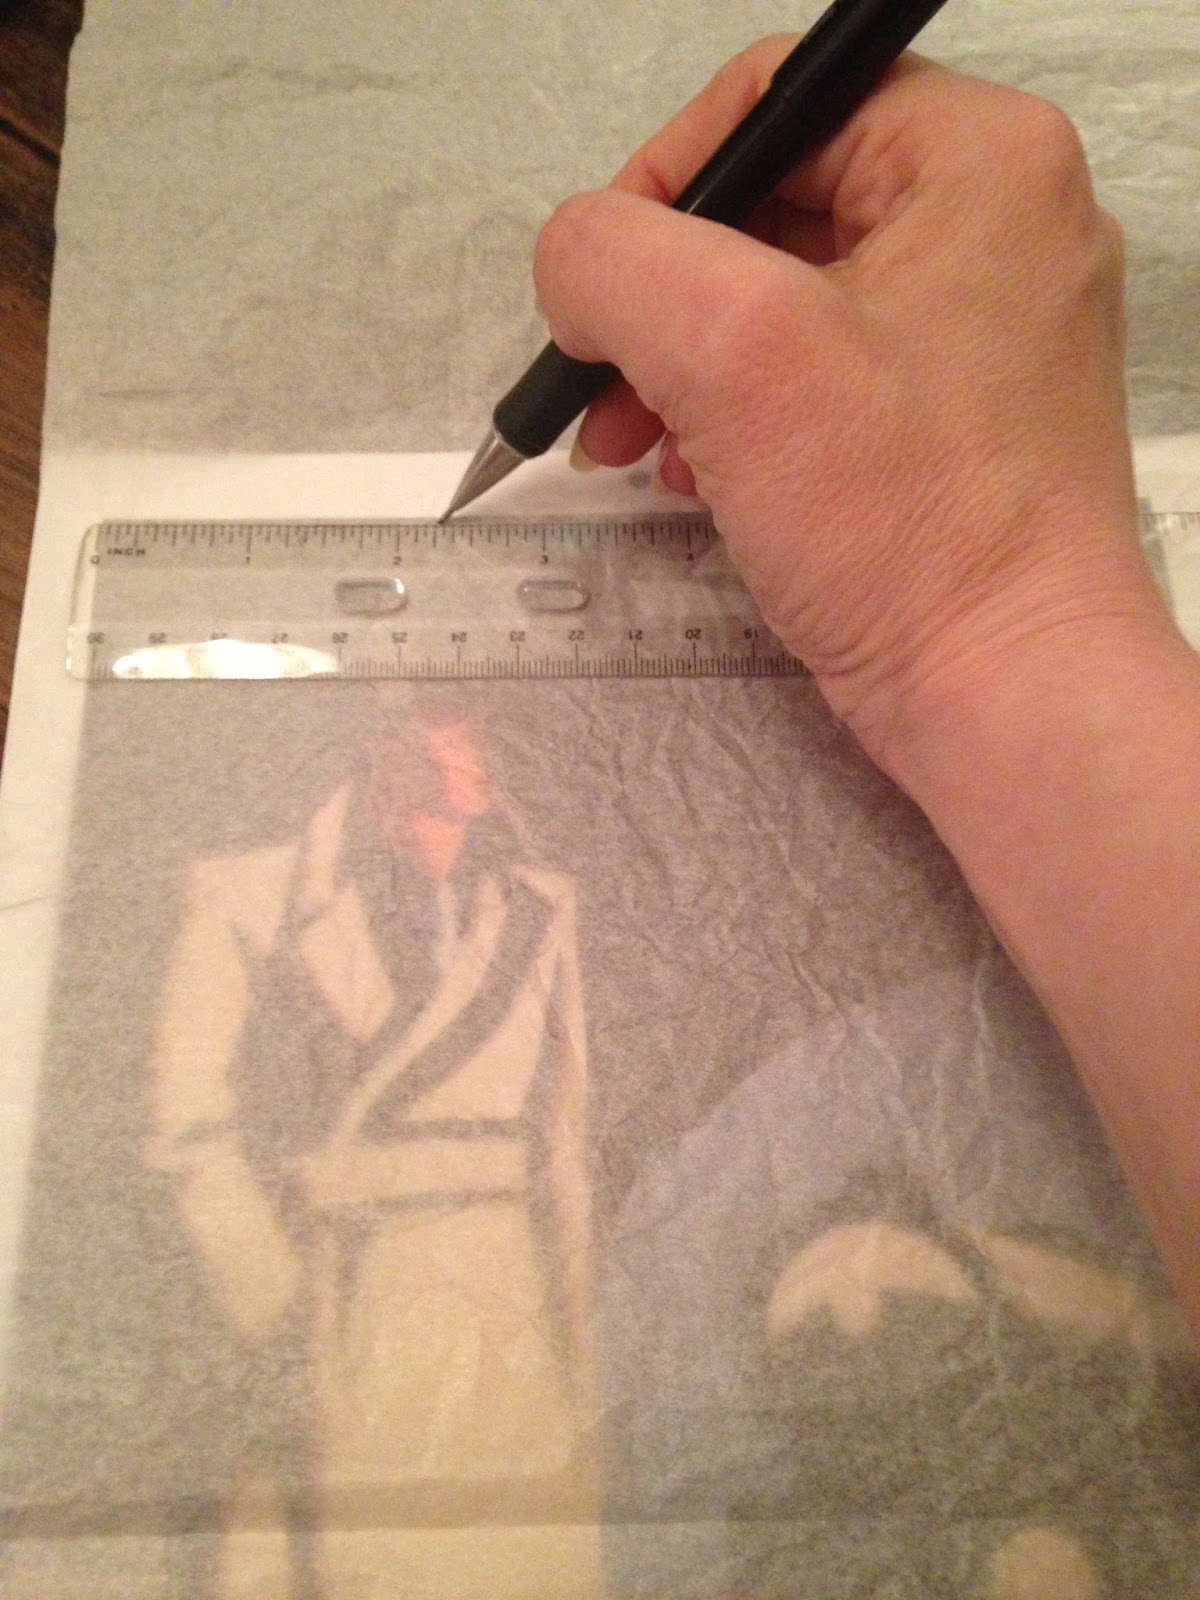
4. Cut out the tissue paper. Place your "measured" tissue paper on the back side of your wall paper. Line up the edges until everything looks good. Then, using a ruler, trace around your tissue paper.

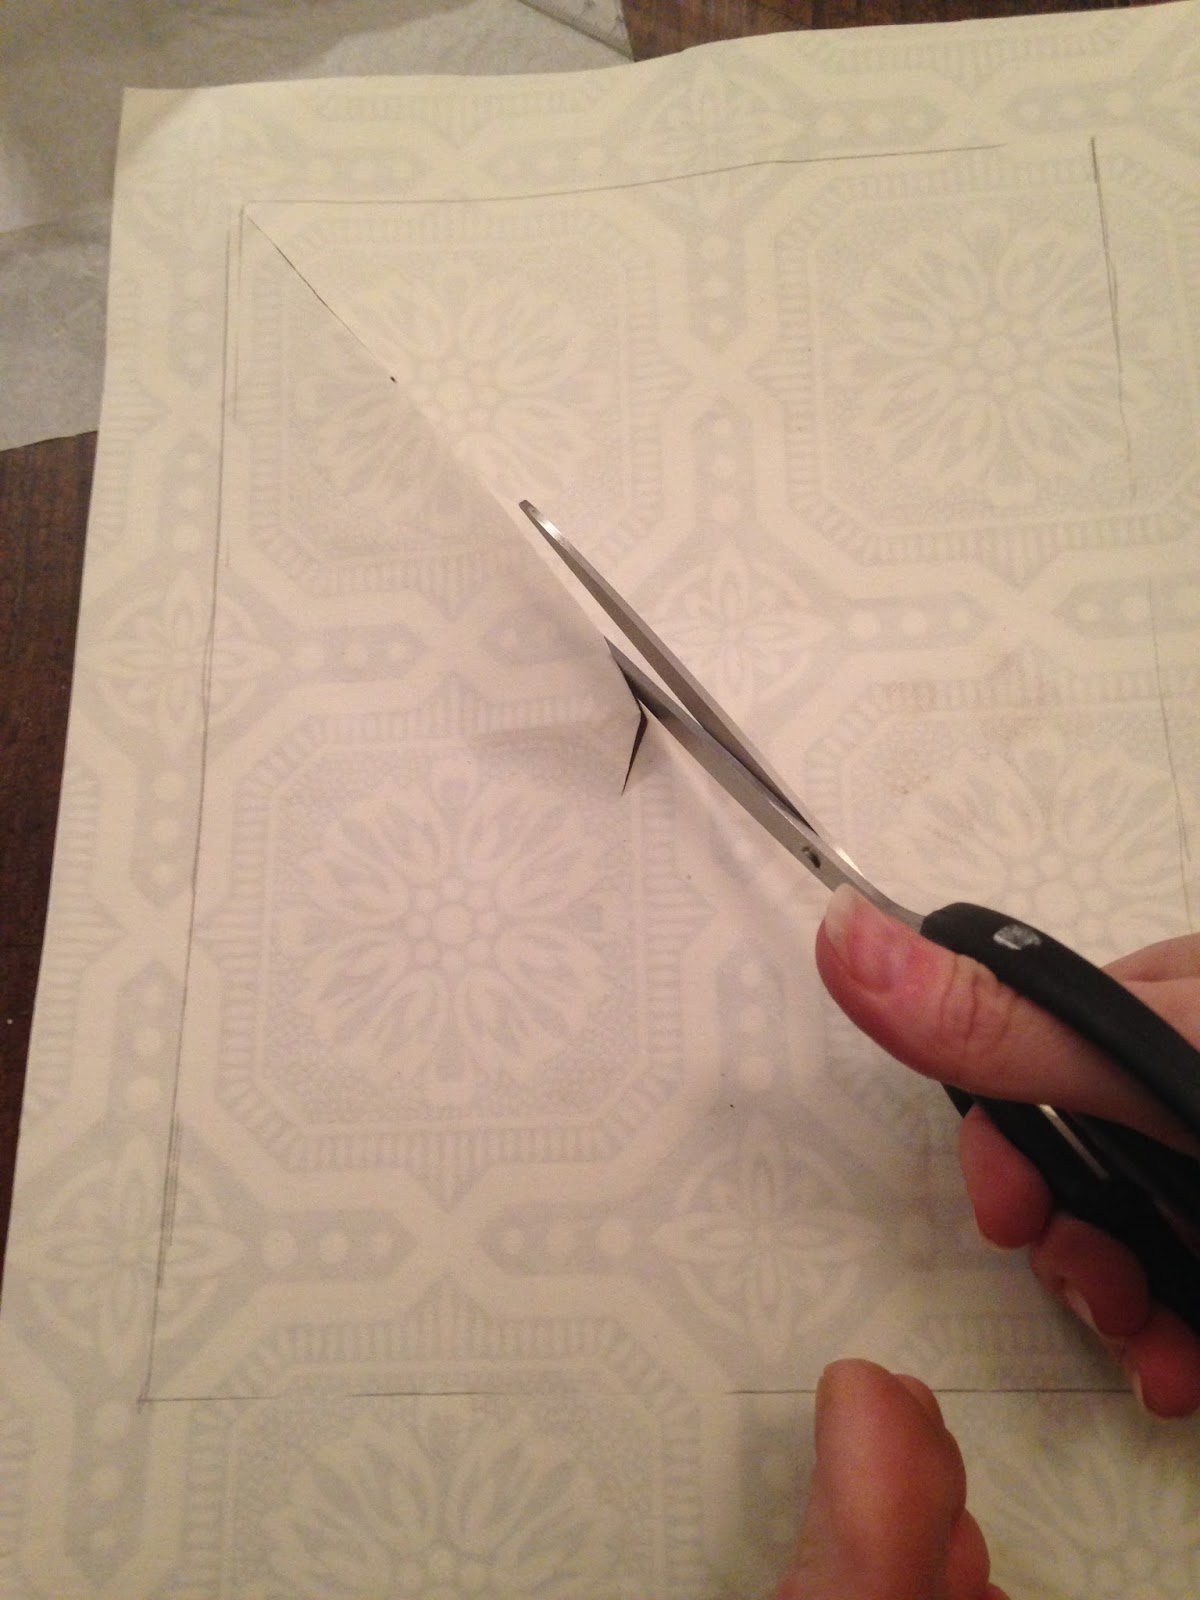
5. Pick up the wall paper and bend it slightly in half. Using a pair of scissors, snip the middle of the paper and cut in a diagonal until you reach the corner of the inside of your matte. Continuing cutting the inside of your matte until you have created a "frame" for your art.
6. Put a piece of tape, sticky side up, on the cut out calendar art. Carefully place your matte frame over the calendar art and line up. When everything is lined the way you want it, press down on the tape. Continue doing this for all four sides.
7. Put your backing and matte into the frame. Place the glass onto the frame and snap back into place.
 |
| I love the texture that I get from using the wall paper. This is a close up of the calendar page behind glass. |
VOILA! Instant art.
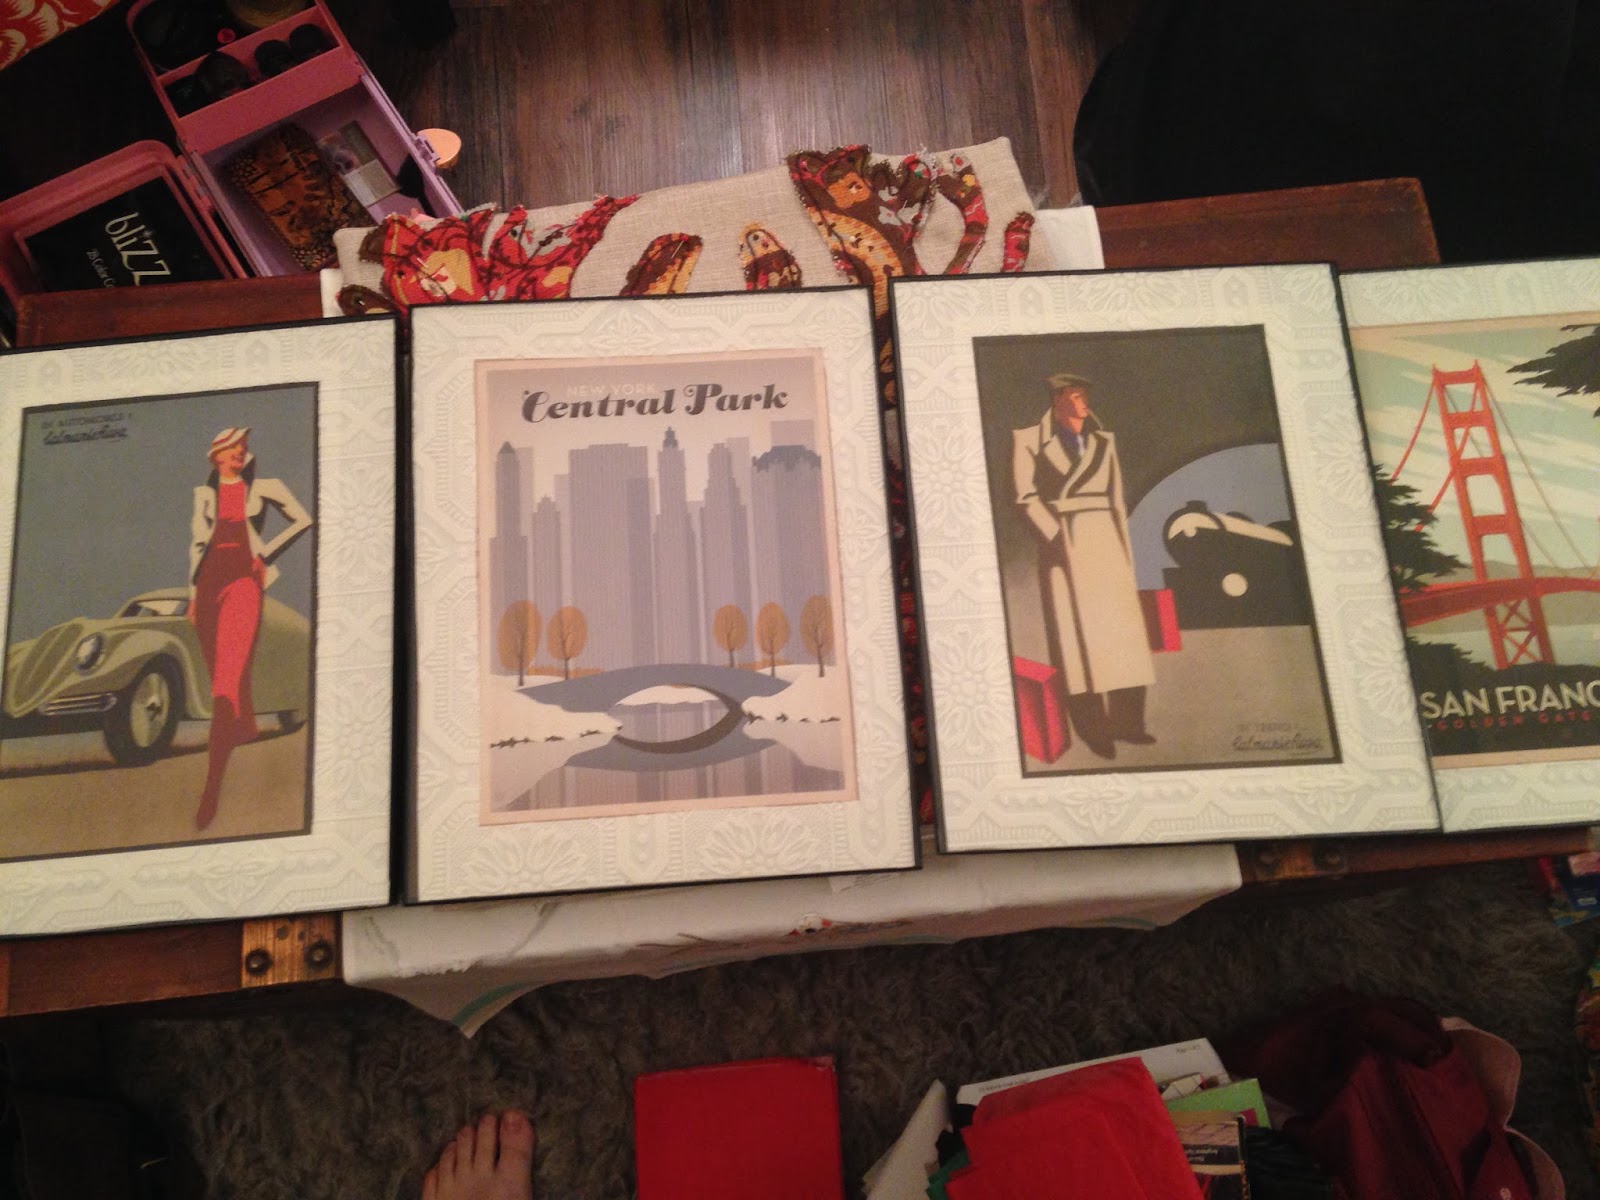 |
| I genuinely love the way that these turned out. Eventually, I want to get, or create, all original art, but this will do until I have the time or the money to do that. |
I am not going to show you how they look in the guest room right now. I am going to wait and do a whole reveal thing near the end of the week.
Tomorrow, we continue preparing for a guest......
No comments:
Post a Comment