Sunday, February 14, 2016

How to Repair Crumbled Make-Up

Hello everyone!
I am sorry that I did not post for Valentine's Day savings tips like I had promised.  I was experiencing technical difficulties getting into my own blog and only today, after the help of a nice technician, was I able to get into my own blog.
It's a shame too, because I was planning on taking advantage of the fact that Valentine's Day falls on Sunday this year.  Which I thought was the perfect opportunity to have a Valentine's Day brunch.  Complete with gifts and romantic drinks, yum!!!  But, since that didn't happen, I am going to hold those ideas in my book of good, do a little modifying, and post them in time for Mother's Day. And I will wait and give the other Valentine's Day tips for next year because they won't do you any good now since the day is past.
I will be completely honest with you right now...... I do not like Valentine's Day.  As holidays go, it is one of my least favorite.  Do I celebrate it?  Yes. But more because I feel I have to participate than because I want to participate. Some years, I feel more into it than others.  This was not one of those years, so my husband and I decided that we would do a low key Valentine's this year.  The rules were as follows: 


1.  We couldn't spend more than $30 on a Valentine's day present for one another.  (I can do ALOT
     with $30 so I was okay with that sum.)
2.  We would not be going out to eat and contributing to the suffering of some poor wait staff and
     chefs/cooks at a restaurant.
3.  We would not be doing any grand romantic gestures for one another, such as surprising the other
     with reservations to a mini-holiday at a bed and breakfast, etc.
4.  We would spend time together and we would do something we both wanted/enjoyed doing.
5.  It being a Sunday, we would relax as much as possible.

Done.
We actually started our Valentine's the evening before.  We went to go have burgers at a little local 50's diner.  (Not romantic, but wonderful none-the-less because we are both trying to live healthier lifestyles and burgers are no longer on our weekly menu.  In fact, we have cut down on beef in general and fried foods.  So, or us, it was heavenly.) And then we went to the bookstore. I love books!  I hardly ever buy them anymore though.  Oh, I still read as much as ever, but now I have a Kindle, and I read books on my Kindle. They are less expensive this way, and I can purchase them from my home and read them right away so it also provides me with instant gratification.  So now, when I purchase books, they tend to be the super-duper expensive books that have beautiful pictures in them.  (Although in this too I wait and see if I can get them in used but good condition on Amazon.  Sometimes I can save ten's of dollars if I wait long enough--sometimes not.  Some books never go down in price and then I have to decide if it is worth it to me to spend the money. For example, I have been eyeballing a book called 1940's Fashion:  The Definitive Sourcebook for a while now and the lowest that it has gotten is $25.  I will probably put it on my birthday or Christmas list this year and see if I can't get it from a friend or family member.)
I found a book like this in the bookstore called Coco Chanel:  The Illustrated World of a Fashion Icon by Megan Hess. SQUEEEEEEE!!!!  An illustrated picture for adults about Coco Chanel.  I swoon.  But it was $25.00--nope, out of my budget.  Fortunately for me, my husband had yet to get my Valentine's day present.  So, voila, I received a Coco Chanel picture book!

 

Isn't it pretty?

Did you notice the black and white Basil?

What did my husband get you may ask?
I used my eBay and Etsy skills and got him a pair of slim fit jeans, (A reward for losing almost 20 pounds.) a French cuff, button down shirt (This was my biggest score as the shirt was new, with tags, from Banana Republic and originally sold for $56 and I got it for less than $8.00.), some solid cologne that smells of pipe tobacco and a leather cuff bracelet. All of this, and I stuck with the $30 budget.
Then for Valentine's Day I made the aforementioned brunch and tonight, when I am done posting this and my husband has finished mowing the lawn,  (My husband has a love affair with our lawn, so it was only fair that it would get some attention for Valentine's day as well.) we are going to spend the evening together eating pizza, yet another food we normally don't allow ourselves, and doing whatever we want as long as we're together.  See?  Romantic.
But, y'all don't come to this post to read about my life, you read to see how to live a luxury lifestyle on a teeny-weeny budget.
So here goes.....
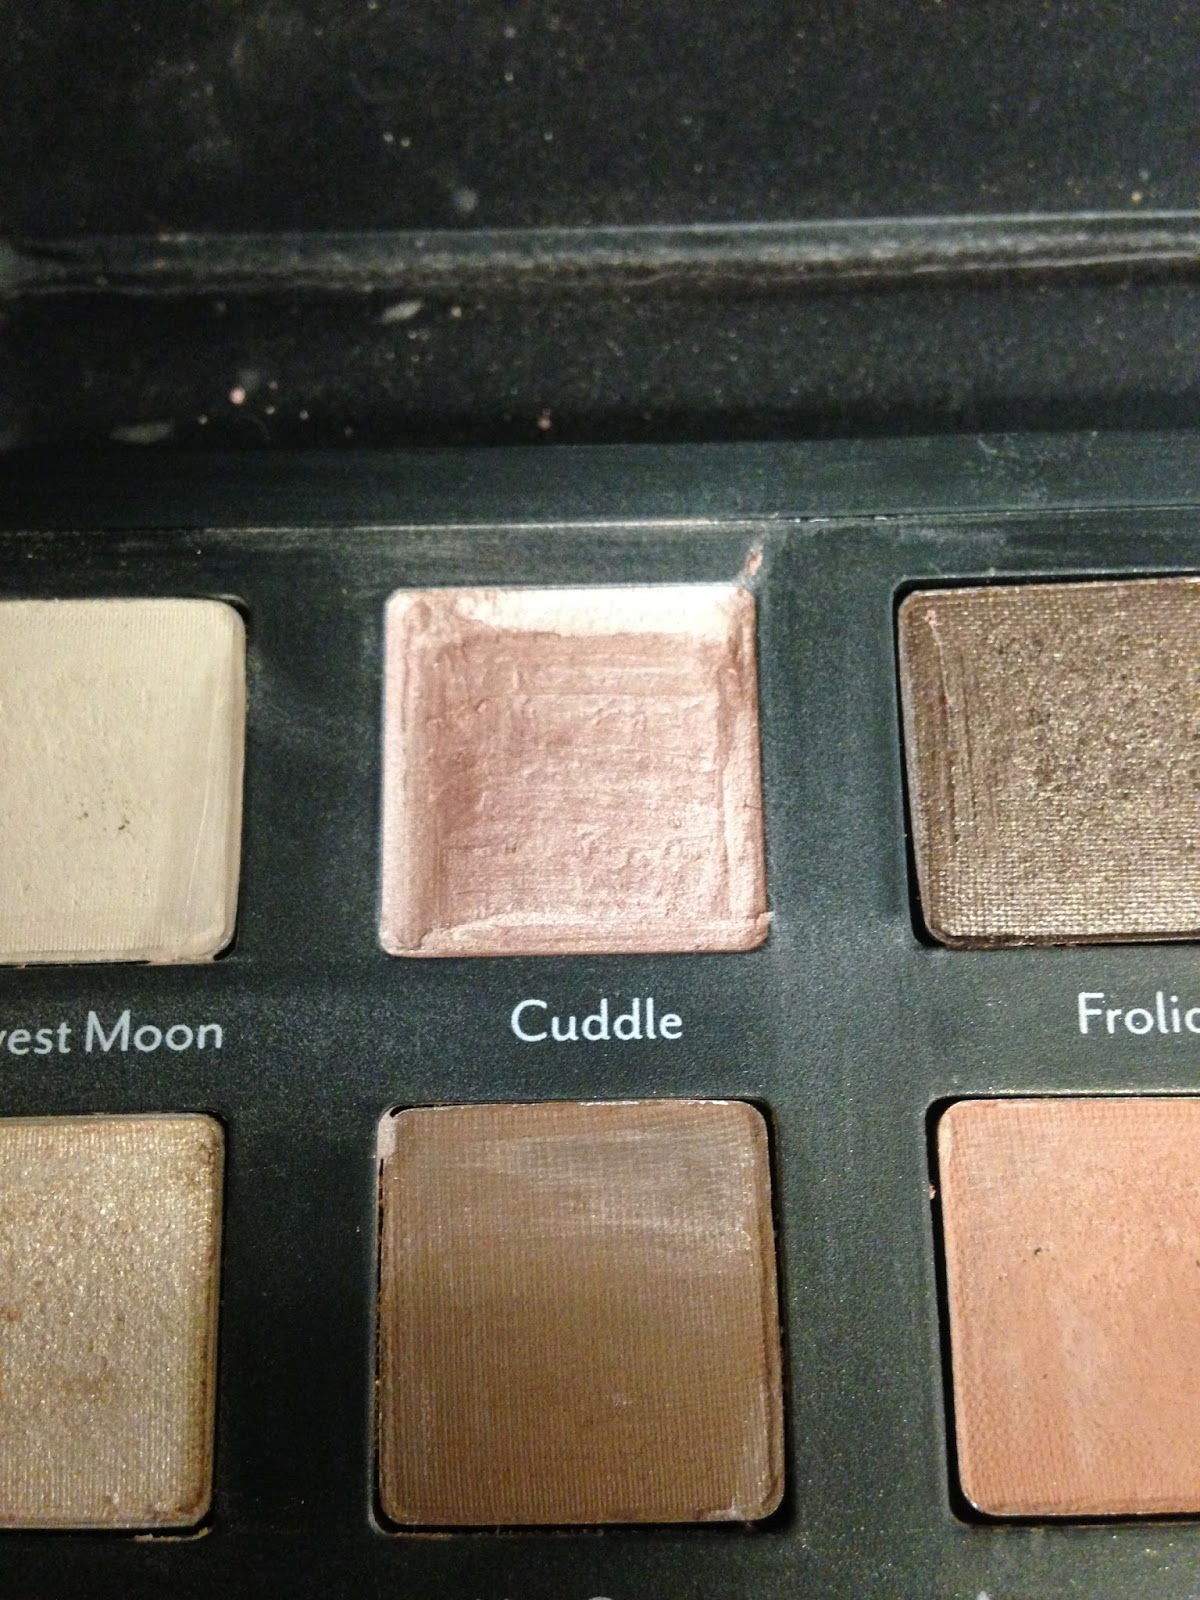
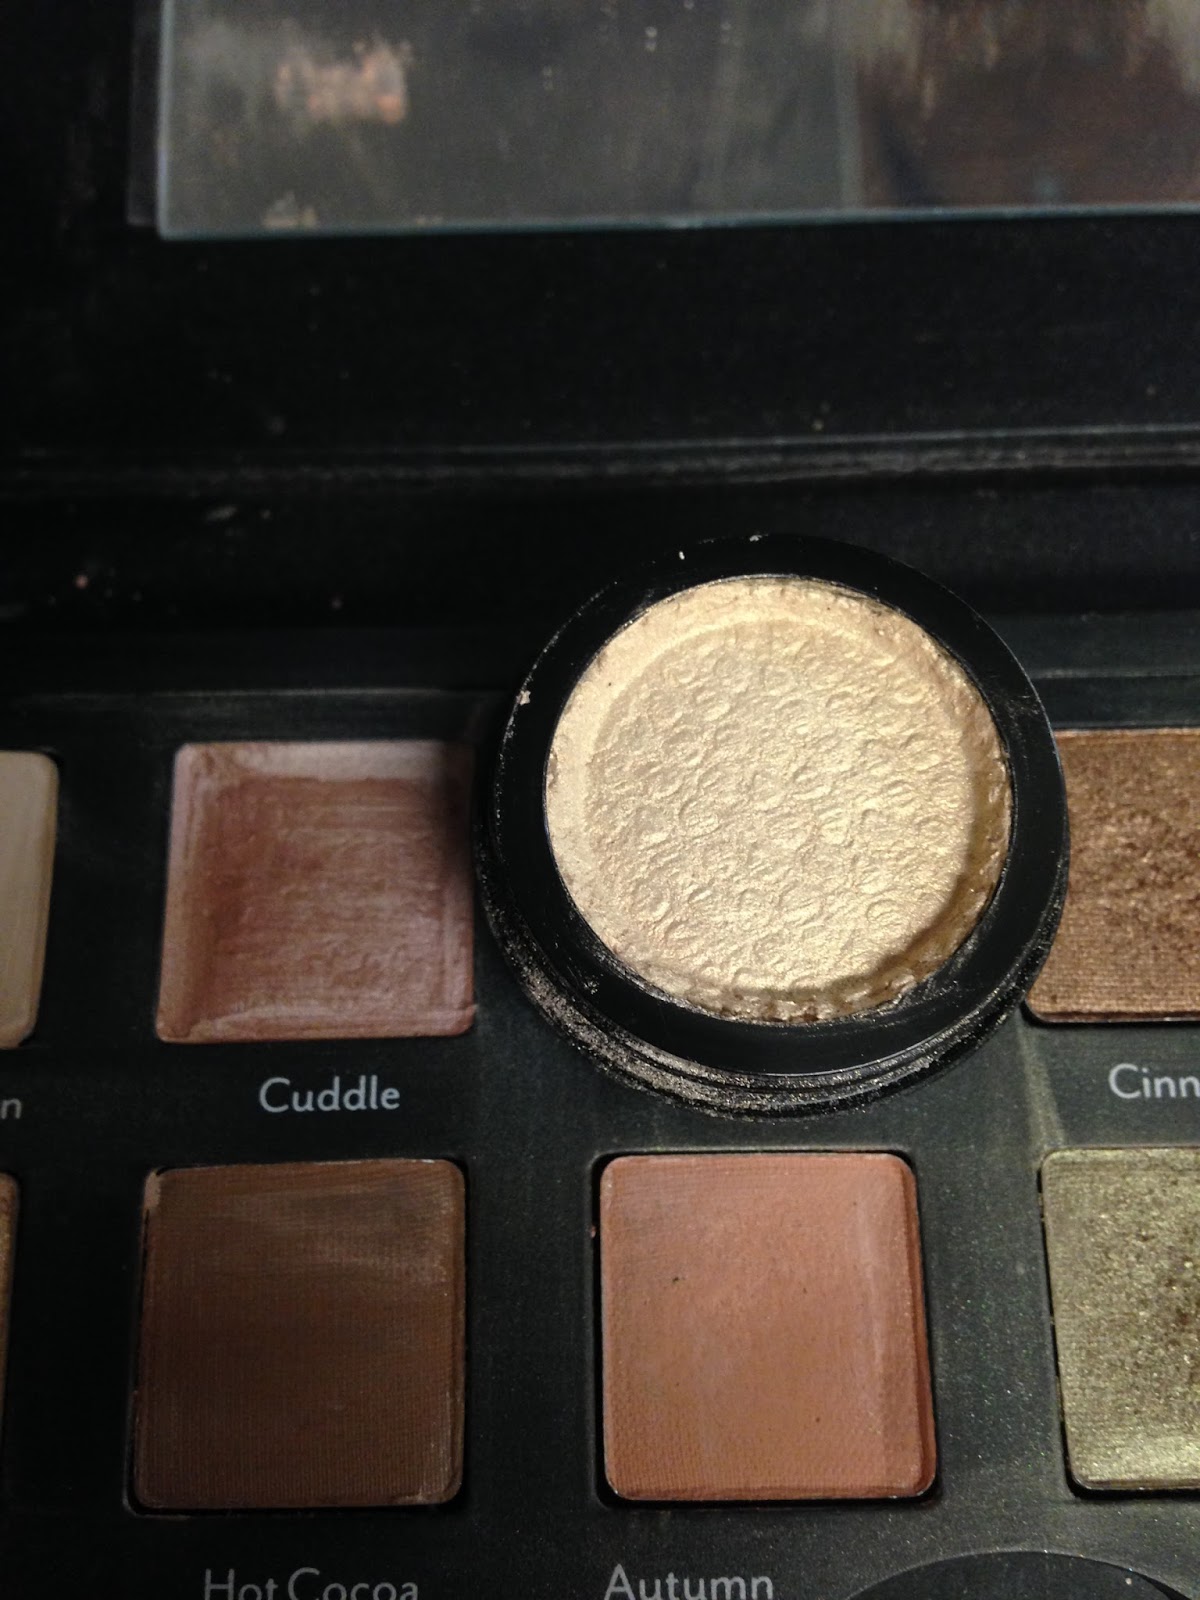
This week, two of my favorite eye shadows fell off the counter top and crumbled into hundreds of pieces.   Grrrr. 
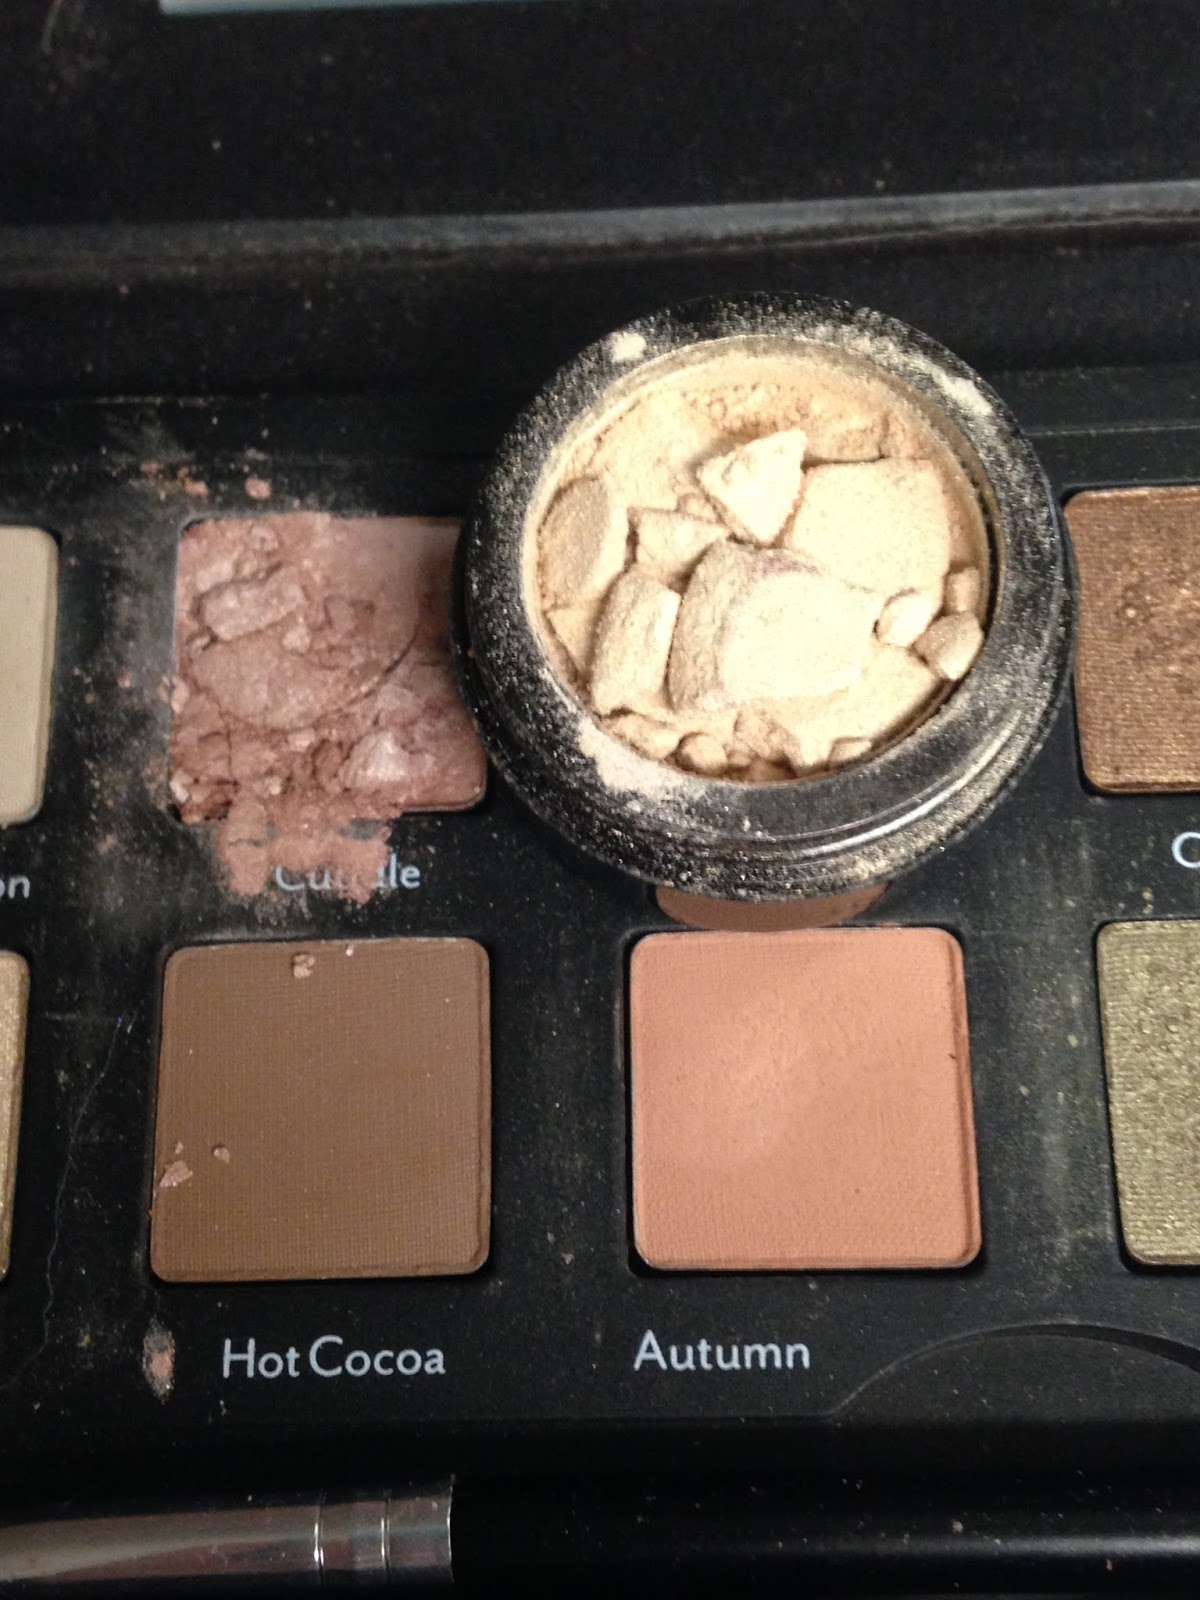
They were practically new and one was part of a set, so I didn't want to throw them away, nor did I want to spend the money to buy new ones when I had so recently purchased these.  What is a girl to do?  Fix it!
I will show you how.


Equipment needed:

1 broken powder make-up  (I am showing eye shadow, but this works on any pressed powder make-up.)
1 tiny spatula or spoon (I like the tiny spatulas that come with high end moisturizers.  You can get these at high end skin care counters with their samples. I got mine with a sample of La Mer when I went to Nieman Marcus one day.)
1 small custard bowl or dish
Rubbing Alcohol
Paper towels
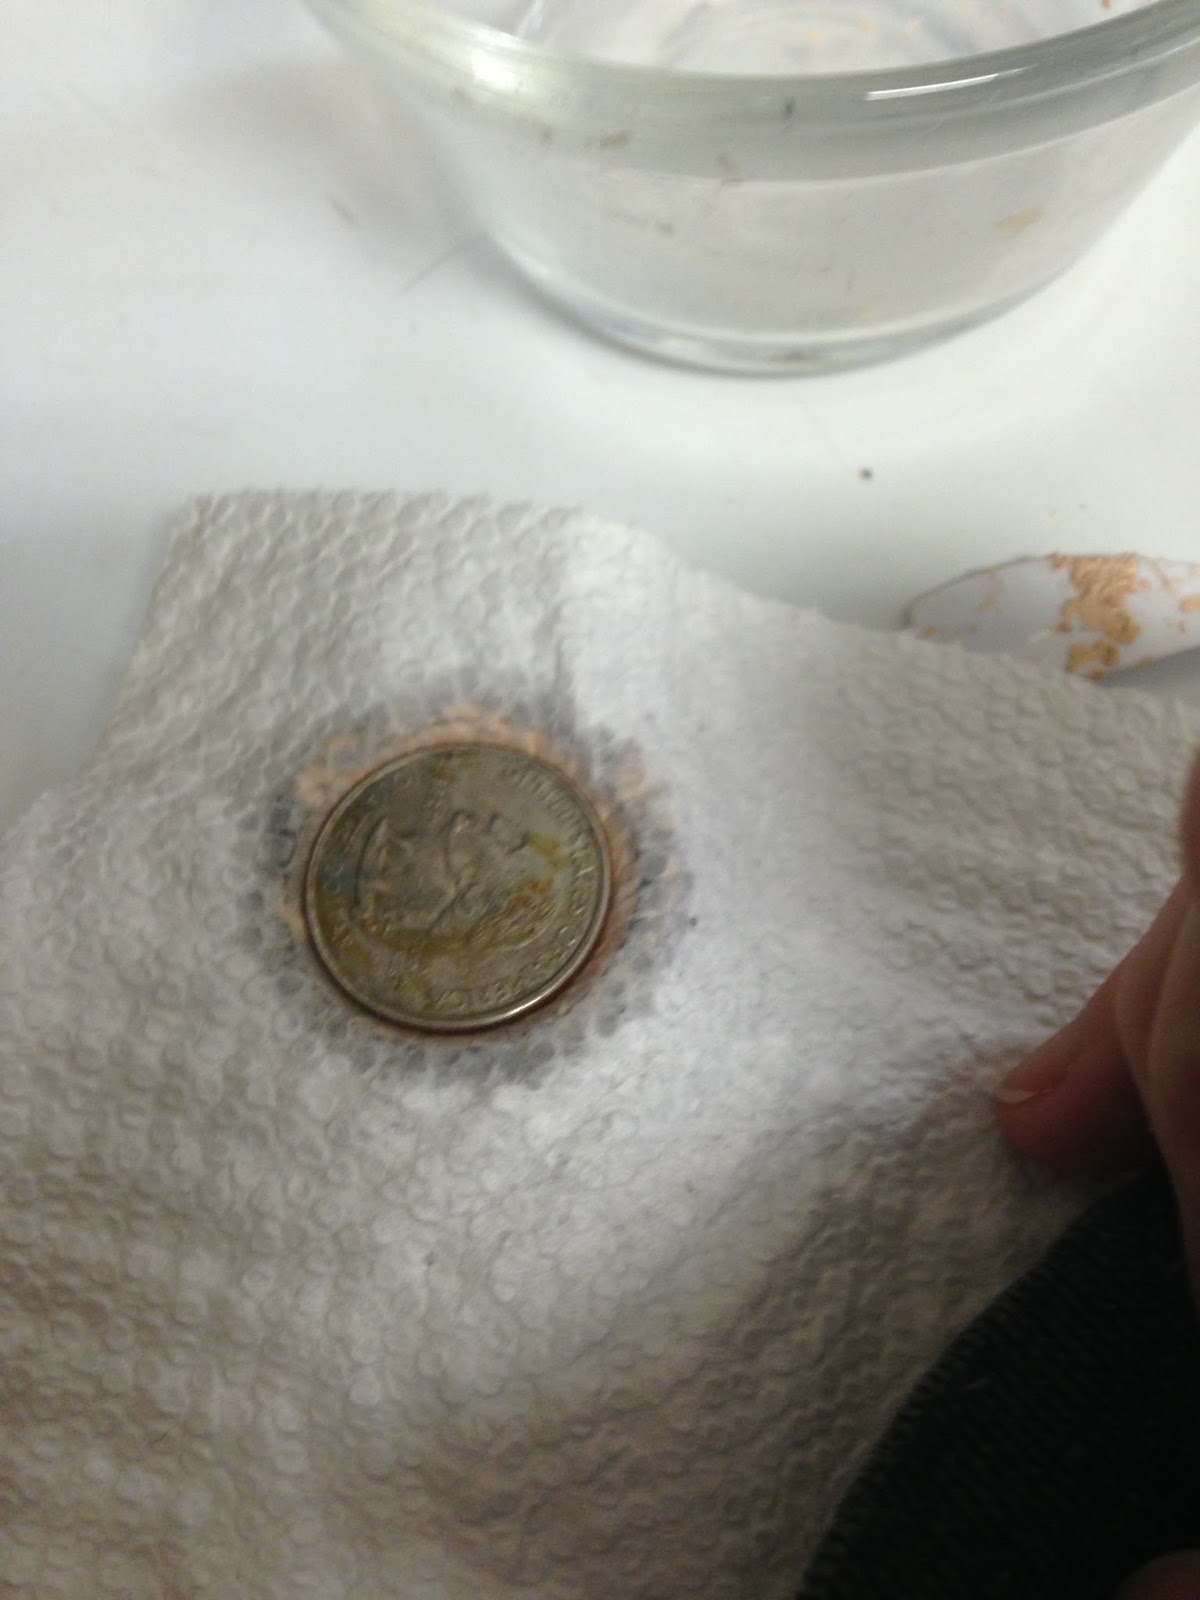
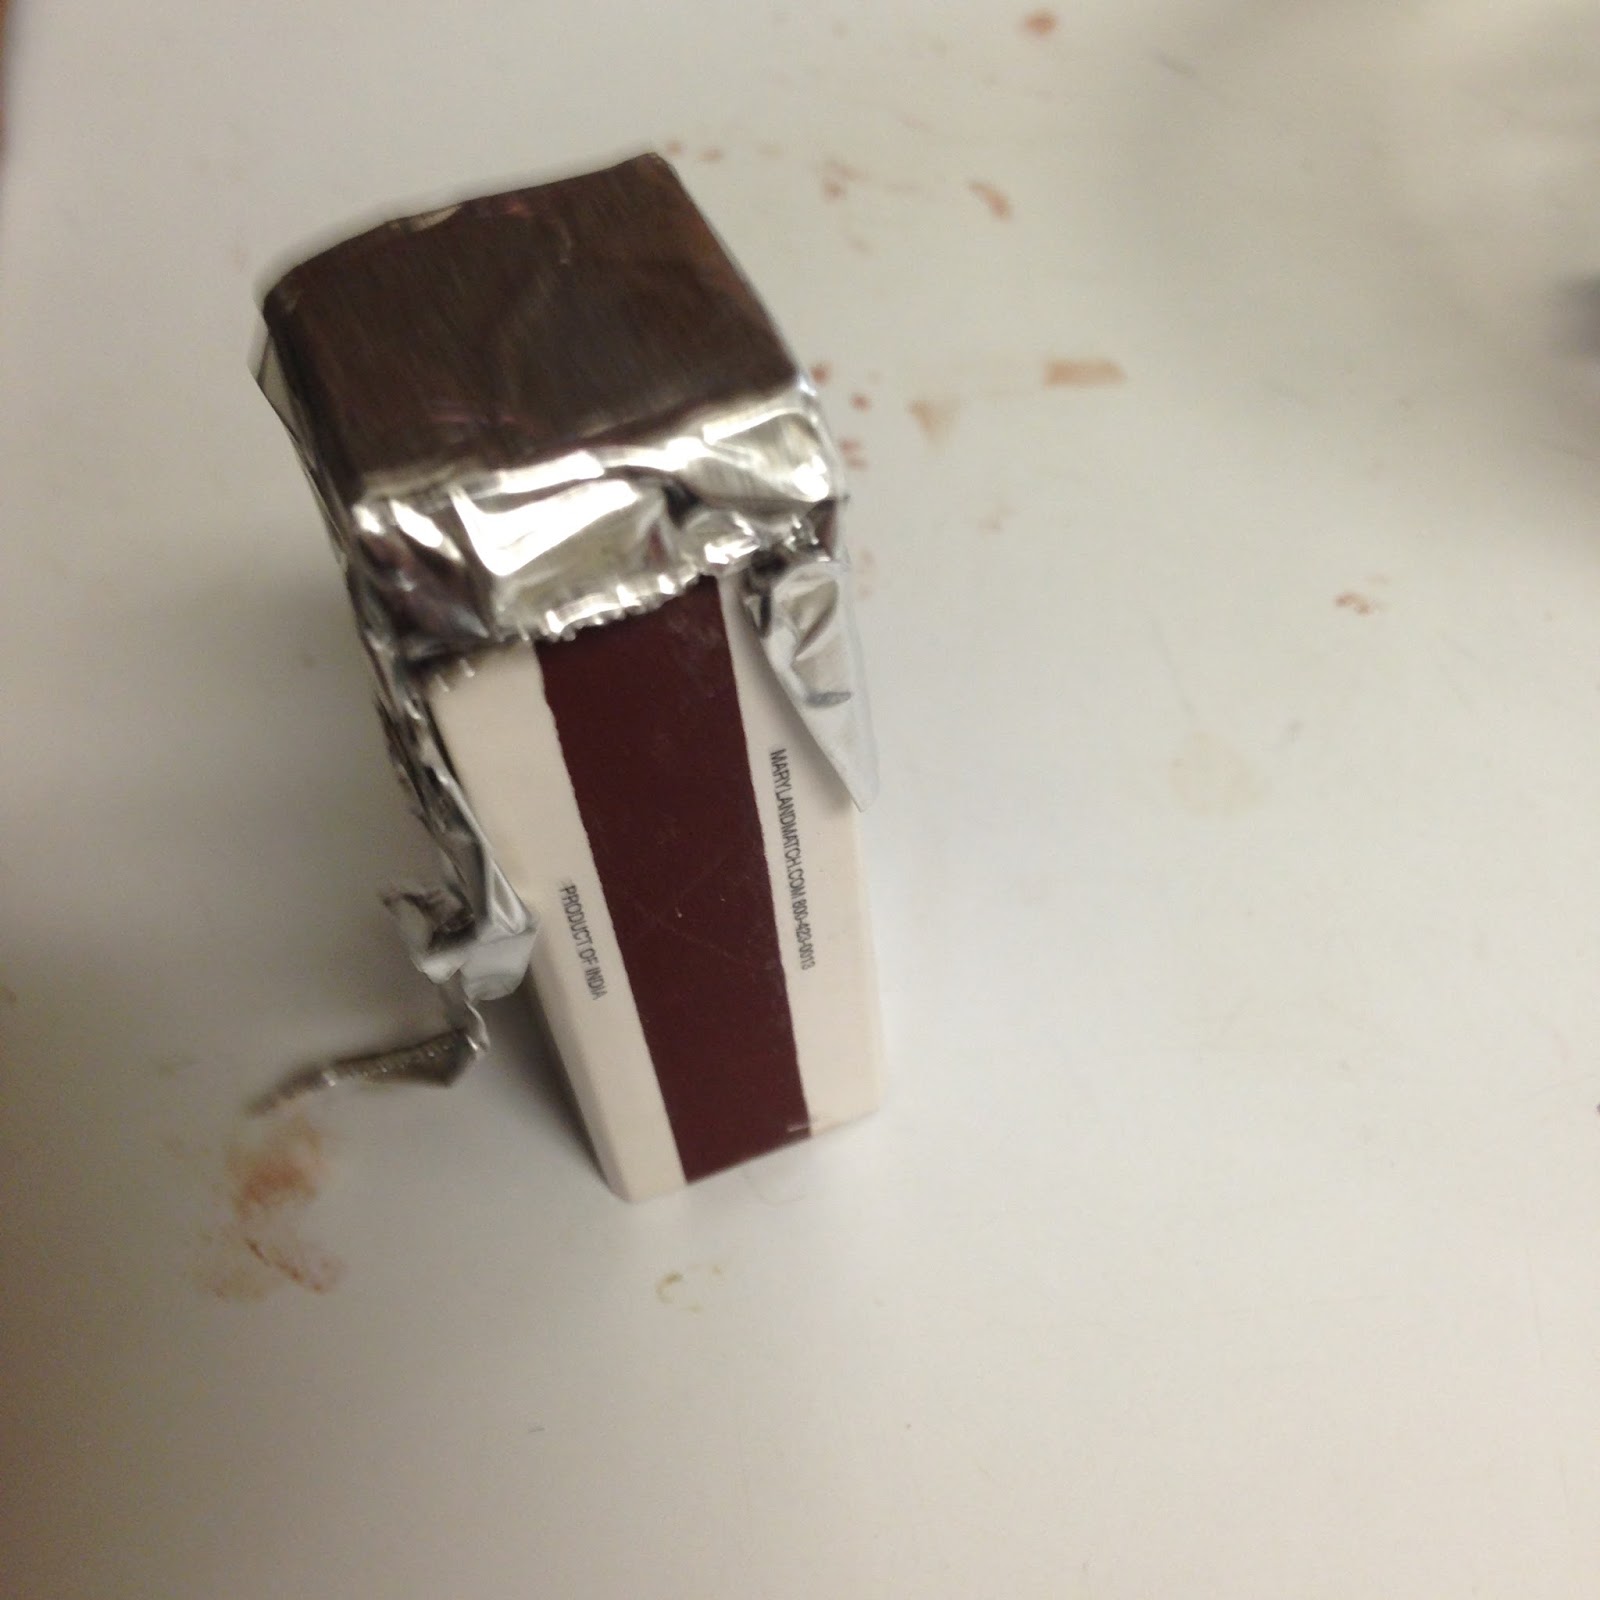
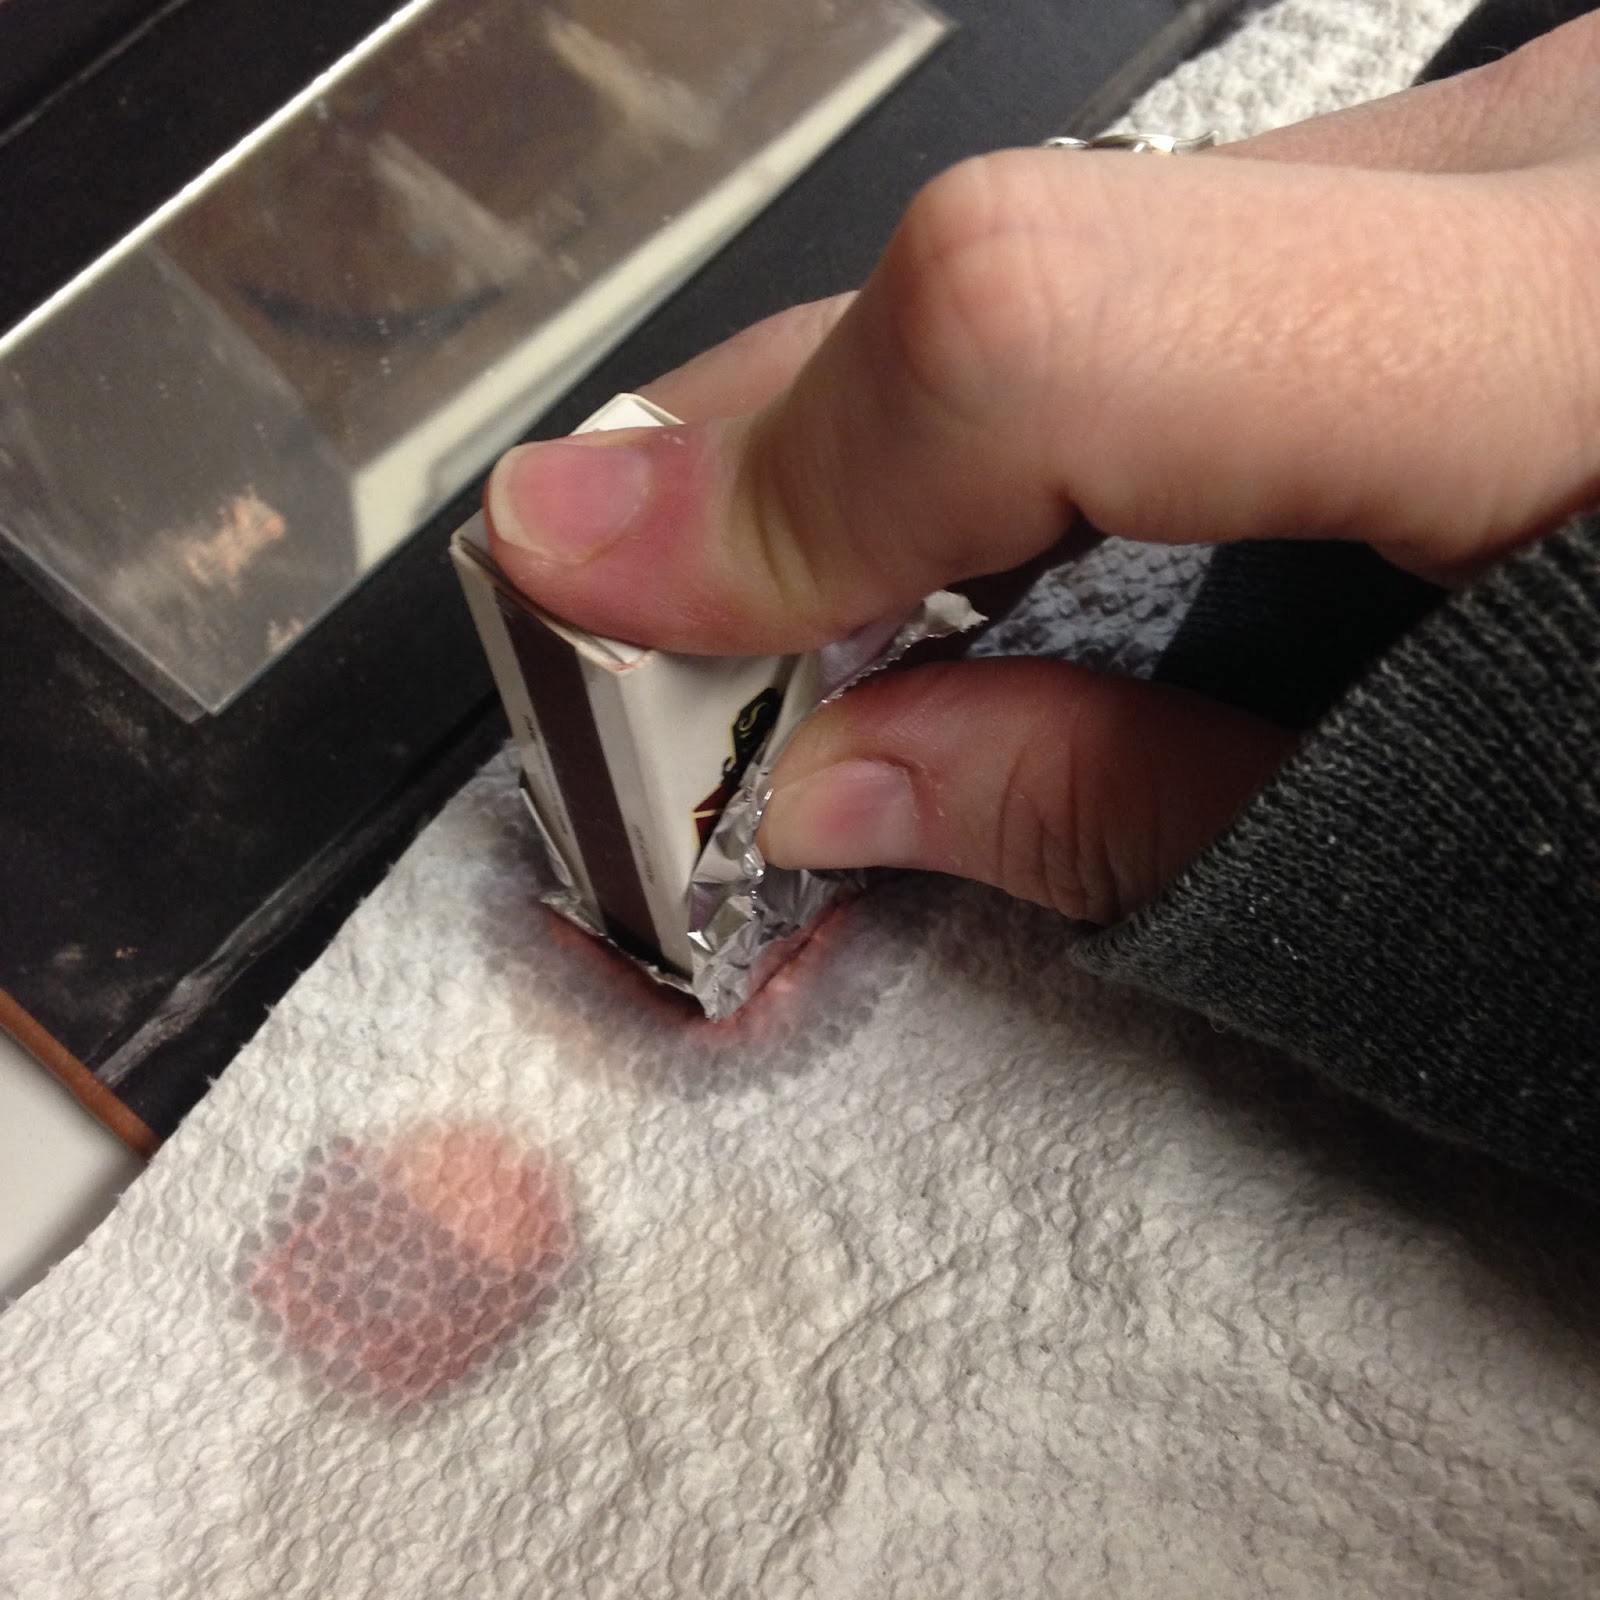
A press- in the shape of the make up you are pressing (In my case, I used a quarter and a match book with the bottom wrapped in aluminum foil

The Process:

1.  Using the tiny spatula, scoop out all of the eye shadow in the compartment into the custard bowl.  (I know this seems counter-intuitive, to completely destroy the eye shadow, but you need to turn all of the shadow back into loose powder form in order to repair it.)
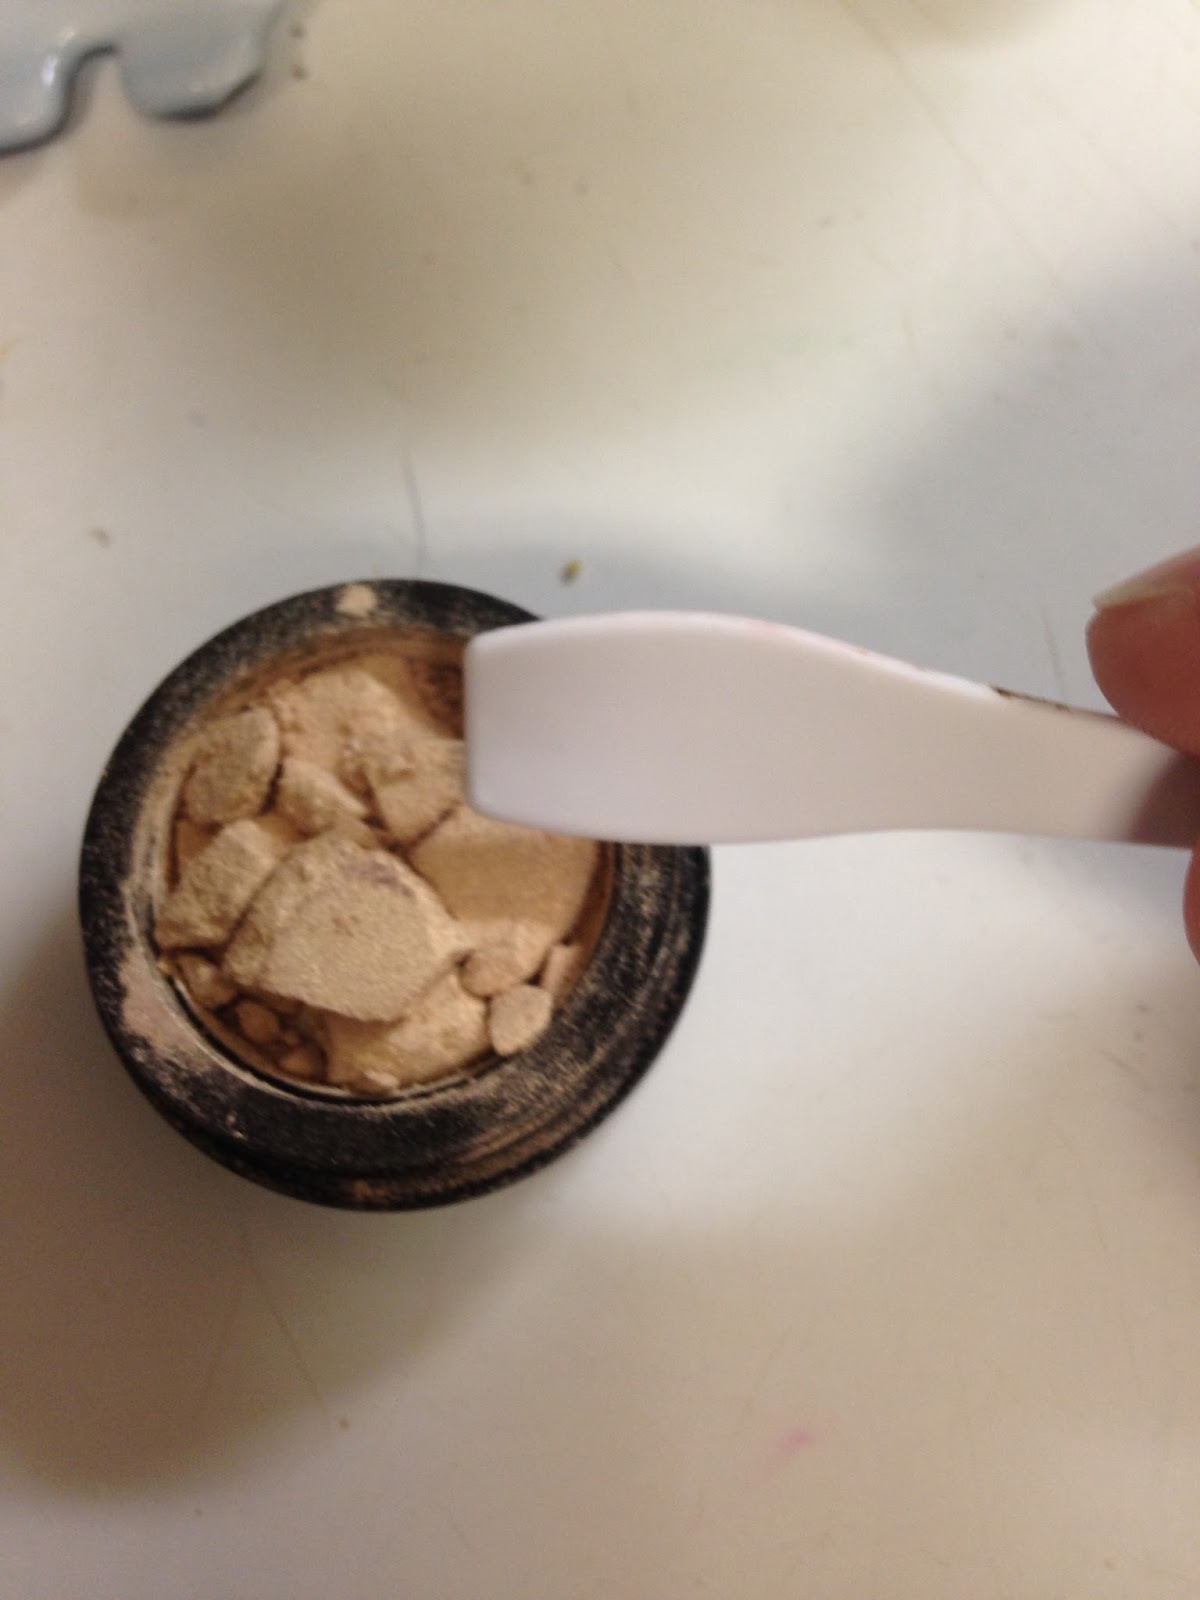
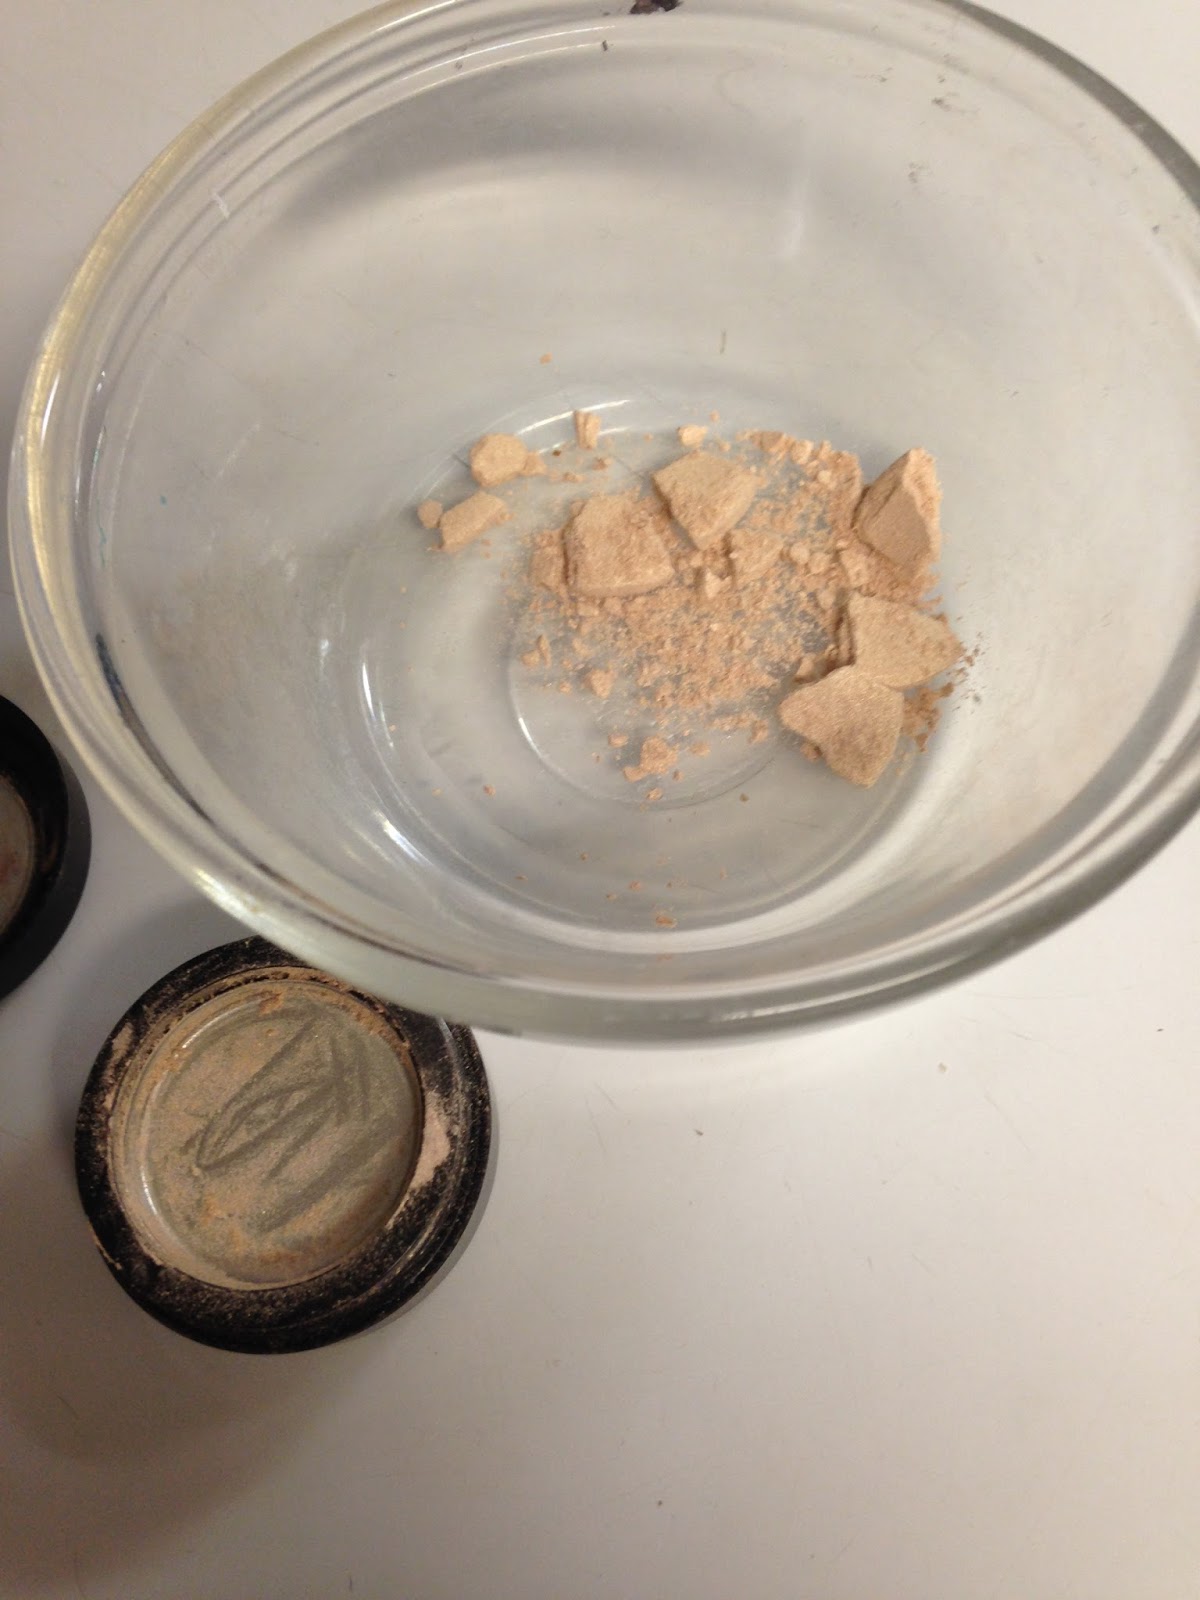


2.  Crush the powder with the spatula until it looks like loose powder.
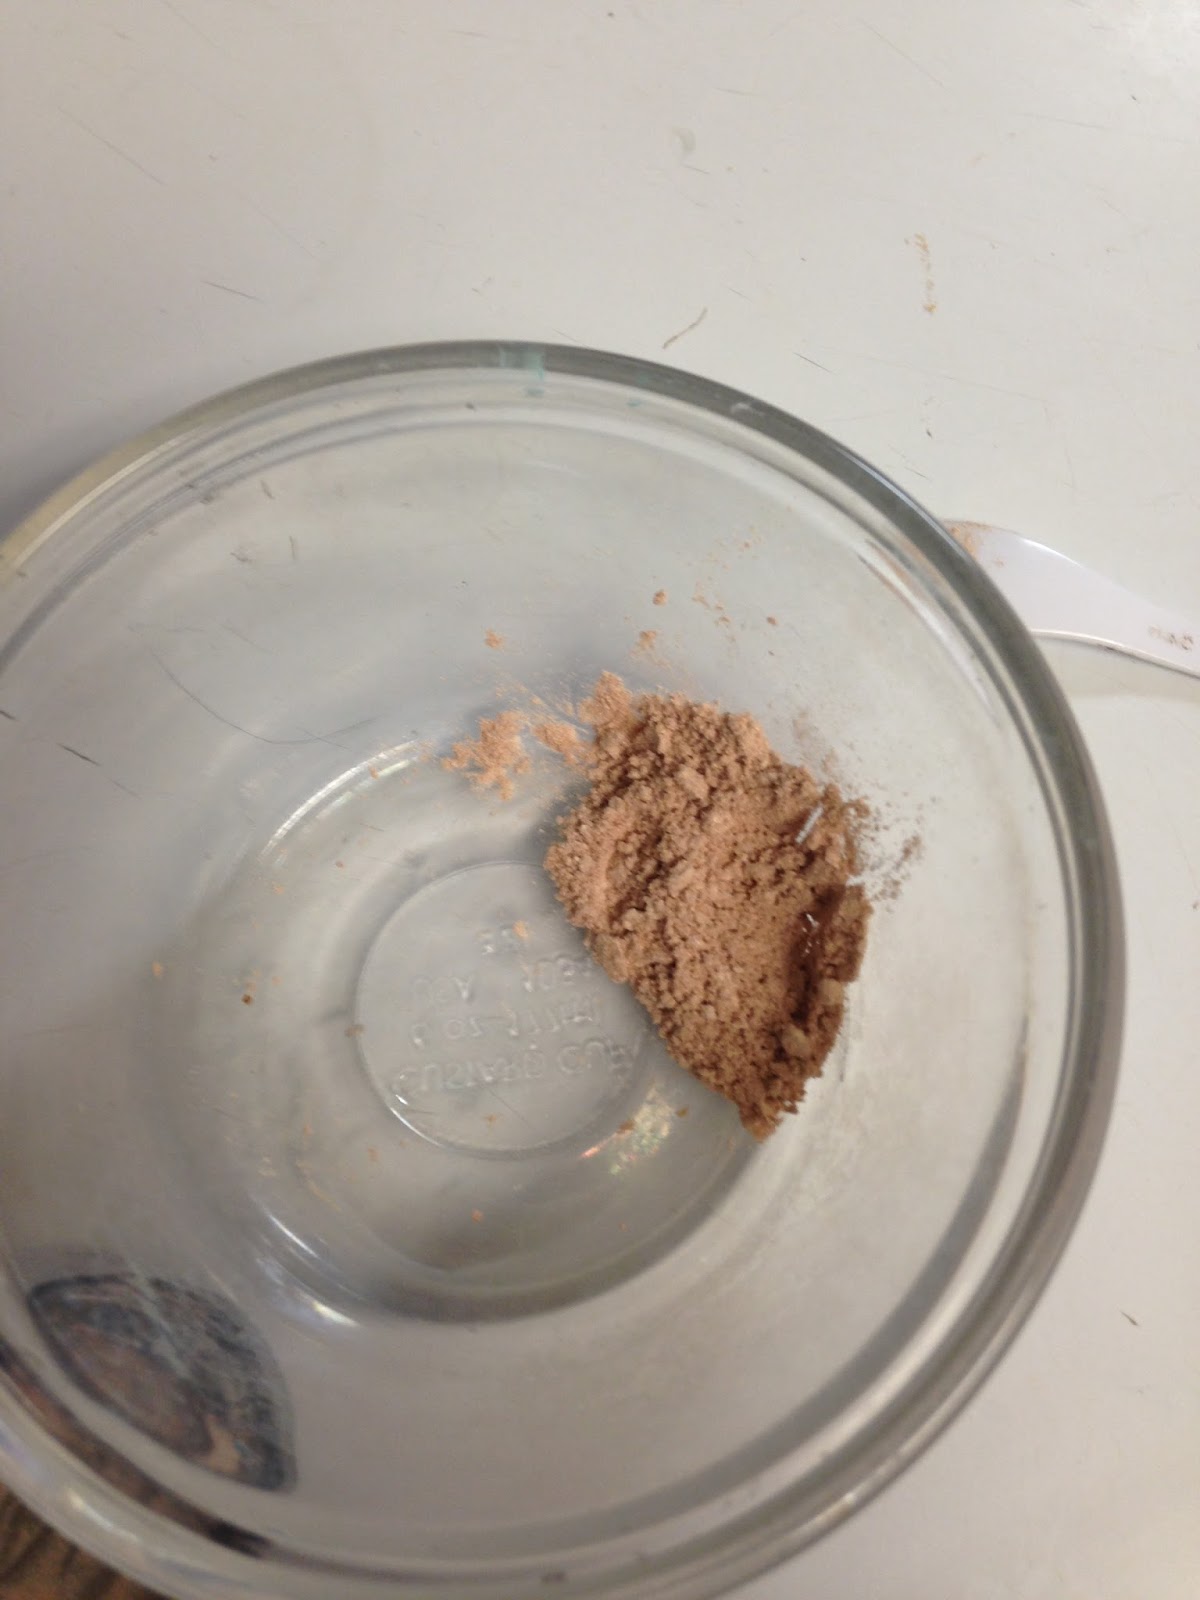

3.  Very carefully add the rubbing alcohol and stir with the spatula. The amount of rubbing alcohol that you add will depend on the size and amount of the make-up that you are repairing, so go slowly, adding a little at a time until the powder has become the consistency of paste.


4.  Once the make-up is the right consistency, using the spatula, scoop the make-up back into its original container.  Pressing down and making certain that the paste goes into all of the corners.
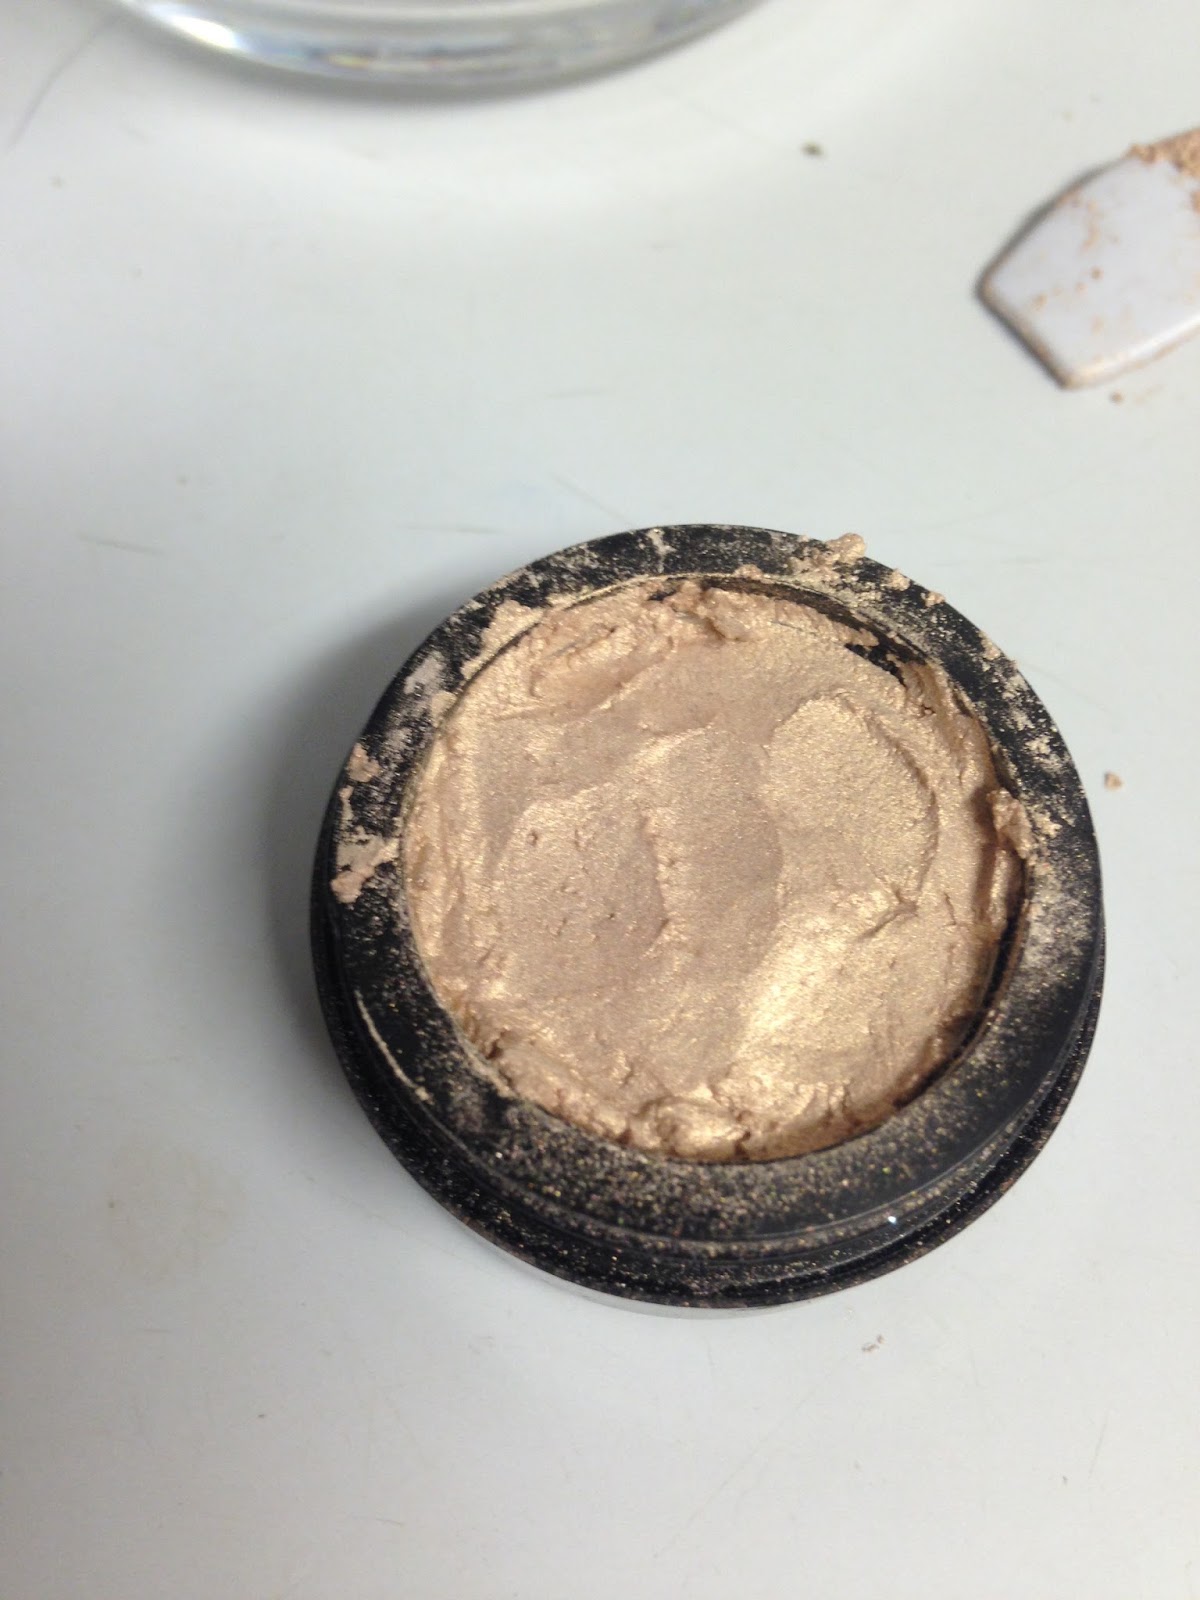

5.  Take a piece of paper towel and place it over the paste.  Press slightly with your finger tip to soak up some of the rubbing alcohol.   Lift up and place a dry piece of paper towel on the paste and press down with the mold.  For round eye-shadow compacts, a quarter or nickel works well. If you are repairing blush or face powder, then you can often use another container in your make-up bag or the lid of the container itself if it is a screw top.  Carefully lift up the paper towel.  You will see the pattern of the paper towel is impressed on the powder.
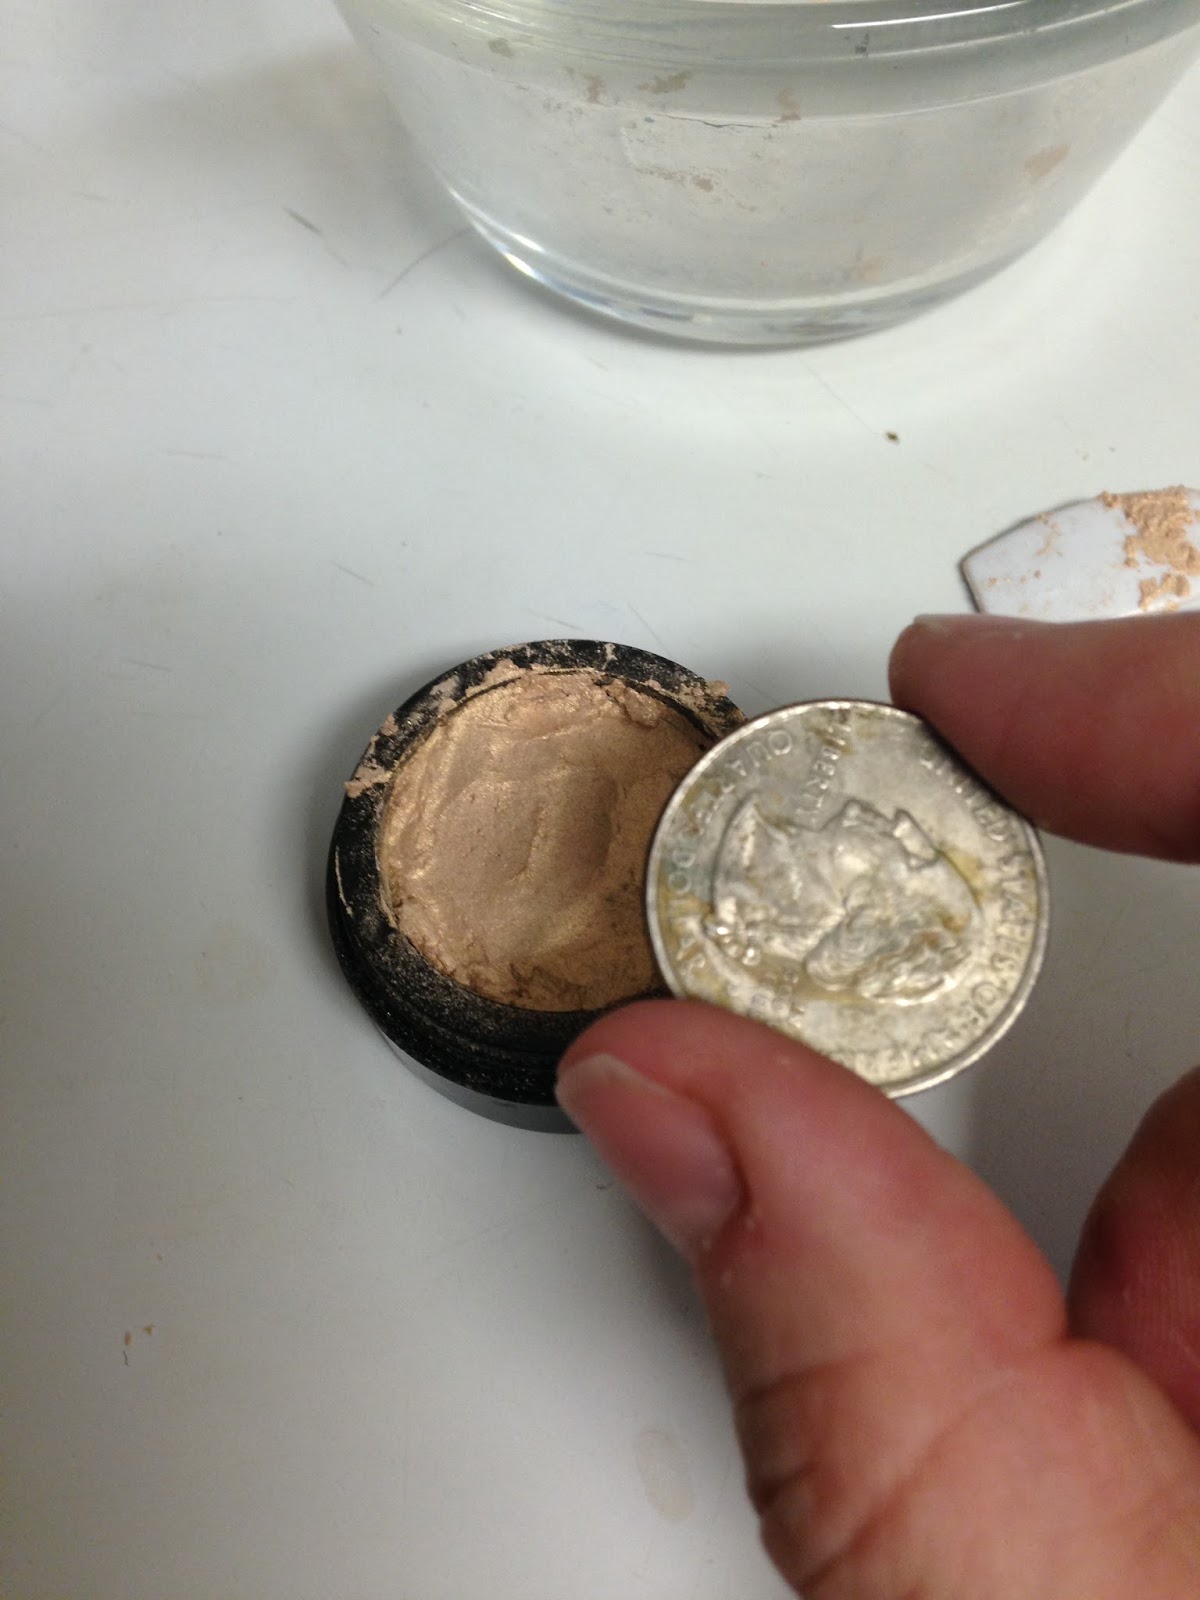


Lovely and pretty again and almost done.


6. Using the paper towel and rubbing alcohol, clean the sides of the make-up container.  (Is this necessary for the process?  No.  But you spent the time to repair the make-up, you can spend the time to clean it and make it look nice again.

7.  Let the make-up sit until it completely dries.  The amount of time this takes will depend on how much rubbing alcohol you used, but I usually let it sit over-night before I use it.

There you go, a Frugal Femme tip for make-up repair.
I hope you find it helpful.  My next post will be a post about dressing on a budget and I am working on another two week menu which will be coming up soon, so I hope you keep checking in and staying interested.


Sunday, February 7, 2016

A Frugal Femme Closet Make-Over Part 2

Hello Everyone.
Can you believe that we are already into the second month of 2016?  This year seems to be going so fast!
Maybe, for me, it is because I am in the middle of Mardi Gras Season which will then be followed immediately by Valentine's Day.  So many holidays!!!!  I have to admit, I love Mardi Gras.  It gives me the chance to dress up in fancy clothes and to try out new fancy hair-dos.
This picture was taken of my husband and me at the Apollo Ball this year.   In an upcoming post, I will show y'all how to make the bow bun that I am sporting in the picture. Its super easy and I always get complimented on it every time I wear my hair that way.
                                                         Picture courtesy of Kelly Ryan

Today, however, we are going to go into the next steps for your Frugal Femme Closet Make-over.  In the last post, we went through every item of clothing that we owned and "weeded out" those items that we didn't need.  You should now have a pretty good idea of everything that you own and what your storage needs are, however, if you are in doubt:

1.  Look over the remaining items in your closet and see what type of storage they should have. If you are unsure what that should be, a short break down is:

                --  Blazers, button down shirts, blouses, skirts, slacks and dresses should be hung on

                     hangers.

                --  Jeans, t-shirts, camisoles/tank tops and sweaters should be folded or rolled and

                     put on shelves or in baskets.

                --  Socks and underwear should be folded or rolled and put in a drawer or basket.

                --  Scarves and belts can be rolled and put in baskets or put on a scarf  rod.  (Information on
                    rod will follow.)

                --  Hats can place on a hat rack or placed on nails in your closet or on the wall

                --  Shoes should be placed in plastic shoe boxes OR should be put on a book case.

Remember some of these items, such as jeans, can be hung if that is your preference and your closet space allows.  Sweaters, however, should never be hung because the hanger pulls on the sweater and causes it to lose its shape.

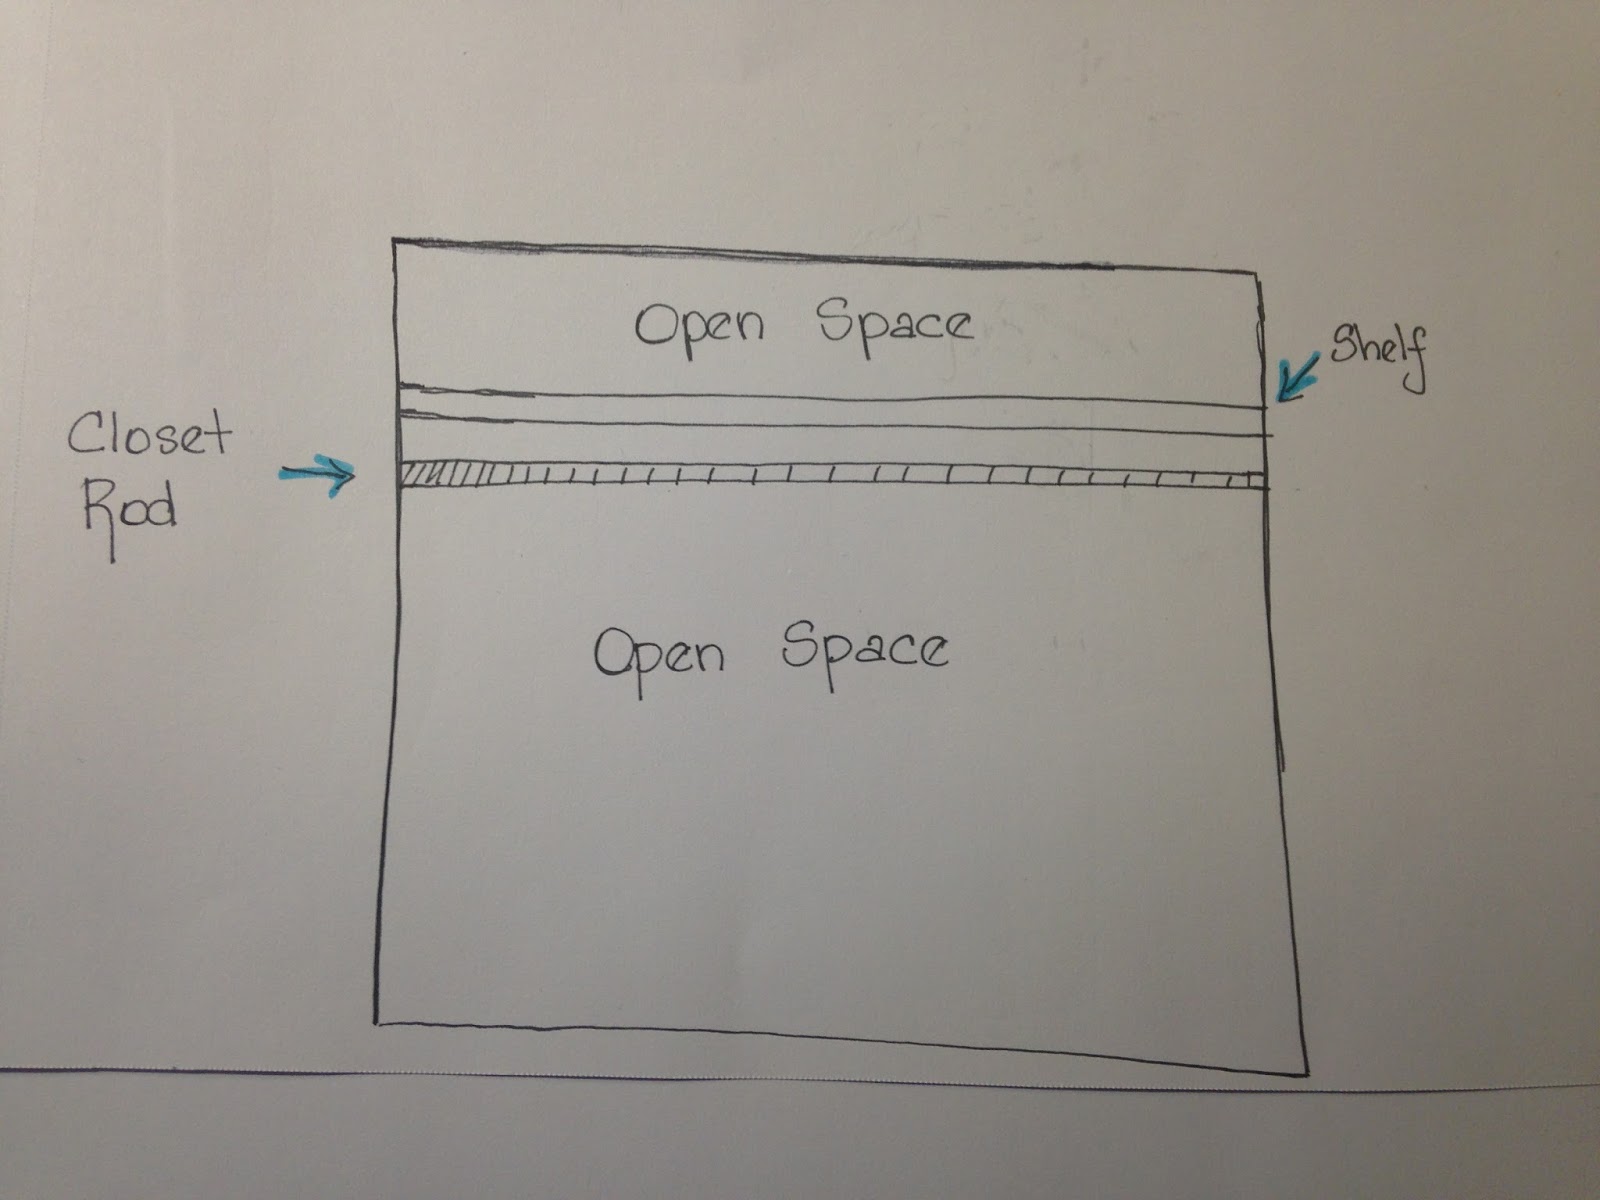
Now figure out what you need for storage for your closet to make it function for your wardrobe, depending on the space that you have and your storage needs.  I am going to  assume that you have the standard closet that comes with older houses and apartments. This would be the closet with the shelf going along the top of the closet with a bar about 4 inches below that also goes along the length of the closet.  This seems to be the most standard of closet configurations with probably the least practical use of space.


When I first moved into my house, I put a goal for myself that I would try to put every item of clothing that I owned in my closet in the master bedroom.  To this end, I did a major purge of my clothes and cut my wardrobe down by almost half.  Even then, it soon became clear to me that I still owned too much to put in one closet.  The task was not helped by the fact that my master bedroom was not big enough to hold a dresser for either myself or my husband -- meaning that the two master bedroom closets were the only option for clothing storage.  After much cursing and arranging, I realized that I would not be able to attain my goal of only using one closet and I would have to take over the closet in the guest bedroom. Before you completely judge me, my house was built in 1965.  I do not have a walk in closet and the closets I do have are tiny by today's standards.

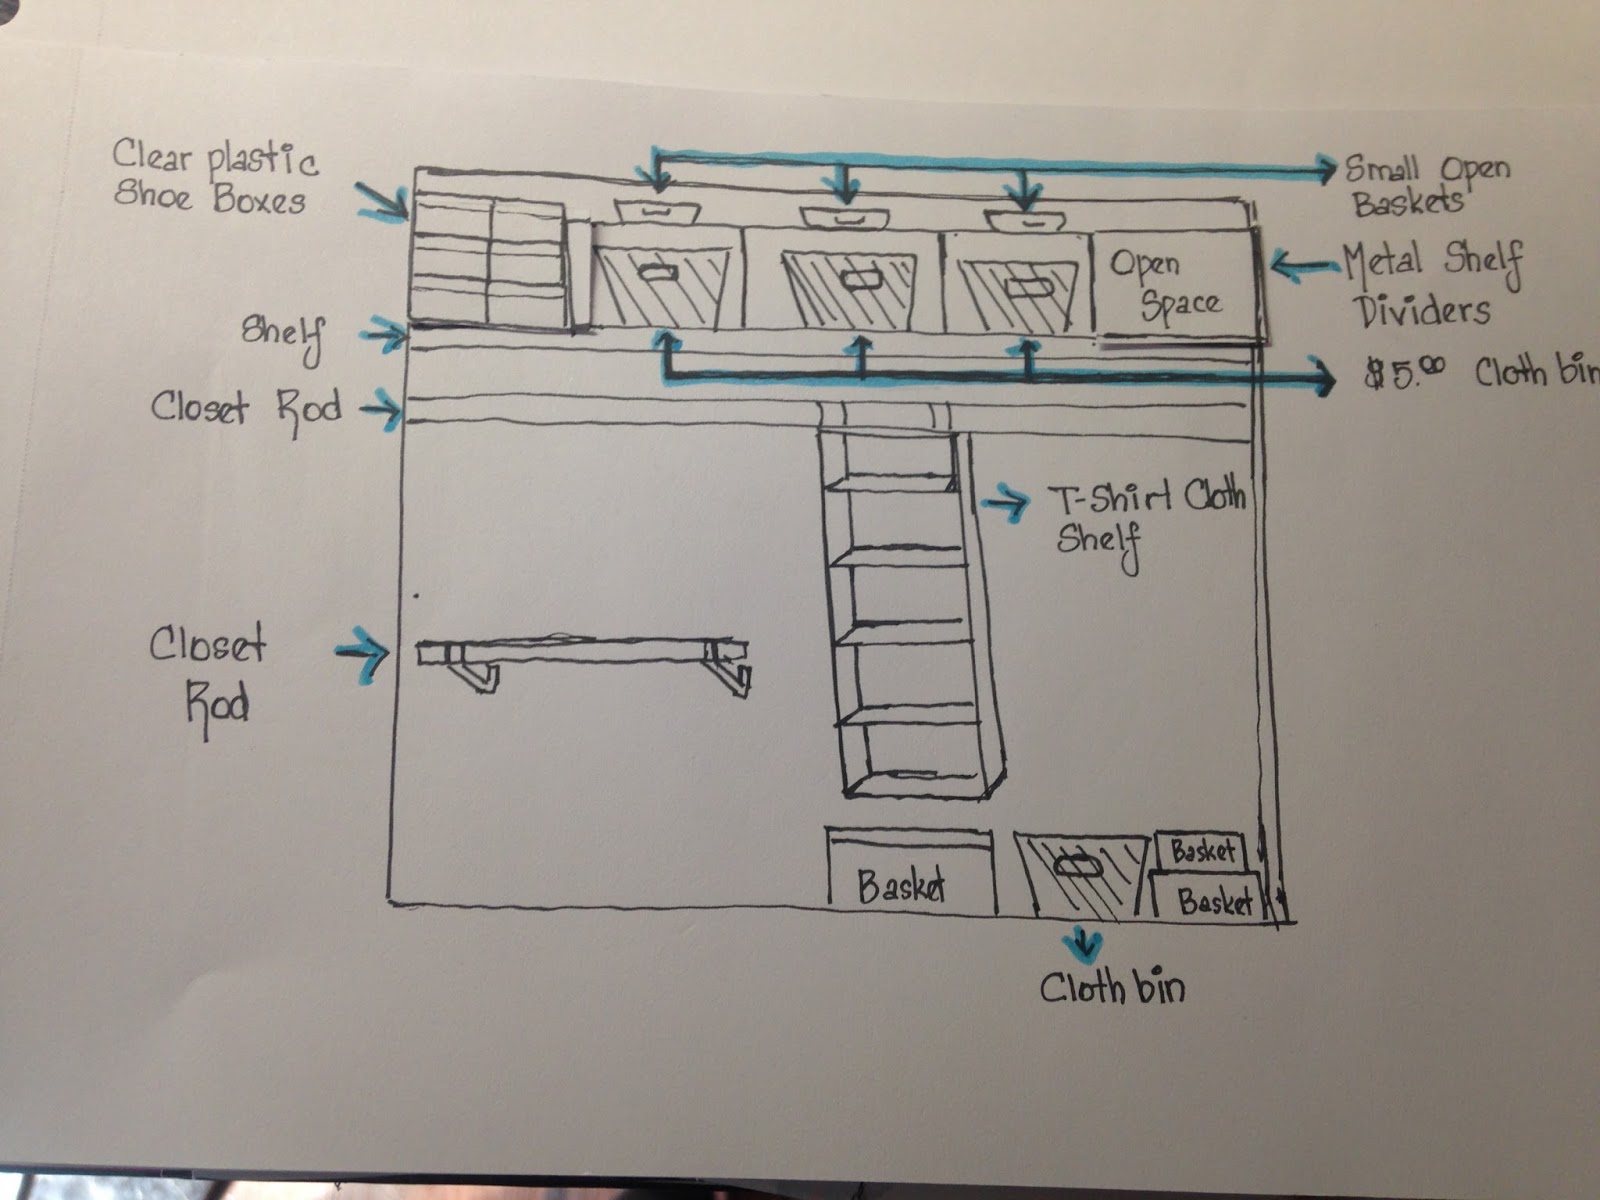
So I came up with a plan to have all of my clothes, for the most part, in my master bedroom closet and I would put my shoes, formal wear and accessories in the other closet. But I still had to figure out how to make that tiny closet work.  I didn't have the money to have a contractor come in, and I didn't have the skills to make my own built in shelves.  Thus, out of desperate necessity, the Frugal Femme Closet Make-over was created.

This will be the blueprint for the closet that I am going to show you how to create.  This closet cost me slightly less than $150 to create.  My husband's closet cost $20 and my accessories closet cost $100. (I will also show you how to create both of these closets, in case these storage solution works better for you,  but today, we will focus on the closet solution that I came up with for the master bedroom.

Supplies you will need:

1 closet rod about 2-3 feet long   ($20-$25 at Lowe's)
Brackets to hold up closet rod ($5 -$10 at Lowe's)
1 Wire Modular Storage Shelf ($20 Target or Online)
4 Cloth  Storage Bins ($5 each at Walmart)
4-6 Clear Shoe Box ($2.00 each at Marshall's or $1.00 each at Walmart)
3 Small Open Baskets ($5.00 each at Marshall's)
1 T-shirt Hanging Shelf ($15 each at Walmart)
2 Medium Size Baskets with Lids ($20 each at Marshall's)
1 Medium Size Open Basket ($15 at Marshall's)
2 Rolling Plastic Storage Bins for Under the Bed ($20 at Walmart --not really part of the closet makeover cost consideration but put here because they are wonderful and useful


Instructions
1.  Hang the closet 2-3 foot Closet rod to the left of your closet.  You want to make certain that you hang it low enough so that your shirts on hangers still have room to hang with bunching at the bottom and catching on the bottom rod but high enough in the closet so that pants and short-mid length skirts do not drag on the floor.  I  hung mine about 32 inches from the floor.
  -- It is up to you what you would like to place on this rod, but I would suggest pants, jeans and mid
     length skirts. 
2.  Put together the wire Modular Storage Shelf and Place on top of the built in shelf that was provided with the closet.  I found that I only had enough space to do one row across the closet, but your closet may be configured differently.
     I put the right side of the bin against the right wall of the closet and that left me about 12 inches of open space in the closet.
3.  Hang the T-Shirt Hanging Shelf so that the left side of the shelf touches the low hanging rod you just installed. I put my t-shirts and cardigans in this shelf as I do not have enough t-shirts to fill all the shelves but you can put any of your clothing that you would fold rather than hang.    It is advisable that you reinforce the bottom of each of the shelves so that they do not fold in under the weight of your clothes. You can use cardboard wrapped in contact paper, but I find that Hobby Lobby and Michael's carry thin 12 by 12 pieces of  for about $1-$3.  These, wrapped in contact paper so that the clothes slide easily, work great to reinforce the shelves and keep them from bending.

You now have the basics to start organizing your closet.  This is your closet, you can do whatever you want, but here are some general guidelines that you may want to consider while organizing:

                                            I don't like sliding doors, so I replaced the doors
                                                  with a tension rod and shower curtains.
To answer those doubters, no I did not just straighten my closet
for this picture.This is how my closet has looked for two years.

Hanging Clothes
Hang any shirts that are not t-shirts or sweaters on the top rod to the left of the closet.  I like to hang mine by type and then color in the follow order going from left to right:
        --  Sleeveless blouses/silk camis
        --  Short sleeve blouses
        --  Long sleeve blouses
        --  Blazers and jackets
To the right of the Hanging T-Shirt Shelf hang long skirts and dresses.  I like to hang skirts, then sleeveless dresses, short sleeved dresses, then long sleeve dresses.  Any maxi dresses that I have get hung all the way to the right of the closet closest to the wall so that they have the most space to hang.

On the bottom rod, hang your mid-length and short skirts and your pants and jeans.  I like to hang my skirts to the left and my pants to the right, but if you wear more skirts than pants, you may want to arrange them the other way around.

You should now be ready to see what you need for your folded clothes.

Folded Clothes
I don't know what your clothing situation is.  If you are athletic, you may have a lot of work-out clothes that you want to fold and put away.  Or you may be a sweater fiend.  No one knows better than you what you own and how it could be stored.  So I am going to tell you how I stored my clothes in the hopes that it will inspire you for what you need for your closet.

         Clear Plastic Shoe Boxes -- these are great for things other than just shoes, they are also the
          perfect size to store your bras the correct way.  You can also use them to hold your under wear,
          panty hose and any other small pieces of clothing that work well in small bins.

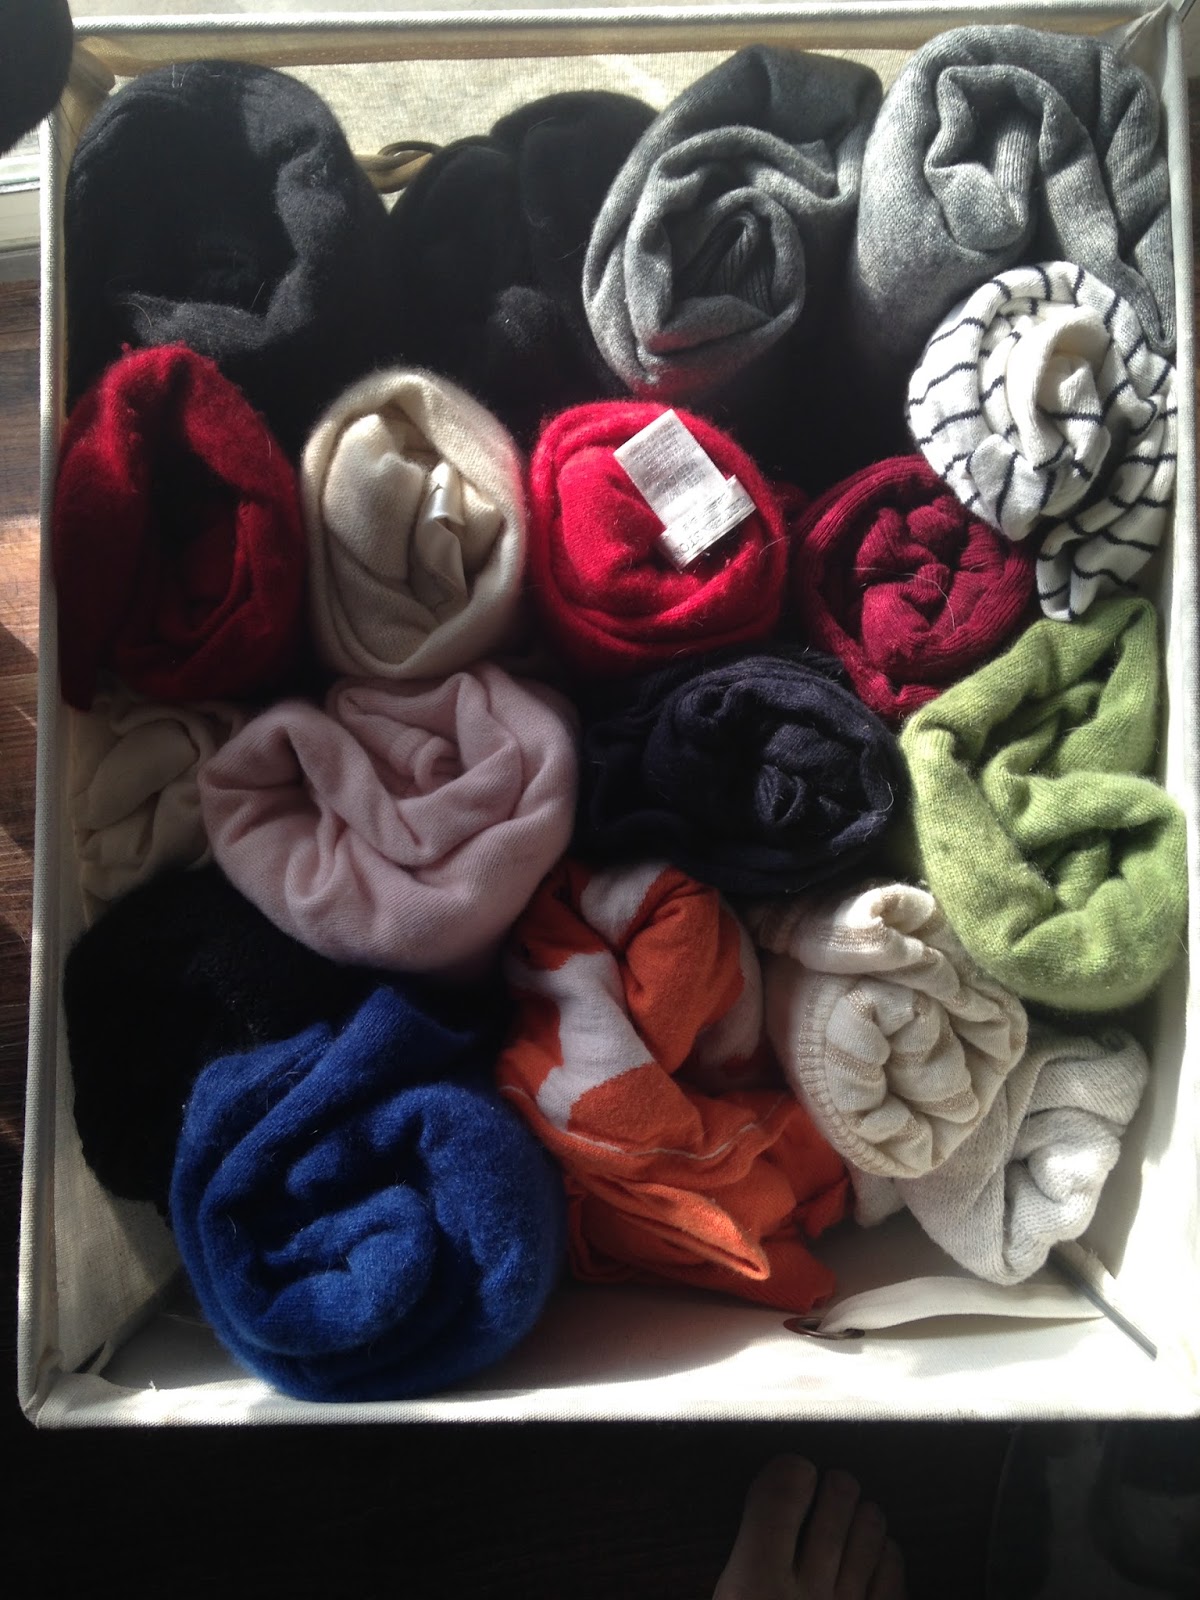
          Cloth Storage Bins -- I like to roll my clothes and put them in bins.  In the cloth bins I store
          thin, warmer weather sweaters, camis and tank tops, rolled shorts and jeans.
                                                  This is a view looking down into the bin.

          T-Shirt Hanger --  I put my t-shirts and cardigans in the various shelves, but you could also
          put sweaters or jeans

         Small Open Baskets -- These are great for holding socks, underwear and scarves.

         Baskets with Lids --  I use these for my bulkier winter sweaters.  I like to have the baskets with
         lids so that I don't have to worry about them getting dusty over the summer months.  I do not  
         switch out my closet from summer to winter clothes --mostly because I live in Louisiana and
         the only season that we ever know that we are guaranteed to have is summer.

         Medium Size Open Basket -- Bulky/thick cardigans and jeans, rolled and put away.

        Rolling Plastic Storage Under Bed Storage Bins  -- Active/Sports wear and cotton night
        clothes.  (If you like silk and satin nightgowns I would recommend hanging them.  Either on the
        closet rod or on hooks or nails put on the wall of the closet.)

This should give you a good place to start in your closet renovation.  I will continue in another post to tell you an awesome, easy way to store your scarves and hats and will show you the other two closets and their storage solutions.  But first, I can't ignore that Valentine's day is coming up.  So my next post will be cost-effective ways to celebrate the coming holiday!!!

Sunday, January 31, 2016

01/30/16 - A Frugal Femme Closet Make-Over Part 1

Hello Everyone!
I was going to start this post with how to "renovate" your closet for $150.00.  But as I started getting the post together, I realized that I was missing a vital step.  Before you can renovate your closet, you have some prep work to do because, first, you have to organize it.
The very first step for a closet renovation is going through every piece of clothing that you own.  Yes, I do mean everything.   This part of the project can take quite a bit of time depending on how much clothing you own.  I would slot a weekend for this part of your closet renovation alone.  This project will give you the perfect opportunity to go through your clothing and "weed" out your closet to make it a more functional space for you.  "Why am I going through every piece of clothing I own?" you may ask. Well.....
                        1.  You want to know what you have so you know the storage solutions that you need.
                        2.  You are going to get rid of anything that no longer works for you in your closet
                             creating space in your closet.

I used to love to watch What Not to Wear and other shows where organizers would come into a person's home and organize their life for them.  I always wanted to hire a personal organizer but there was no way that I could afford even an inexpensive one. So I went to the library and checked out books on the subject.  I also went on the internet and read what other people were doing to organize their lives.  Some of the advice seemed incredibly impractical to me, other pieces of advice I modified and made work for me.  Here is the most important piece of advice that I will give to you about organizing gathered from books and personal experience: 

                                Make it easy to get to your items AND to put away your items.

It doesn't matter how organized you begin once your closet is finally organized, if you don't plan for ease of use, it won't stay organized because it will be too much of a pain for you to maintain it. For example, if you decide that you want to organize your clothes and use stacked baskets, I would recommend no more than three baskets.  Why?  Because once you get past three baskets, it becomes a chore to start getting to the items in the bottom basket and, if you are anything like me, you will put those clothing items in a pile somewhere and completely nullify having an organizational system in the first place.

Closet Renovation Step 1

Items you will need:
Plastic bags for items that you will be getting rid of
Plenty of space to lay out clothing

Go through your clothes and remove those items that are in need of repair, have not been worn in a year or no longer fit. This step can be the hardest step.  But it is necessary.   This means trying on any piece of clothing that you are not certain fits as it should. Keep these guidelines in mind:

*  If an item is torn or missing a button, either take this time to repair the item or get rid of it.  Or, if you are needle and thread challenged, put it in a bag to go to the tailor.  Be honest with yourself.  If you are not going to go to tailor, get rid of the item.  


*  Do not keep those items that you once wore but now cannot fit into to.  Seeing "skinny" clothes in your closet will just depress you and do you no good. You may keep one pair of jeans for inspiration.   The reverse is also true if you have lost a lot of weight.  If you spent a lot of money for your clothing and you are reluctant to get rid of them because it seems wasteful, take them to a tailor and see if the tailor can alter them to fit you as you are now.  If  there is nothing the tailor can do, just let them go. 


*  Don't keep the item that you bought because it was such a good deal in the store but then never wore because it simply isn't you and you got caught up in the euphoria of a good deal. If you think it will sell, you can put it aside to sell on eBay or to sell at a commission shop but it is only taking up valuable space in your closet and needs to go.

*  Remove items that are worn beyond further wear and cannot be repaired.   This includes bras and underwear that have been stretched beyond recognition, socks that have lost their elasticity, shoes that a homeless person wouldn't wear, and clothing that is only held together with hopes and wishes.

*  Carefully look through your items and remove any items that have been stained and the stain cannot be removed.  You may keep one two sets of these for house renovations and painting and the like but, unless you are an artist or have a messy job and wear these clothes to work, get rid of them.

*  Remove any item of clothing that you are keeping for "sentimental reasons".  You can take a picture of it and keep your memories that way.  Or, if the material is beautiful and there is enough, put it aside to make a throw pillow out of it.  Either way, remove it from your closet.


*  If you have not worn an item in over a year, remove it from your closet.  (The exception to this
    rule is evening wear.  If you have a nice formal gown that you can wear to a formal occasion-
    keep it.  It is always good to have one evening piece in your closet for those times when you have
    an unexpected social occasion.  Or, an occasion that is not so unexpected but at a horrible time in
    your budget for you to be purchasing a dress that you may only wear once or twice a year.) 

*  Get rid of all clothing that is not flattering to your figure.  I don't care if your mom bought it for you or if you love the color.  If it doesn't look good on you, it doesn't belong in your closet.

After going through your closet, the only items remaining should be items that you can and do wear.

You should also have a pile of clothes that no longer belong in your closet.  You may give them away to Goodwill or similar organization, put them on eBay to see if you can make some of your money back OR, and this option is my favorite,  if you have friends who are a similar size to you, see if they have some clothes that they want to get rid of and do a swap party.  Just because it no longer works for you doesn't mean that it won't work for them.  Please be kind and respectful and don't try to swap the clothes that need repair.

Congratulations!  Once you are done with this project, you have completed the first step of renovating your closet.  The next step will be organizing and planning.

Sunday, January 24, 2016

Grilled Balsamic Chicken, Garlic Parmesan Pasta and Salad

Hello Everyone!
So, here is the second post I mentioned, today,  as promised. 
The final recipe in the first Two Week Menu Posting.
Both of these recipes are very new to my two week menu  rotation as I am branching out and trying to find healthier variations of the meals that I already make.  I made it for my husband and he told me that it was a definite keeper so I am sharing it with you.

Balsamic Herb Grilled Chicken

Ingredients
1 large chicken breast cut into two pieces
Balsamic Vinegar
1 tsp. Herb de Provence (or more if prefer)
1 tsp. Black Pepper, freshly ground
1/4 tsp. Garlic Salt
1 tsp. Onion Powder
1/2 tsp. Creole Seasoning Low Salt/No Salt version
Olive Oil/ Garlic Olive Oil/Truffle Oil

Instructions
To be honest, I don't actually use measurements to make this recipe as amounts of spices vary depending on the size of the chicken breasts and what I'm in the mood for.  So you can feel free to add more or less of any of the spices to this recipe as per your own personal taste.

1.  Split the chicken breast into two equal pieces and pat both pieces dry with a paper towel.  Put the breasts into a large plastic bag and, using the flat side of a meat tenderizer, flatten the chicken until both breasts are about one and a half,  to two inches thick all the way through.  (If you do not have a meat tenderizer, you do not have to do this step, but it does help to guarantee that your chicken breasts will more evenly cook on the grill pan.)
2.  Put enough balsamic vinegar in bottom of a square baking pan to be able to "dredge" the chicken breasts in the vinegar and put on a large plate.
3.  Lightly sprinkle one side of the chicken breasts with half of the  Herb de Provence, black pepper, garlic salt, onion powder, and Creole Seasoning.  Rub the seasoning into the chicken breasts, turn over and repeat the process.  Let the seasoning soak into the chicken for at least five minutes.
4.  Using a pastry brush, coat a grill pan with the olive oil of your choice.  I like to do a combination of garlic oil and truffle oil, but regular olive oil will work just as well. Heat the oil in the grill on medium heat.  When cold water droplets flicked on the grill pan bounce or "dance" the grill pan is ready.
5.  Put chicken breasts on grill pan and cook about 7 minutes on each side until chicken is cooked all the way through, turning only once.  You will need to take a pair of prongs and gently move the chicken along the grill pan to keep it from sticking, but do not turn. 
6.  About 4 minutes into cooking the first side of the chicken breast, brush balsamic vinegar on top of chicken.  After about 3 more minutes turn the chicken.
7.  About 3 minutes after you have turned the chicken breasts, brush top of chicken breasts with balsamic vinegar and let cook for about four more minutes or until chicken is cooked all the way through.  (Juices should run clear when the chicken is pierced.)
8.  Let rest for about 5 minutes before serving.


Garlic Parmesan Pasta

Ingredients
1 lb. angel hair or spaghetti pasta.  (I don't weigh this, I just eyeball it.)
2 tbsp. garlic olive oil
1 tbsp. butter
2 tsp. black truffle salt  
1/3 cup freshly grated parmesan cheese

(Variation of recipe.  I know that not everyone will buy truffle salt, but you may buy the not too pricey truffle oil to help expand your pantry and add that special something to your dishes.  If this is the case, you can substitute 1 tablespoon of truffle oil,  and one table spoon of garlic oil  in place of the garlic oil and 2 tsp.kosher salt in place of the truffle salt.  To get the garlic taste that you are removing from changing the garlic oil ratio, add one clove minced garlic to the pan while the oil heats, making certain not to burn the garlic.)

Instructions
1.  Prepare pasta per package directions but DO NOT ADD ANY SALT to the pasta water.
2.  Heat garlic olive oil and butter in a large pan.
3.  Before draining pasta, save one cup of the pasta water
4.  Add drained pasta to the garlic olive oil and butter.  Using prongs, toss coating the pasta.
5.  Add black truffle salt and toss in grated parmesan cheese.  Using prongs, toss to distribute among the pasta.  If pasta is too "stiff" add pasta water to loosen.

Serve Immediately.

TIP: You do not have to buy garlic olive oil, you can make your own just a few days before you make this recipe.  It is nice if you have an olive oil infuser,  (my husband got me one for Christmas)but it is not necessary for making flavored olive oil.  And you can make as little or as much as you want.  If you only want enough for this recipe, put 3 tbsp. of olive oil in a mason jar and add 2 large crushed cloves of garlic.  Let the garlic steep in the oil for at least three days in the closed jar.  After three days, it will be strong enough for this recipe.
If you think that you would like to use garlic infused olive oil for other dishes, fill a small mason jar with olive oil and put 5-6 large crushed cloves of garlic in the oil. Put on the lid and  let it steep for at least one week before using.  This will keep in your pantry for months and you do not need to remove the garlic from the oil.  The longer the garlic steeps the stronger and better tasting the oil will get.  I'm not sure how long the oil will last, because I usually have used mine by the time four months has passed.  A good rule of thumb is to smell the oil.  If it smells rancid, don't use it and throw it away.

Salad

You can do any salad that you would like with this recipe using up the remaining vegetables that you have in your fridge.  I actually like a salad with Ranch with this recipe, but, if you want to stay healthier, do a salad and use the oil and vinegar.

Well, as stated above, this is the last recipe of the two week menu I started in my first post.  I am going to take a break from recipes and menus for a little while and cover some other ways to be frugal in your own home.  Don't worry, I will have more two week menus, but I want to streamline them a little for you and do some pre-prep so that I can have some gorgeous pictures for you of how to do the recipes and the recipes should look when completed.
My next post will be later this week and will cover organizing and "renovating" your closet on a shoe string budget.


Barbeque Pork Sandwiches and Pasta Salad

Hello Everyone!
I know that I have been a bad blogger and have missed two posts on the two week menu. For this, I apologize.  In my defense, it is Mardi Gras Season in Louisiana.  For those of you who do not live in Louisiana, I know that Mardi Gras is not even a blip on the radar, but down here, it can get busier than Christmas with the different balls and functions that you attend.
This weekend I went to the Apollo Ball on Friday, left the ball and started preparing food for my friend whose daughter was having her first birthday, and was up until 3am preparing food.  I woke up at 7:30am to finish preparing the food and then was at the party til 3pm.  By that point I was dead on my feet and I went home and took a nap. I had every intention of posting when I woke up, but my brain had decided that it was done functioning for the day and I just couldn't write.
So, I have been spending the morning trying to figure out how I should do the two posts.  I thought about doing one long  post, but that seemed a little too much. So I decided that I would post the two blogs that I missed today and then post what I was planning for today sometime later this week.
I do not plan on blogging every day except for when I am doing the two week menus, and I plan on spreading them to about one two week menu per month as I figure out better ways to present them to y'all and make them more enticing and interesting to view.
For now though, I will continue on as I have been doing the past two weeks. Today We are doing Barbeque Pork Sandwiches and Pasta Salad. The sandwiches are made using the last bit of meat that you have left over from when you cooked the pork tenderloin.  They are super easy and super fast to make and are perfect for those nights where you have somewhere to be and you know there will be no food served.  For me, that would be when I have rehearsals for a show so, for those of my friends who are in the theatre, this is a good rehearsal night meal.


Barbeque Pork Sandwiches

To be honest, I do not have a set recipe for this.  It is one of those meals where I throw in a little of this and a little of that and let the spirit move me.  Which I only realized when I sat down to write this recipe.   So, if you want to add things or take things out of this recipe, go for it!  (I know I do.)
Here is a tip for when you are putting in a little of this and a little of that, I learned this from my best friend, Chris,  years ago and it stuck with me--along with her recipe for a homemade breakfast sandwich that kicks all of the restaurant chains breakfast sandwiches in the butt.  If you are putting in all kinds of different herbs and not following a recipe, do the smell test.  Open up the bottles of herbs and smell them along with your main ingredient.  The rule of thumb, which I have found to be usually true, is that they smell good together, they will taste good together.

Ingredients
1-2 cups shredded pork (depending on how much is left over from your roast.)
1/4 cup chicken broth
1/2-1 cup barbeque sauce (do this per your preference depending on how much you like barbeque sauce, I usually like Sweet Baby Ray's Barbeque Sauce but you can use any kind you like--including one you made yourself!)
1/2 cup sherry (or chicken broth/stock)
1 tsp. Worcestershire Sauce (optional)
1 tsp.  onion powder (optional)
1 tsp. garlic powder (optional)
(I do not usually add salt to this recipe as I find that there is plenty in the barbeque sauce.  However, if you are using a homemade barbeque sauce, you may want to add a pinch of salt.)
Hamburger bun (Can be put on bread if you don't have any hamburger buns.)

Instructions
1.  Using a fork, shred the pork roast. You can do this using one fork or two forks.  I usually start with one fork and then work my way up to two.  If shredding is too much work for you, and I have had nights where it has been for me, you can take a knife and chop the pork roast into small pieces, or you can use the food processor to "shred" the pork, making certain that you only pulse a few times or it turns into a weird consistency.
2.  In a large cast iron pot or heavy skillet, put in your shredded pork and 1/4 cup chicken broth.  Since your pork is already cooked, you can lose some moisture when you reheat it, adding the chicken broth will help to keep the meat moist, it will also help keep your meat from sticking to the pan.  Cook on medium heat.
3.  When the liquid in the pan starts to simmer, add all of your remaining ingredients to the pot and stir until combined.  Continue cooking on medium heat until the liquid has reduced and the barbeque pork has reached the desired consistency, usually about 15 minutes.  I like my barbeque pork to slightly thick, so when I put it in the bun, it doesn't run or soak through to the bottom of the bun. (Think of the consistency that you like for sloppy joes and apply the same rules here.)
4.  Put on a bun/bread and serve warm.

Pasta Salad

This is a recipe that I came up with when I could no longer find the Italian Pasta Salad that I loved that Betty Crocker put out.  I don't know if they stopped making it because it wasn't a top seller, or if my local grocery stores stopped carrying it, but I made it my mission in life to try to come up with one similar myself because I loved it so much.  After many experiments, this is the recipe that I came up with.

Ingredients
2 cups tri-colored pasta
1/2 package of Good Seasons Zesty Italian Salad Dressing Mix
1/2 cup mayonnaise
1/8 tsp. truffle oil (optional--but this one ingredient really takes the recipe from something ordinary to something delicious.)
2 tsp. Progresso bread crumbs (I like the Italian or garlic and herb)  This is to taste, if you want to add more, please do.
2 tbsp. freshly grated parmesan cheese (Again, add more or less per your personal taste.)

1.  In a medium sized pot, cook the pasta according to the package directions.  ( I always add about a teaspoon of butter and a teaspoon of kosher salt to my pasta water, bring it to a boil and then add my pasta.  I find it helps keep the pasta from sticking and adds a little flavor.)
2.  While the pasta is boiling, in a medium/large bowl  combine the Italian Dressing seasoning mix, the mayonnaise and the truffle oil.  Set aside.
3.  When the pasta has reached your preferred pasta consistency, I like mine a little al dente, drain the pasta in a colander.  After the pasta has drained, run cold water over the pasta, mixing/folding with a spoon until all of the pasta becomes cool to the touch. Shake the pasta until most of the moisture is gone.
4.  Pour the pasta into the bowl with the mayonnaise mix and stir until all the pasta is coated.  
5.  Shake bread crumbs over pasta.
6.  Grate the parmesan cheese over the pasta and bread crumbs.
7.  Cover with plastic wrap and keep in the fridge for no less than 15 minutes allowing the pasta to cool even more and the flavors to combine.)

TIP:  I usually make the pasta first and allow it to cool in the fridge while I make the barbeque pork.

Thursday, January 21, 2016

Ham Frittata and Salad

Hello Everyone!
I love individual foods.  I love them even more if they are mini versions of larger food.  That is why I am going to show you two ways to do this Ham and Cheese Frittata dinner-  one normal size and the other as individual little servings. This dinner recipe calls for the use of some of the ham section that should be left over from the ham we did not use for pan fried ham night.


Ham and Cheese Frittata

Ingredients
4 eggs
2 tbsp. milk
1 tbsp. onions, minced
1 tsp. butter
1/2 tsp. dried thyme
1/2 tsp. dried dill
1/4-1/2 cup cheddar cheese, shredded (amount used is per your personal taste)
1/2 cup cooked ham, diced
Salt and pepper to taste OR Creole Seasoning and pepper to taste

Instructions (Mini Frittatas)
1.  Preheat oven to 375 degrees.
2.  In a small non-stick skillet melt 1 teaspoon butter over medium heat.  Once butter is melted, add the minced onions and sauté until they are crisp tender--about 3-5 minutes.  You will know they are done when the onions turn translucent. Remove from heat.
3.  While the onion is sautéing,  whisk the eggs, milk, butter, thyme, dill, cheddar cheese, diced ham, salt/Creole seasoning (I prefer Creole seasoning.) and  pepper together until the eggs become smooth and golden yellow.
4.  After the onion has cooled a few minutes, add the onion to the egg mixture and stir to combine.  You want to make certain the onion is cool or it can start cooking the egg and you don't want that to happen.
5.   Spray two small custard bowls with cooking spray or lightly oil with a paper towel and olive oil. Pour half of the egg mixture into each bowl.  Set the bowls onto a baking sheet and put into the pre-heated oven. 
6.  Cook for 22-25 minutes until a toothpick inserted in the middle of the egg mixture comes out dry.
7.  Serve warm or at room temperature.

Directions (One Pan Frittata)
1.  Position a rack about 8 inches from the broiler and preheat.
2. In a small/medium cast iron skillet or oven safe frying pan, melt 1 teaspoon butter over medium heat. Once butter is melted, add the minced onions and sauté until they are crisp tender--about 3-5 minutes.  You will know they are done when the onions turn translucent. Remove from heat and put onion in a bowl reserving the skillet for later use- do not wipe away the grease.
3.While the onion is sautéing, whisk the eggs, milk, butter, thyme, dill, cheddar cheese, diced ham, salt/Creole seasoning (I prefer Creole seasoning.) and  pepper together until the eggs become smooth and golden yellow.
4.  After the onion has cooled a few minutes, add the onion to the egg mixture and stir to combine.  You want to make certain the onion is cool or it can start cooking the egg and you don't want that to happen.
5.  Heat the cast iron skillet over medium heat.  Pour the frittata mixture into the pan and stir to make sure the fillings are evenly arranged. Cook, stirring gently a couple times in the first minutes of cooking. Then let the mixture cook undisturbed until the bottom sets, about 5 minutes.
 6.  Transfer the skillet to the oven and broil until the eggs are just set and brown, about 3-5 minutes. Take care not to overcook or the eggs will be dry
7.  Remove from the oven, cover, and set aside for 5 minutes.
8.  Invert the frittata onto a large plate or platter. Cut into wedges and serve warm or at room temperature.


Spinach Salad

This salad is a very simple salad that balances well with the frittata.  It is a side dish salad only, I would not try to make it a meal.

Ingredients
2-3 handfuls baby spinach (or more to personal preference)
3 tbsp. extra virgin olive oil 
1 tablespoon red wine vinegar (or balsamic, apple cider, rice, sherry, white, or other wine vinegar)
1 clove garlic, very finely minced
1 tsp. Dijon mustard
Pinch of kosher salt. (To Taste)
A turn of freshly ground black pepper (or more to taste)
1-2 tsp. freshly grated parmesan cheese

Instructions
1.  Put the baby spinach in a large bowl after cleaning the spinach and patting it dry.
2.  Grate parmesan cheese over spinach.
3.  In a small bowl, whisk together the olive oil, vinegar, garlic, Dijon mustard, salt and pepper until combined.    OR Put all ingredients into a mason jar and shake until combined.
4.  When ready to serve pour the desired amount of prepared dressing over the salad and toss.

NOTE:  Since this is a vinegar and olive oil dressing, it will last in the refrigerator for two to three days.

Wednesday, January 20, 2016

Chicken and gravy, rice and wilted spinach

Good Evening Everyone!
My post is late tonight because I went to go see The Cmpleat Wks of Wllm Shkspr (abridged) special, friends and family performance at Theatre Baton Rouge.  I have friends who are in the show and it was hilarious and I loved it. If you live in Baton Rouge, you should definitely go see it.  It did however delay my post and for that I apologize.
Tonight's recipe is created using one of the mutant chicken breasts that you can get from Costco and is actually a recipe that I got from my ex-mother-in-law; a woman that I still adore and who gave me some wonderful recipes.  This recipe is, hands down, my favorite of hers.  She always called it smothered chicken, but my husband hated that name - as it always reminded him of the smothered chicken that he used to serve at Bennigan's when he was a bartender there and he didn't particularly care for the dish. So we have renamed it chicken and gravy in my house.  Change in name or not, this recipe is delicious. 
It also took me at least 10 tries to get it right and make certain that I had the right amount of ingredients because my mother in law would just "judge" the amount of ingredients without measuring them.   This, I find, is the sign of a woman who cooks a lot. My great grandmother was also someone who just put "a little of this" and "a pinch of that" in her recipes and it took our family forever to measure and write down some of our most cherished family recipes from her. I myself do the "eyeballing of ingredients" and, with this blog, I am really having to stop and measure what I put in my dishes.  Tradition kept- my great-grandmother would be so proud!


Chicken and Gravy with Rice 

Ingredients
1 lb. skinless, boneless chicken pieces cut into bite size pieces (My ex-mother-in-law would actually purchase a fryer chicken and cut it apart into pieces and would serve the pieces whole, as in she would cook breasts, thighs and legs.  I found this a little time consuming so I just substituted chicken breasts.)
Creole seasoning to taste
1/4 cup cooking oil (I personally like corn oil for this dish, but I saw her use many kinds of oil.)
2 tbsp. sugar
1 small onion, diced
1 clove garlic, diced
2 cups chicken broth or stock
1tsp. cornstarch
1/4 cup cold water

Instructions
1.  Cut the chicken into bite size, one inch pieces and place the pieces on a plate.  Sprinkle the chicken with Creole seasoning.  (This is really per your personal taste, but I usually use about 1/2 tsp. and then add more if I feel the chicken isn't covered enough. A little goes a long way, so I would experiment with small amounts and then work your way up.)
2. Cover the chicken and let the seasoning soak in for an hour.  (My mother-in-law always just left it on a plate on the countertop and I do the same.  If you are worried that practice may not be safe, you can put the chicken in the refrigerator for an hour.)  While the chicken is "soaking" prepare your vegetables.
3.  In a large, heavy duty cooking pot or cast iron Dutch oven/pot  with a lid(I prefer the cast iron and she would swear by cast iron and wood cook it in nothing else.) put in the sugar and the cooking oil.  Turn heat to medium and cook, stirring constantly.  IT IS VERY IMPORTANT YOU STIR CONSTANTLY!!!
The sugar will start getting clumpy.  Keep stirring. 
4.  Continue stirring until the sugar is smooth and caramel brown in color.  (I think of this in my mind as making a sugar roux.  It is not something that you can rush.  Cook the sugar too fast and it will burn and ruin the taste of the dish just be patient and your taste buds will be rewarded.) As soon as it reaches this stage, CAREFULLY put the chicken in the pot.
5.  Turn the chicken constantly, I know this is counterintuitive for many cooks who are proponents of the one turn only method, but you have to do this to get the sugar coating on the chicken properly.  Your chicken will start to turn a beautiful brown color.  Keep turning until all of the chicken is evenly coated and all of the pieces are a beautiful, rich, dark caramel brown.
6. Put in onions and garlic, sautéing until softened.  This should take anywhere from three to five minutes, you will know the onion is ready when it becomes translucent, again you want to be stirring constantly or your garlic will burn and become bitter.
7.  Slowly add 2 cups (or cans) of chicken broth/stock stirring as you poor in the broth/stock.
8.  Lower your heat to medium low.  Cover partially with a lid, leaving a space of about 1/2 an inch. Let it cook down for at least 45 minutes.  At this point, you do not have to stir it or do anything.  Just leave it alone and let the ingredients simmer and work their magic with each other.
9.  When the chicken has about 20 minutes left of cooking, prepare one cup of white rice according to the package directions.  Most rice directions will have the rice finishing about the same time that the chicken is done cooking.
10.  Once chicken is done cooking, remove chicken from the pot with a slotted spoon or tongs and place on a plate.
11.  In a small bowl, combine 1/4 cup cold water and 1 heaping teaspoon cornstarch.  (If you are out of cornstarch you can use flour.  If you use flour, start out with 1/2 teaspoon flour and put it in 1/4 cup hot chicken broth rather than water.)  Stir with a fork until smooth.
12. Pour the cornstarch/flour mixture into the gravy mixture in the Dutch oven and whisk until it starts to smooth and thicken.
13.  Put the chicken back into the gravy.   Serve over the white rice.

Wilted Spinach


I'll be honest with you, I do not like cooked spinach.  But (sigh)  I am trying to expand my diet and eat healthier.  This means that I  am trying to include more vegetables in my diet--despite the fact that I think that most vegetables taste like grass or dirt.  I cannot eat canned spinach (I am allergic) and there is only so much raw spinach that you can eat before you start to feel like a rabbit, so I came up with a recipe for wilted spinach.  I still don't love spinach, but I can eat this.  This was a recipe that I originally saw on a Rachel Ray show on the Food Network and then modified so that I could eat it--eventually turning it into another recipe entirely.  But the idea came from her originally so, there you go.

Ingredients
1 tbsp. olive oil
2 cloves garlic, minced
1/2 lb. spinach, washed and with the stems removed OR two ounces baby spinach
1 tbsp. balsamic vinegar
1/2 tsp. lemon juice
salt and freshly ground pepper
When I want to be bad, I also cook three slices of bacon and crumble it and then I cook the spinach in the bacon grease rather than the olive oil. It makes the spinach delicious, but it sort of defeats the purpose of trying to eat healthy if you do this to a vegetable.

Instructions
1. Heat oil in a large skillet over medium heat. 
2. Add 1 clove minced garlic and sauté for two to three minutes.  Remember to stir constantly because you do not want your garlic to burn. 
3. Add spinach to pan in stages, about a handful at a time.    The process should be:  add spinach to pan, turn in warm oil until they wilt, add another handful of spinach, etc. until all of the spinach is in the pan.  Season the spinach with  salt and pepper to taste.
4.  While the spinach is wilting, combine the balsamic vinegar, lemon and other clove of garlic. (Since this garlic is uncooked, it will give a different garlic flavor than the one cooked in oil.)
5.  Once all of the spinach is wilted, turn off the heat and pour your balsamic vinegar dressing over the spinach, and toss with tongs until all of the leaves are covered.  Serve warm.  (If you are doing this with the bacon, this is also where you add the bacon crumbles.)

I hope you enjoy the meal!