Monday, April 23, 2018

Roast Beef Boursin Bites

Hello Everyone!
I don't know about any one else, but I always seem to be a little more whipped after work on a Monday than any other workday.  Even if the work day isn't anything out of the normal.  That was how it was for me today.  Of course, it didn't help that my allergies were the worst today and were kicking my behind like they were getting paid for it.  So when I got home today, I was hungry, and didn't want to eat fast food, but I just was up to doing even one of my super basic meals.  So I decided to make a leftover picnic.


What, you may ask, is a leftover picnic?  That is when you go into the fridge, look at all of the foods that you can eat without cooking, and see if you can prepare a nice, easy cold meal out of them.  One of the things I had was a little bit of pot roast that I had made earlier in the week.  Normally I would have turned it into roast beef sandwiches - but there wasn't quite enough, or stir-fry - but I didn't feel like cooking.  Instead, I decided that I would serve them on crackers as part of my leftovers picnic. 
Oh.  My.  Goodness. 
They were so delicious that I thought that I would share this quick "meal" idea with y'all.  For those nights when cooking is just too much.

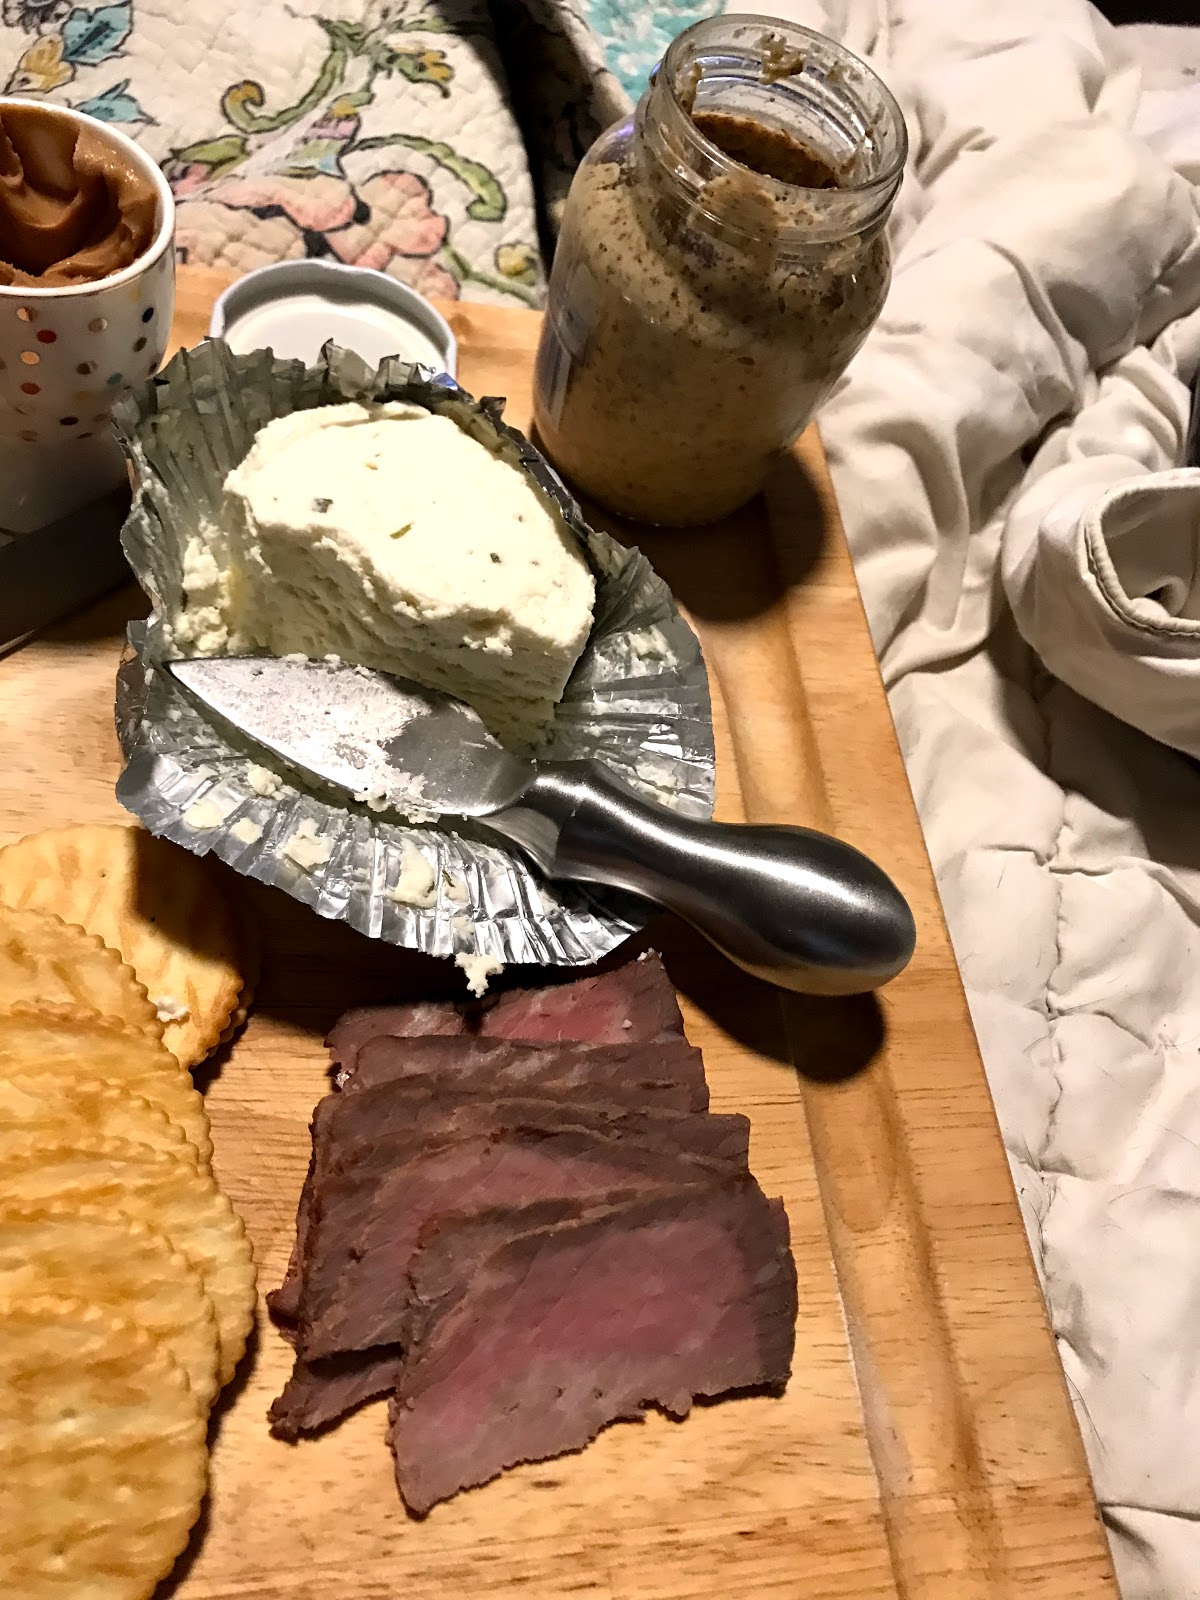
Roast Beef Boursin Bites


Ingredients
Roast Beef  (a small piece leftover from a pot roast dinner)
Boursin Cheese - Garlic and Herb
Dijon or Creole Mustard - my husband and I like the Grey Poupon Country Dijon Mustard
Round Crackers - like Ritz crackers

Instructions
1.  Slice the roast beef as thin as you possibly can.  Trying to do your best to trim them into two inch, by two inch pieces.  You know, the perfect size to put on a cracker.
2.  Assemble your cracker.  For me, I like to smear the Boursin cheese on the cracker, then put the roast beef slice so that the Boursin sort of works like a glue to keep the roast beef in place, and then I put a small dollop of the Grey Poupon.

These things are so good!  My husband and I couldn't believe how delicious they were. 

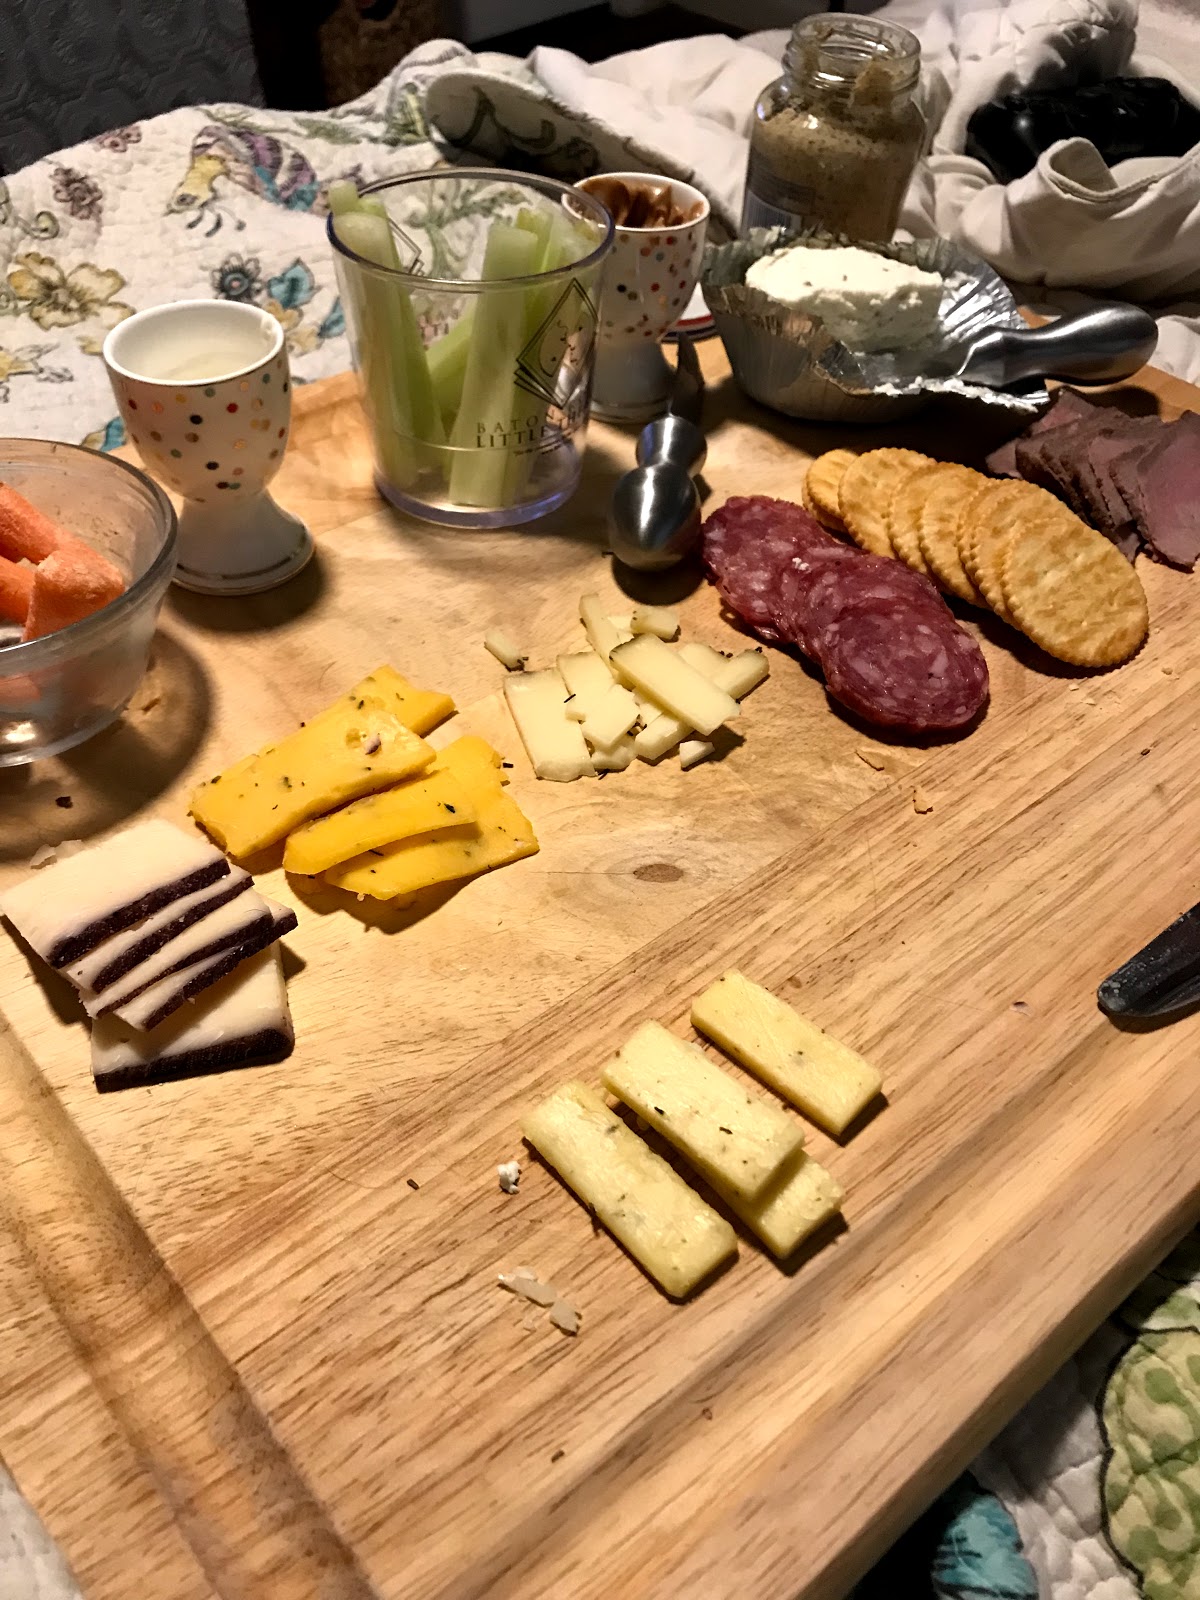
Along with the Roast Beef Boursin Bites I included the following:
     Assorted cheeses, thinly sliced
     Salami, thinly sliced
     Celery sticks with peanut butter for dipping
     Carrots with blue cheese dressing for dipping
     Grapes
     Apple slices sprinkled with lavender sugar
I put everything on a big cutting board and put it on the bed in the bedroom.  So relaxing.
I know!  It sounds fancy when you put them all together, but these are just things that I have in my fridge for lunch and dinner during the week.  (The cheese and the salami are part of my go to's for eating a semi-healthy lunch.)
It makes for a super relaxing meal - partly because you can munch on it as you watch television.  I know, I know we're not supposed to eat and watch television, but almost all of us do it, so don't judge me.  You can relax even more if you have glass of wine or cup of tea with your leftover picnic.
Well, this was just a quick post to share a quick meal idea.
Hope you enjoyed! 

Thursday, April 19, 2018

Easy One Minute Egg or No Excuse to Miss Breakfast

Hello Everyone!
In the attempt to live a healthy lifestyle, and lose about six (ahem, realism check - 3) inches of my waistline, I have been making a conscious effort to eat healthier.  I don't believe in diets and banning foods from myself.  From what I have observed in my personal life, these types of diet plans may work for a short time but they, usually, never work out in the long run- mostly because you are denying yourself everything delicious. 

Yes, this was a real ad at one time.  Don't eat food! Smoke cigarettes instead.  Ummmm.  I think I'll pass.

Instead I prefer to try to make certain that the foods that I am eating are the right proportions according to the Food and Drug Administration.  I also try to make certain that I eat at least three meals a day - and a light snack. This means that there is no missing breakfast - which may be the most important meal of the day but is absolutely the easiest meal of the day to skip. 
To that end, I have been trying to come up with easy breakfasts that I can take to work that aren't just yogurt.  So far, my favorite is what I am calling the one minute scrambled egg. In fact, I love it so much that I thought that I would share it with you.

The One Minute Scrambled Egg


I call this recipe the minute egg but sometimes it can take less or more time, depending on how cold your fridge is and how powerful your microwave runs, but I have never had it take less than 30 seconds or over 1 minute and 15 seconds, so I have averaged the time and call it the minute egg.  This recipe can be easily modified to suit your personal taste - but my recipe is very low in fat, although it doesn't taste like it, so, do yourself a favor and don't make it with egg whites to try to reduce calories.

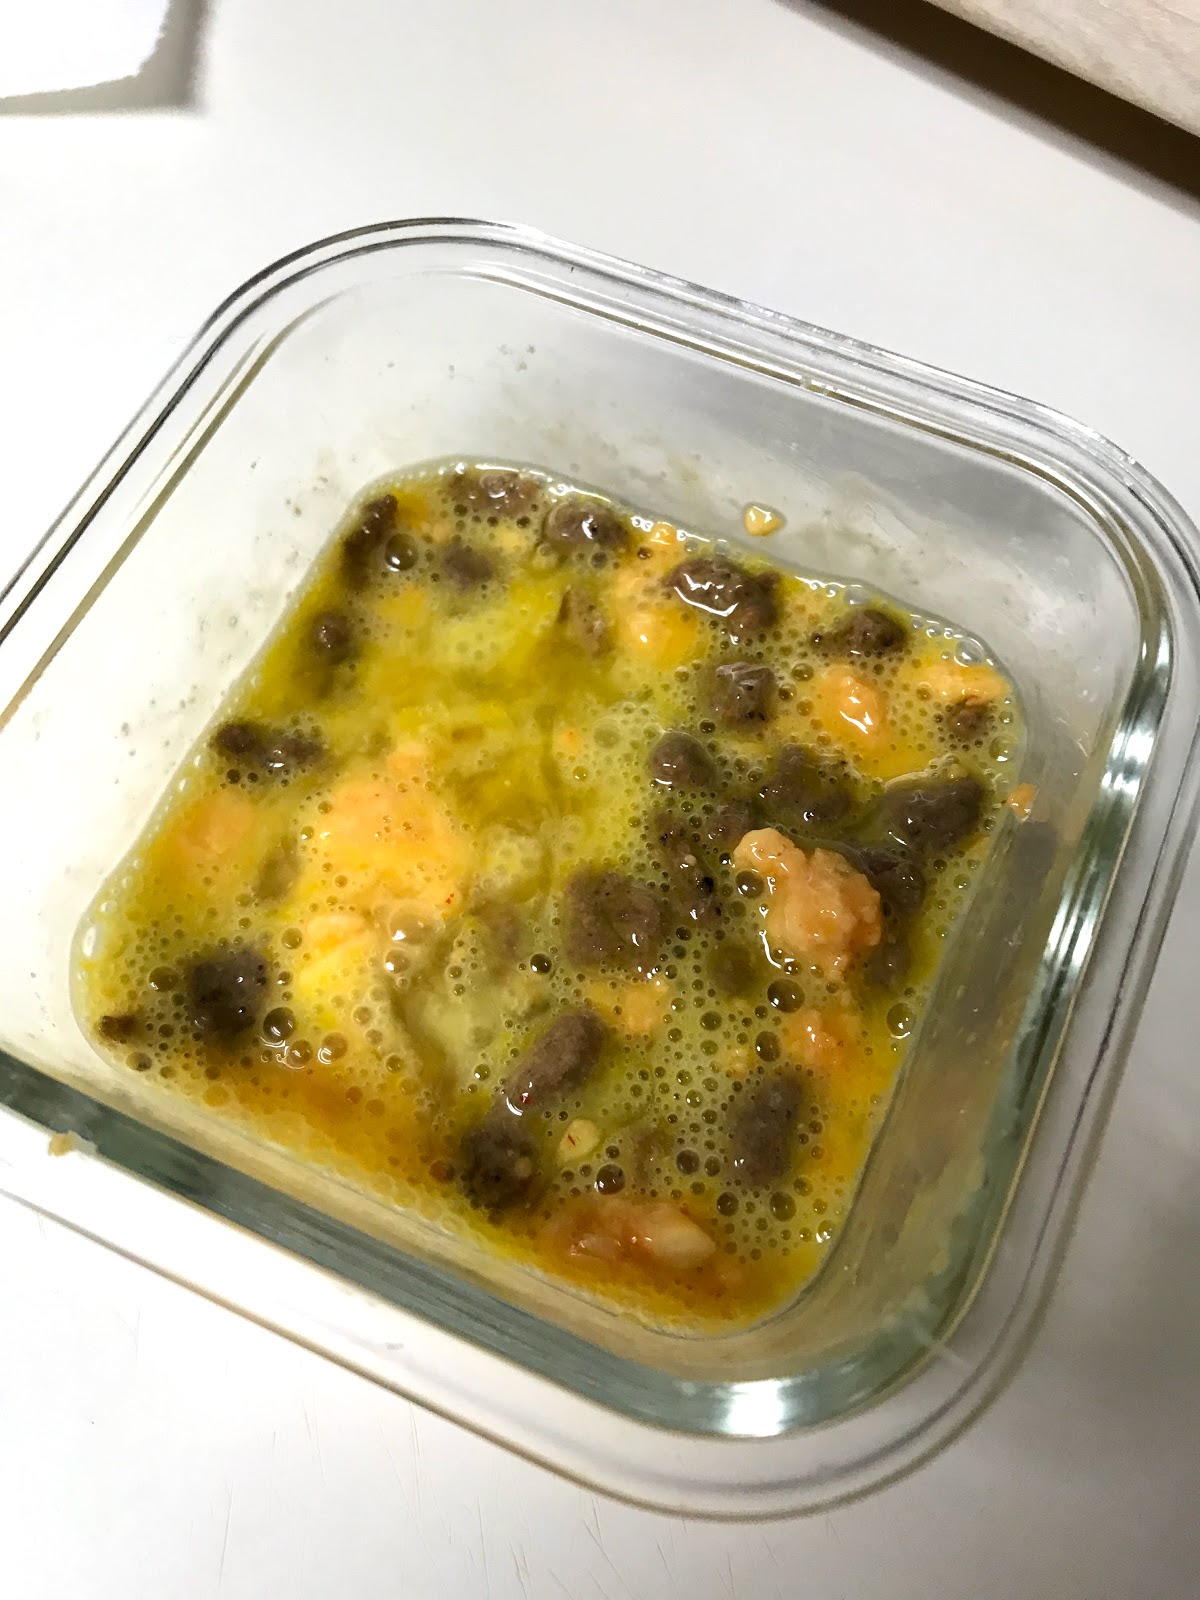
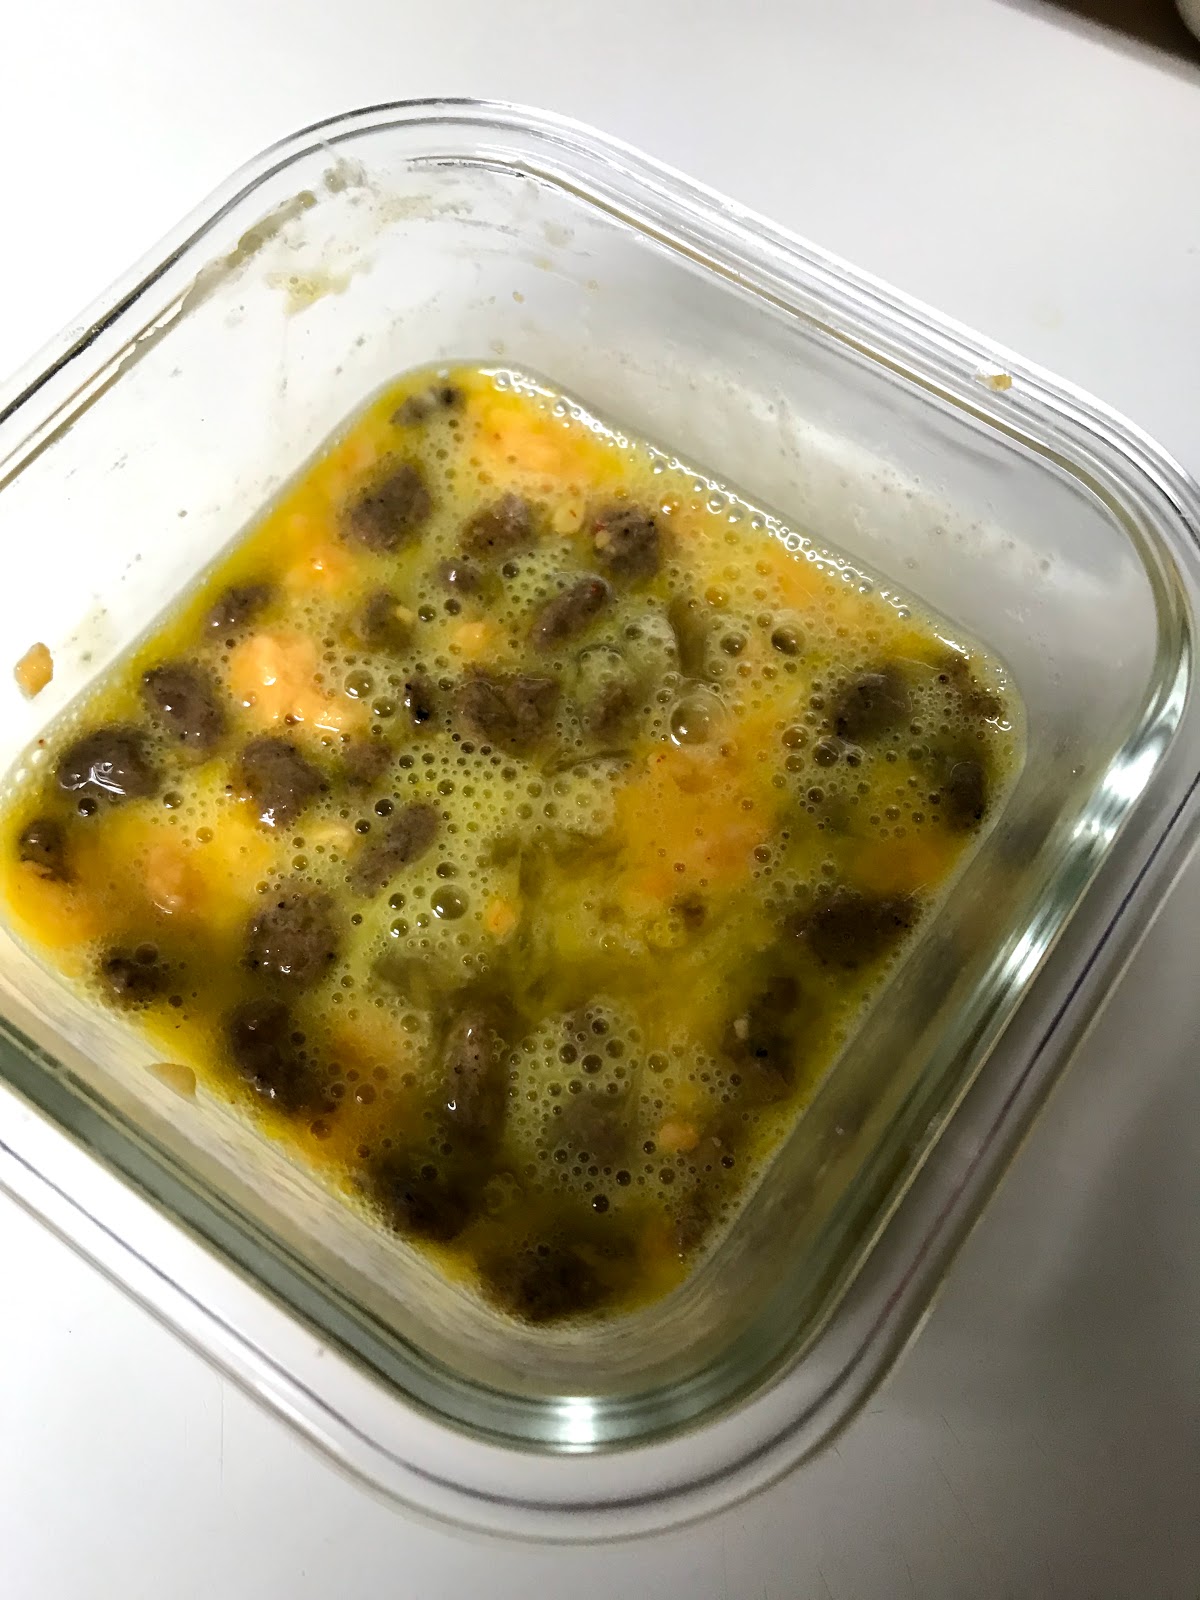
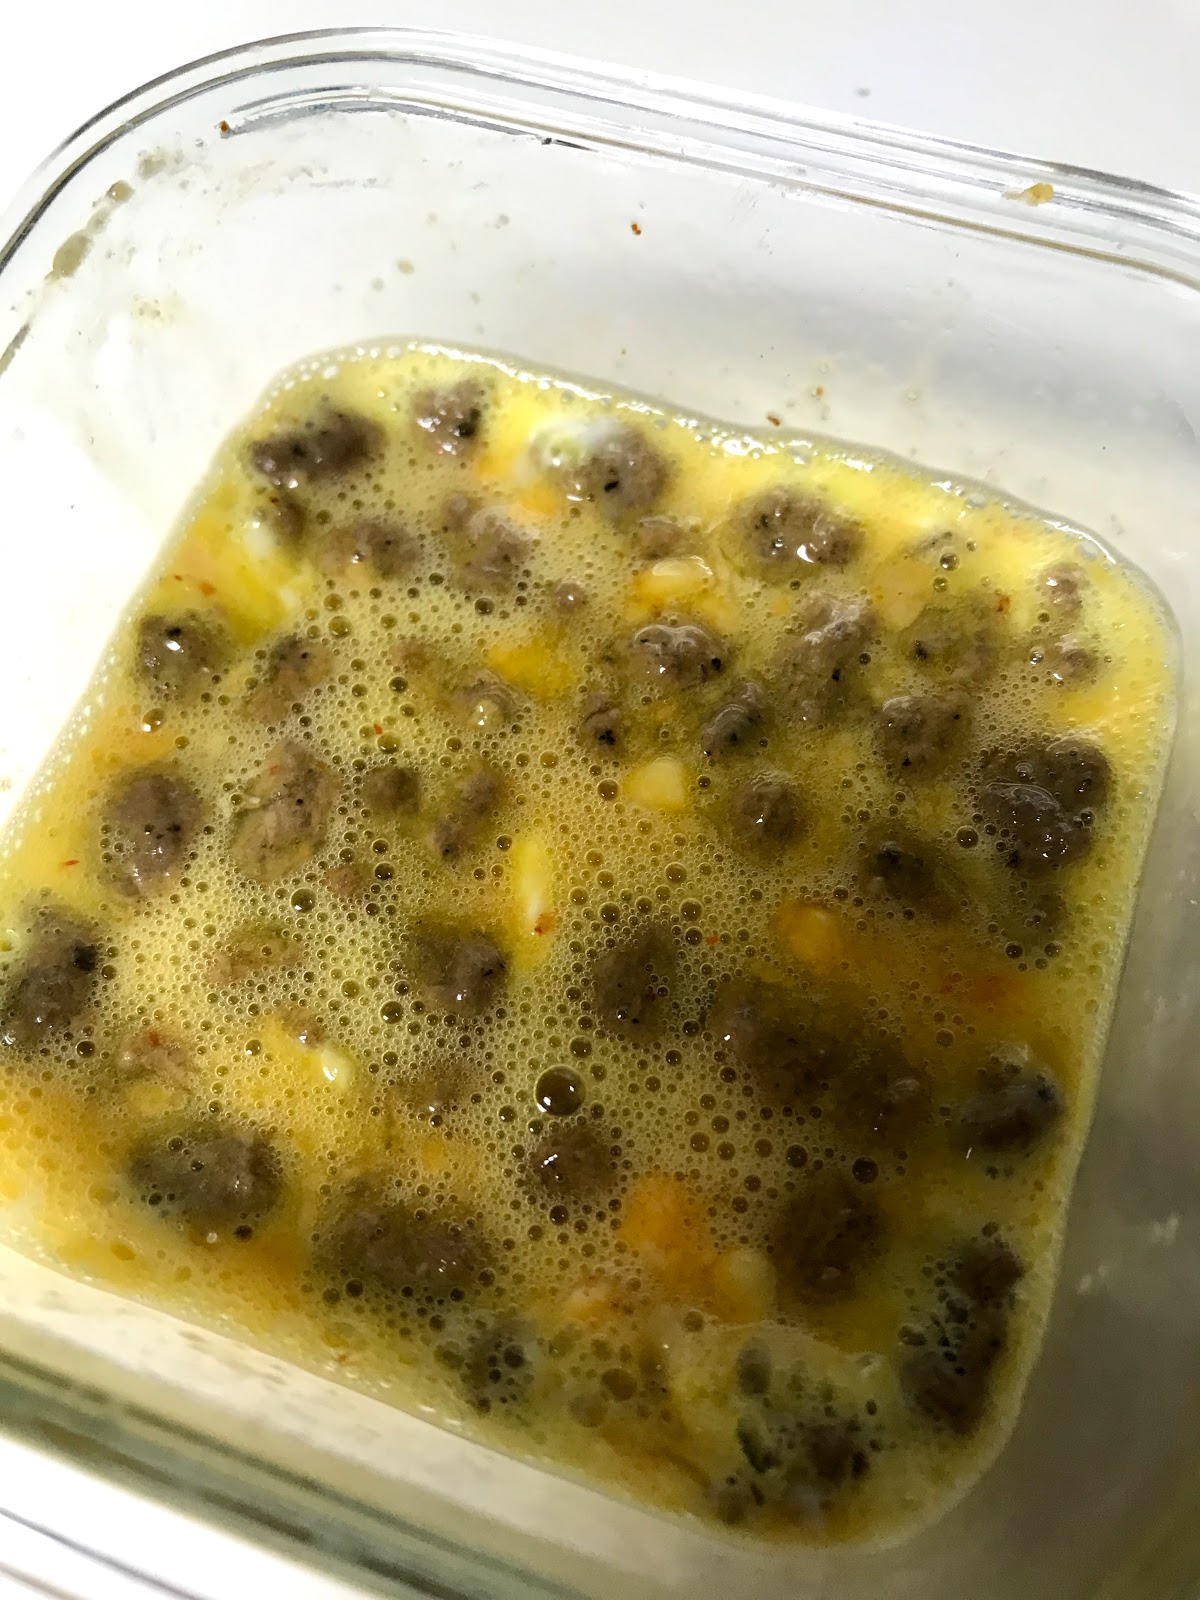
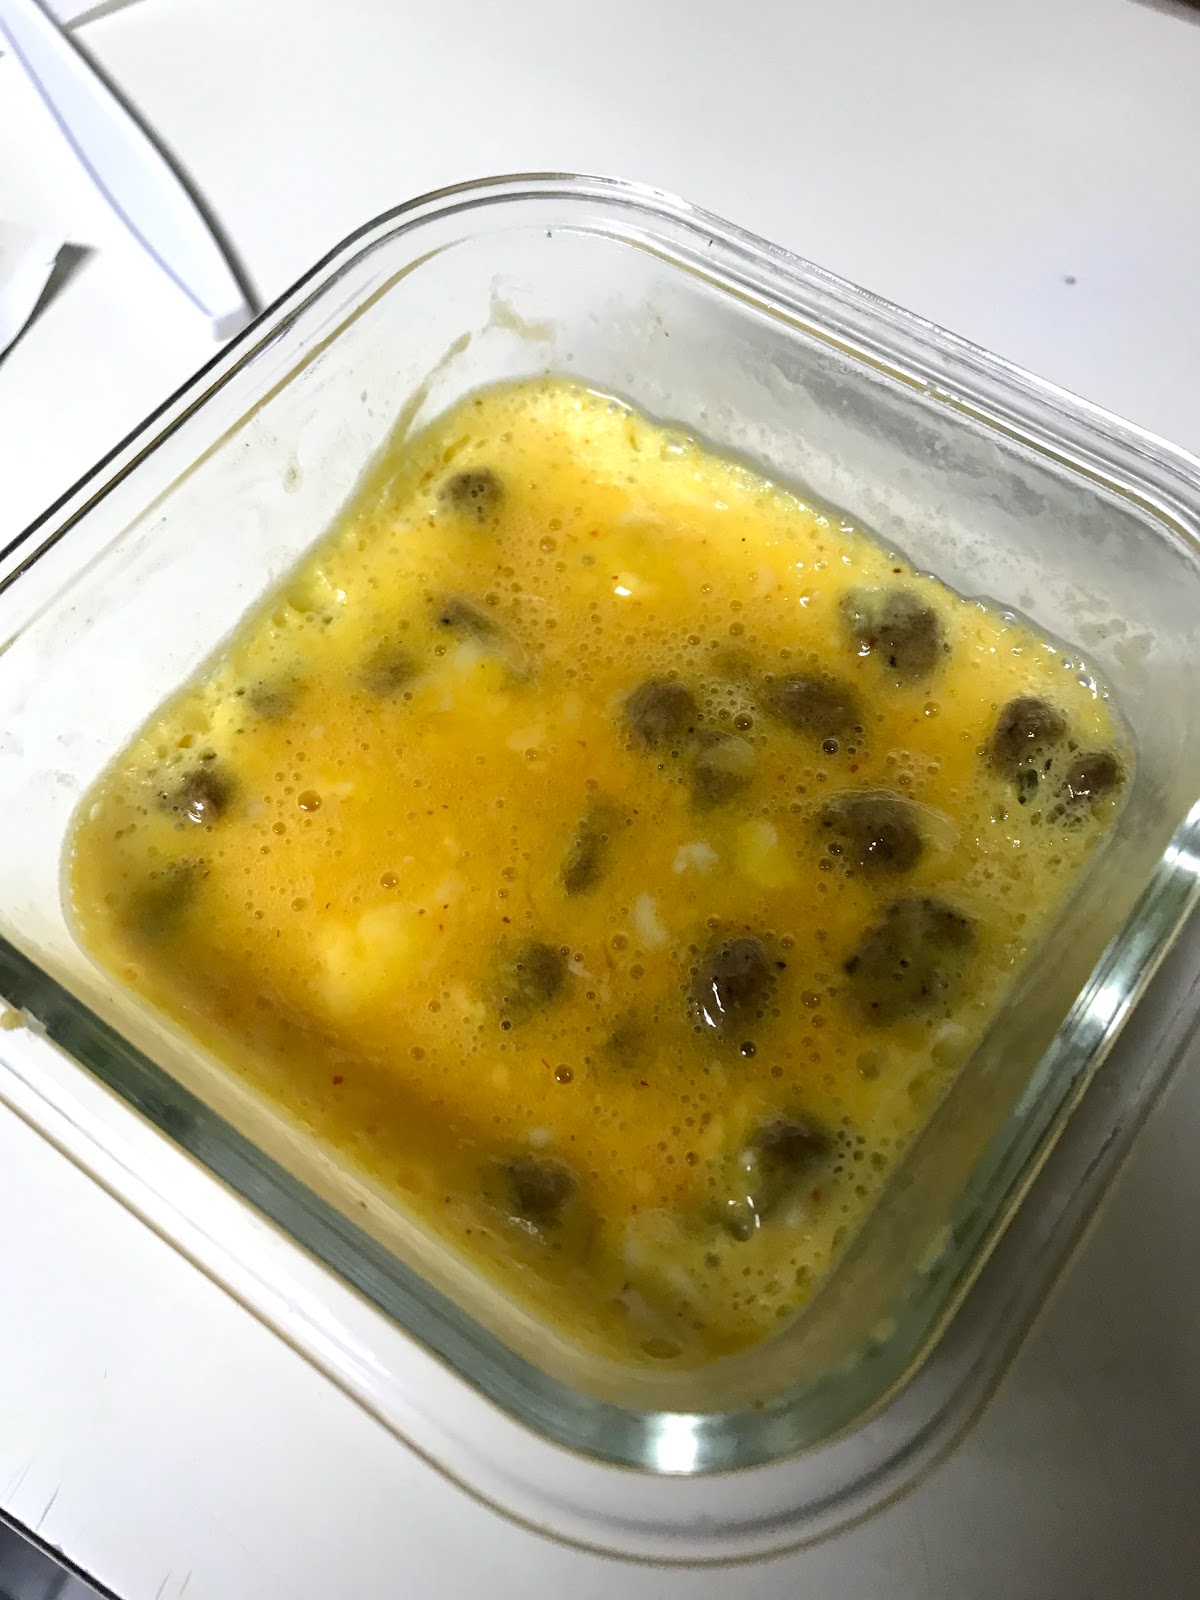
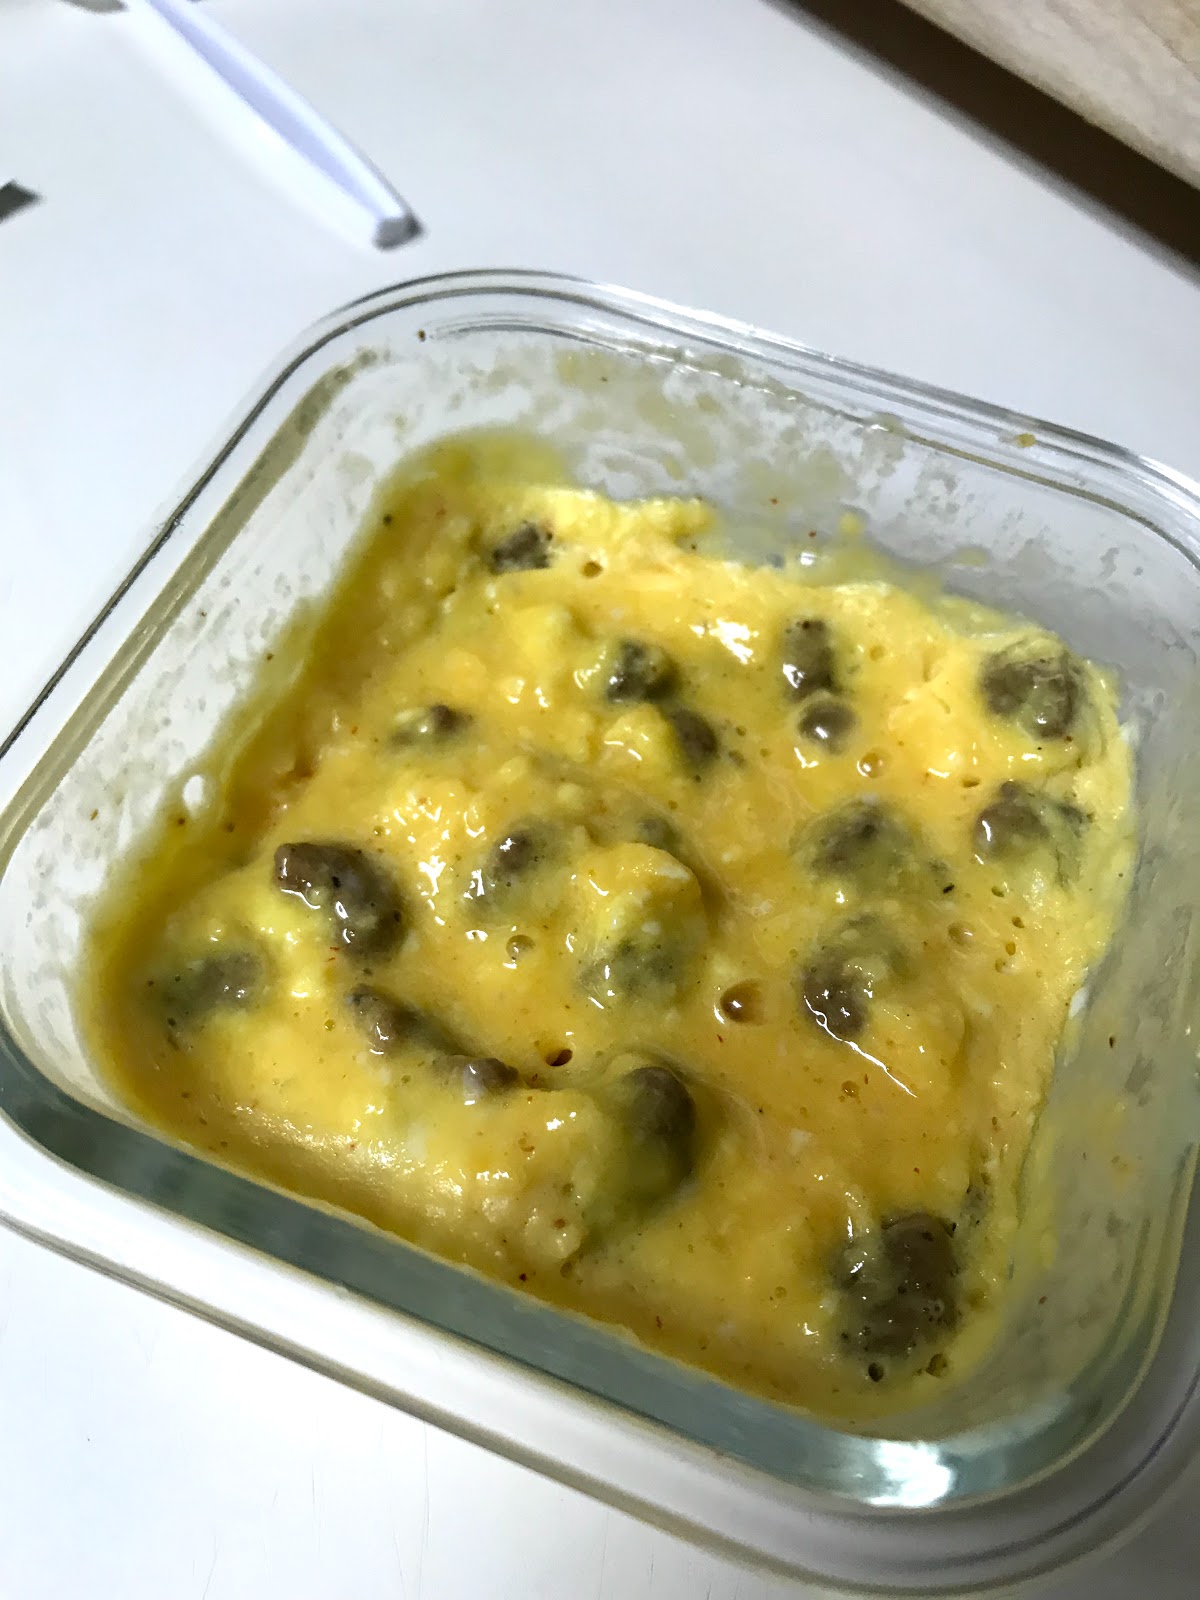
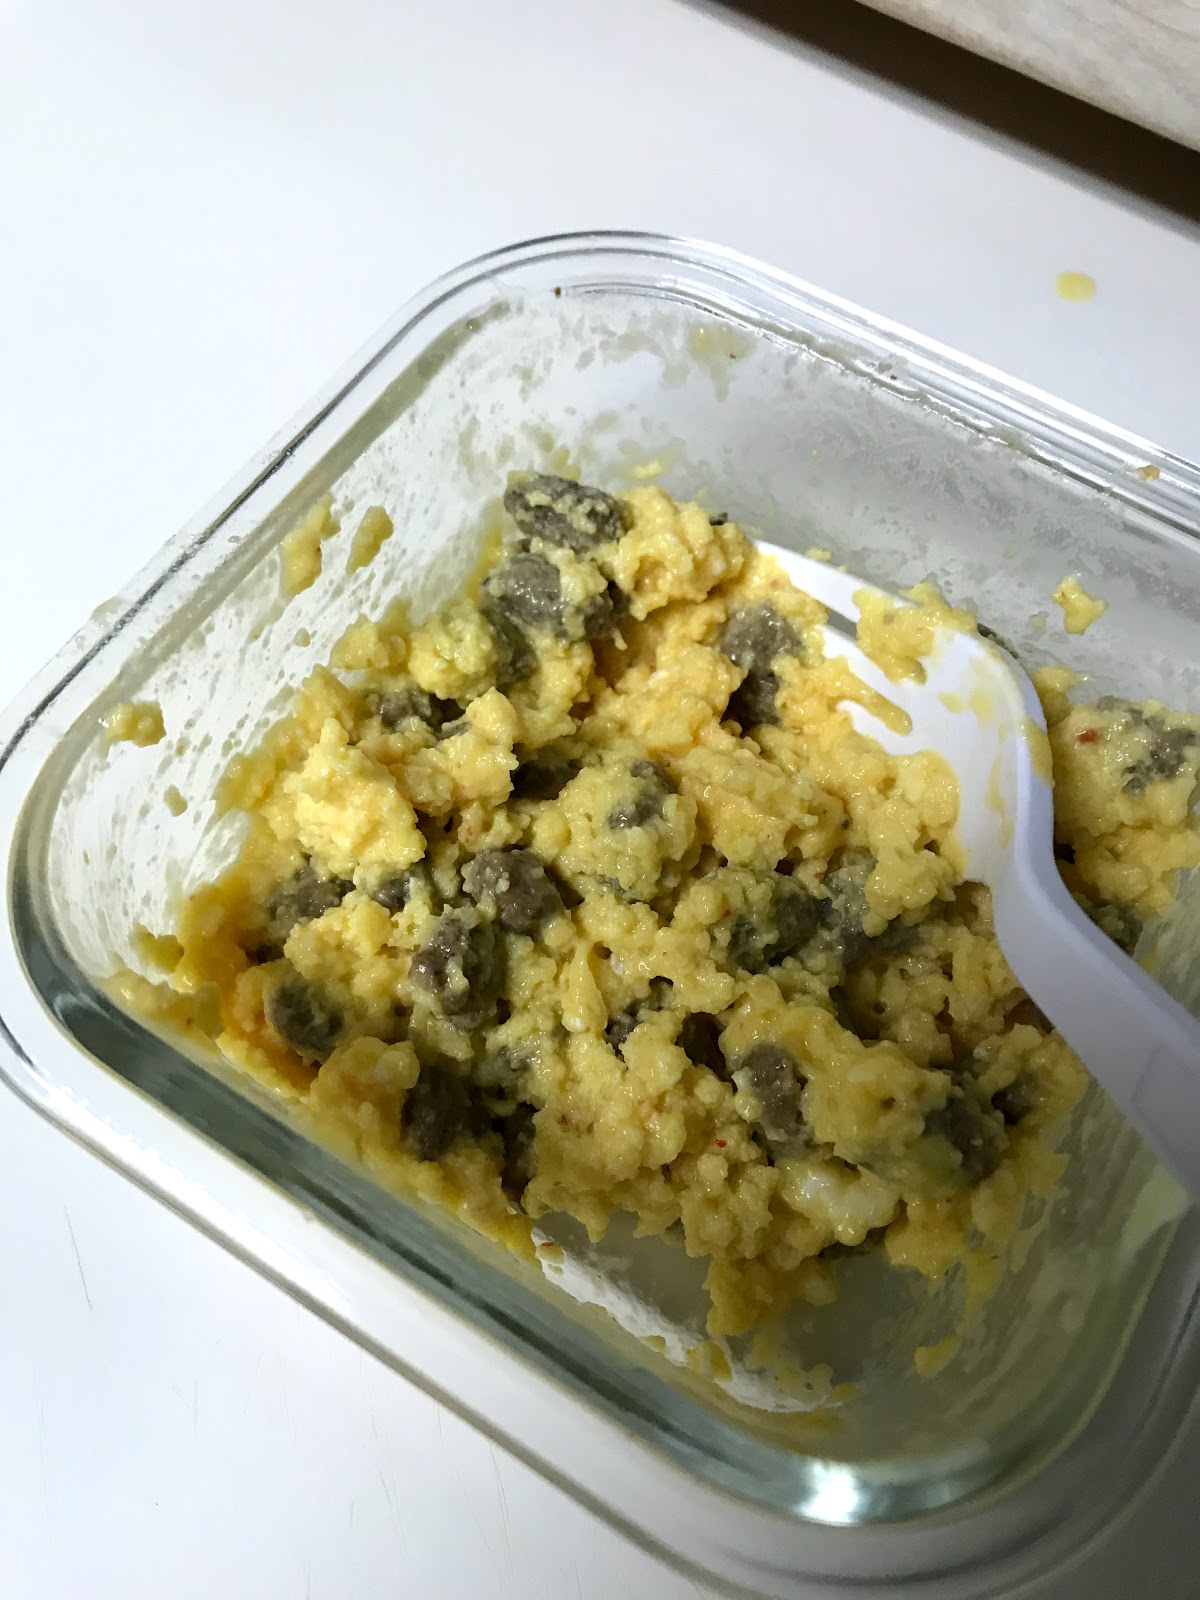
I have included pictures so you can see what the eggs look like during the different stages of cooking.

Ingredients
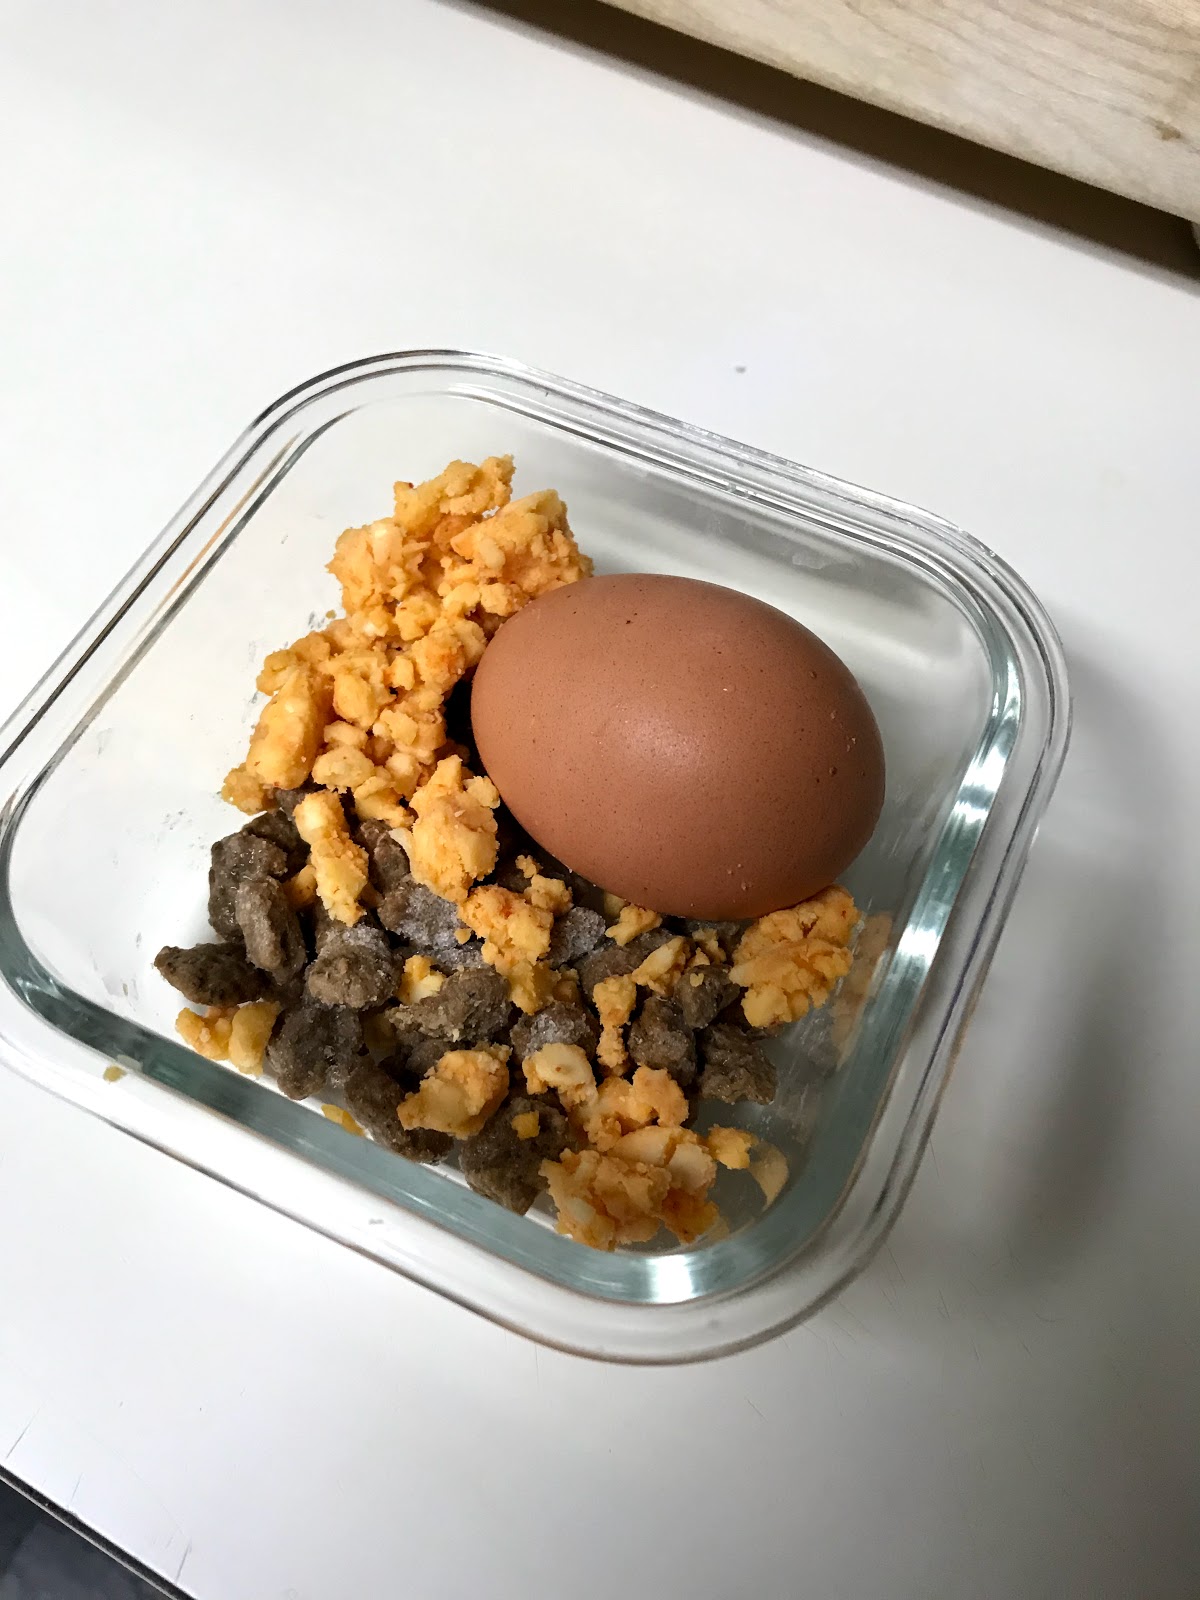
1 egg
1 tbsp. crumbled sriracha cheese (I get mine from Trader Joe's and I get the smallest block I can because a little goes a long way.)
1-2 tbsp Jimmy Dean turkey sausage crumbles (I freeze mine.  They come in a bag that contains too much for me to eat before they go bad, so I store mine in the freezer.)

Instructions
1.  The night before, or in the morning, put all of your ingredients into a small, glass dish. (Don't crack the egg.)  I like to use the small, square, single serve, dishes that are made by Systema and you can get for about $3.00 at Marshall's.  But any microwave safe dish that has a lid and is about the size of a tea cup will work. I have actually made this dish in a tea cup.  It looks so cute!!!
I just leave the egg like that, but if you're nervous, you can always wrap it.

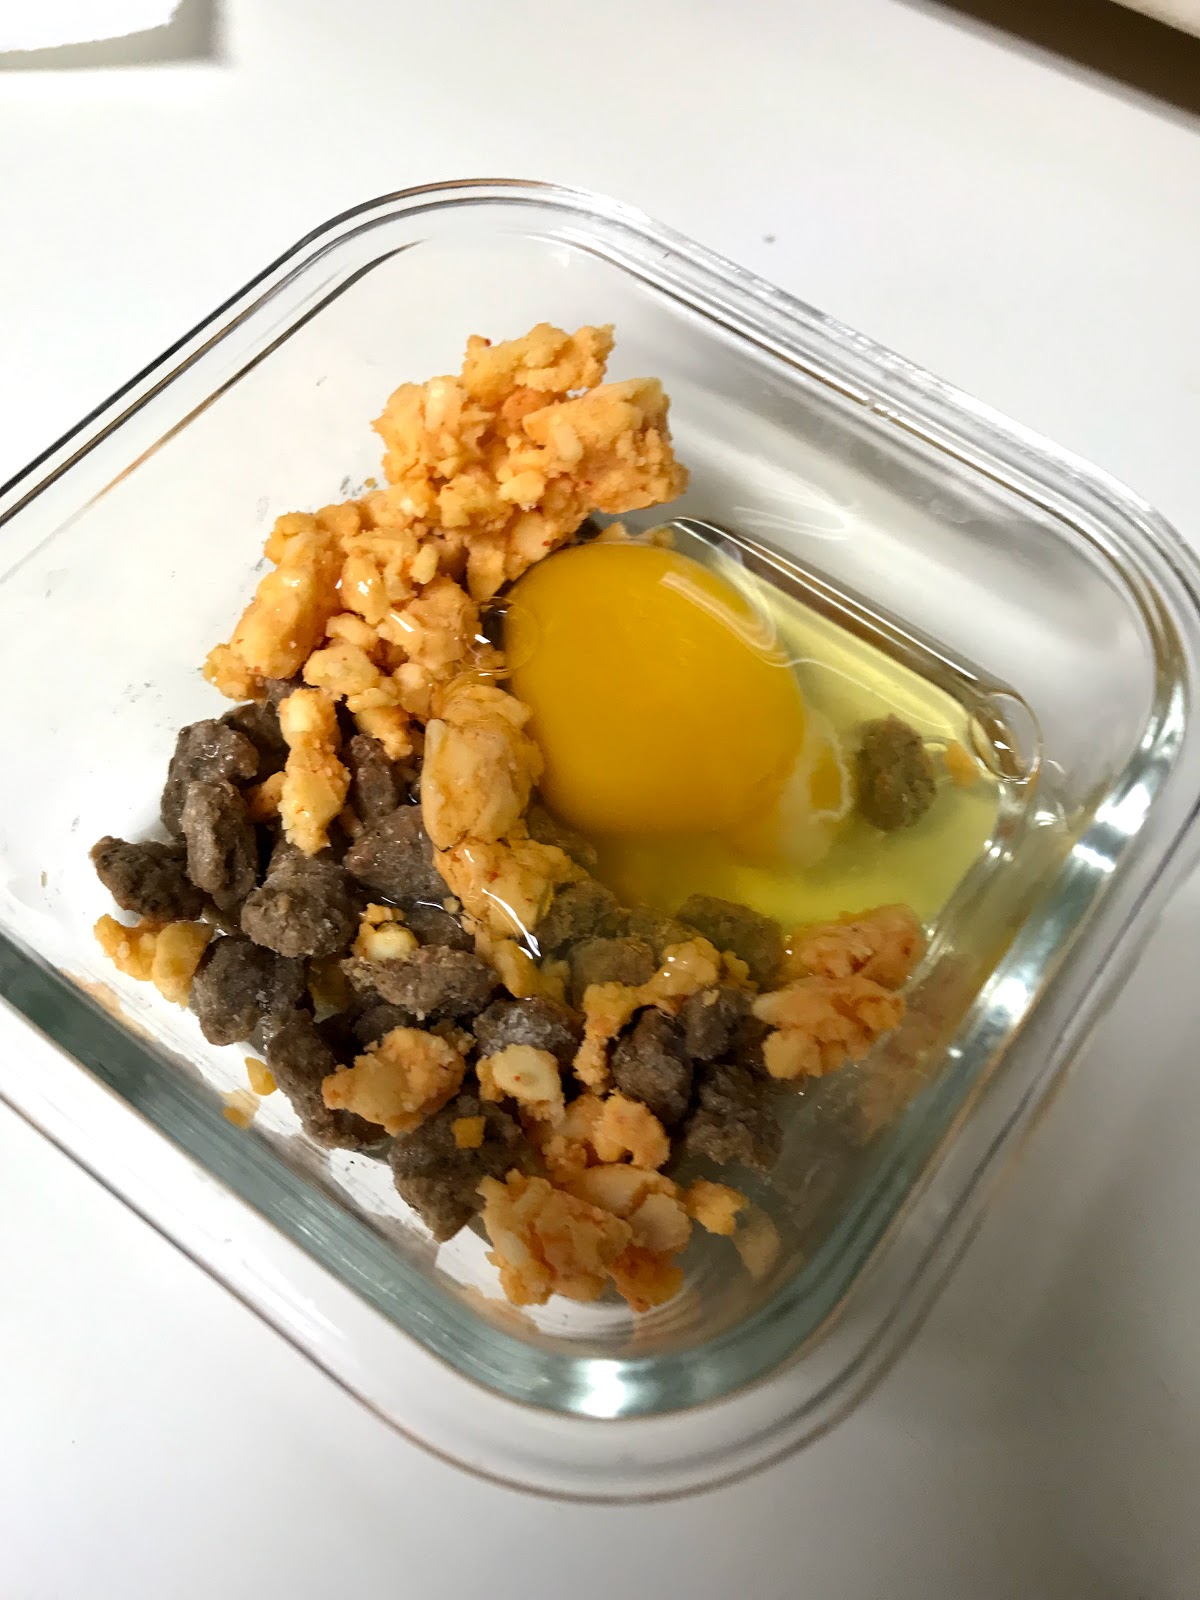
2.  Once you are ready to eat your breakfast crack your egg into the dish.  (You don't have to worry your egg will stick if you follow these instructions, so you don't have to worry about "greasing" the dish.


With a fork, lightly beat the egg, sausage and cheese until they are "mixed" together.


3.  Put in the microwave  and cook on high for 15 seconds.  Stir with a fork.

4.  Put back in the microwave and cook on high for another 15 seconds.  Stir with a fork.  Pay special attention to the sides as the egg will be warmer here than in the center.


5.  Put back in the microwave and stir for another 15 seconds.  Stir with a fork.  The eggs will really start firming at this point.  In fact, in some microwaves your eggs will be ready.


I know its kind of hard to see, but the sides are firming in this picture.

6.  Put back in the microwave and cook for another 15 seconds.  At this point your eggs will, in most cases be ready.  You will know it is done when your eggs look cooked around the side but are still wet-ish in the center.

 I know this sounds wrong, but once you stir the egg with a fork, the heat from the rest of the egg will finish cooking the eggs.

This will produce lovely, moist, fluffy eggs.  If you like your eggs drier, you can cook them for another 15 seconds.  I like to have these eggs with fruit - either a banana, half an apple, or grapes and Mrs. T's Bloody Mary Mix in the can.  Yum.

Whatever you do, don't put the eggs in for one minute and skip the stirring.  This will end up in very rubbery, slightly gross eggs.

Do y'all have any breakfasts to go that you like to do for a workday?  If you do, I would love to hear what they are!

Monday, April 16, 2018

Balsamic Chicken and Bacon Pizza

Hello Everyone!
It Sunday night and the final night before my husband and I (again) start our regime to eat healthier.  We let things go a little - what with all that is going on in our lives - and we have been comfort eating.  So I look like I might be two/three months pregnant and my husband is not happy at his current weight.  But, before we start to eat spaghetti squash and kale - not in the same dishes mind you, but they are on the menu for this week, I thought that I would make a pizza.


I have actually made this pizza a couple of times and it has always come out delicious, so I thought that I would share it with you.

Balsamic Chicken and Bacon Pizza


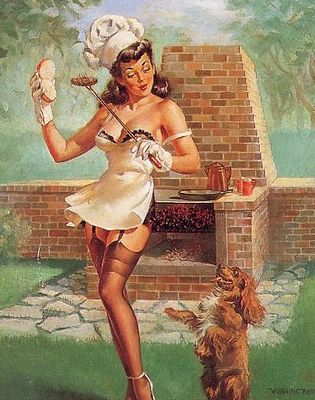
I actually had a picture of my pizza, but I accidentally deleted it.  So you get the little pizza Valentine chef and his French bulldog.

Ingredients
1 Pillsbury Original Pizza Crust
1/2 jar Progresso Pizza Sauce
1 chicken breast, thinly sliced and cut into 1 inch pieces (If this is the one of the large, mutant, chicken breasts, then you can just use half the breast)
3 slices bacon, finely chopped
Scallions, finely chopped
Red Onions, finely chopped
1/2 container Ricotta Cheese
1/2 cup to 1 cup assorted shredded cheeses (I use what I have in the fridge, which is usually from Trader Joe's and is an assortment of truffle cheese, creamy Toscano cheese soaked in Syrah, and sharp cheddar cheese.)
1/4 cup fresh parmesan aregiano, grated
1- 2 tsp. balsamic vinegar
Herb de Provence to taste
Creole Season, to taste
Fresh oregano
Fresh basil

Instructions
1.  Precook the crust according to the package directions. 
2.  While the oven is preheating and the pizza crust is cooking prepare your toppings.
3.  In a small, non-stick pan, cook the diced bacon until it is cooked all the way through but not crunchy.
4.  While the bacon is cooking, prepare the chicken. Thinly slice the chicken into one inch pieces, sprinkle with Creole seasoning and Herb de Provence and toss with your fingers to cover all of the chicken with the herbs and seasoning.
5.  Using tongs, place the cooked bacon in a small bowl and set aside.
6.  Drain most of the bacon grease but leave about 1 tsp. of the bacon grease in the bottom of the pan.
Place the sliced chicken in the pan with the bacon grease and toss constantly using tongs about 30 seconds.  Add the balsamic vinegar and  toss for about another 30-45 seconds. Drain the chicken and any remaining vinegar into a small bowl and set aside.  (Don't worry that the chicken may not be fully cooked, the chicken will finish cooking when you bake the pizza, but this is why you slice the chicken so finely.)
7.  Shred the various cheeses and put in a small bowl, mixing the various cheeses together.  Add the parmesan cheese and toss to mix.
8.  Assemble the pizza.
       - Spread the pizza sauce on the pizza crust, leave about one inch of crust on all sides.
       - Sprinkle the chicken breast pieces, trying to space as evenly as possible. (Reserve the chicken
         juice and the balsamic vinegar.)
       - Sprinkle the bacon bits, trying to space as evenly as possible.
       - Sprinkle the red onion/scallion, trying to space as evenly as possible.
       - Using a spoon, dollop the Ricotta cheese on the pizza, trying to space the cheese as evenly as
         possible
       - Sprinkle the cheese over the pizza, leave about one inch of crust on all sides.
       - Pour the chicken juice/balsamic vinegar over the pizza
9.  Place in the oven and cook according to the crust directions.
10.  Once the pizza is done cooking, remove from the oven.
11.  While the pizza is cooling, sprinkle with the fresh oregano, basil and Herb de Provence.
12.  Let the pizza cool slightly.  Slice and eat. Yum!


Wednesday, April 11, 2018

Homemade Sumo Shirt!

Hello Everyone!
I am sorry that I have not posted in a while.  But my truly spectacular 2018 is continuing in a fantastically epic fashion and not in a good way.


In the end of February my dad passed away.  He lived a long life and I know he was ready to go, but I wasn't ready for him to be gone.  I know that I am forty three years old, but to him I was still "his little girl" and I could always count on him for advice and to listen to the ups and downs of my life.  He was the one "adult" still in my life and now he's gone.
I went to Coweta, Oklahoma, where he lived,  to help my family with the arrangements and to help go through his things.  It was one of the most surreal experiences of my life.
And when I returned home I was not myself.  A couple days after I returned home, I broke out into terribly ugly and itchy hives.  And they weren't going away.  Which forced me to go the dermatologist.  She couldn't determine what caused my hives, we (meaning my husband and I) are thinking they were probably a reaction to stress from my father's passing - but she did let me know that the ugly, red, bump on my shoulder, that I have had for about a decade from a spider bite that healed weird, and that I only showed to her because I promised my husband, was probably cancer.
Wonderful.
As she put it,  if you are going to get cancer, this is the cancer that you want to get because it won't kill you.  Which sounds reassuring but, honestly, that still doesn't make it scary as crap when its about you.  Fortunately, I found out two days later that it wasn't cancer - just an ugly scar.  I still needed to have it removed so that it wouldn't turn in to cancer.  Which is what I did yesterday.  So I am typing this with three stitches in my shoulder.


My husband kept saying what more could possibly happen -implying the worst was behind us.  His answer came when half of the people where he worked were all laid off by the company-including him.  Yay!!!  And then, a few days later our washer broke and we had to get a new one because the transmission went out.
I was unaware that wash machines had transmissions.
So this year is kicking my butt.  I know that there are others that have it worse and I know that I should be grateful for everything, and everyone, that I have in my life, and I am, but the will to do anything productive sort of left me.  Including crafting, cooking and blogging - three things that usually bring me joy.  Thus there was no blogging going on.
However, there is one thing that I discovered in 2018 that makes me happy, and that is Japanese Sumo tournaments.........  I know right?!?!?!  Sumo!
There are so many things wrong about this poster.  But the it still makes me smile.

My husband and I love Japanese game shows and anime and we do searches on YouTube to see what translations we can find for some of the shows that we enjoy.  One night, after one of our regular shows, YouTube decided that - if we liked Japanese games shows - then we would probably like sumo.  It was so right!  Within minutes my husband and I were enthralled.
Tournaments occur about every two months and we happened to catch the New Year's tournament.  All two weeks of it.  By the end of the New Year's tournament we were hooked.  So we waited in anticipation for the next tournament in March.  And we continued to love it.  We jokingly say that we now have a sport that we can watch since we don't watch any of the usual sporting events.  Like all sports fans, we wanted to support our "teams".   We are American, so we thought the best way would be to wear a "team" shirt or jersey.
Unfortunately, sumo t-shirts are not cheap.  Which I should have known from the cost of hockey and football jerseys that I have looked for as gifts for friends and family.  So my husband and I decided that we would just do generic sumo shirts without one of our favorite wrestlers.  This was much easier for my husband than it was for me.  I guess there aren't a lot of female sumo fans in America because pickin's were slim and I definitely did not want to wear a shirt that proclaimed that I was a "Sumo Wrestler in Training" -  yes, that is a real thing.  I finally narrowed my options down to this shirt on Amazon:
It combines two of the things I deeply enjoy sumo and ramen. Plus, style-wise, this little guy reminds me of the geisha poster in Jen's office from the IT Crowd.  (A fantastic comedy from Great Britain that you should watch if you haven't already.)

I actually have a copy of this that I painted for my mantle when I do my eclectic art.  Don't you think that she and the sumo guy look very similar.  I may have to paint him with a turquoise background and have them as a "set".

Unfortunately,  I could only find them for men, and I didn't want a baggy shirt. I also didn't want it in grey, black or white.  I wanted something cute.  And in cherry blossom, because that is my favorite color, next to the turquoise, that the wrestlers where as they fight.  Since I couldn't find anything in my size that I liked and in my price range I decided that I would make it myself.
First I went on eBay and got a t-shirt in lilac for about $5.00.
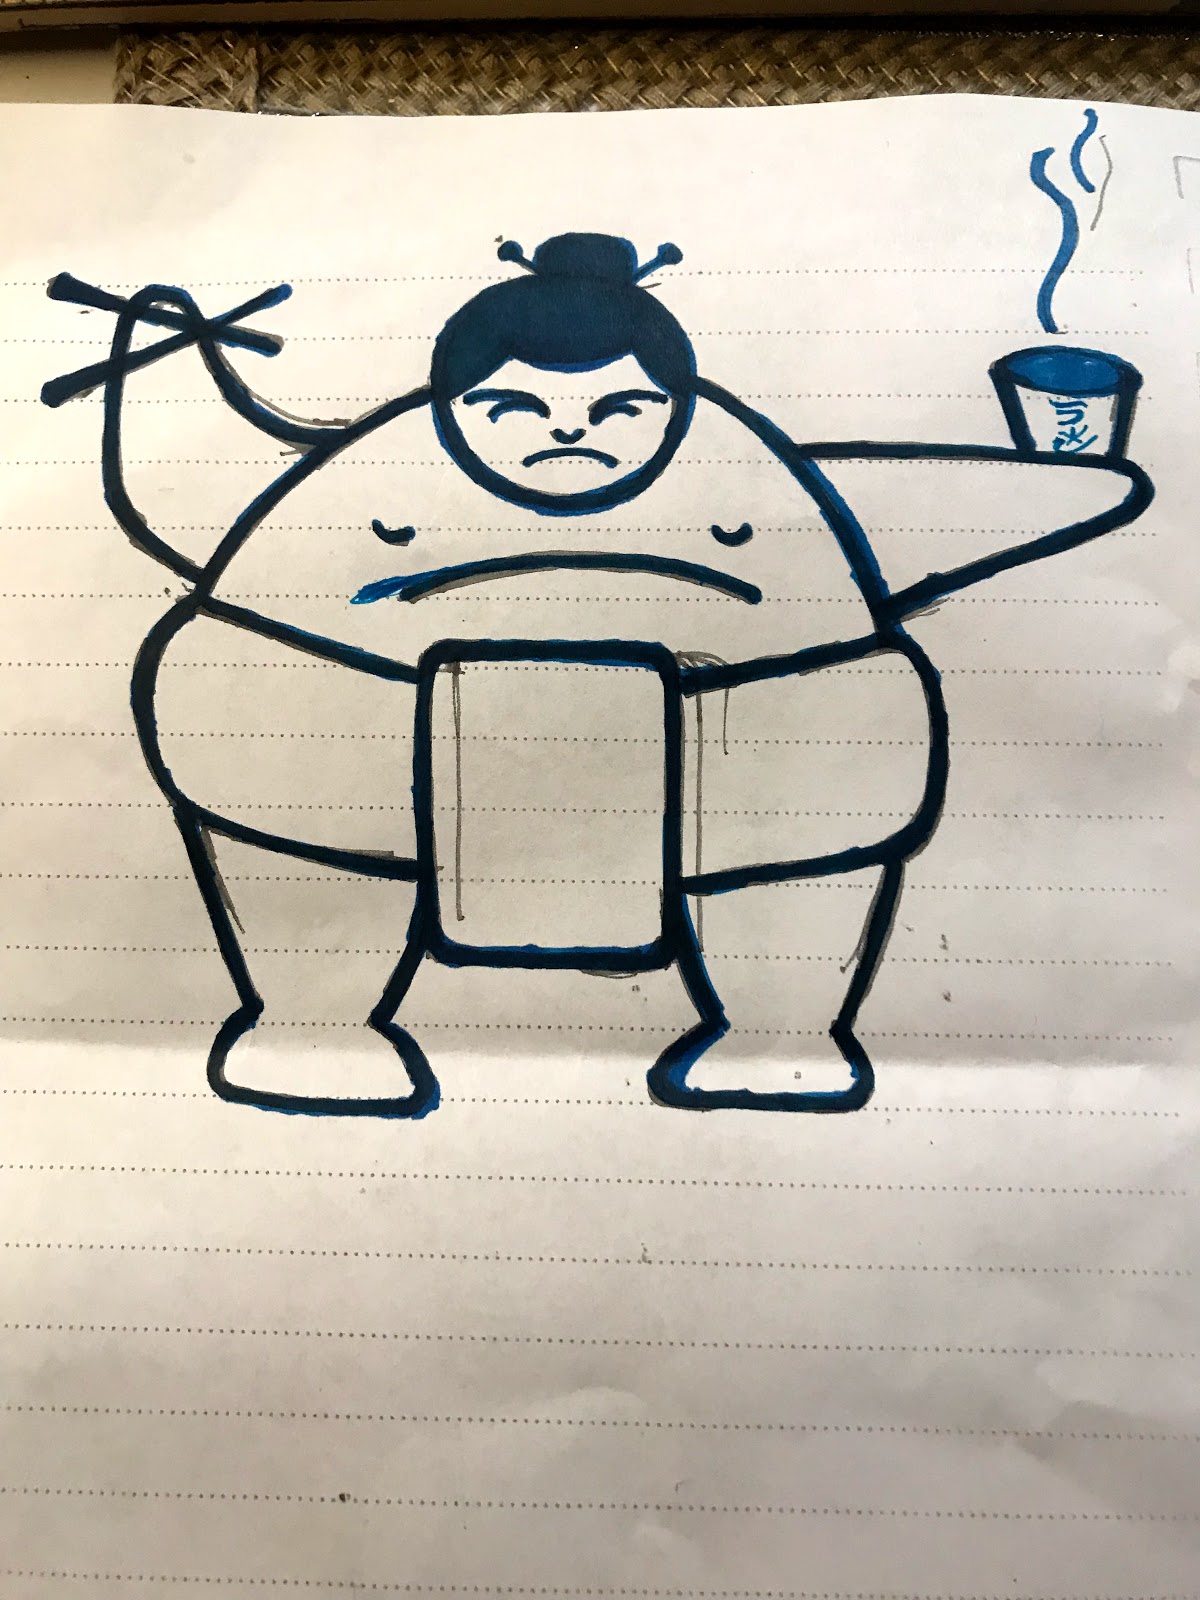
Then I drew the little sumo guy.


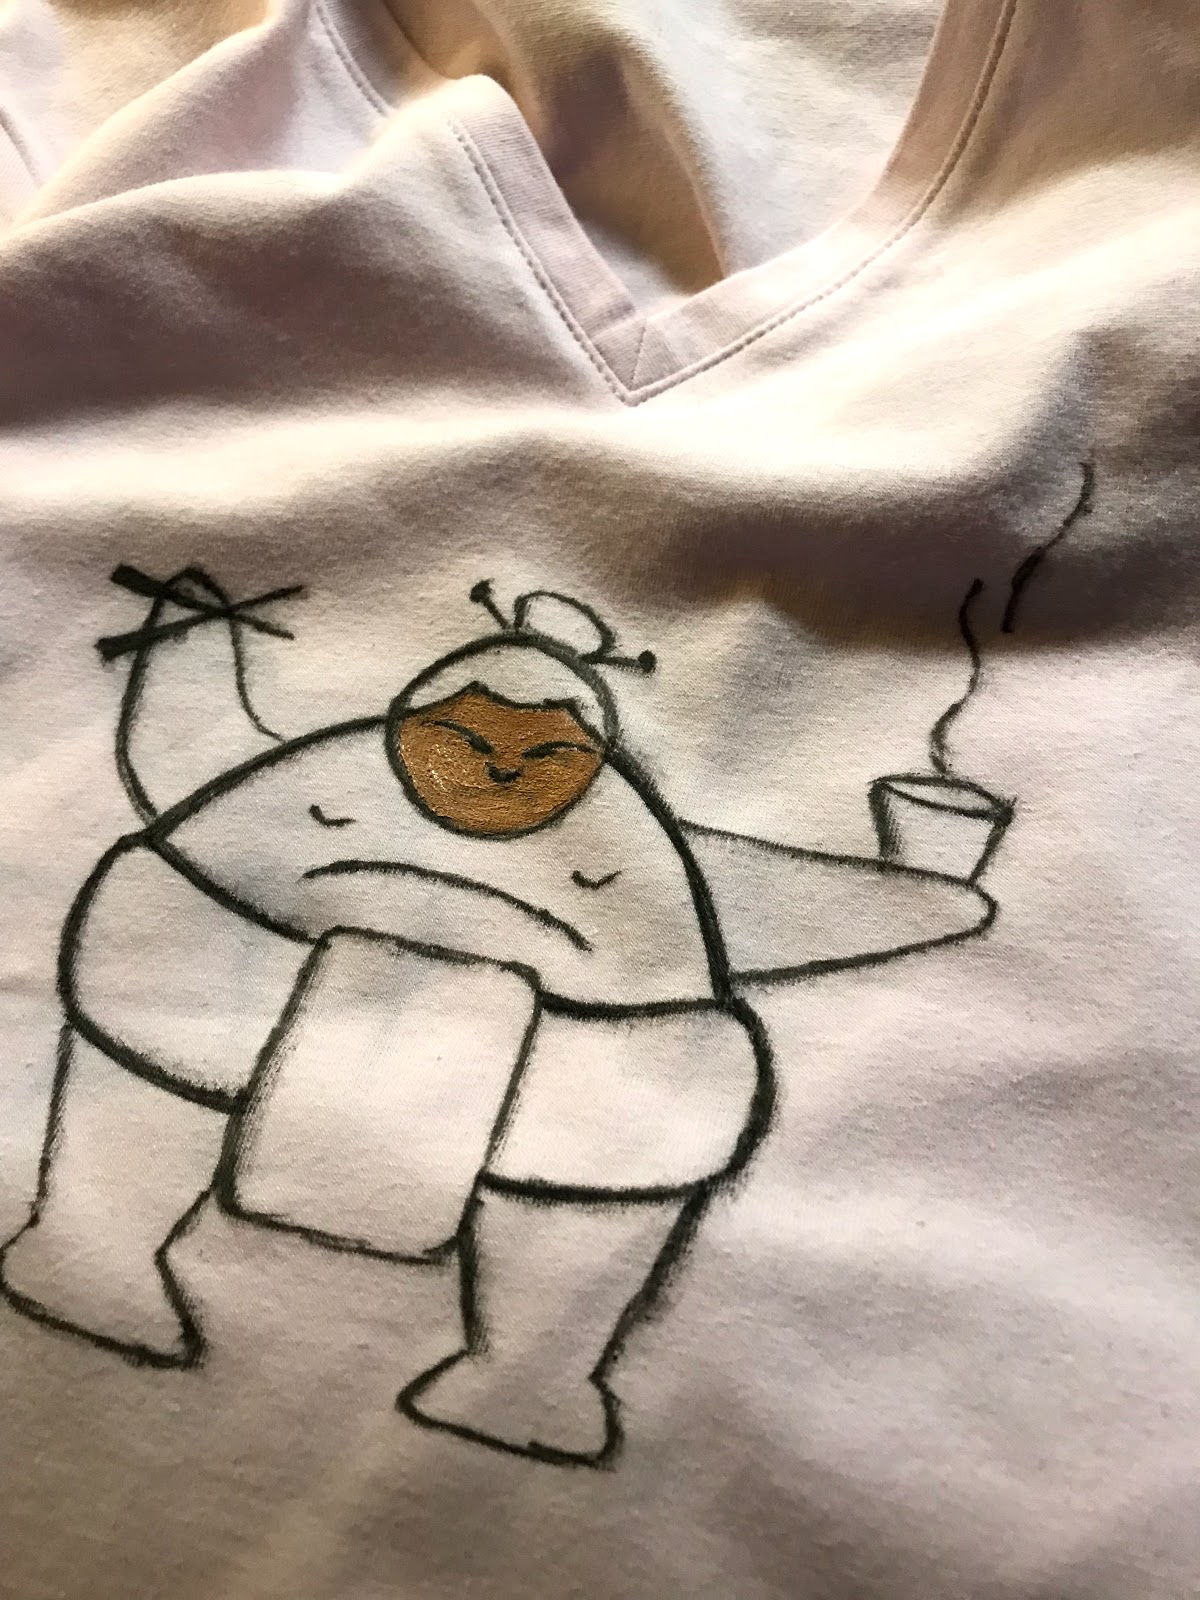
The next step was to put the drawing under the front section of the shirt and trace it with a fabric marker.  This is where I found out that, if you are not careful, fabric marker smears very easily.  This will be good to know when I do my literature scarf - which is a project that I have in my mind for another time.
And from there I painted him with fabric paints that I had purchased for myself to create a painted circle skirt like they used to make in the fifties.  I thought this would be a perfect practice item before I started to work on the skirt.  Also, I keep changing my mind about what I want to paint on the skirt.

This is what my little sumo guy looked like after I traced him.  So the black you are seeing here is fabric marker.

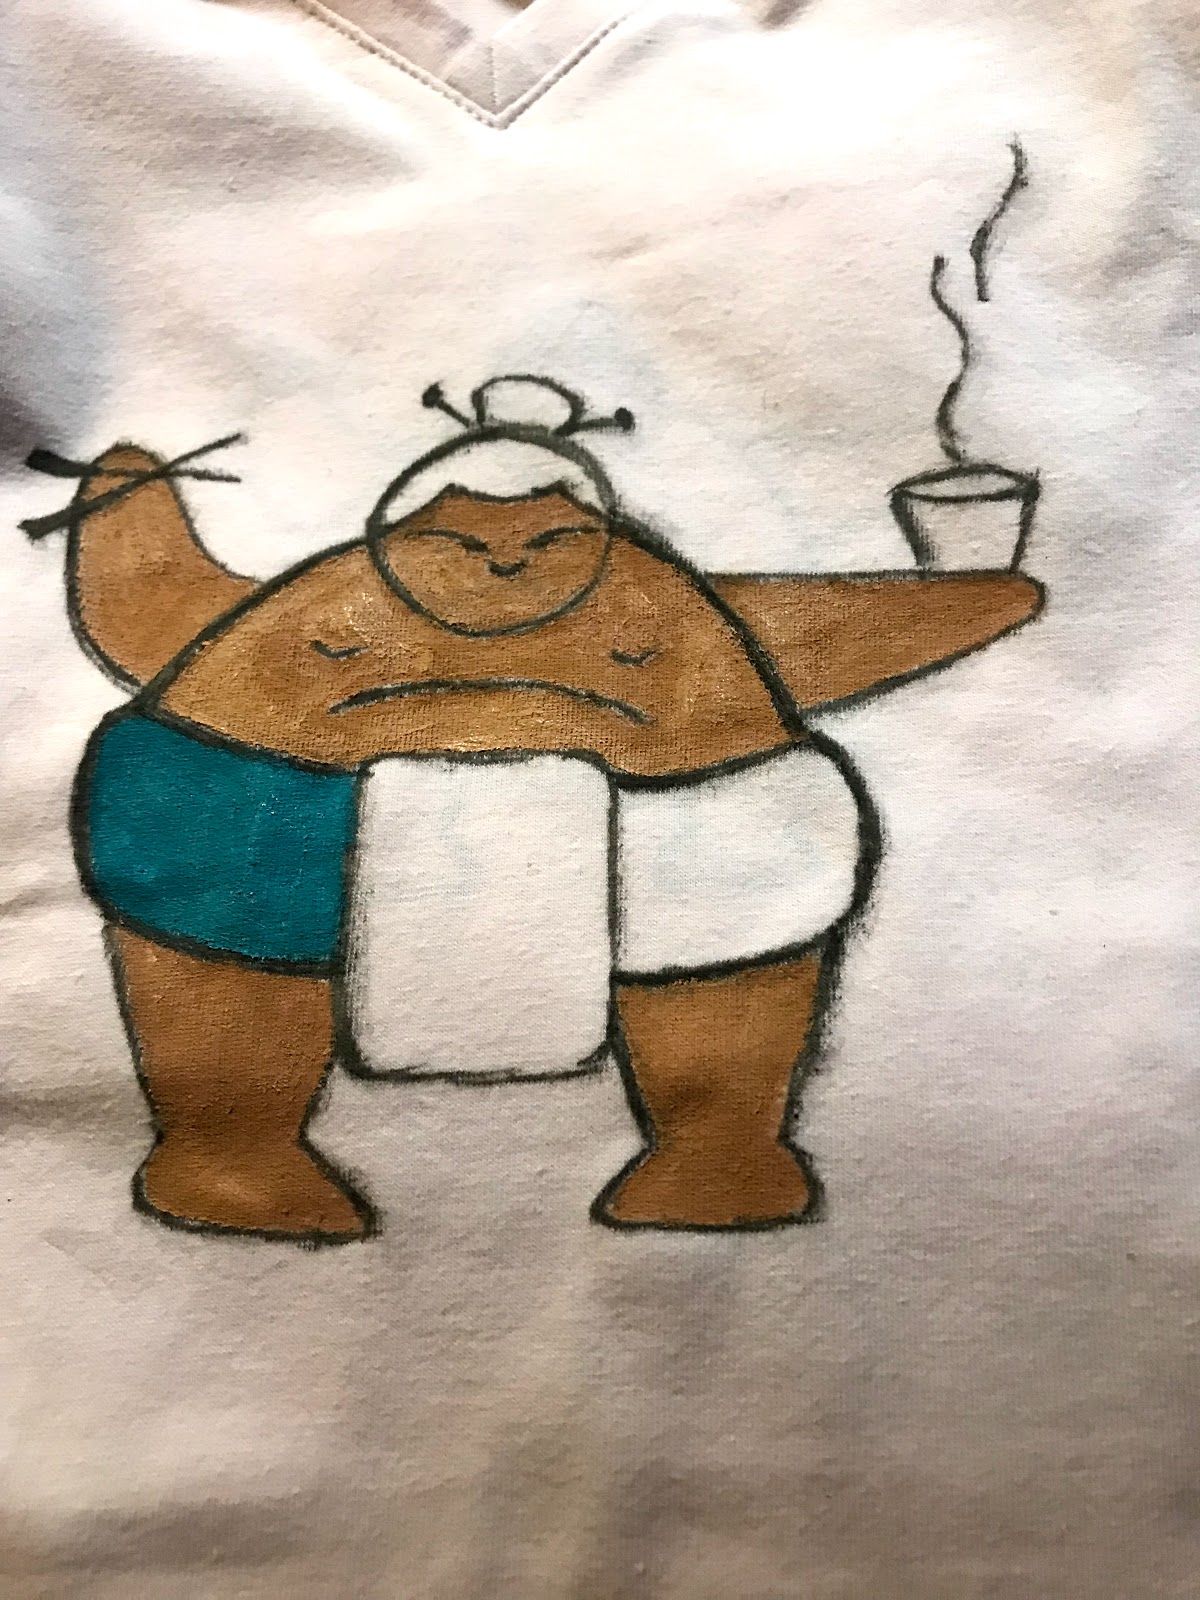
I painted his mawashi turquoise because, in the tournaments that I have watched, the sumo wrestlers don't wear white mawashi,  Plus, I love turquoise.

Here he is all painted!  I don't know if you can tell, but I even painted the black outlines over so that my lines would be more defined than they were with the fabric marker.

And this is what I ended up with!


I think he turned out pretty good.  And I am ready to wear my shirt in May when the next tournament starts!
Well, that is it for now.  Unless something else happens in my life, and its 2018 so it may, I hope to be posting again very soon.

Sunday, February 25, 2018

Another Lazy Sunday Post - YouTube and Tomato Soup

Hello Everyone!
In Louisiana, the weather has started to warm which has caused my thoughts to wind their way toward  my garden and what I would like to plant this year.

This is one of the weirdest, sweetest Disney cartoons ever.  I hope I'm not breaking any copyright rules by posting this.

To my amazement, despite the hard freezes we had this winter some of my herbs survived.  I still have some oregano - its puny and wimpy because it really didn't like to be taken in and out of doors, but it is alive.  The apple mint can be saved, I think, once I remove all of the weeds.  My Spanish Tarragon has started to grow back, as have my chives and my bay tree is thriving.  And, insanely, my curry plant isn't dead.  My sweet olive has also survived and has started to blossom.  I love that smell so much!!!   If I could find a perfume that actually smelled like sweet olive, I would wear nothing else.  Which means that I only have to replace my basil, thyme, dill and rosemary.  I'm going to call that a win considering the winter my poor plant babies had to go through.


I am also contemplating what I would like to plant for the vegetable garden.  I know that I want to plant the mini cucumbers that I had last year and plum or cherry tomatoes but I am wondering if it is worth the time and effort to try to grow my own potatoes, onion and garlic.  Since the Farmers Almanac tells me that I can plant them, except for the garlic which I would plant in August, during any of the next few months, it will give me time to ponder as I research online whether growing them is actually feasible. 
This means that I plan on spending a day on the internet being lazy, researching gardening, watching YouTube and cooking foods which need to simmer for hours.  So I thought that I would share some of the things that I will be looking at and listening to with you.  I even thought that I would share a recipe.  As per my other lazy Sunday post most of these activities will be free and can found on the internet.

But first, lets pretend that we are being industrious before we start being lazy and start with a recipe.  I am going to give you my recipe for Brown Sugar Roasted Tomato and Vodka Soup.  This soup recipe is perfect for the winter and is what I call a nearly-homemade recipe.  It is perfect for the winter because, rather than using fresh tomatoes which can taste just like water during the winter months, it uses can tomatoes but, because of the some of the cooking techniques that we are going to use, it is not going to taste like we used canned tomatoes.  It is delicious and it takes hours both in the oven and on the stove top so it gives you plenty of time to watch shows, do laundry, paint your nails - however you want to kill the time - while it cooks.


Brown Sugar Roasted Tomato Vodka Soup
What does this poster have to do with soup?  Absolutely nothing! But it cracks me up so I thought I would put it here.

Although it takes a few hours to actually cook this dish the actual prep time is only about 15 minutes max.  It does make ALOT of soup.  It will feed 8-10 people.  I like to make this soup and freeze it in two cups increments to eat at a later date, but I will go over that later in the post.  I'm sorry that I don't have pictures for this, but I find that cooking and photography do not go hand in hand for me.  I promise you that I will work on it.

Ingredients
3 tbsp. light or dark brown sugar
1 tsp. kosher salt  (you can skip this step if your tomatoes are the kind that come in sea salt)
Pepper to taste
1 tbsp. olive oil
1 tbsp. butter
1 medium onion, sliced
1 scallion, sliced
3 cloves garlic, sliced
1 (32 ounce) veggie broth (or you can use homemade)
2 (28 ounce) Italian plum tomatoes  (I sometimes have trouble finding these, if that is the case whole tomatoes are fine) , drained - reserve the juice
1 (15 ounce) tomato sauce
1 tsp. anchovy paste
1/4 cup vodka
1-2 tbsp. chopped fresh dill  or  1-2 tsp. dry dill
1-2 tbsp. chopped fresh basil or 1-2 tsp. dry basil
2 cups half and half

Instructions
1.  Adjust the oven racks to the middle position and preheat oven to 375 degrees.
2.  Spray a large, rimmed, baking sheet evenly with cooking spray.  (If you would like to make even less of a mess, put down a piece of parchment paper on the baking sheet.)  Place the tomatoes evenly in the baking tray. 
3.  Season the tomatoes with salt and pepper.  (If your tomatoes are the type that are canned with sea salt, do NOT use salt, just do the pepper.  Divide the brown sugar over the top of the tomatoes.
4.  Roast tomatoes in the oven until sugar is melted and tomatoes have shrunken slightly, about 45 minutes.
(Why am I doing this step you may be asking yourself?  The reason is twofold.  Number one, you are using canned tomatoes, by roasting them you are removing the slightly tinny flavor that canned fruit and vegetables can have. Number 2, roasting the tomatoes in brown sugar is adding a lovely flavor to the tomatoes and will make the soup taste better than if you simply added sugar.  Yes, you do have to do the sugar if you don't add sugar in some way to tomato soup, the soup is too acidic and doesn't taste as good.)
Remove from oven.
5.   In a large, heavy bottomed pot or dutch oven heat olive oil and butter over medium heat.  Add onions and shallots.
6.  Saute the onion and shallots over low/low-medium heat for 15 minutes.  By this time, the onions should have begun to caramelize but should not be caramelized.
7.  Add the garlic and the anchovy paste, cook for two minutes, stirring continuously.  (You must stir as this will prevent the garlic from burning and turning bitter.)
8.  Add the roasted tomatoes and slowly pour in the vegetable broth while stirring, then add the reserved tomato juice, tomato sauce, and vodka.  Stir to combine and bring to a simmer.
8.5.  If you are using dried rather than fresh herbs, add your dill and basil.  If you are doing fresh herbs wait.
9.  Cover and simmer over medium/medium high heat for one hour stirring periodically.
10.  If using fresh herbs, chop the basil and dill and add to the pot.
11.  Using a blender to puree the soup.  (You can use an immersion blender or a regular blender, if you are using a regular blender.  If you are using a regular blender, blend the soup in batches and BE CAREFUL.)  It is up to you how smooth or chunky you would like the soup to be. I personally like my soup to be smooth with no chunks - but you do you.
12.  Return the pureed/blended soup to the pot.  Simmer 20-45 minutes depending on the consistency you prefer.
(At this point, you have a decision to make - whether you want to freeze the soup now or after you add the half and half.  It all depends on how you want to reheat the soup from the freezer.  If you want to do it fast and quick in the microwave you will want to freeze the soup after you add the half and half.  If you want to reheat the soup on the stove top, then I would suggest freezing it without the cream.  Then, while you are heating the soup over the stove, you can add the half and half then and you can add as much or as little as is per your personal taste.)
13.  Stir in half and half.

Serve and eat.  If you want to freeze, make certain that the soup has reached room temperature before you place it in the freezer.

Now that we have our soup simmering on the stove, we can get down to the task of relaxing!
Lately I have found some things that are currently available on YouTube that I am obsessed with.  I am going to share them here with you but, as you know, things can and will get taken off of YouTube when you least expect it, so if any of these sound interesting to you, you should check them out now while they are still available.  I love to learn and so most of these are going to be historical documentaries, but I also like to be entertained so many of these are funny as well.

Timeline
This is, for lack of a better term, a history channel on YouTube.  This is what the history channel was before it became nothing but Ice Road Truckers.  Many of the shows that I mention below can be found on this channel  but there are also several more.  If you like history, it is definitely worth checking out.

The Supersizers Go.......


I love this series!!!  I first discovered this series with the WWII episode.  The concept of this show is that the hosts live for an entire week in a house that from the period.  During that week they dress in the clothes of the era and, more importantly, they eat the food of the era.  This show is part history and part food channel and it is great.  I thought they were done with the series a while ago and then, about seven months ago they added another episode The Supersizers Go...... Royal Wedding.  All of the episodes are worth watching.  I have watched many of them repeatedly.

Terry Jones Medieval Lives


I am a huge fan of Terry Jones.  I mean, yes, he is a member of Monty Python and has been in arguably some of the funniest sketches of all time but, more importantly, HE WROTE LABYRINTH!!!!  For this reason alone he has won my undying love.  He also has done several different series on different historical periods- a couple of great ones are The Hidden History of Rome and The Surprising History of Sex and Love.  The newest one, for me, that I have discovered is Terry Jones Medieval Lives.  In this series each episode covers a different "person" who has been myth-ed into something completely different than they actually were in history.  Some of the lives that are covered are:  The Damsel, The Knight, The Philosopher and The King.  This series is part history and part comedy and is thoroughly enjoyable to watch.

The Worst Jobs in History


Have you ever watched Black Adder?  Arguably one of the most hysterical shows ever written and, if you haven't watched it, do,  each season of Black Adder covers another era in British history.  In every era you have two characters: Black Adder, played by Rowan Atkinson and his man servant Baldrick, played by Sir Anthony "Tony" Robinson.  Both of these characters have become icons in Bristish comedy and one of the long running jokes is that Baldrick is consistently given the worst and most disgusting jobs because Black Adder does not want to do them himself.
In The Worst Jobs in History, Tony Robinson embraces his iconic role and goes back in time to work some of the most dangerous or disgusting jobs throughout time.  Each episode he goes back to another era and looks at some of the gross jobs that people have had to do as he looks for the worst job of that era.  This show is part Dirty Jobs and part History Channel and is fascinating to watch.

BBC A People's History Breakfast, Lunch and Dinner


I sincerely don't know what is more fascinating about this show, finding out the history of how these three mealtimes came to be as we know them or watching the truly Faustian woman that hosts the show.  This show is a bit like slowing down to watch a car wreck on the side of the road, sometimes you want to look away but you just can't do it. 

So, there you go, day planned.  Day of laziness about to commence.  Enjoy.

Tuesday, February 13, 2018

Dinner and a Movie - My Stay at Home Valentine's Day Plans

Hello Everyone!
Wooh!  We're not even two months into 2016 and it has already been a doozy for me.  First, my faithful steed, a Mini-Cooper lovingly named Deuce, completely died and had to go in for some major repairs. 

Who knew how important a power steering pump is for the running of your car?  (Just kidding, I knew - I was just in blithe denial for as long as possible because I was trying to hold off on repairs until I got my income tax return.)  Then my little baby, my sweet French bulldog, Basil got hurt.  I don't want to go into the details of what happened, for those of you who may be squeamish, but suffice it to say that he had to go to the doggie ophthalmologist  and have surgery on his left eye.

My Frenchie, Basil, in a clean laundry pile before his boo boo.

Since neither of these two events were exactly inexpensive, in fact, I think I can safely say they were both very expensive, I am living more frugally than normal to cover the added bills.  Rather than thinking of this as a minus, I have decided to look on it as a challenge and really put my frugal skills to the test.  I also am not going to use a lack of funds as an excuse to not have fun.
So, tomorrow is Valentine's Day.  It is always weird when Valentine's Day falls on a Wednesday - at least it is for me.  Its even more weird if you live in Louisiana, because Mardi Gras is literally the day before Valentine's Day this year - which just makes for a holiday traffic jam.  While most people will try to celebrate on either the weekend before or after the actually day, I like to celebrate holidays on the actual holiday day. 

To do this during a week-day evening, I am opting on staying in this year.  This will also help me with my goal of living even more frugally.  After talking it over with my husband, we have decided that we will do a stay-at-home version of dinner and a movie.

For dinner, I am planning a dinner of steak and bleu tips, roasted potatoes, and garlic butter edamame sprinkled with truffle salt.  As all of these recipes, except for the potatoes, are new recipes for me and are based off of some of our favorite appetizers from a couple of our favorite local restaurants, I am not going to include the recipes in this post.  However, if they turn out, I will put them in a post this weekend.
The movie we will either rent from Amazon or Red Box. But we could just as easily go the free route and choose a dvd from our rather large dvd collection.  YouTube is also another option for watching free movies.  As we are true romantics, we are thinking of watching Thor: Ragnarok if we can find it.  More importantly than the movie is the popcorn.  I think many of you can agree with me that one of the best things about going to the theater and watching a movie is the popcorn with the extra butter.  Many theaters have gotten smart and now have the butter pump in a little popcorn station where you can put as much butter on your popcorn as you desire.  I love this!
Although movie butter microwaveable popcorn can be delicious, it's just not the same as dripping butter on your popcorn............ Until now!!!!
I don't know how long this has been out in stores, but I just discovered it in the last couple of weeks or so, and I am now practically an addict.  Orville Redenbacher's has put out a microwaveable popcorn that you can pour the butter over!!!  And they give you enough butter so that, if you like an obscene amount of butter, as I do, you will still be content.  (Probably.)  I use the whole pouch, but again, I have a true problem when it comes to buttered popcorn.
So for about $5.00 you can watch a movie and eat true theater butter popcorn and all without leaving the comfort of your own home.  What more could you ask for on a weekday holiday?

Well, I know this hasn't been the longest post, and I haven't shared any recipes or craft projects, but I hope that I have inspired you to maybe kick things up a just a little tomorrow to celebrate Valentine's Day - even if you are not part of a couple.  (No reason why you can't treat yourself to dinner and a movie.)

Well, keep your fingers crossed for me that my dishes turn out and I'll post more soon!

Sunday, December 24, 2017

Last Minute Recipes for a Christmas Eve Gathering

Happy Holidays Everyone!
So its Christmas Eve and you have a family dinner/get together that you must attend.  And you find out that you need to bring something for the party.  Oh my! 


Well never fear, the Frugal Femme is here to give you some easy recipes that you can whip up in minutes and have ready for a party!  These are just some tried and true recipes that I have on hand so that I can whip them out for parties - some of them may be modified from your grandmother's recipes. 


Oyster Crackers


This is one of my husband's favorite things.  So much so that his mother usually makes them every year and includes them as part of his Christmas present.  This year, his parents came down for Thanksgiving and not for Christmas so it was up to me to carry on the tradition.  I don't know who's recipe this was originally, but I'm fairly certain most of us have some version of this recipe, hand written and stashed in a family cookbook.  Me being me, I had to modify the recipe just slightly.  So here is my version of a Christmas Classic.

Ingredients
1 (1 ounce) package Ranch dressing Mix (I like Hidden Valley)
1 tsp. dried dill weed  (If you don't love dill as much as I do, you can put 1/2 tsp and it tastes just as good.)
1/4 cup vegetable oil
1/2 tsp. truffle oil
1/2 tsp. garlic powder
5 cups osyter crackers

Instructions
1.  Preheat oven to 250 degrees.
2.  In a large bowl, combine the first five ingredients.  Whisk with a fork until all of the ingredients are blended together.
3.  Add the oyster cracks and toss with a spoon until all of the oyster crackers are covered with the oil mix.
4.  Spread the oyster crackers evenly on a baking sheet.

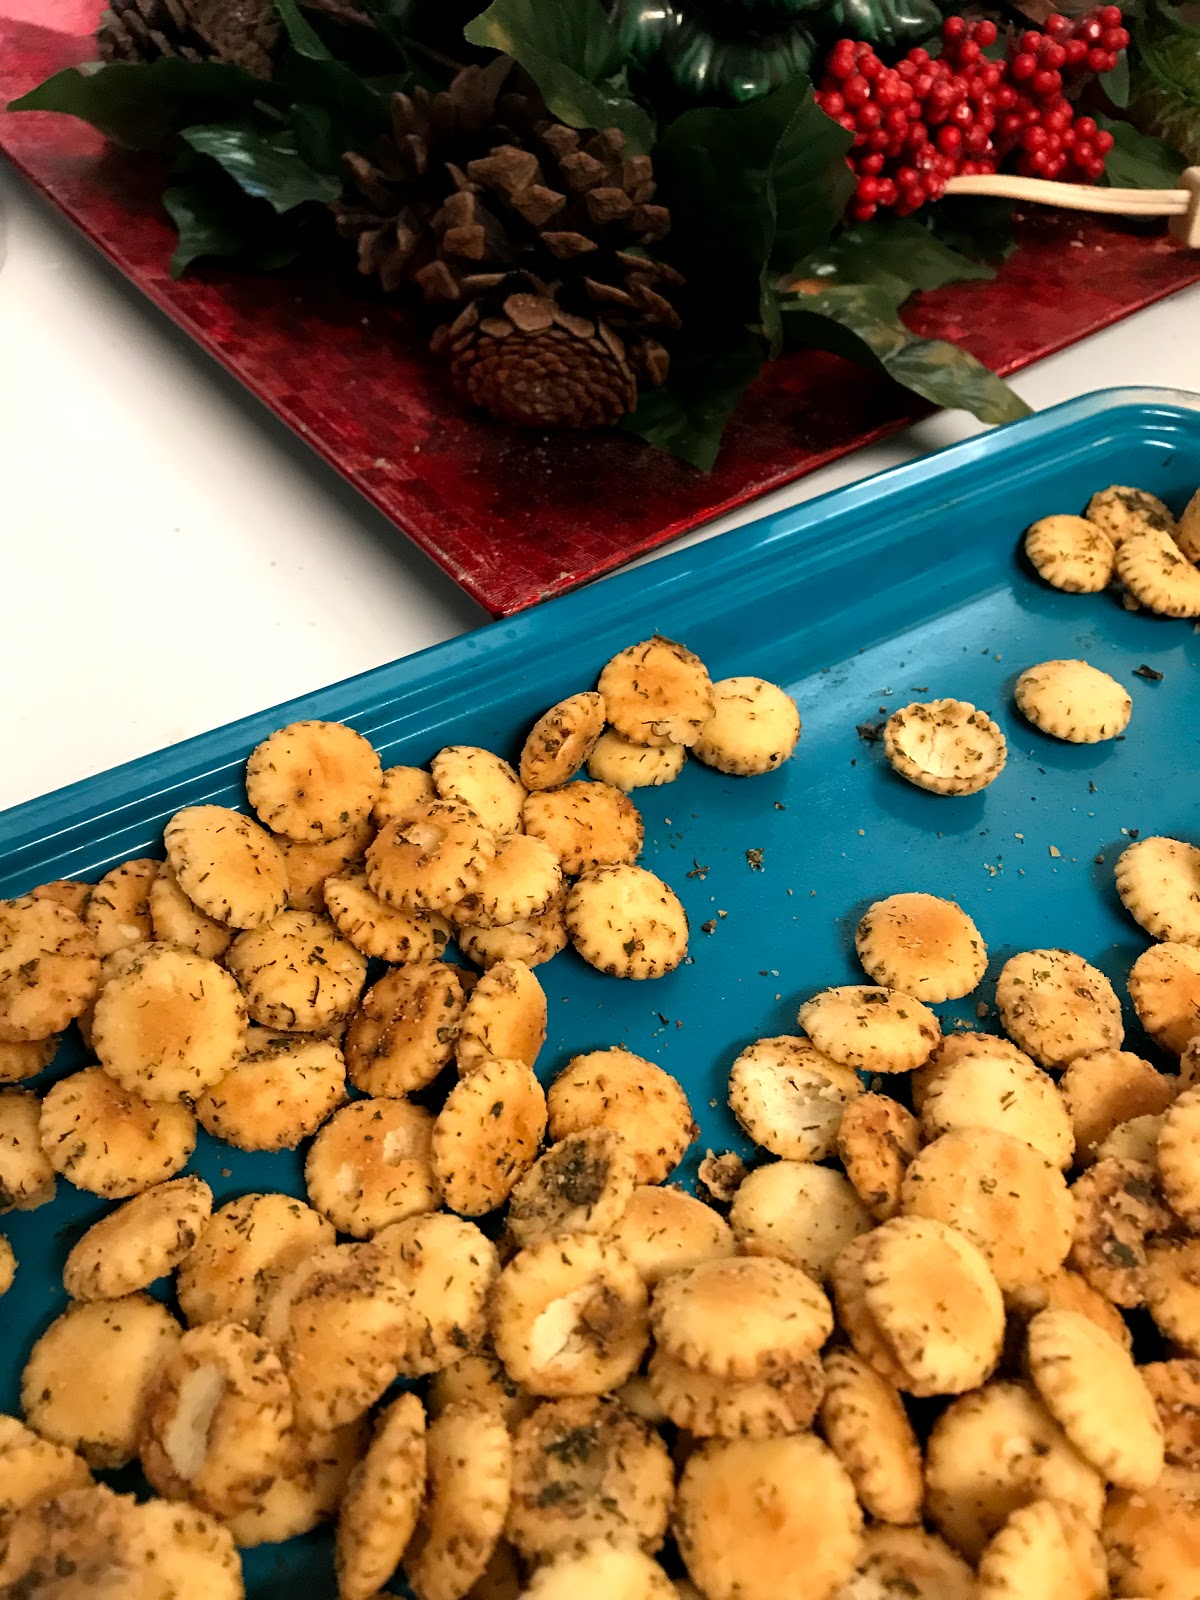
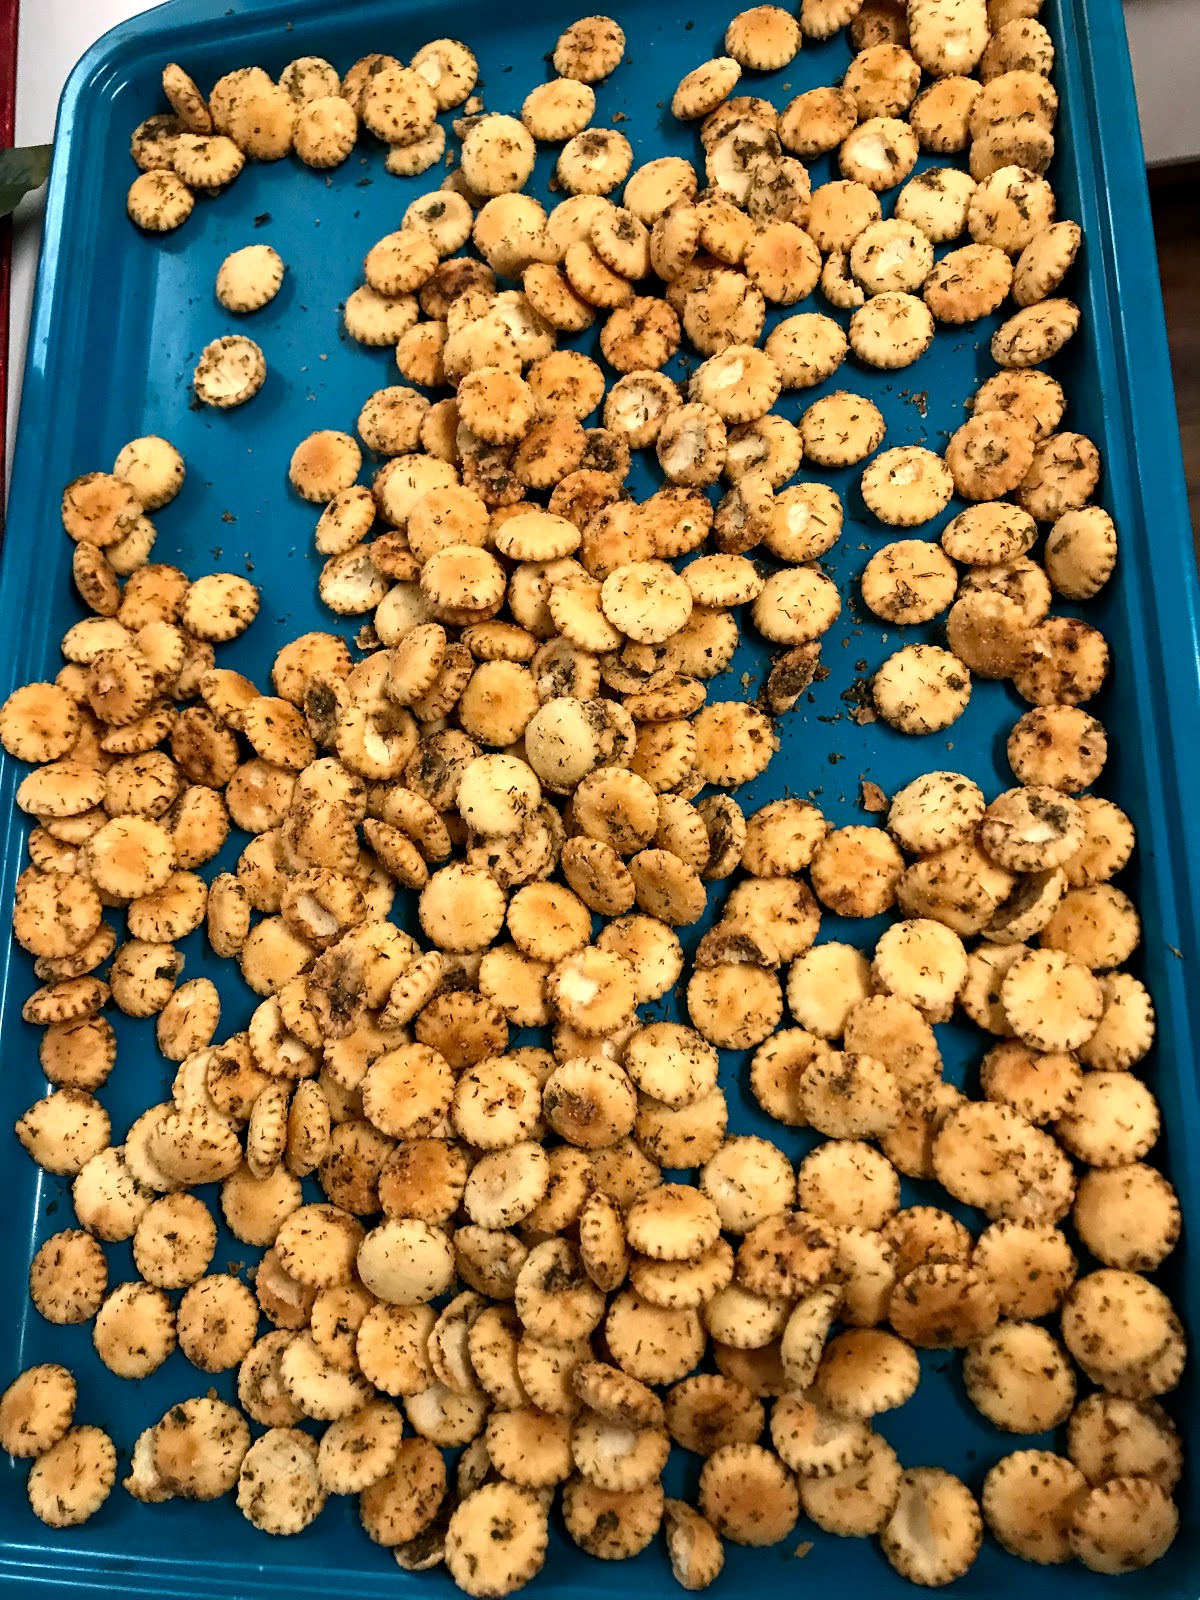
This is after they have come out of the oven, but you get the picture.
5.  Bake for 10 minutes in the oven.  After 10 minutes, rotate the pan and stir with a spoon, redistributing the oyster crackers on the pan.
6.  Cook for another 5 to 10 minutes.  Remove from the oven when the oyster crackers are a golden brown.
7.  Allow to cool completely before serving.  (Put in an air tight container to store.)

So how easy was that?!?!?!

This next recipe is one of my favorite recipes of all time and is a go to for all sorts of functions.  I break it our for parties, holidays and sometimes just because I want to eat it.  I honestly thought that I had already posted this recipe, but when I went back into the Frugal Femme archives, I realized that I have not.  So here it comes, my favorite cheese ball recipe of all time.

Cheddar Cheese Apple Balls


These cheese balls have no apple in them.  They are called apple balls because that is the way that they are shaped.  One recipe will make two cheese balls, you can easily half this recipe and make only one.  I do this all the time so that I can make two different flavors of cheese balls.
This is another recipe that I just slightly modified from a family recipe.  I'm not sure who first made it up.

Ingredients
1 package (8 ounces) cream cheese, softened
2 tbsp. finely chopped onions
2 tsp. Worcestershire sauce
1/2 tsp. ground mustard
2 cups (8 ounces) shredded cheddar cheese
Paprika
Cinnamon Sticks
Fresh Sage Leaves or Bay leaves

Instructions
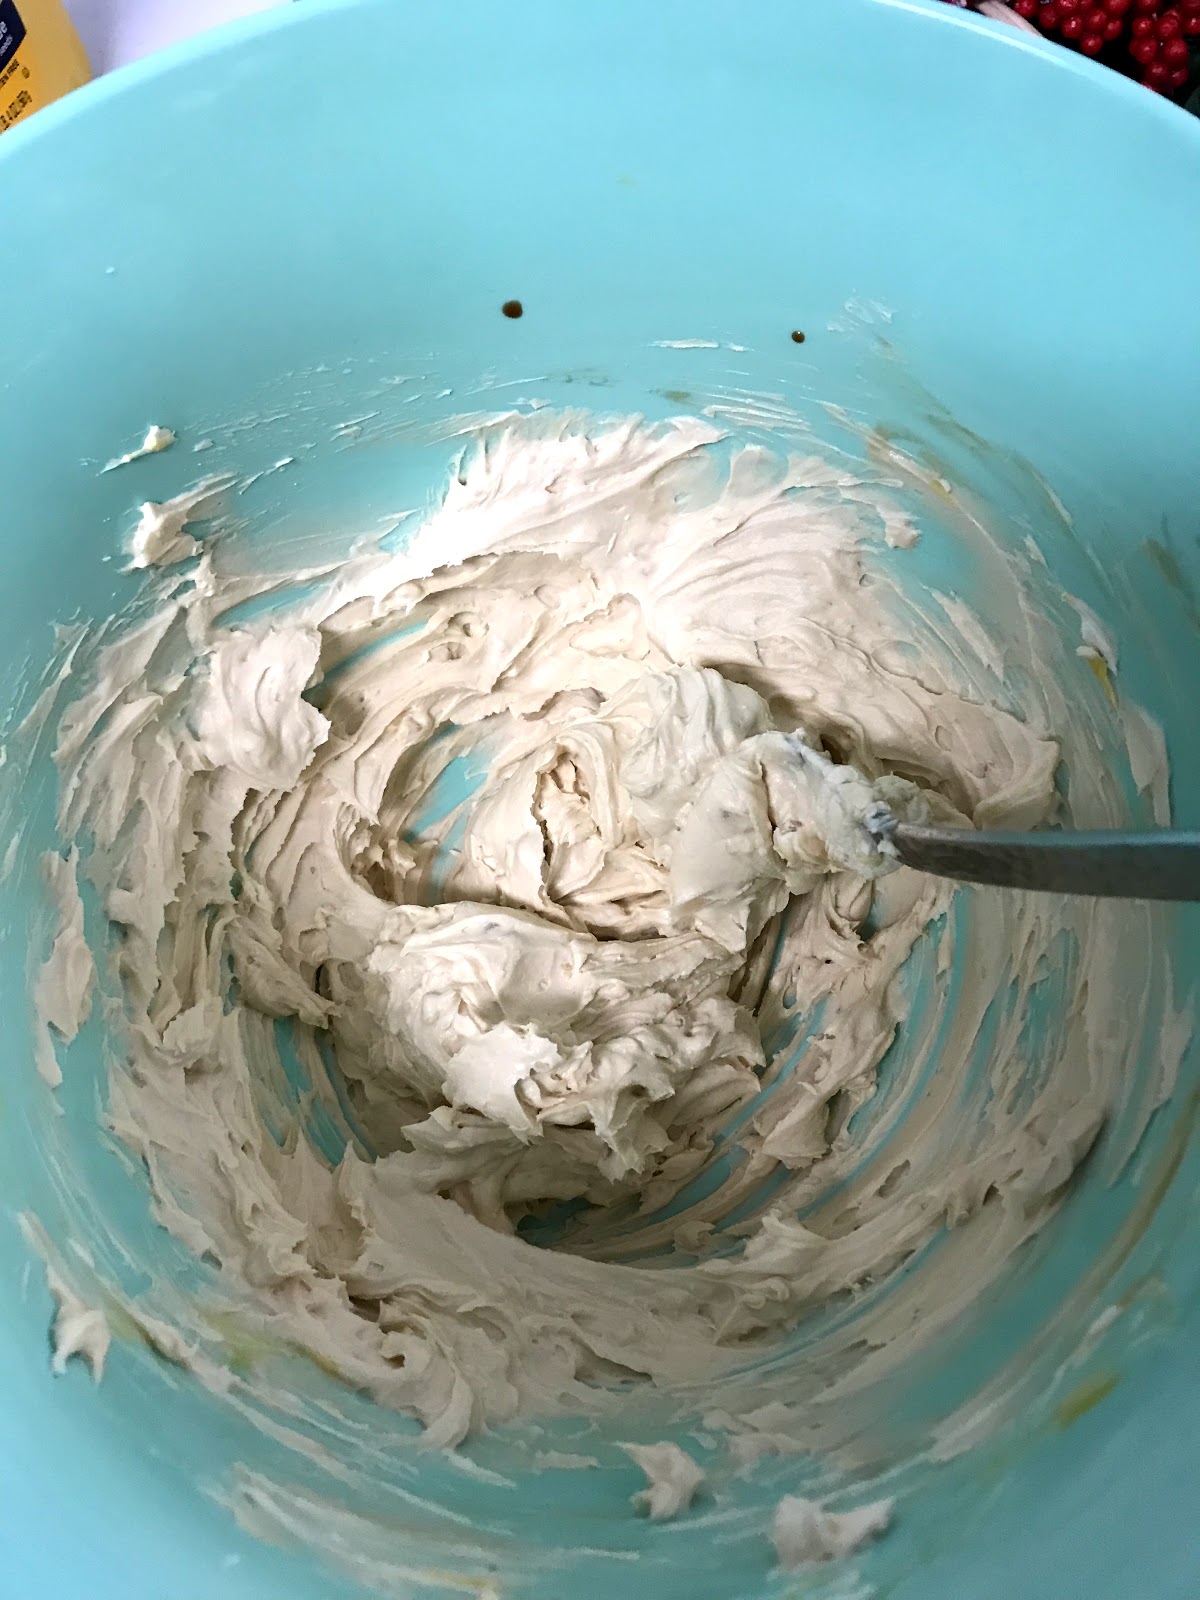
1. In a large bowl, beat cream cheese, onion, Worcestershire, and mustard in a large bowl until blended. 


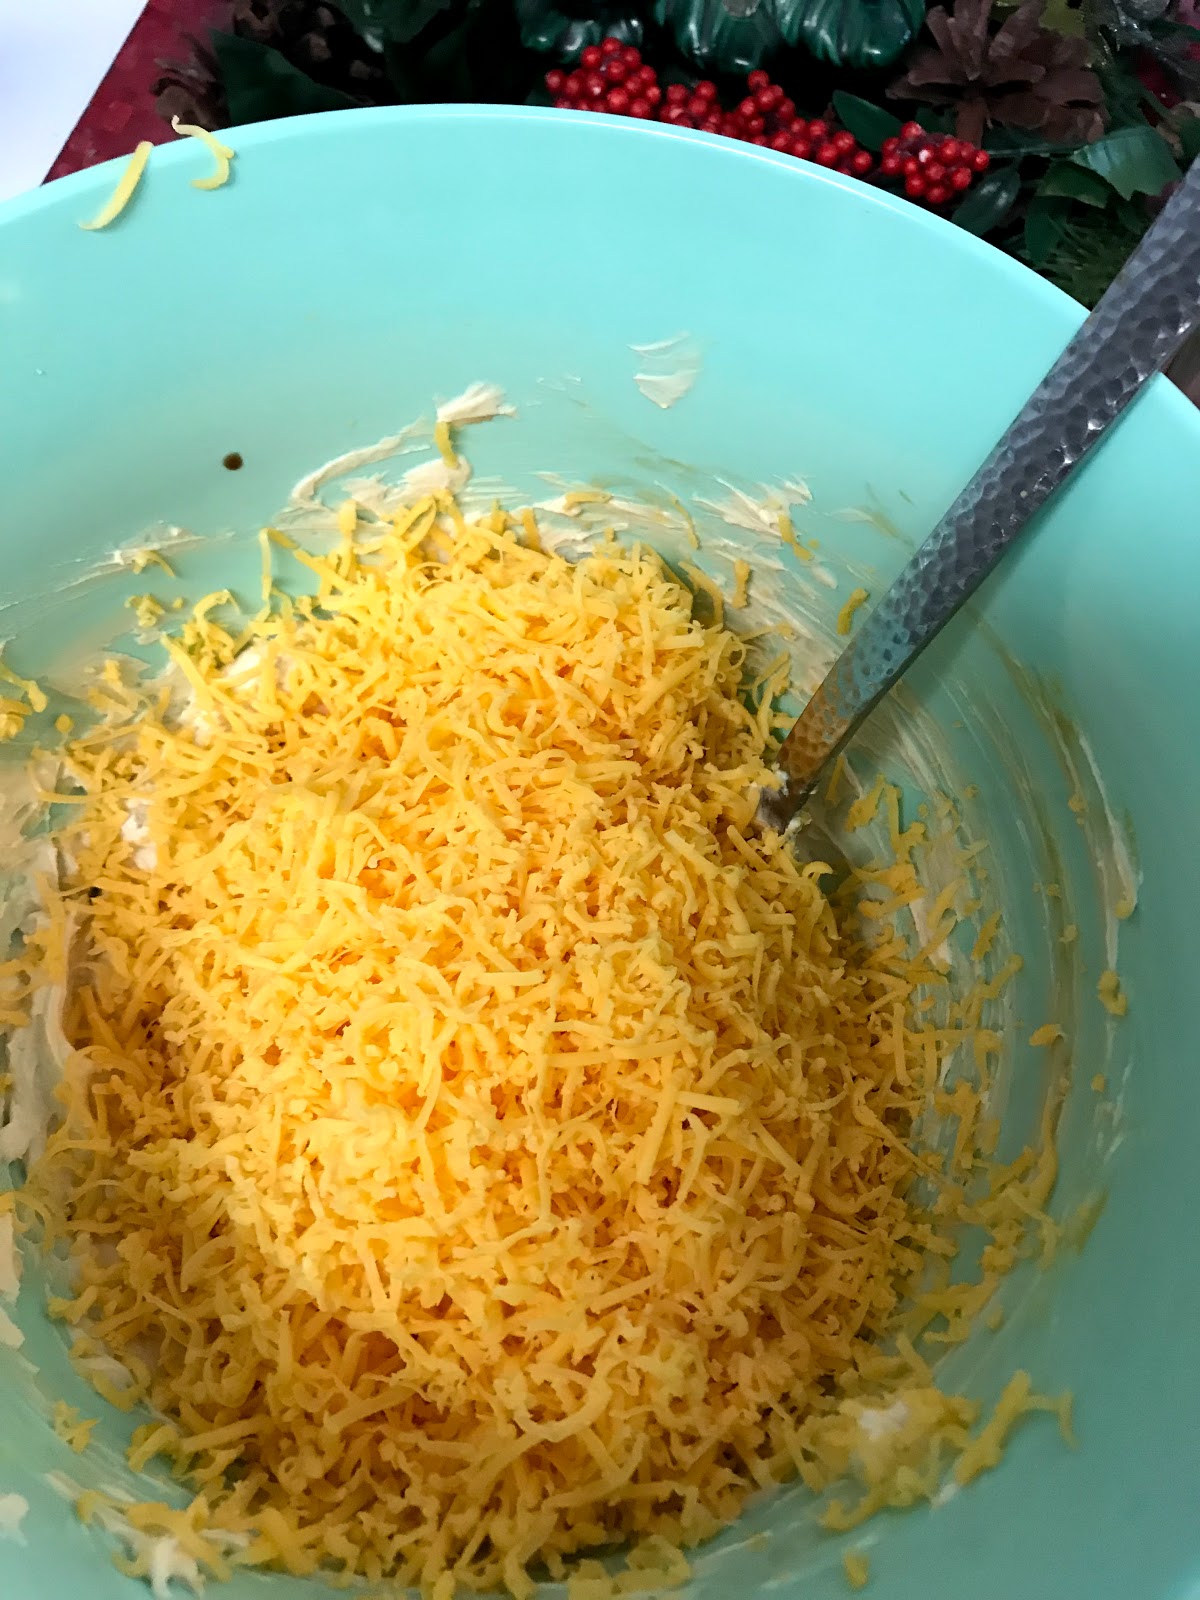
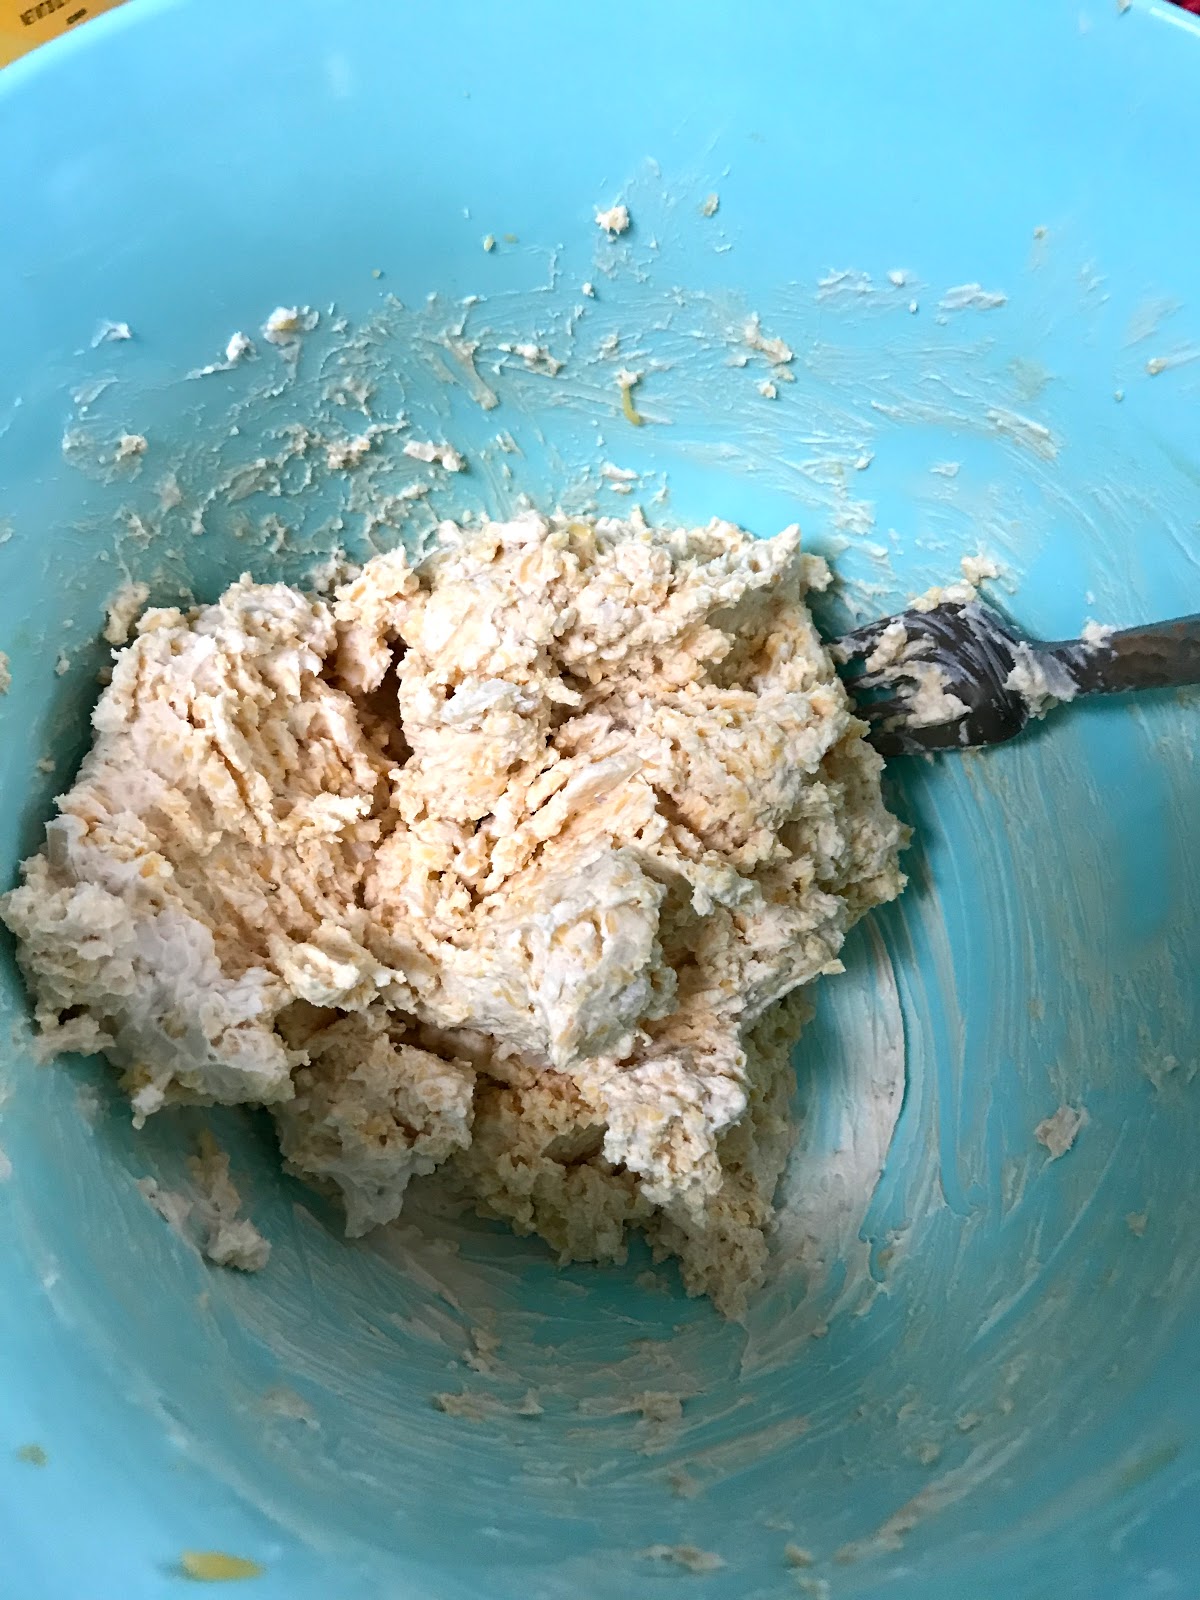
2.  Mix in the cheddar cheese.


3.  Cover and refrigerate about 2 hours or until firm enough to shape.
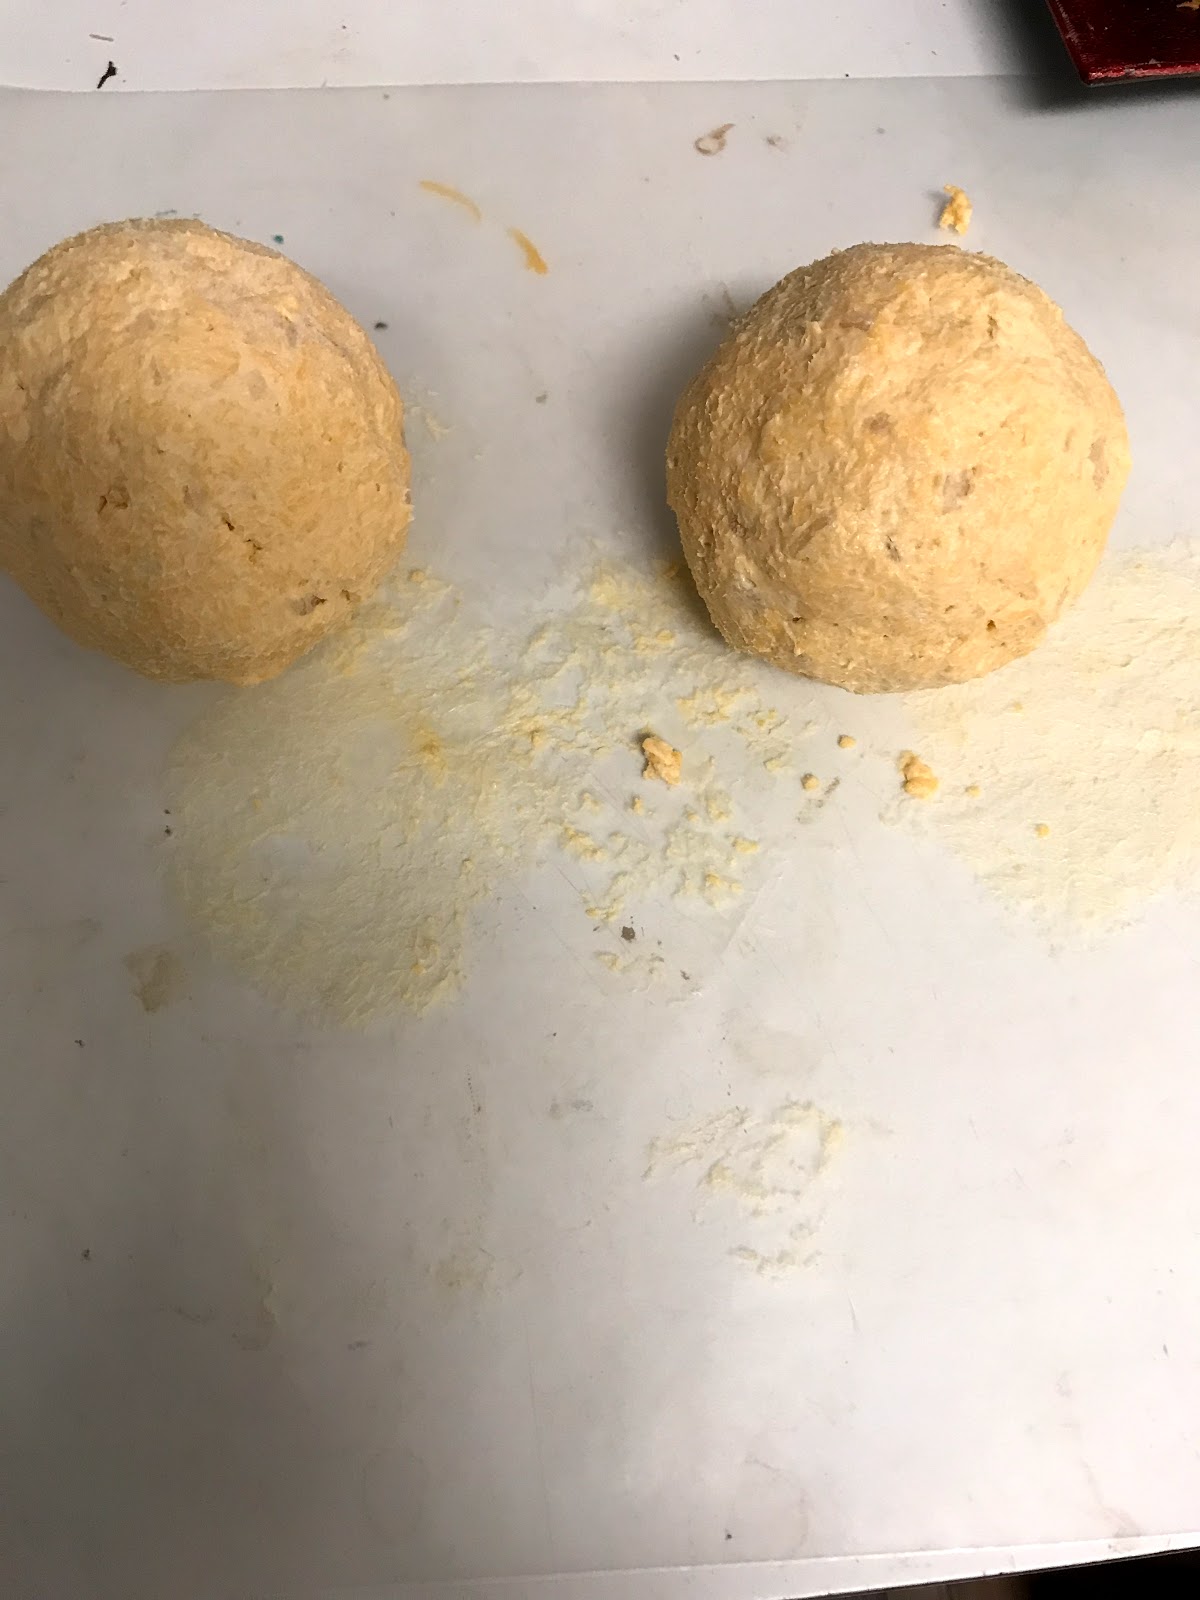
4.  Divide cheese mixture into two halves.  Take one of the halves and form into a ball on waxed paper.  Repeat this step on the other half of the cheese mix.


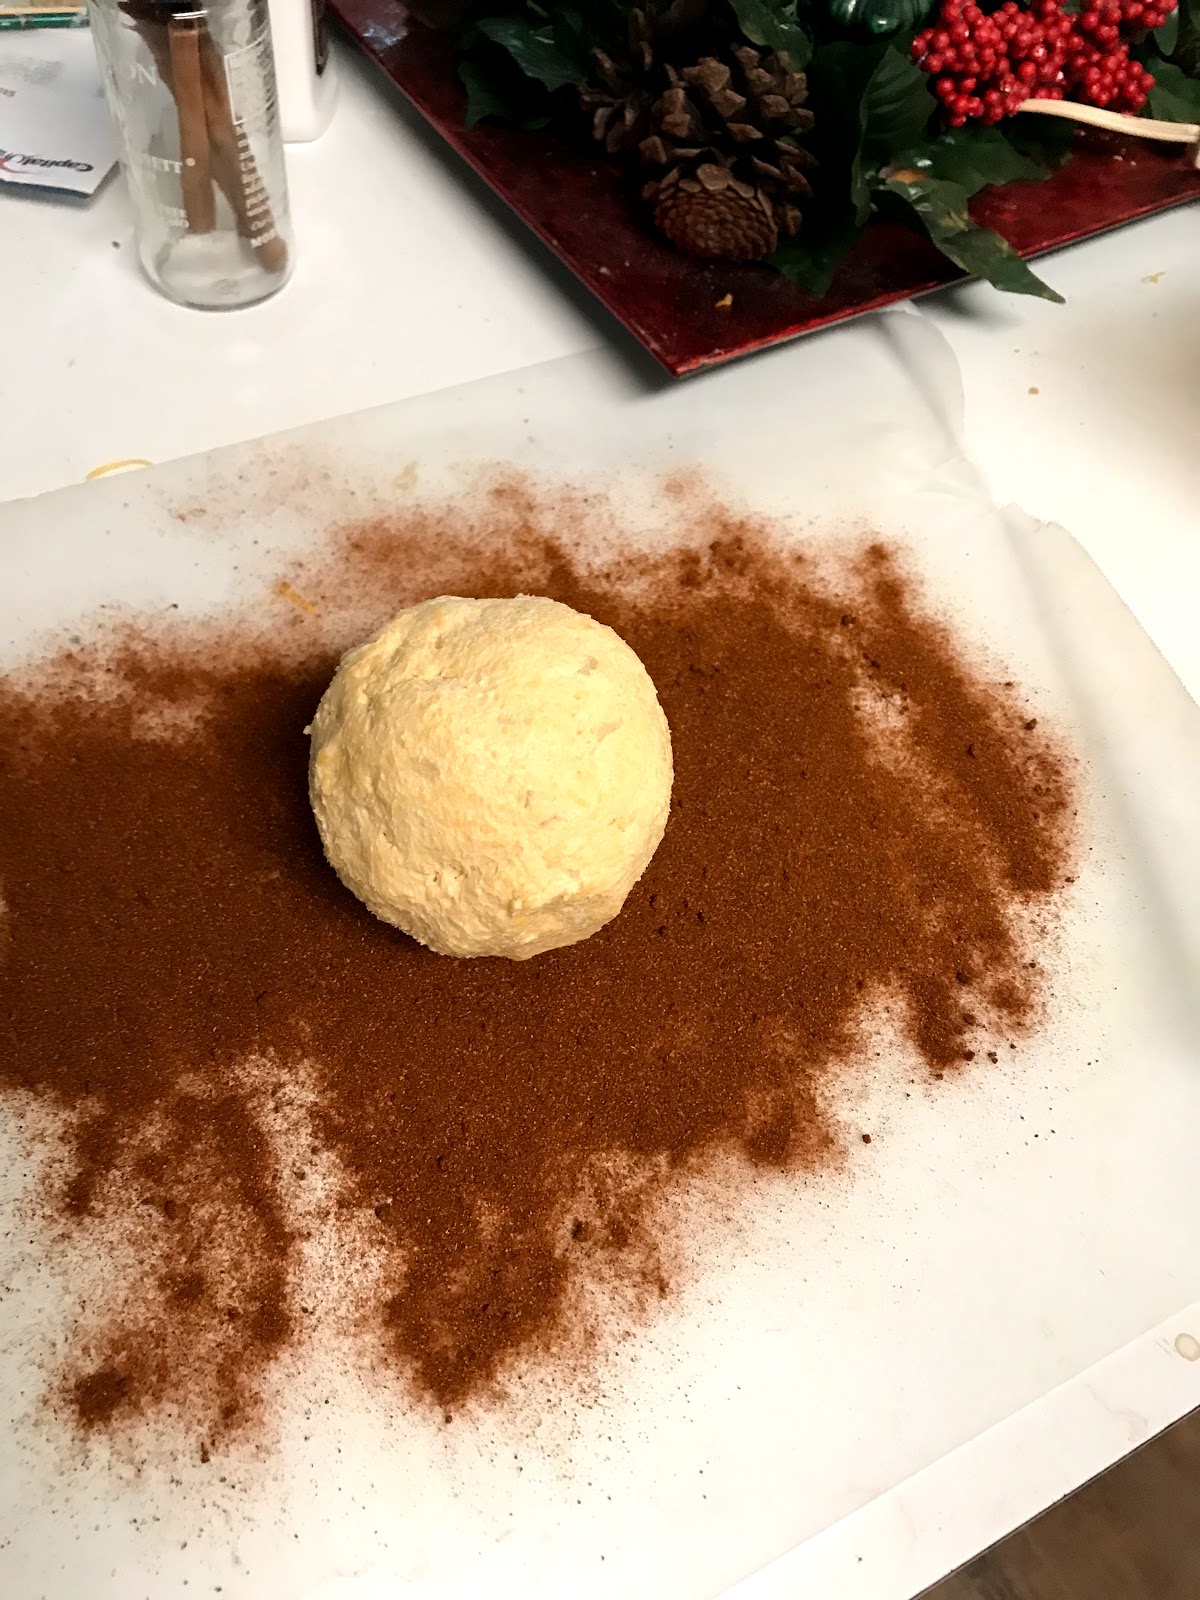
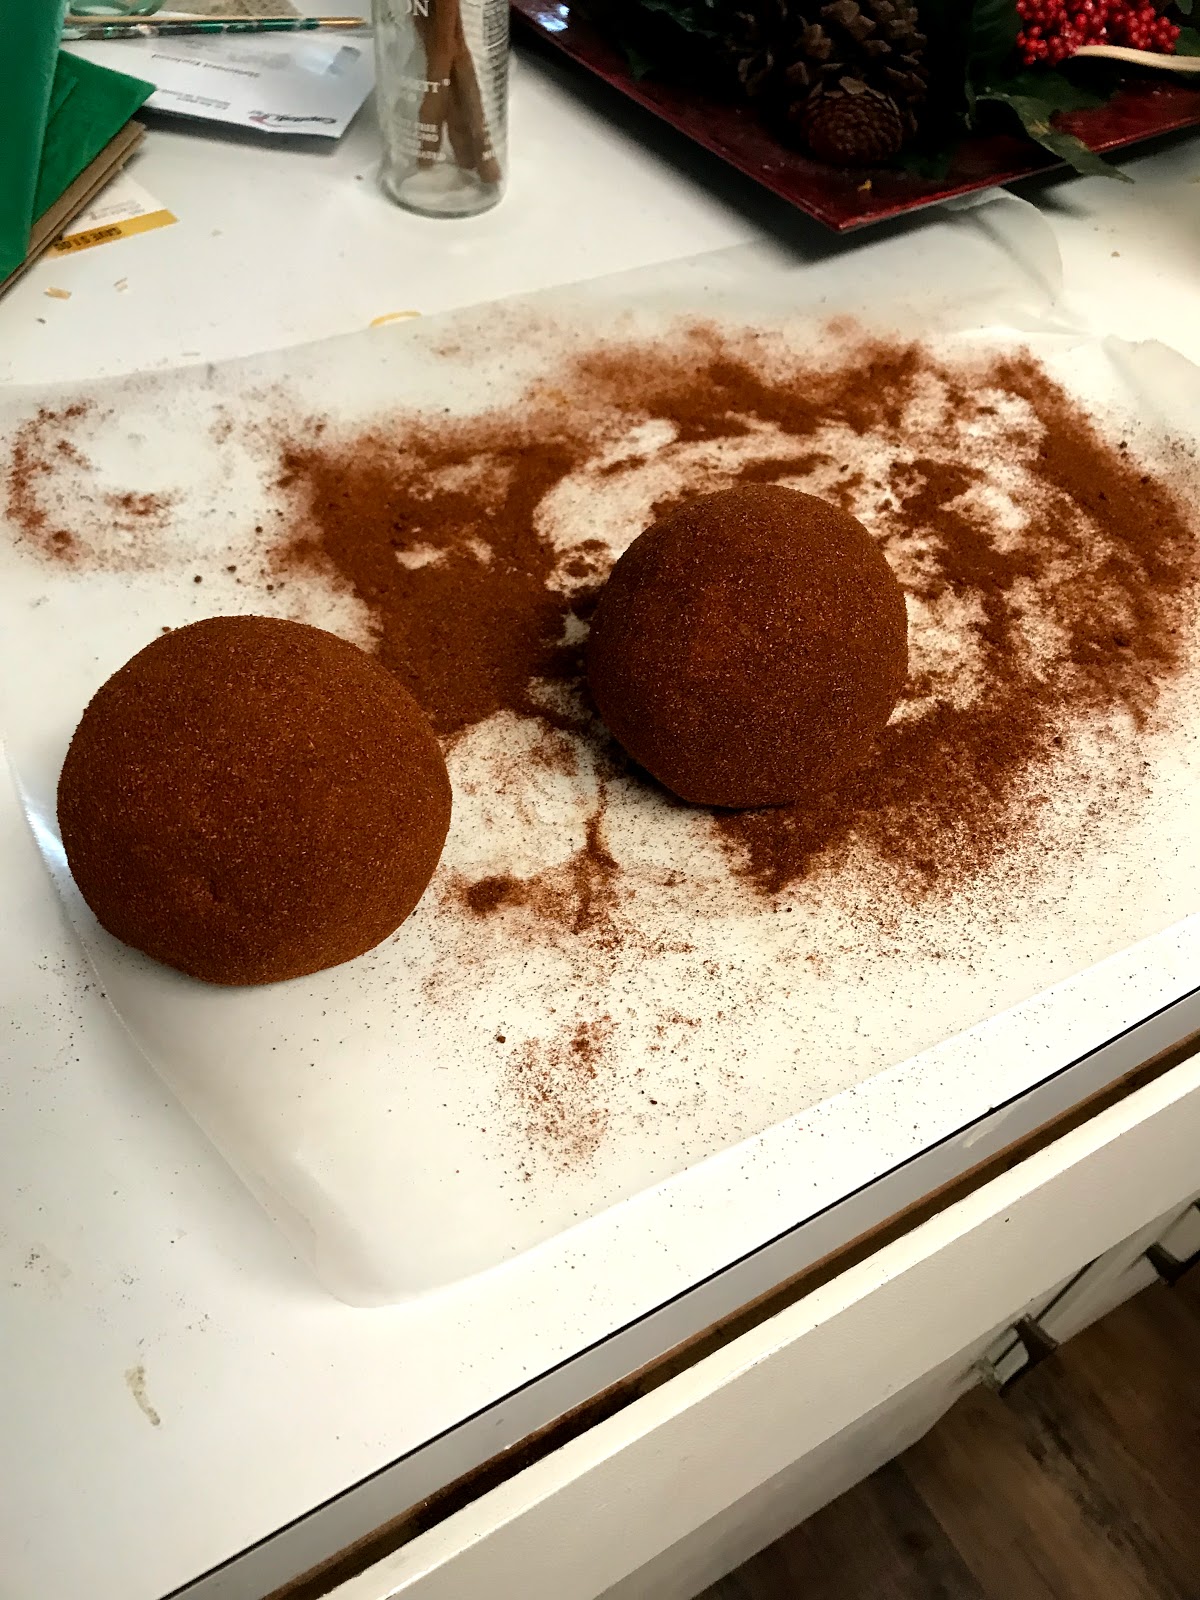
5.  Sprinkle another piece of waxed paper with paprika.  Roll cheese ball in paprika, coating thoroughly.  Repeat this step with the other cheese ball.


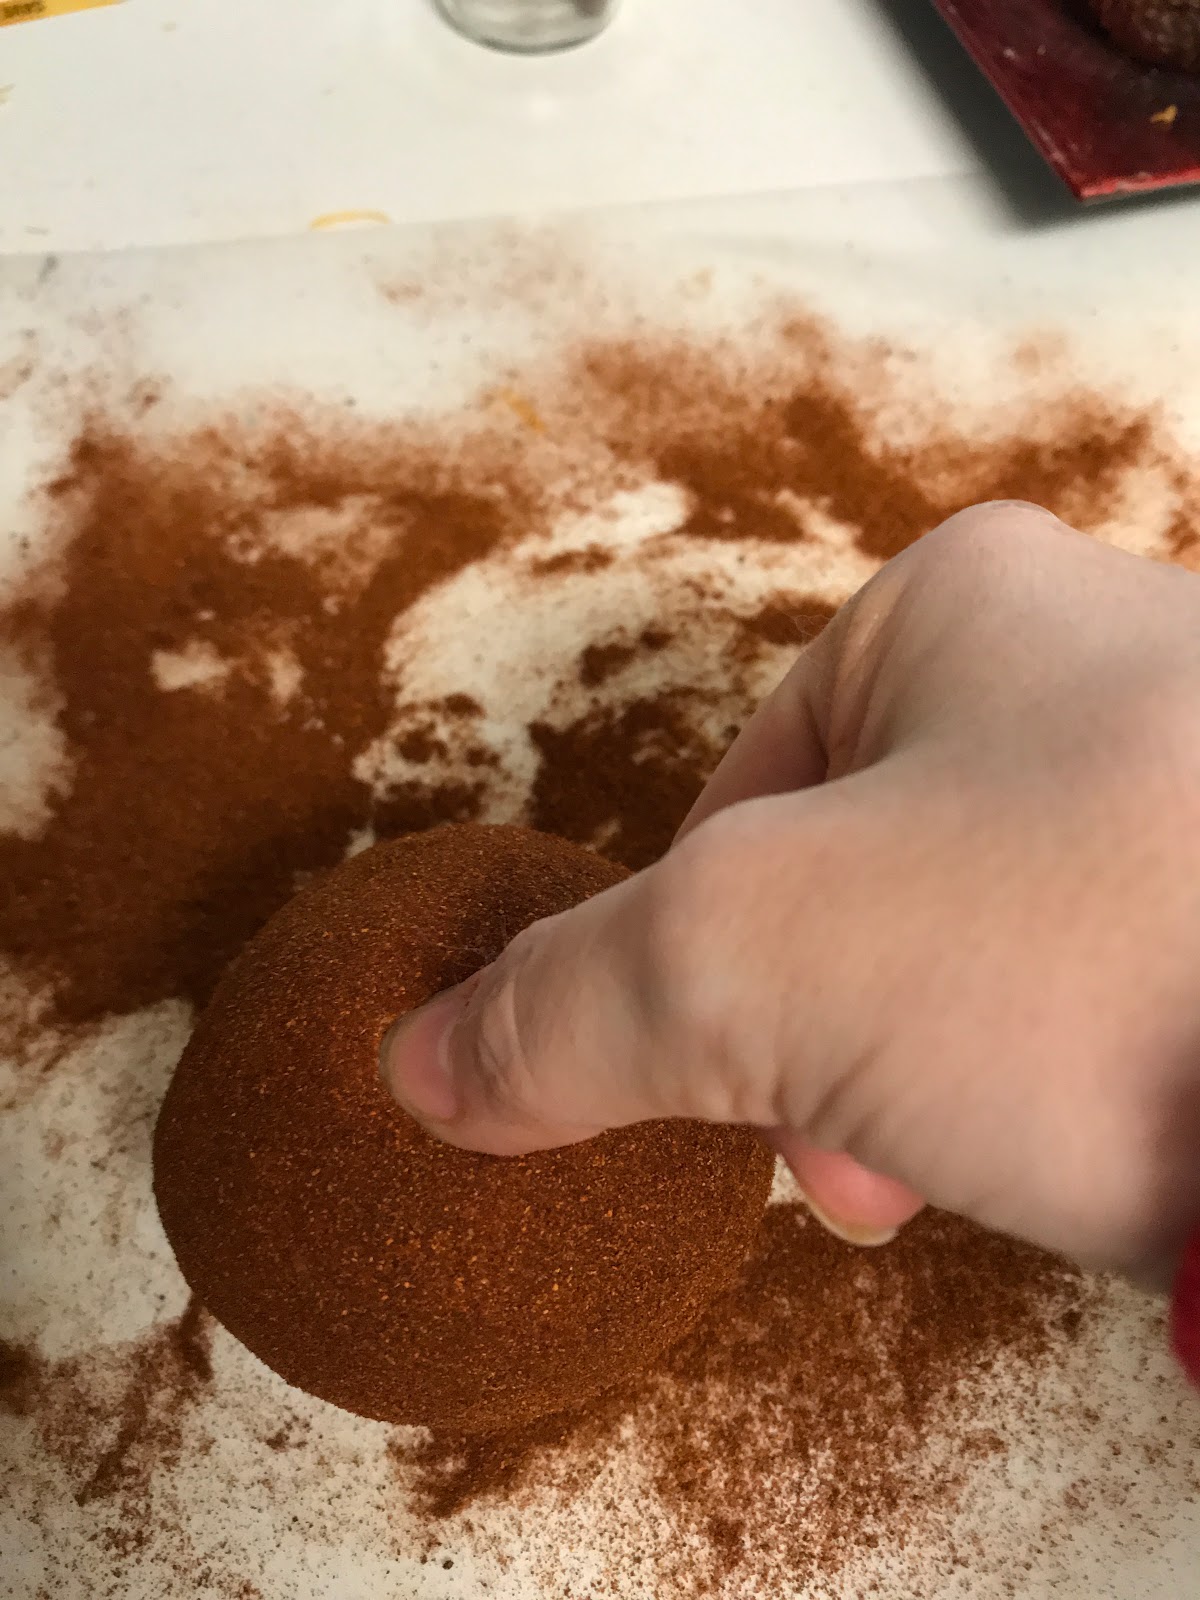
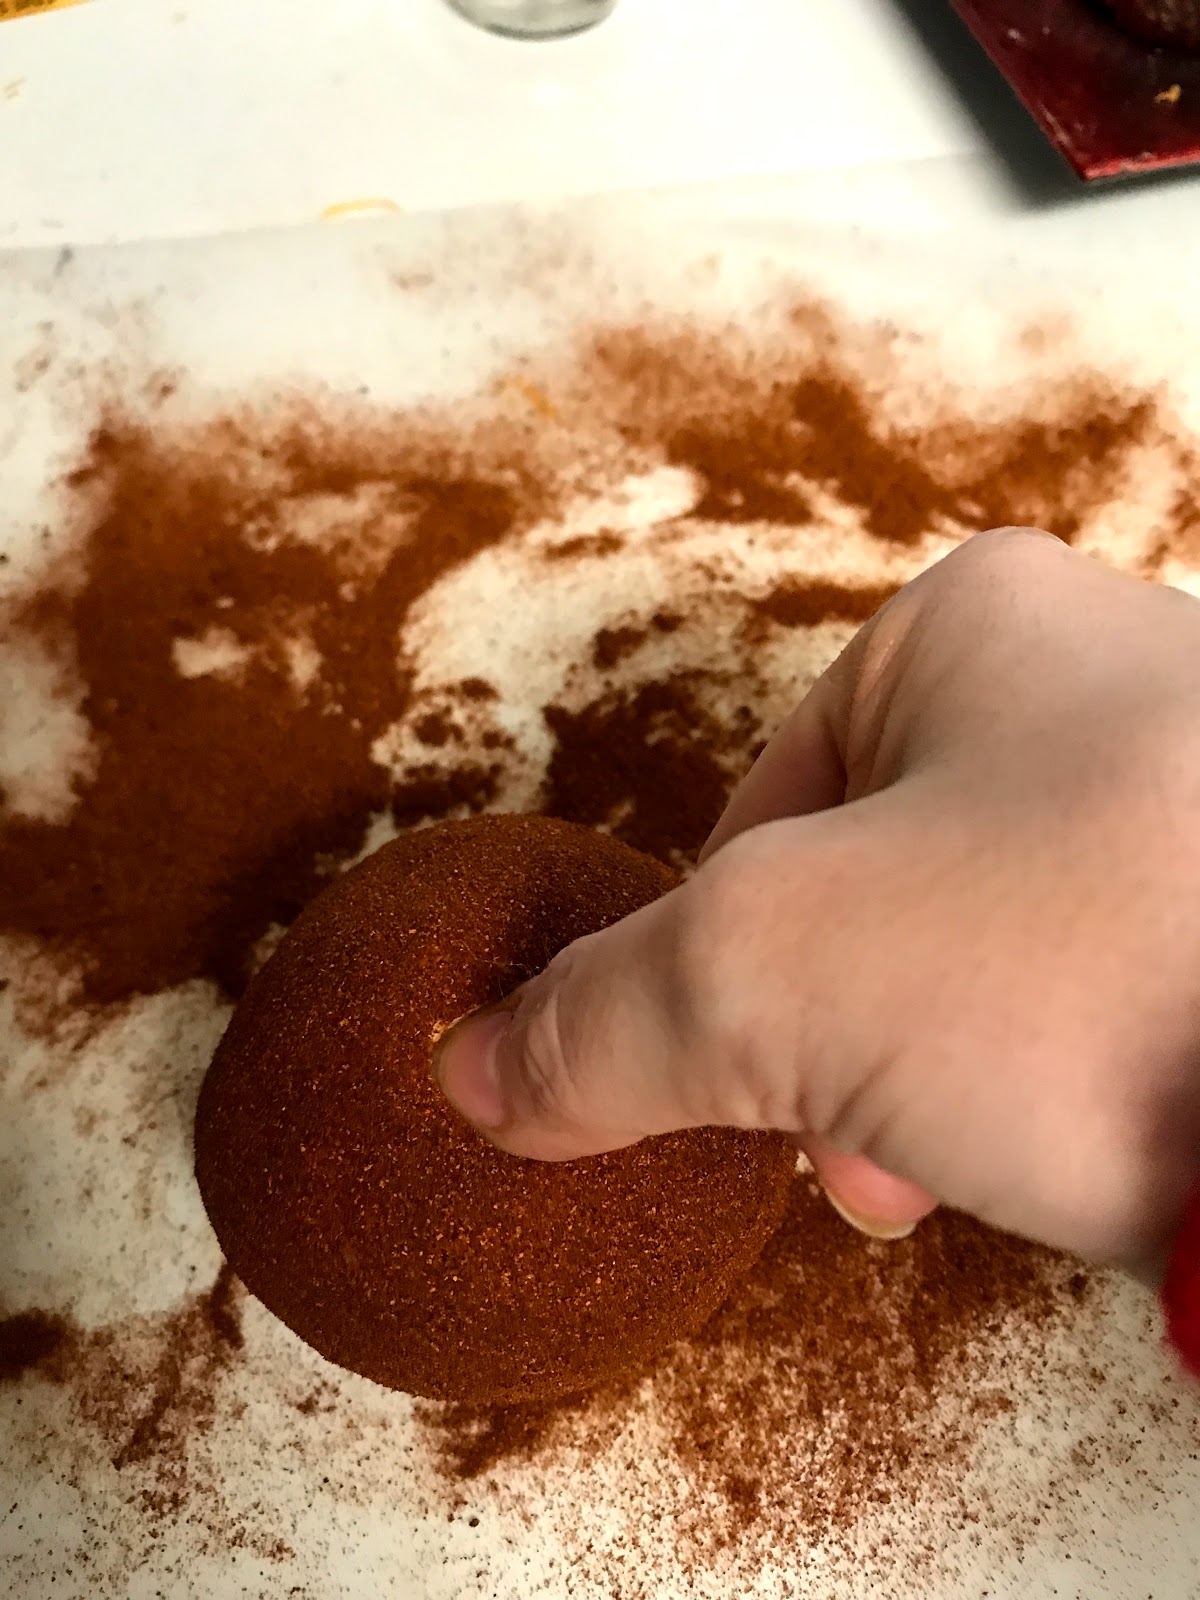
6.  Mold paprika covered cheese ball into an apple shape.  Repeat.
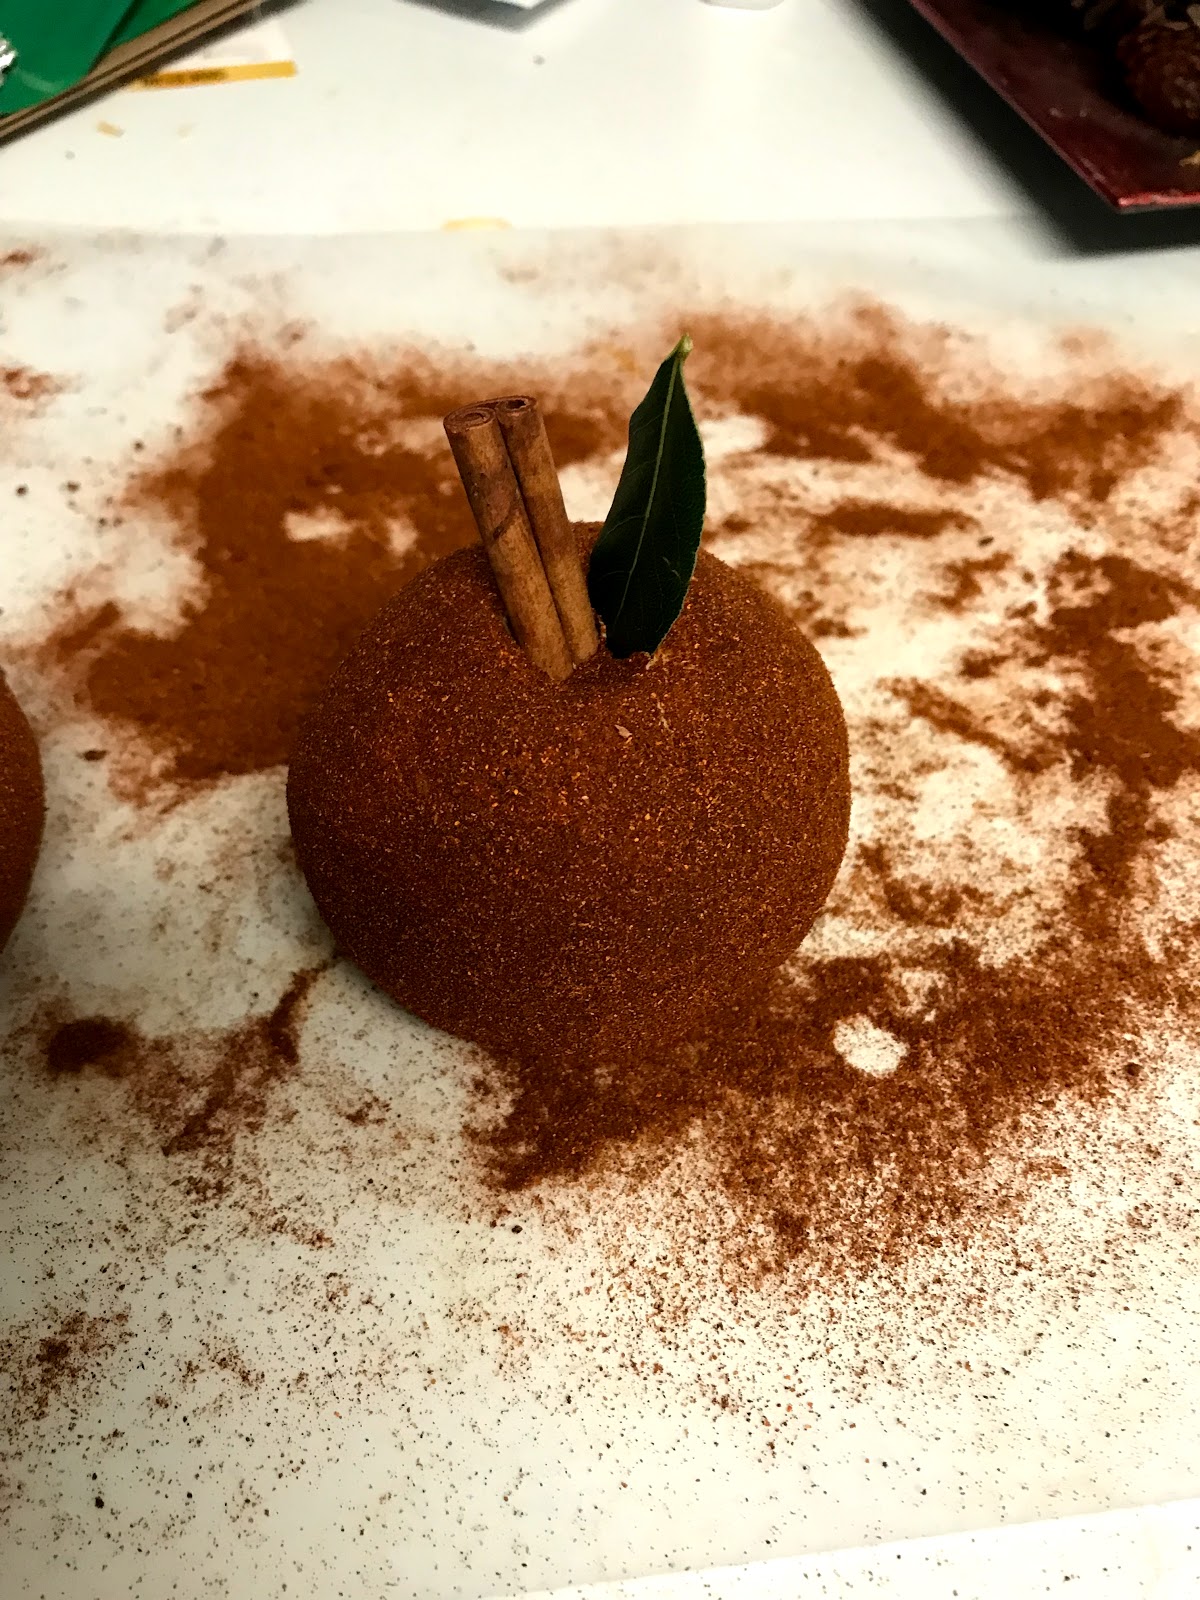
7.  To garnish, make a small depression in the "top" or the stem ends of your apples.


 Cut a cinnamon stick in half.  Insert cinnamon stick half into depression to make the "stem" of the apple.  Insert sage/bay leaf next to the cinnamon stick. 


8.  Serve with crackers.

And voila!  You have a beautiful and delicious cheese ball that looks like an apple.  A note of warning for this dish, people find it so pretty that they are afraid to cut into the cheese ball.  I find that, when I put the cheese ball out to serve, I have to make an apple "slice" into the cheese ball.  Otherwise, people don't want to mess up the pretty.

So there you have it!  Two quick and easy recipes to bring to a party that you can whip up at the last minute.

Have a happy Christmas Eve!