Showing posts with label Recipes- breakfast/brunch. Show all posts

Monday, July 3, 2017

An Easy Breakfast for the 4th of July and my recipe for a Summer Wine Slushie

Hello Everyone!
Its a holiday weekend and that means fun in the sun and more time to work on projects - be they crafts or things that you want to get done around the house.  I have a couple of craft projects that I want to work on tomorrow while my husband works in the kitchen and, if everything goes well, I will have a new cast iron kitchen sink to ring in my Fourth of July this year!


So if you read my blog you are probably wondering, where are the flower barrettes, where is the tiki mantle, and all of the other things that you said were coming?  They are still coming, but I had to do this post which was inspired by an unexpected visit from my nieces and their father.
I hadn't seen my nieces in about a decade so I was very excited to see them.  They were going to stay the night with me and then continue on their way to see New Orleans for the first time.
Living in Louisiana, I almost always have a huge amount of homemade gumbo in the freezer, so I had dinner solved, but I was a little concerned about Breakfast/Brunch.
I am a firm believer that a holiday weekend should have at least one day where you have a larger than necessary breakfast/brunch and I always try to do one whenever I have the chance.  The catch for me with this brunch was that I didn't want to spend all of my time in the kitchen on the day when they were leaving when I would rather spend time talking with them.  Fortunately for me, they both love French Toast and not eggs, so a French Toast Casserole was the perfect way to go.
 I first had a french toast casserole on the day of my wedding to my husband.  His aunt made a french toast casserole and some tiny quiches and I ate like.......  well I don't want to draw demeaning comparisons to anything, so lets just say that I ate ALOT.  I naturally had to get the recipe.

Wait!  Are there any more of those little baby quiches or maybe some of the French toast casserole?  I'm still hungry.  (This is a picture of me putting on makeup for my wedding, and I'm fairly certain I am asking for food here.  Even though I just ate!

I have changed this recipe a little from the one that she gave me, as I often do to suit my tastes or what I have in my cabinets and fridge, but the basic idea is still the same.
I thought that today would be the perfect day to post this as you can make it for the Fourth of July.  Just make it the night before, and pop it in the oven the next day. Bam!  Super easy breakfast and a great start to a day at the lake or whatever you plan on doing.

French Toast Casserole


I don't have pictures of this because I made it in a hurry so that I could go spend more time with my family.  Sorry!

Ingredients
1 stick (1/2 cup) unsalted butter
1 cup packed brown sugar
2 tbsp. maple syrup
8-9 inch round loaf country style bread (Or, if you can't find that, you can use french bread but it won't fill your baking dish as well)
5 large eggs
1 1/2 cups half-and-half (can also use buttermilk or 2% milk that has been thickened to the constancy of heavy cream by adding sour cream.  I know that last bit sounds weird, but trust me, it works in this recipe and I am far more likely to have sour cream and 2% milk and hand than I am those other items.)
1 tsp. vanilla, over flowing (What do you mean over flowing.  Well, what I means is, pour the vanilla in a teaspoon above your bowl, when it starts to over flow the sided and go into the bowl, you have enough vanilla.)
1 tsp. Grand Marnier, overflowing
1 tsp. Cinnamon

Instructions
1.  In a small heavy sauce pan, melt butter with brown sugar and maple syrup over moderate heat, whisking until the mixture becomes a smooth consistency.
2.  Pour the sugar/butter mixture into a 13-by-9-by-2-inch baking dish.
3.  Cut six, one inch thick slices from the center portion of the bread loaf. If you are using the french bread, keep the crusts on.  If you are using the round country bread you can leave the crusts on or off depending on your preferences.
4.  Arrange bread slices in one layer in baking dish over the sugar/butter mixture.  (With the round country loaf you may have to squeeze the bread slightly to have it fit in the dish, that is fine.)
5.  In a medium sized bowl, whisk together the eggs, half-and-half, vanilla, Grand Marnier, salt and cinnamon until all of the ingredients are well combined.  Pour evenly over the bread in the baking dish.
6.  Cover and chill in the refrigerator at least eight hours or up to one day.
7.  When ready to eat, preheat oven to 350 degrees and bring bread mixture to room temperature.
8.  Bake, uncovered, in middle of oven until puffed and edges are golden, 35-40 minutes.

Can serve it with powdered sugar sprinkled on top, but is wonderful just as it is coming out of the oven.

I do have some variations on the recipe, depending on the season and how I am feeling.
To make the dish slightly more citrus-y, add about 1 tsp. of orange zest to the half-and-half mixture.
During the fall, I like to add about 1/2 tsp. nutmeg, 1/2 tsp cloves, and 1/2 tsp. dried ginger to make it seem more fall-like.
You can mix and match the syrups that you use, so you don't have to use maple syrup.  The aunts recipe called just for regular corn syrup.  Or, if you are feeling adventurous you can try substituting a flavored syrup like blueberry syrup or strawberry syrup and garnish with summer berries for the summer time.

Also, this dish freezes very well after baking, just store in an air-tight container and it will last in the freezer for up to one month.

And what is a 4th of July celebration without a little frozen beverage goodness?


The next recipe is a perfect recipe for a hot Louisiana day.  It just hits all the right buttons and makes you feel fancy when you are lounging by the water.  (I don't know why, but I always picture having the 4th of July by a lake or pool.  Even though I haven't done that since moving to Louisiana.  I blame it on my childhood where we used to go to Shell Knob, MO and we would celebrate the holiday on Table Rock Lake.

Summer Wine Slushie


This is one of the pricier of the Frugal Femme food items, but it is delicious and wonderful and, if you would purchase this at a bar or restaurant, would cost you way more than it would to make at home.  So, if you think of it like that, it is still frugal.  I got all of my ingredients for this at Trader Joe's for about $20.00.  (No, Trader Joe's is not paying me to write this.  But they do have $7.00 limoncello and $3.00 wine so it makes this recipe a whole heck of alot cheaper than if I went somewhere else.  This recipe will make about 6 cups of frozen goodness, if you do the large cups like my friends and I do -  or about 10 glasses if you serve it in a champagne flute and make it pretty.  It is great for parties - which is one of the reasons that I thought it would be great for a 4th of July post.
This recipe is very similar to my other smoothie recipes, there really isn't a wrong way to make them, its just a matter of personal taste.  So, have a blast and experiment with it.

Ingredients
1 bottle of white wine  (I like a Pinot Grigio but my husband likes the chardonnay.  I say do whatever white wine you like the best.  Heck, I think a Riesling would go great in this recipe, although I haven't tried it.)
1 cup frozen mango
1 cup frozen peaches
1 cup frozen strawberries
1/4 cup Limoncello*  (If you don't have limoncello, orange juice is good.  Or you can split the difference and do both!)

     *  A quick note here, you can use whatever kind of fruit that is frozen that you would like to put in this beverage, I also like to use pineapples.  For this recipe I was trying to stick with more of a summer theme, but if you wanted to go for a tropical theme, pineapple would be the way to go.


Instructions
1.  Carefully put all of your ingredients into a blender and pulse until the mixture is smooth.  (If the drink is too thin, just add more of any of the fruit that you would like.  If the mixture is too thick, then add more of the orange juice or the limoncello.)
2.  Pour into glasses and serve immediately.

Garnish it with whatever floats your boat.  Some ideas are:  fresh fruit, fresh basil, and fresh mint.

Just a quick note, this drink is sweet, but is not sweet like a smoothie or a daiquiri, so do not expect it to be.

This photo was taken by George Barris.  They are arguably some of my favorite photos of Marilyn Monroe and were taken on Santa Monica Beach.

I do think that these could be made individually if you would like.
I haven't done individual servings before, but here is how I think that it would break down.  Again, I haven't tried to do these single servings, so you may need to re-adjust the ingredients from what I have here.

1 small single serving white wine of choice
1/4 cup frozen mango (about two slices)
1/4 cup frozen peaches (about two slices)
1/4 cup strawberries
1-2 tbsp. limoncello or orange juice
This is the photo that makes me want to go to the Eastern seaboard and hang out on a cold beach.  It is one of my vacation destinations and I fully plan on taking photos that look like these.  Photo by George Barris.

Well, I hope that y'all can use both of these recipes for your Fourth of July and I will be back shortly with my tiki mantle and some how to's on how to create it for yourself!


Sunday, November 13, 2016

Pumpkin - Its What's for Breakfast!


Hello Everyone!
I woke up this morning, there was an almost-crisp chill in the air, and I decided that I wanted to have a Fall inspired breakfast.  For me, my two most favorite Fall fruits are apples and pumpkins.  Unfortunately, I didn't have any apples, having eaten the last of them the night before for my evening snack, but I did have one of my pumpkin smoothie packets remaining.  Using this as inspiration, I decided that I would create Pumpkin Pie Waffles!


Pumpkin Pie Waffles

I admit, I cheated on this recipe and did not make "homemade" waffles.  Instead, I got some help from Pioneer Brand Baking Powder.  Its just plain easier than measuring flour and baking powder, etc.  For those of you who are purists, I apologize but I was out of the homemade pre-made stuff.  (That recipe will follow at a later date.)

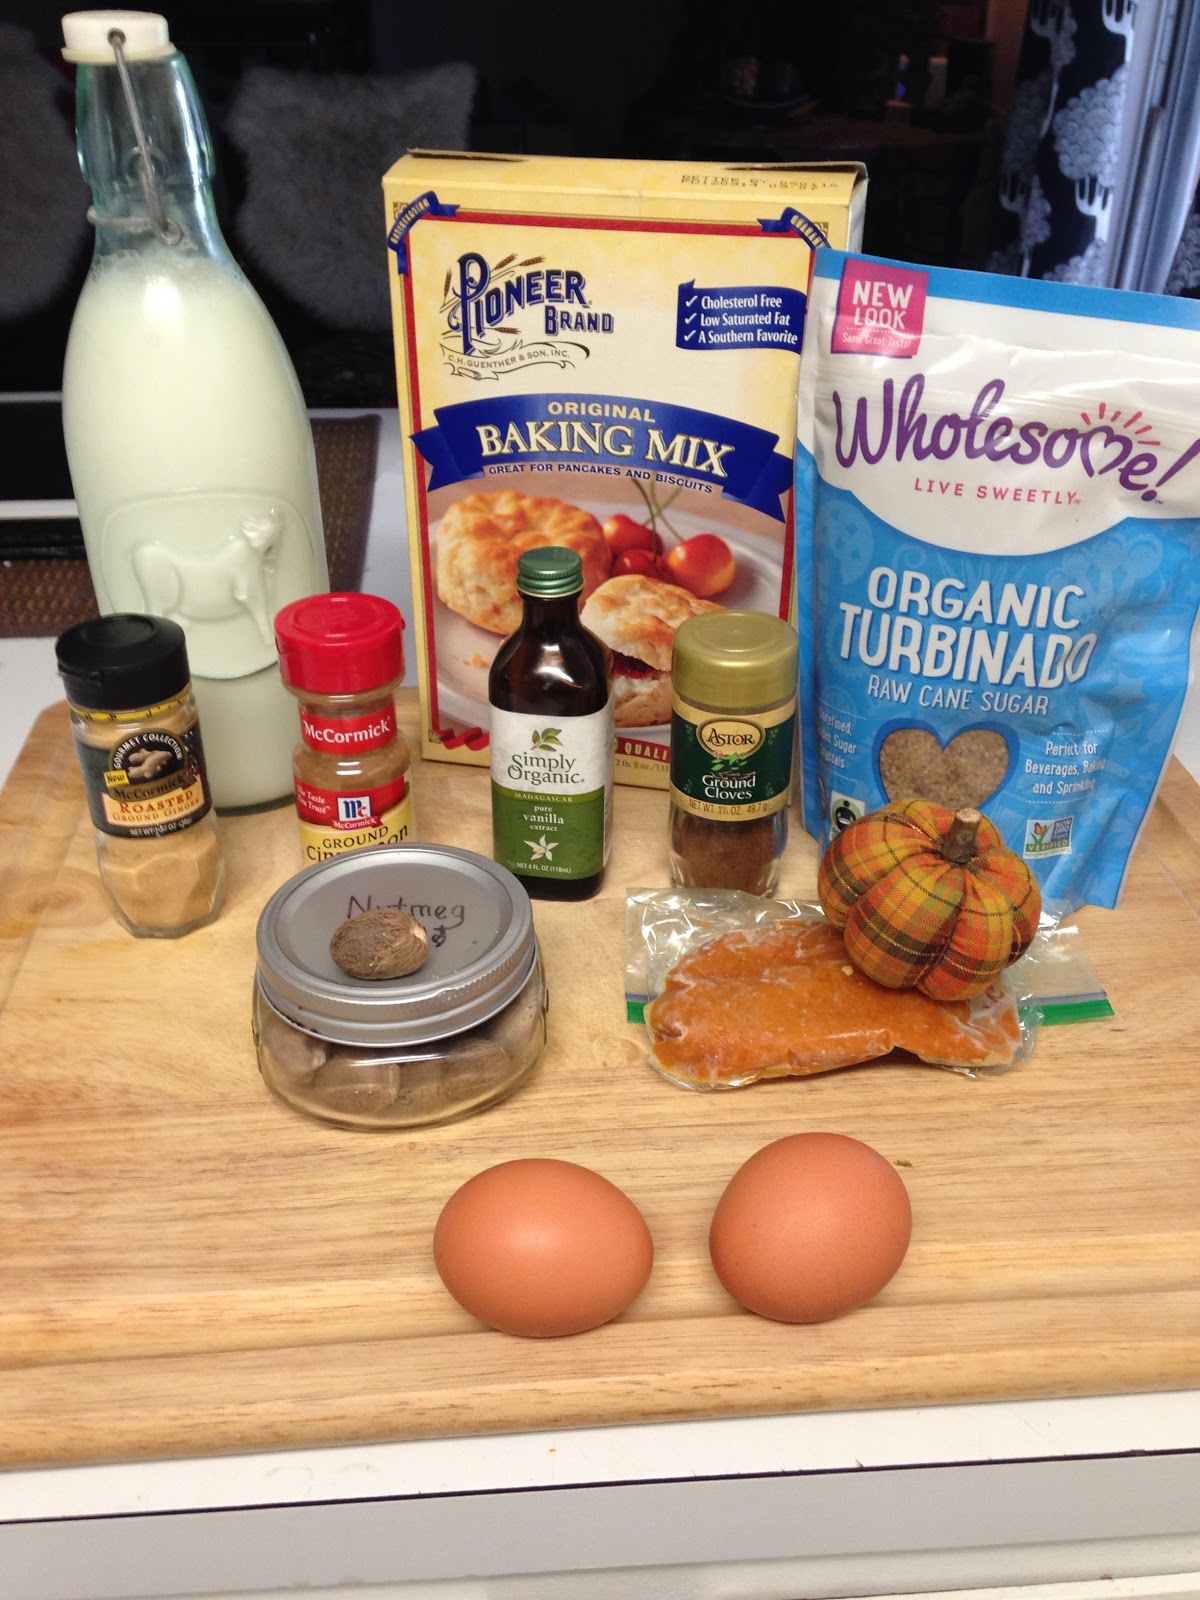
Ingredients


1 cup baking mix  (I used Pioneer, and that may make a difference on the wet measurements)
1 egg
1/4 can of pure pumpkin puree  (If you are measuring, this is slightly less than 1/2 cup pumpkin)
3/4 cup milk or buttermilk
1/2 tsp. vanilla
1/4 tsp. ground ginger
1/4 tsp. ground cloves
1/4 tsp. ground nutmeg
1/2 tsp. cinnamon
1 tsp. raw cane (Turbinado) sugar

Instructions
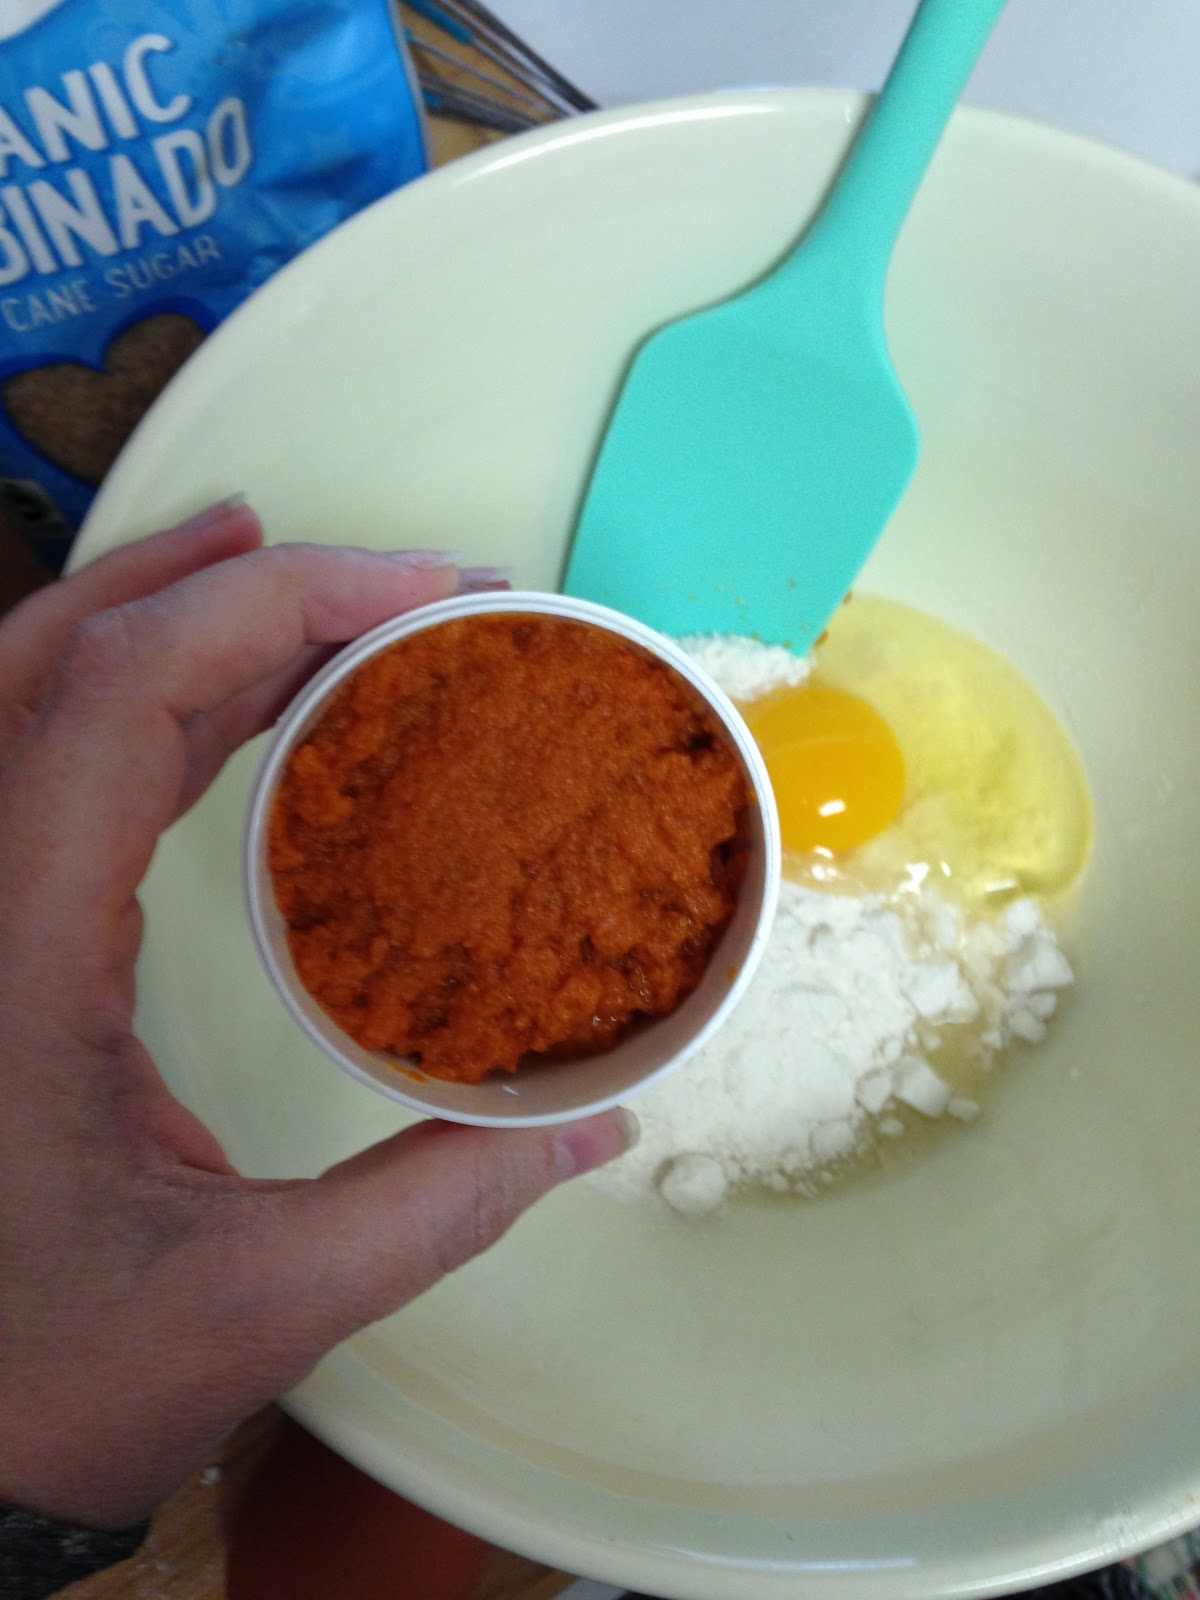
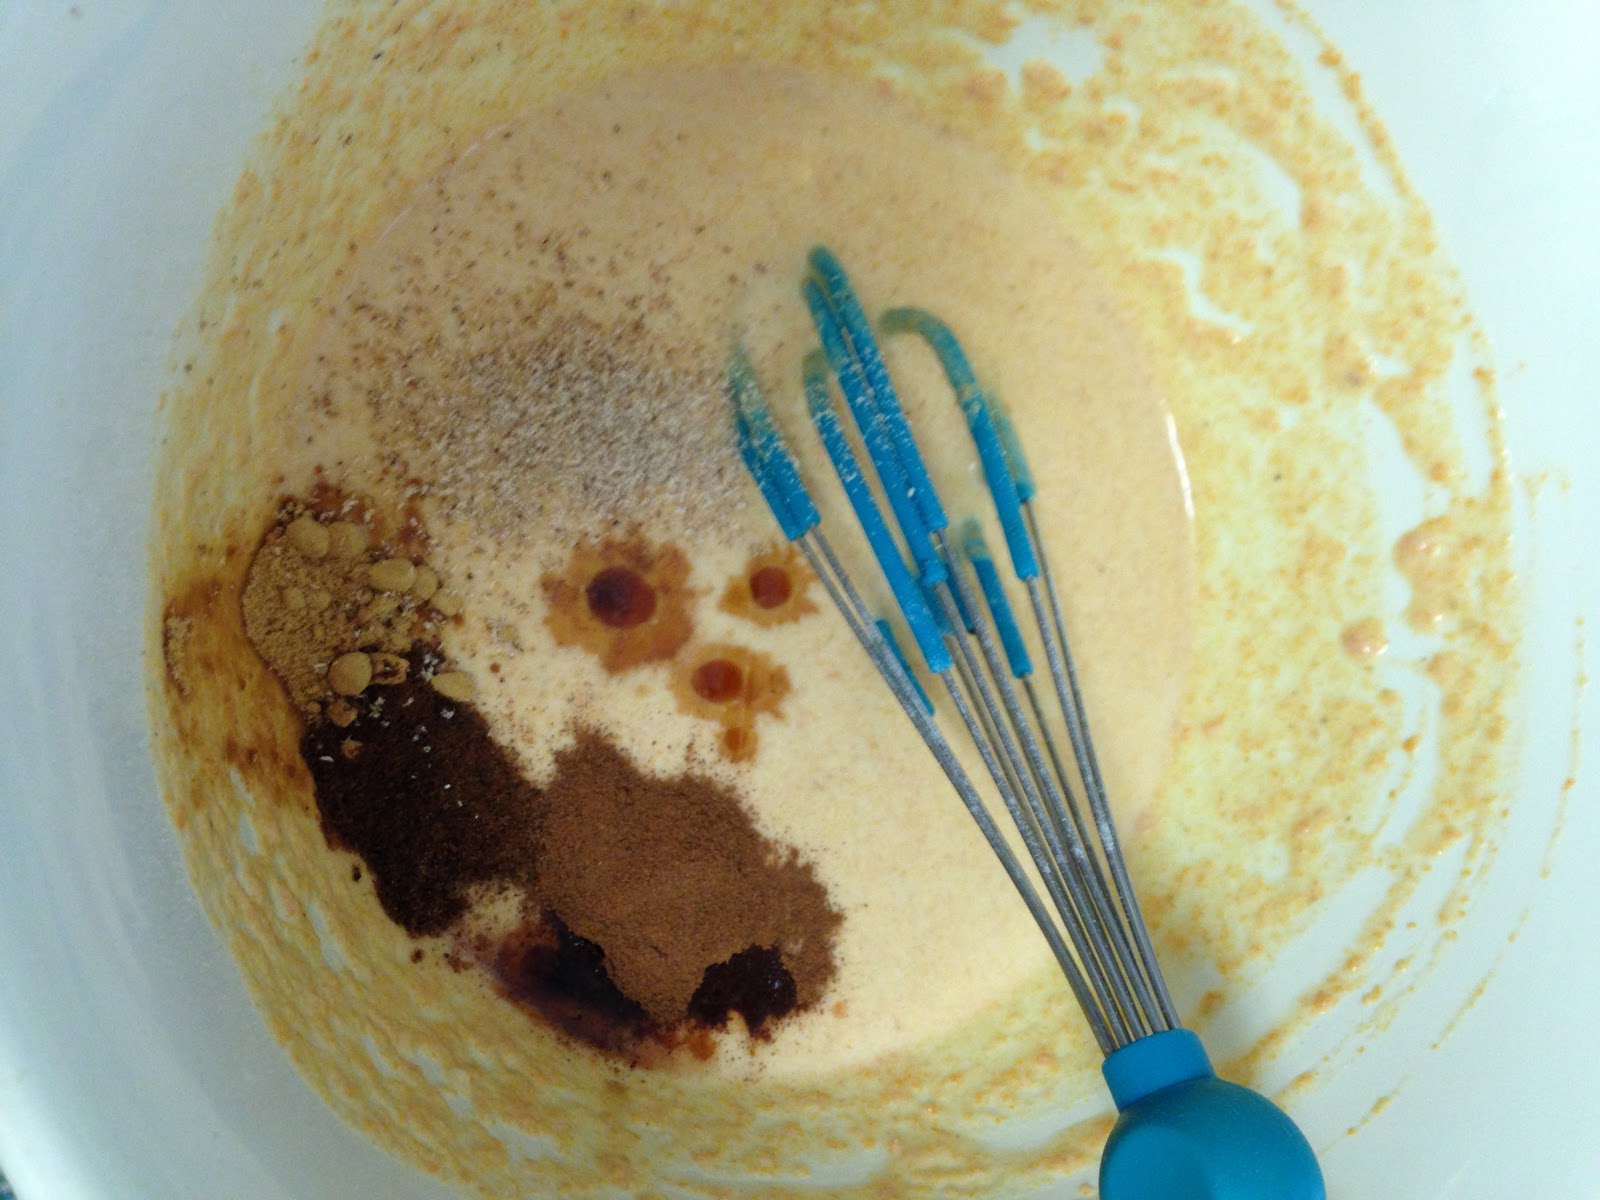
1.  In a large mixing bowl combine the baking mix, egg, pumpkin puree and milk and whisk until all the ingredients are combined.  (If you follow my blog, you can see from the picture above that I used one of the packets I created for my pumpkin smoothie. (For instructions on the smoothie, please see the link below.)

http://frugalfemmecarole.blogspot.com/2016/10/pumpkin-pie-smoothie-its-not-as-scary.html

If you too are using one of your frozen packets, you will need to gently squeeze the defrosted pumpkin to get some of the extra liquid out of the pumpkin left over from the ice crystals formed during the freezing process.)
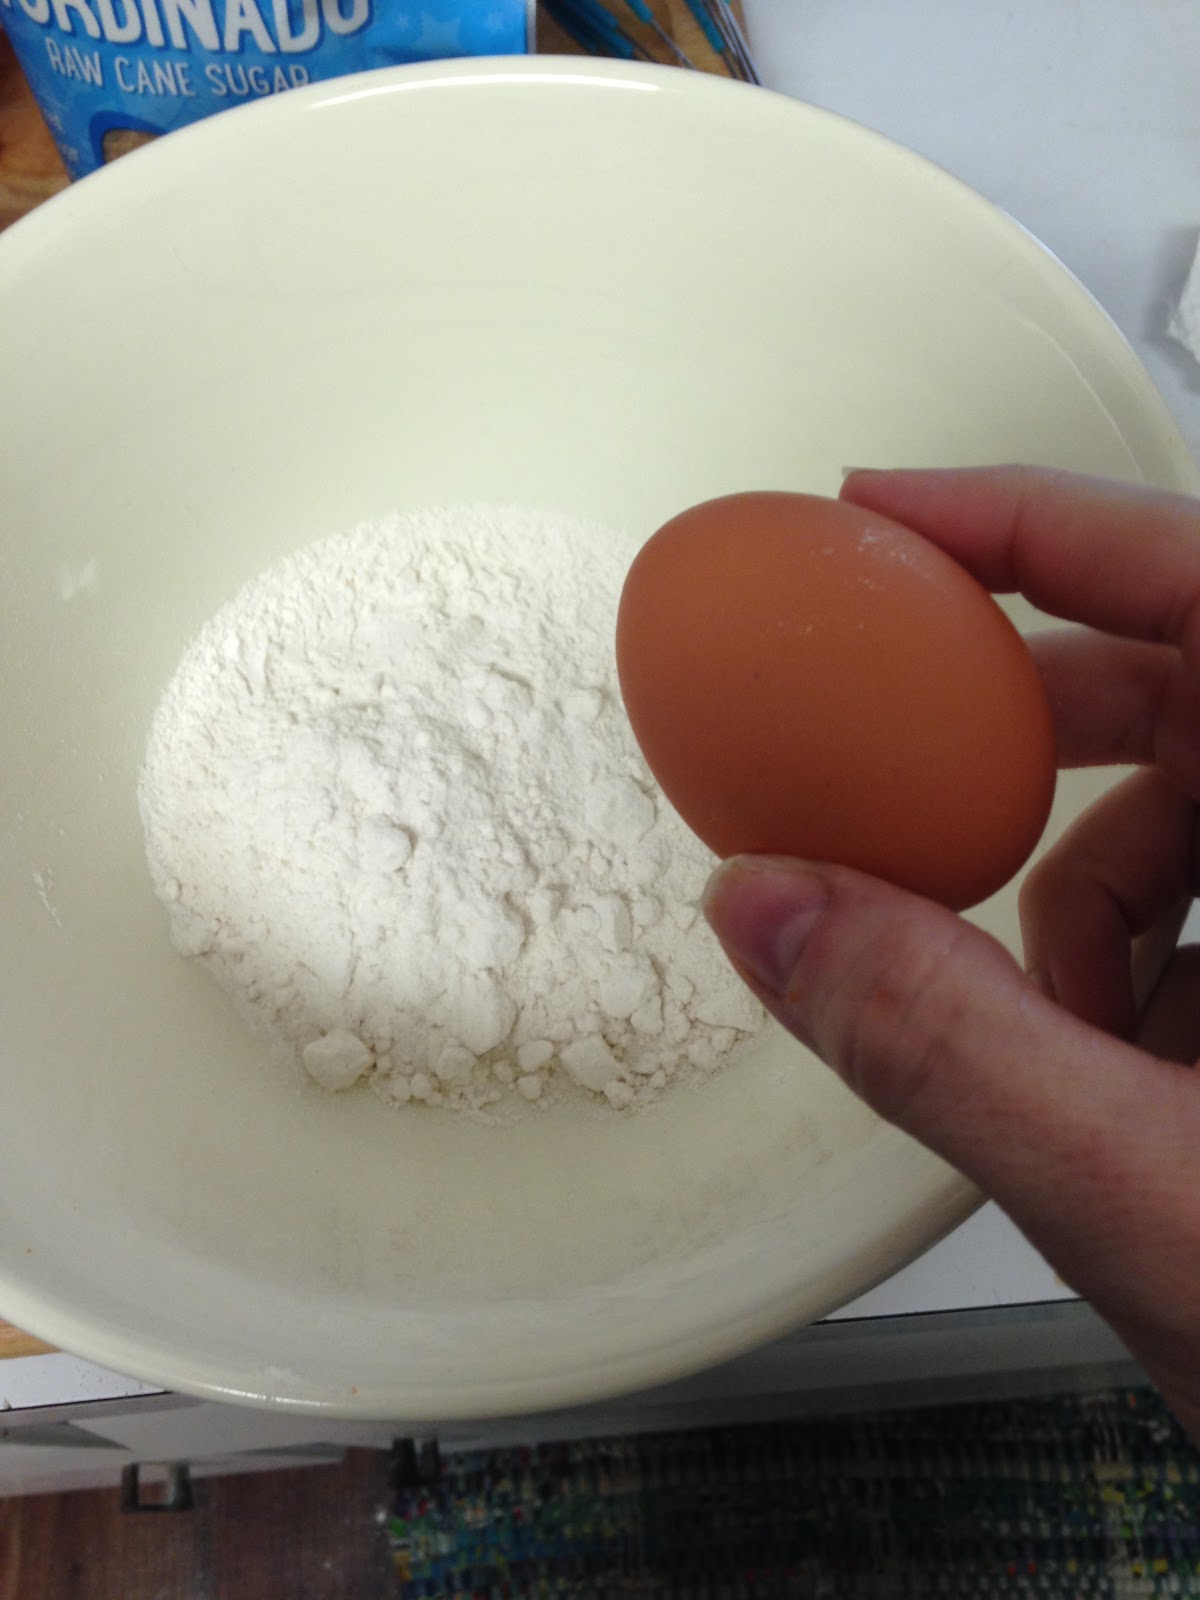
Adding the egg to the baking mix
As you can see by the picture, 1/4 of a can of pumpkin puree is slightly less than 1/2 cup of pumpkin.
 
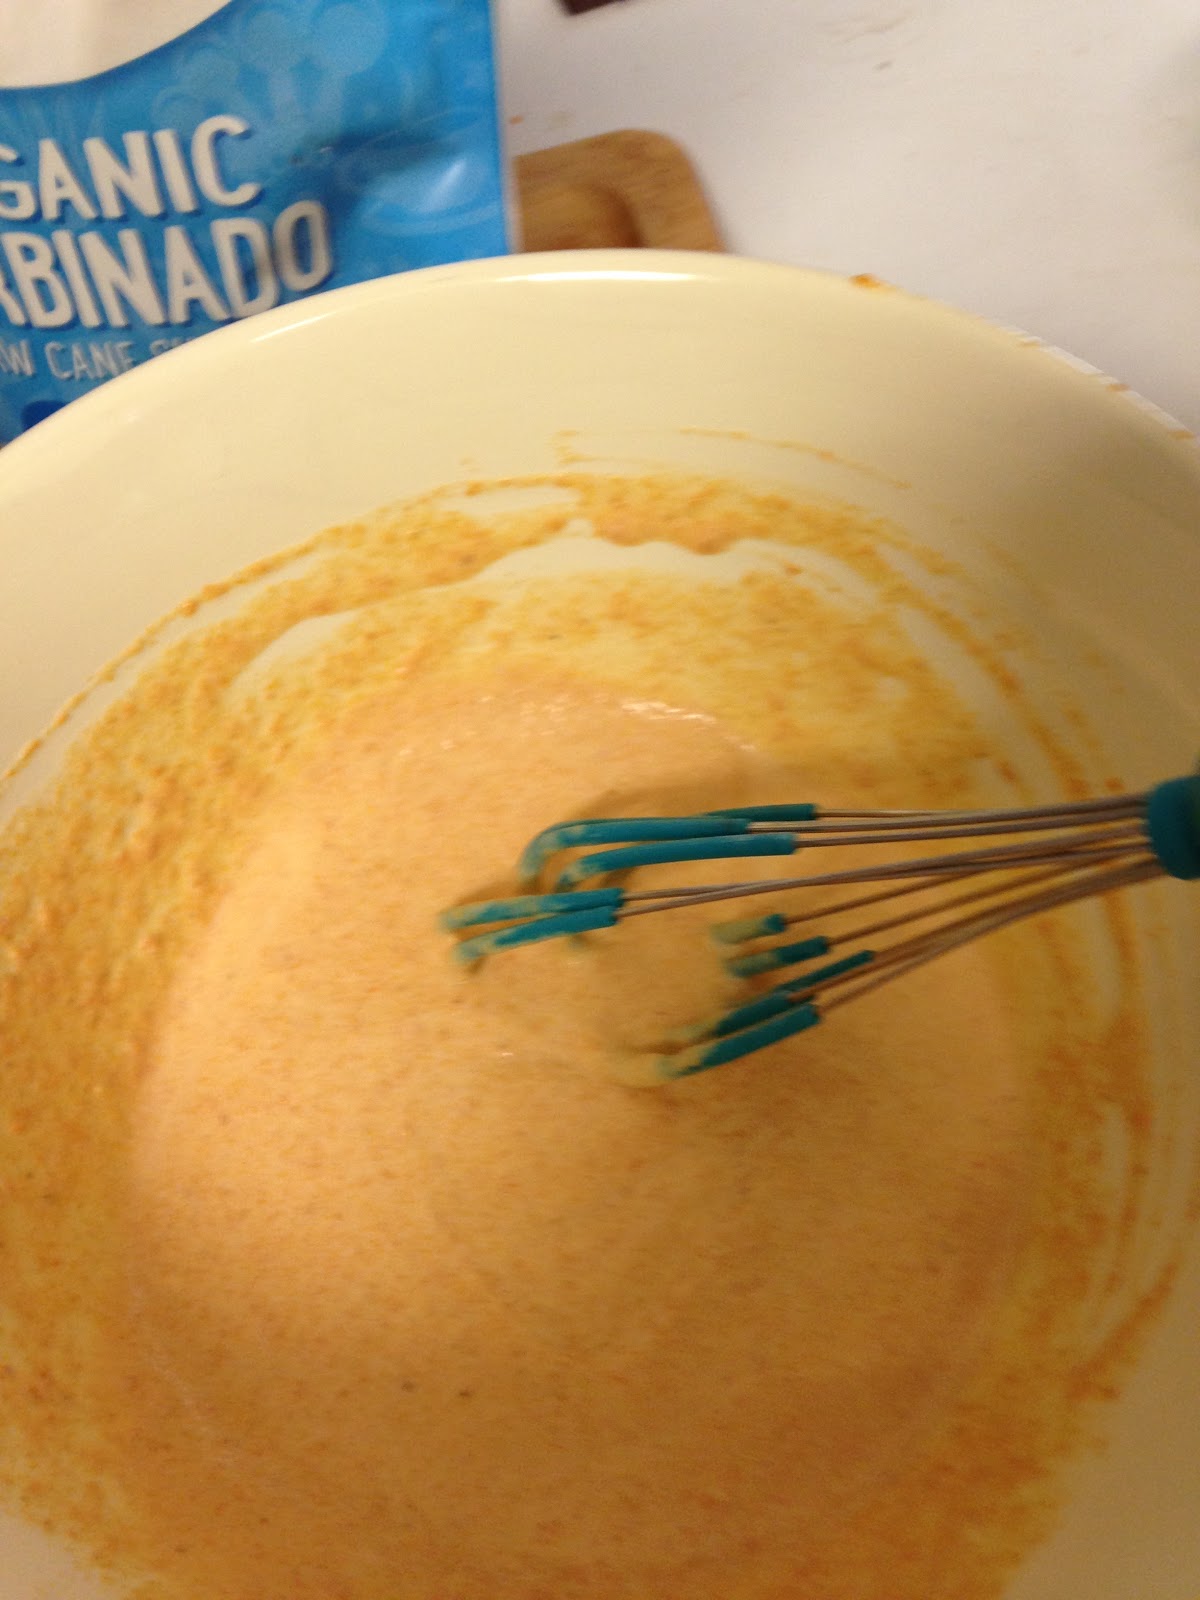
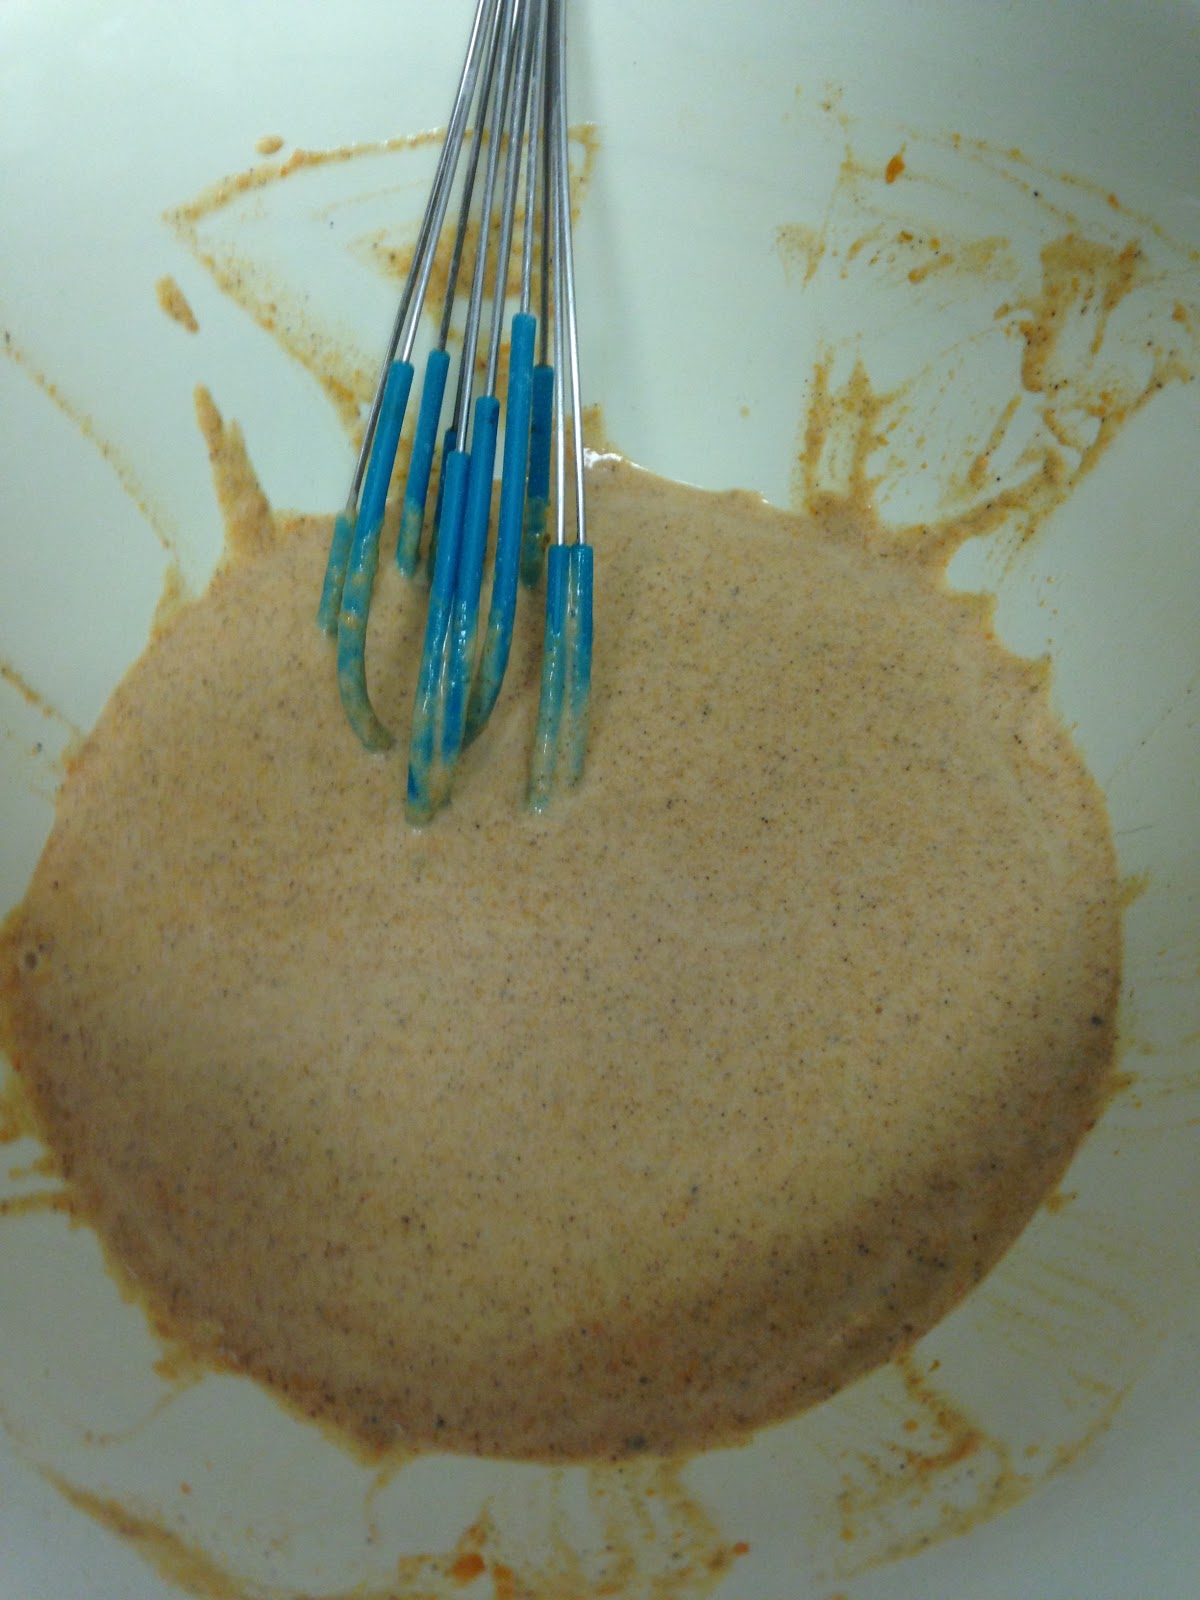
Once you have mixed everything together, it turns this lovely orange color and really looks like you are making pumpkin pie.                                             
2.  Add the remaining ingredients to the pumpkin mixture.

I know it looks like alot of spices, but trust me.

Gently whisk until all of the spices are combined into the pumpkin mixture.
With all the ingredients in the bowl.

3.  The next few steps you will need to follow the instructions for your particular waffle machine.  So I am speaking in generalities when it comes to cooking your waffles.
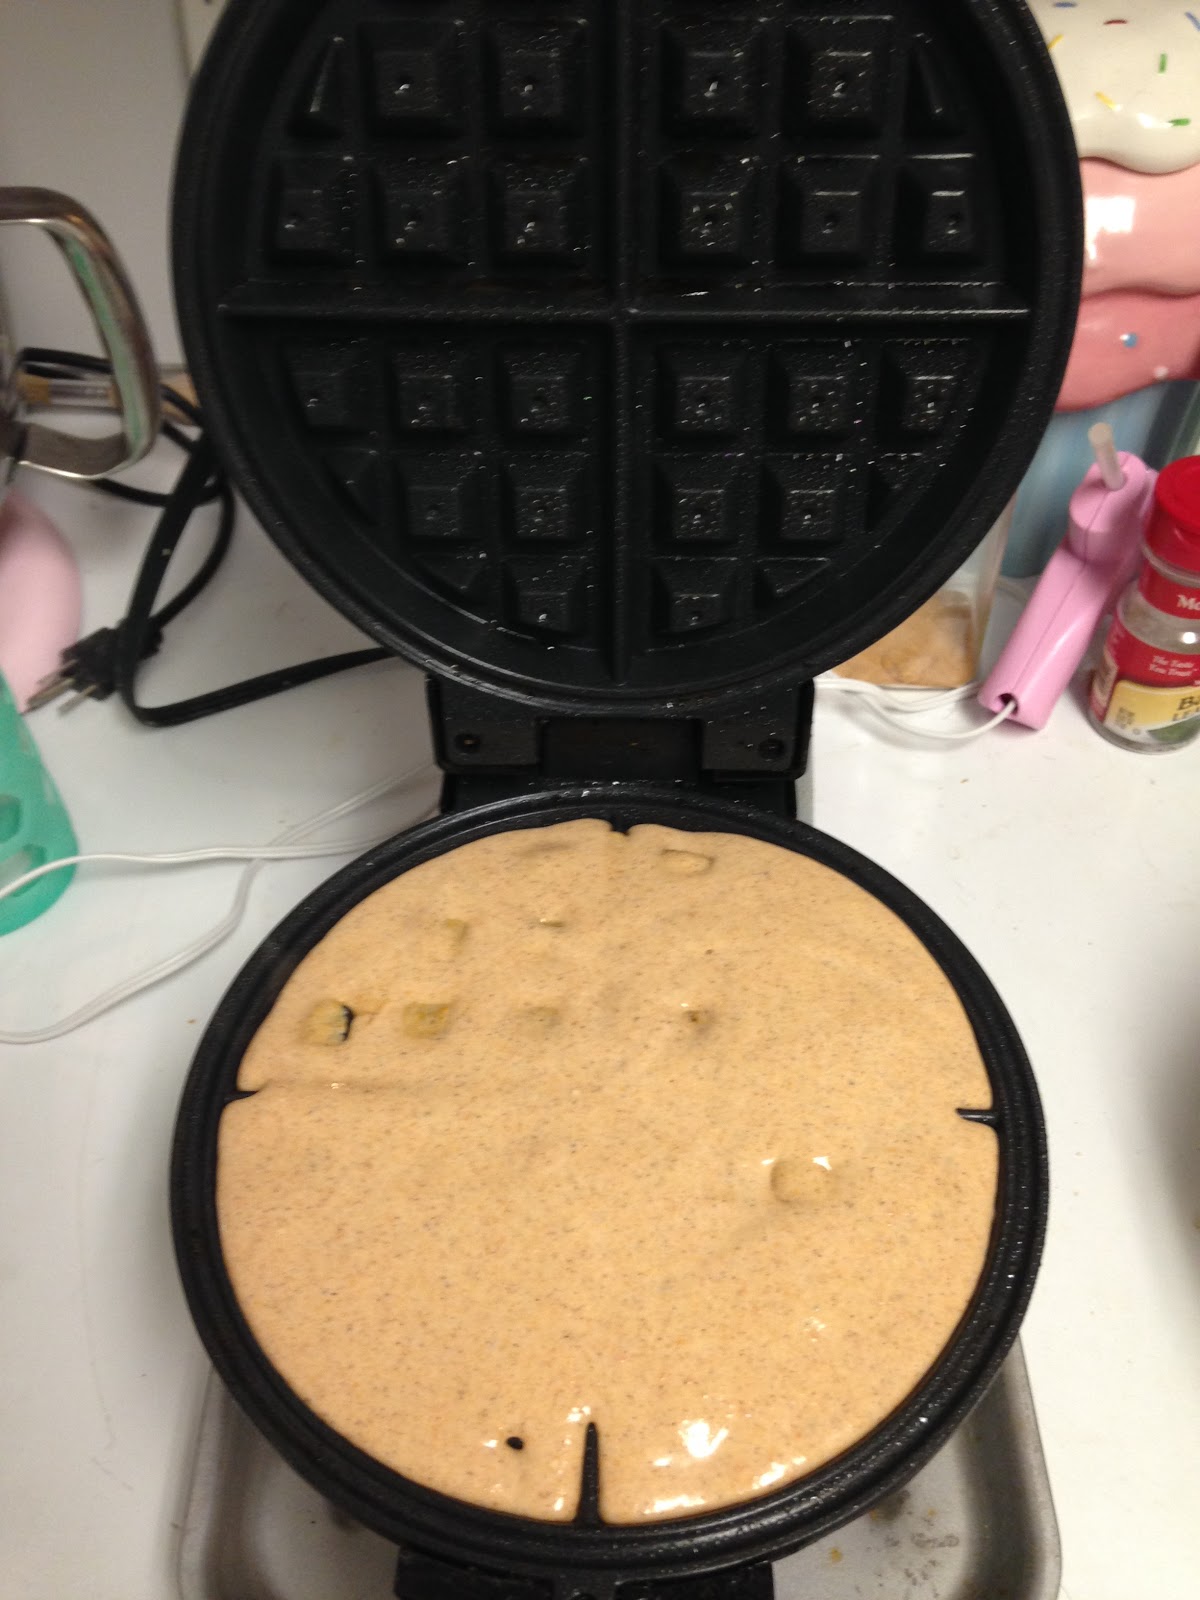
Spray your waffle machine with oil or non-stick spray.  (This is a good idea even if your machine has non-stick plates.)
Ladle the waffle mixture into the machine. Making sure to fill it as full as your machine instructions advise.


4.  Close the lid and cook until done.  (This ranges from machine to machine.)

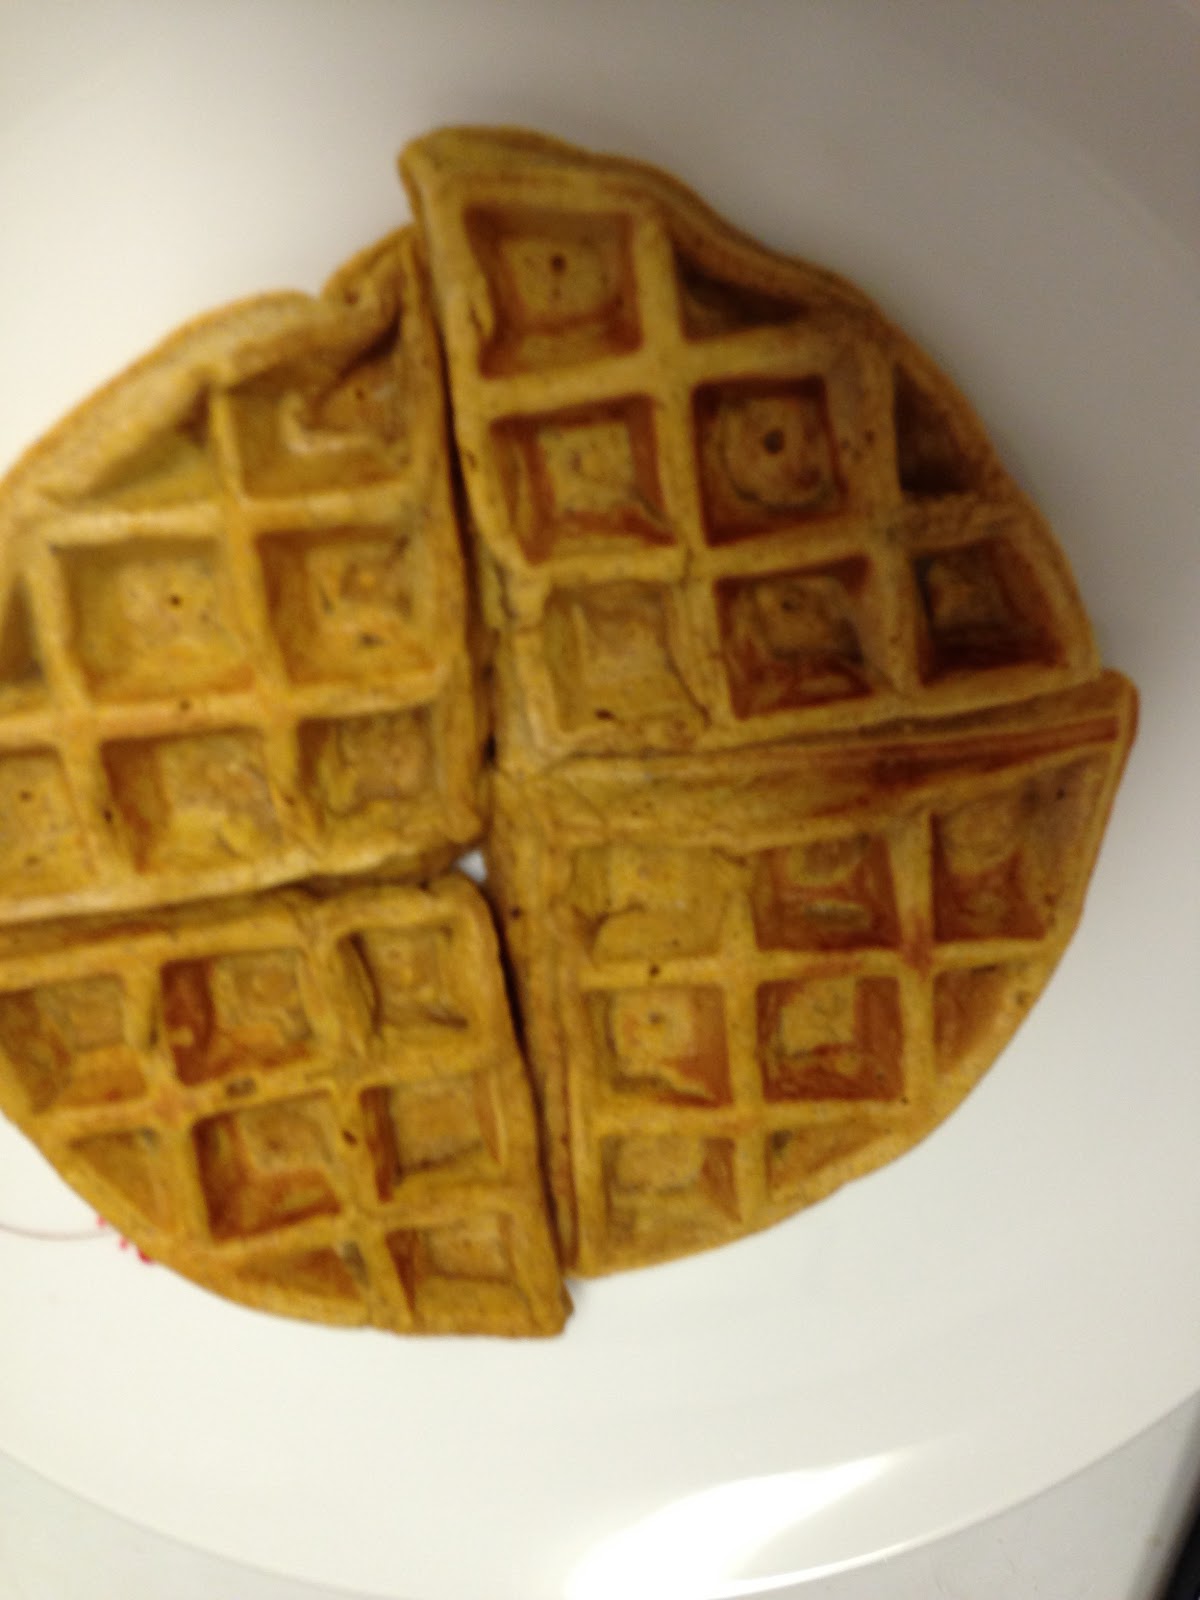
Yum.


Serve warm.  

Serving suggestions:  I served my waffles with butter and REAL maple syrup.  But this would also be good with apple butter, or powdered sugar.

For many, breakfast wouldn't be breakfast without coffee.  I am a tea person myself, but I do love all the different flavors for coffee that become available for the fall and Christmas.  If you don't want to go to Starbucks in the morning but would rather stay in your pj's, and you want a REAK pumpkin creamer for your coffee rather than just something that is pumpkin flavored and full of corn syrup, here is the recipe for you!

Spiced Pumpkin Pie Coffee Creamer


Sorry, I don't have pictures for this one, I was focusing more on taking pictures of the waffles.  But its super easy to do, so I don't think you will have any trouble making this, even without pictures.

Ingredients
2 cups heavy cream, half-and-half or milk of your choice  (You can even use almond milk.  This will effect the flavor however and, if you are using Vanilla almond milk, do not put in the vanilla and only use 2 tbsp. of sweetened condensed milk.)
1 12-oz can sweetened condensed low fat milk (I like Carnation)
3 tbsp. pumpkin puree  (NOT pumpkin pie filling)
1/4 tsp. ground ginger
1/4 tsp. ground nutmeg
1/4 tsp. ground cloves
1/2 tsp. ground cinnamon
1 tsp. vanilla

(You do no need to add any sugar to this.  It gets plenty of sweetness from the sweetened condensed milk.)

Instructions
1.  In a large measuring cup or medium size bowl, combine all of the ingredients and whisk to combine.
2.  Pour into a 1 quart canning jar or resealable container.  (I really like those plastic containers with the flip top lid for pouring.  I think they are technically for salad dressing, but they work great for this.)
3.  Store in refrigerator for up to two weeks.  (I find that the heavy cream and half-and half last the longest in the fridge, but you can do a more low fat version with the milk.  Especially if you use 2% milk.)

Serving Suggestions:  Shake before using.
This recipe will make about 3 1/2 cups of creamer.


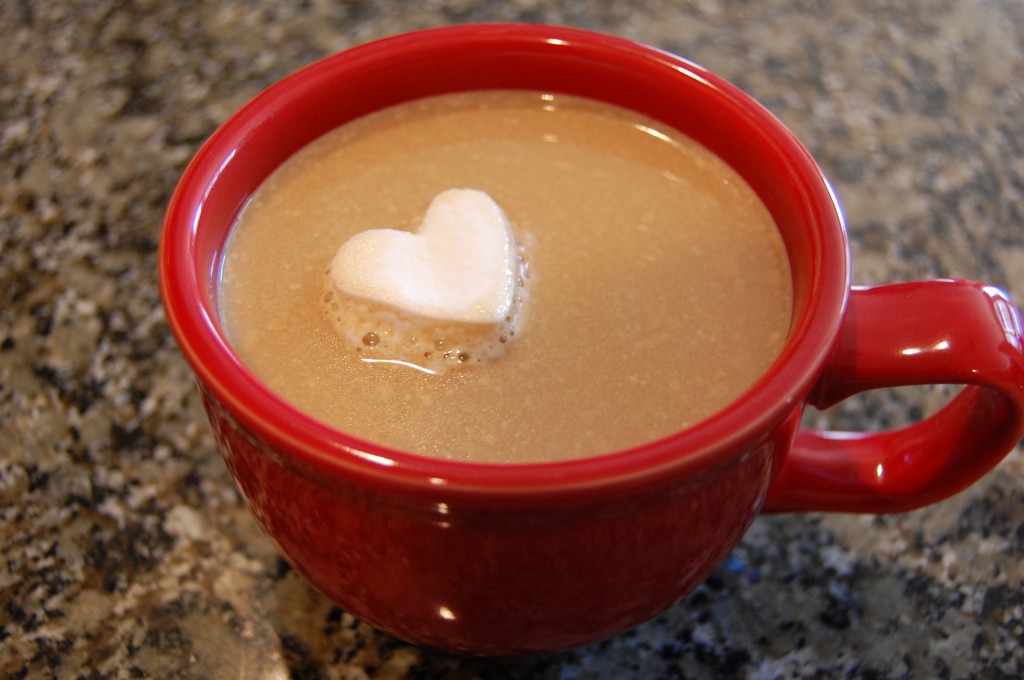
I took this picture off of another website because I think it is adorable.  So the credit goes to her.  If you would like to see the website and her recipe for vanilla creamer, go to this link: http://www.cozycakescottage.com/2012/02/10/diy-project-homemade-coffee-creamer/


I hope you enjoyed this Fall inspired breakfast!  Soon I will be posting instructions on how to make your own table decorations for Thanksgiving and Thanksgiving week will be the start of another two week menu inspired by the Thanksgiving holiday.  


Wednesday, May 4, 2016

Mother's Day Brunches Continued

Hello Everyone!
As promised, I am posting the second in the Mothers Day Brunches.  I have not included it in the menu, but a small bowl of fresh fruit would go perfect with the other elements of this brunch and would look so pretty.


I am loving these vintage Mother's Day Cards. 


With this particular brunch, you should start the Gourmet hash browns first. They are going to take the most prep and take the longest.

Gourmet Hash Browns

These hash browns are a more "genteel" version of the country hash browns I usually make.
I love this table setting.  In Friday's post, I'm going to show you how to lay out a pretty table without spending a pretty penny.

Instructions
3 large Yukon gold potatoes  (You can also use russet potatoes.),  cleaned
kosher salt
1 tbsp. butter
1 small onion, chopped
1 clove garlic, minced
1/4 cup cheese, this can be a cheese of your choice.  I like asiago, mozzarella, or montasio but it is also very good with cheddar. 
1/4 tsp. - 1/2 tsp. freshly grated nutmeg (if you don't have fresh nutmeg, you can use dried nutmeg.)
1/2 tsp. herb de provence  or you can use basil
1/2 tsp. dill
2 tbsp. canola oil, split  (You can also use olive oil or grape seed oil.)
1 small shallot or green onion, minced
1/2 - 1 tsp. sherry wine vinegar or white wine vinegar (to taste)

Directions
1.  In a medium pot, put the scrubbed potatoes and cover with water.  Put about 1 tsp. of salt into the water with the potatoes.
2.  Bring to a boil on medium high heat and cook until potatoes are fork tender, about 45 to 50 minutes.  Drain the potatoes and let them cool slightly.
3.  While the potatoes are cooling, melt butter in a heavy bottomed 8-in. skillet (I like to use cast iron.).  Add the onions and garlic and cook on medium heat until the onions are translucent,  Make certain to stir constantly and make certain not to burn the garlic.  This will take about 6 to 8 minutes. Take off heat and set aside.
4.  Peel the still-warm potatoes and crush them gently into small pieces with a fork in a medium sized bowl.  (The pieces should be about 1 inch, you are not make mashed potatoes.)
5.  Gently fold in the onion/garlic mixture, cheese, pinch of salt, nutmeg, herb de provence or basil, and dill.  Do not over mix.
6.  Wipe out the heavy 8-in. skillet and heat the pan until hot but not smoking.  Add one tbsp. of oil to the pan and heat oil. The oil will begin to shimmer when it is heated through.
7.  Add the potato mixture to the skillet in an even layer. 
8.  Let the mixture cook on one side until golden brown, about 3-4 minutes.  Run a spatula around the edge of the pan and underneath the potato mixture to loosen from the pan.  Give the pan a shake to loosen potatoes from the bottom completely.
9.  You can try flipping the potato mixture with the spatula or do the fancy flip move that you see chef's do on tv, but I prefer the plate method.  Place a plate over the top of the skillet and quickly turn the skillet so that the plate is on the bottom and the skillet on top.
10.  Put the skillet back on the burner and, using a spatula, carefully push the potato mixture, brown side up, back into the skillet.  Smooth the top if necessary.
11.  Let the potatoes brown on the bottom for another 3-4 minutes.  Using the spatula, loosen the sides and bottom of the potatoes again..
12.  Carefully slide onto a plate or serving platter. Set aside and allow to cool slightly. The potatoes will firm up as it cools. 
13.  In a small bowl mix together 1 tsp. olive oil,  the sherry vinegar and the shallots.  Salt to taste.

To Serve: Cut potatoes into wedges and drizzle the vinegar mixture over the potatoes.

Ham and Egg Cups

These look super fancy and will impress, but they are super easy to make and are so delicious!  This is one of my husband's favorite breakfast dishes of all time.


Ingredients
3-4 slices deli ham  (Although I have used the thin sliced prepackaged ham it worked just fine.)
3-4 eggs
1 tsp. Boursin cheese, per cup
basil, to taste
kosher salt and freshly ground pepper, to taste

Instructions
1.  Pre-heat oven to 350 degrees.
2.  While oven is heating, spray muffin pan with non-stick spray or brush with melted butter.
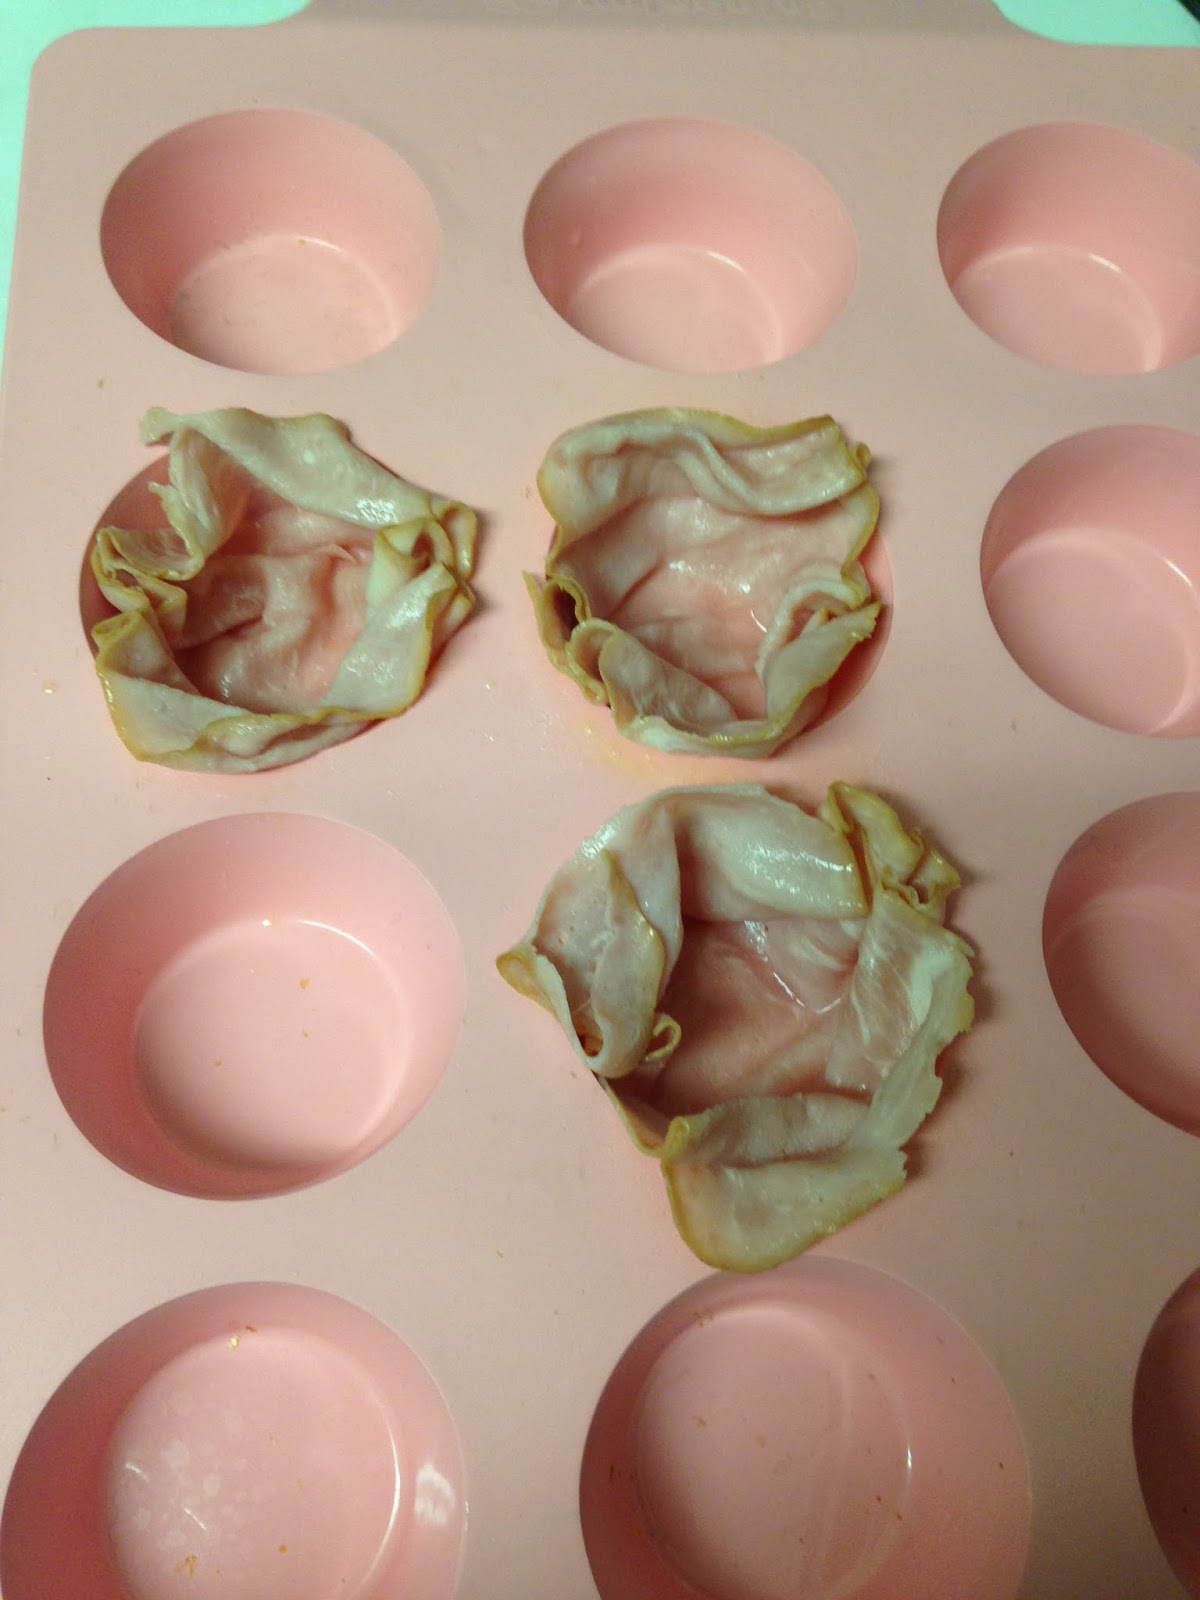
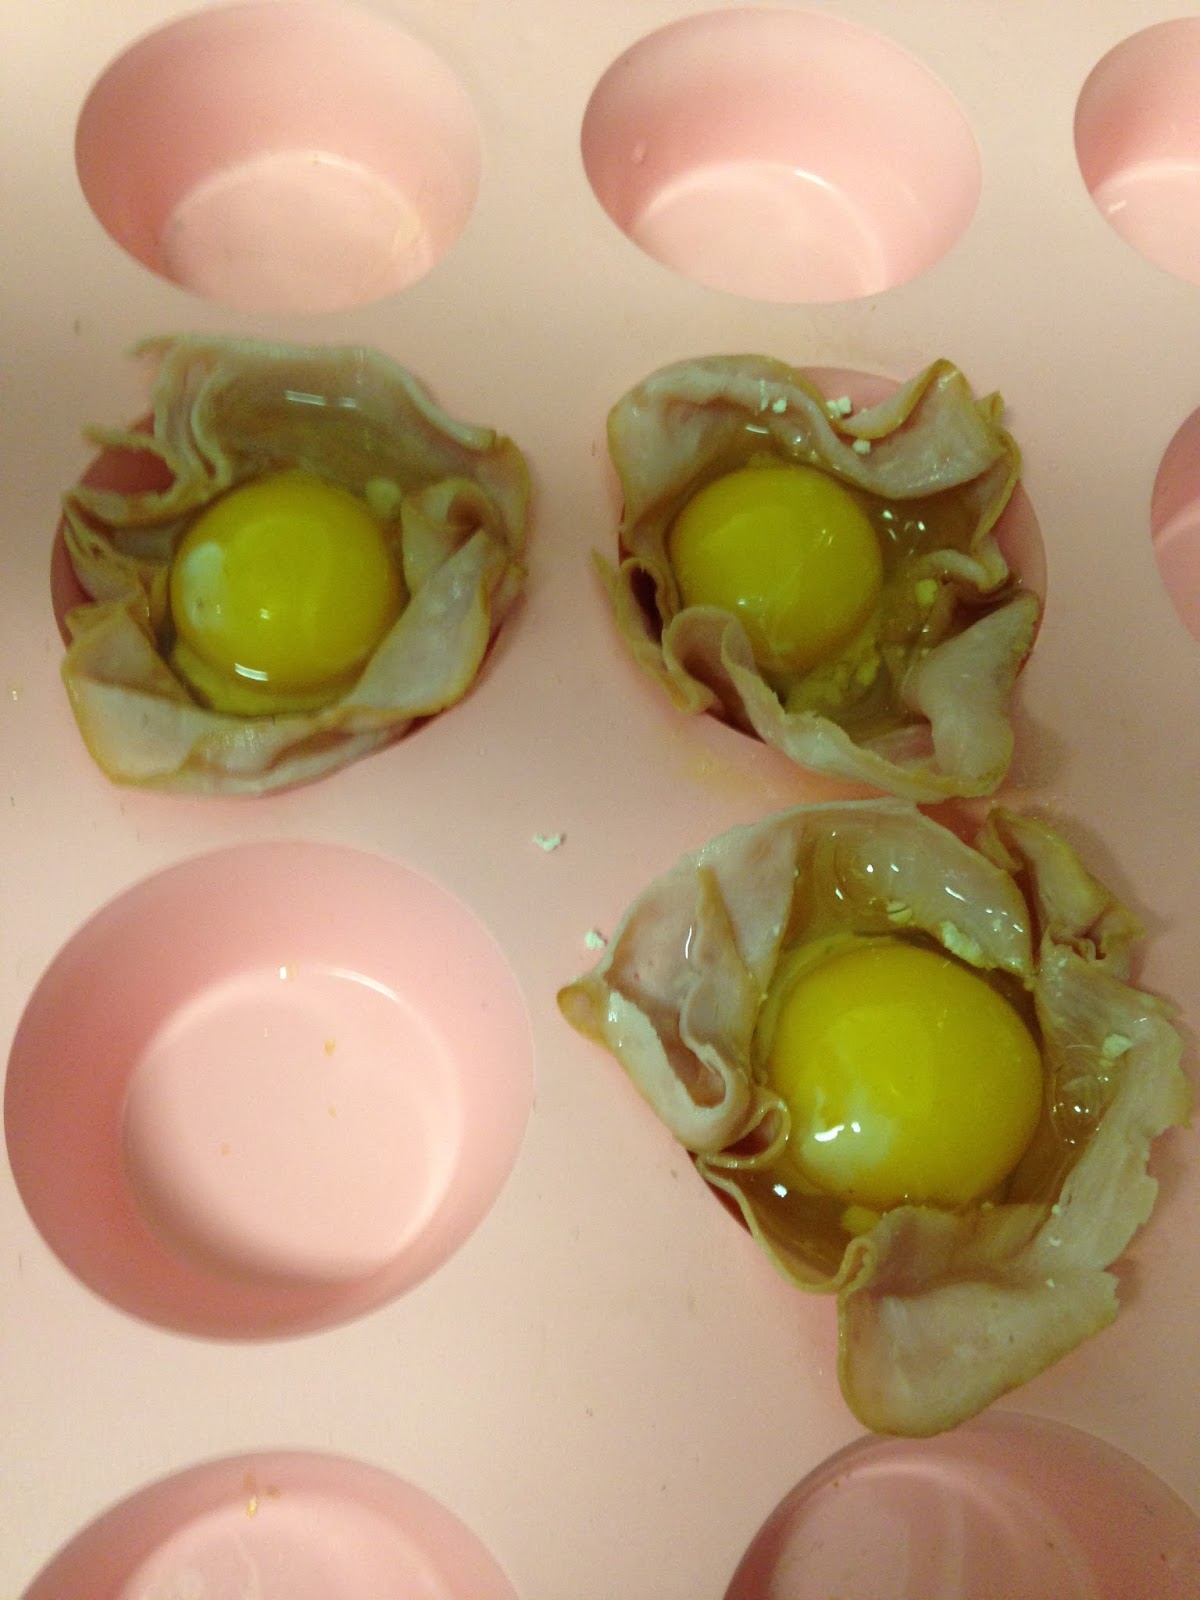
3.  Place one slice of ham into each muffin cup.  I like to flute the edges so that the ham sort of looks like a rose.

All of my baking pans are pink.  They make me happy.

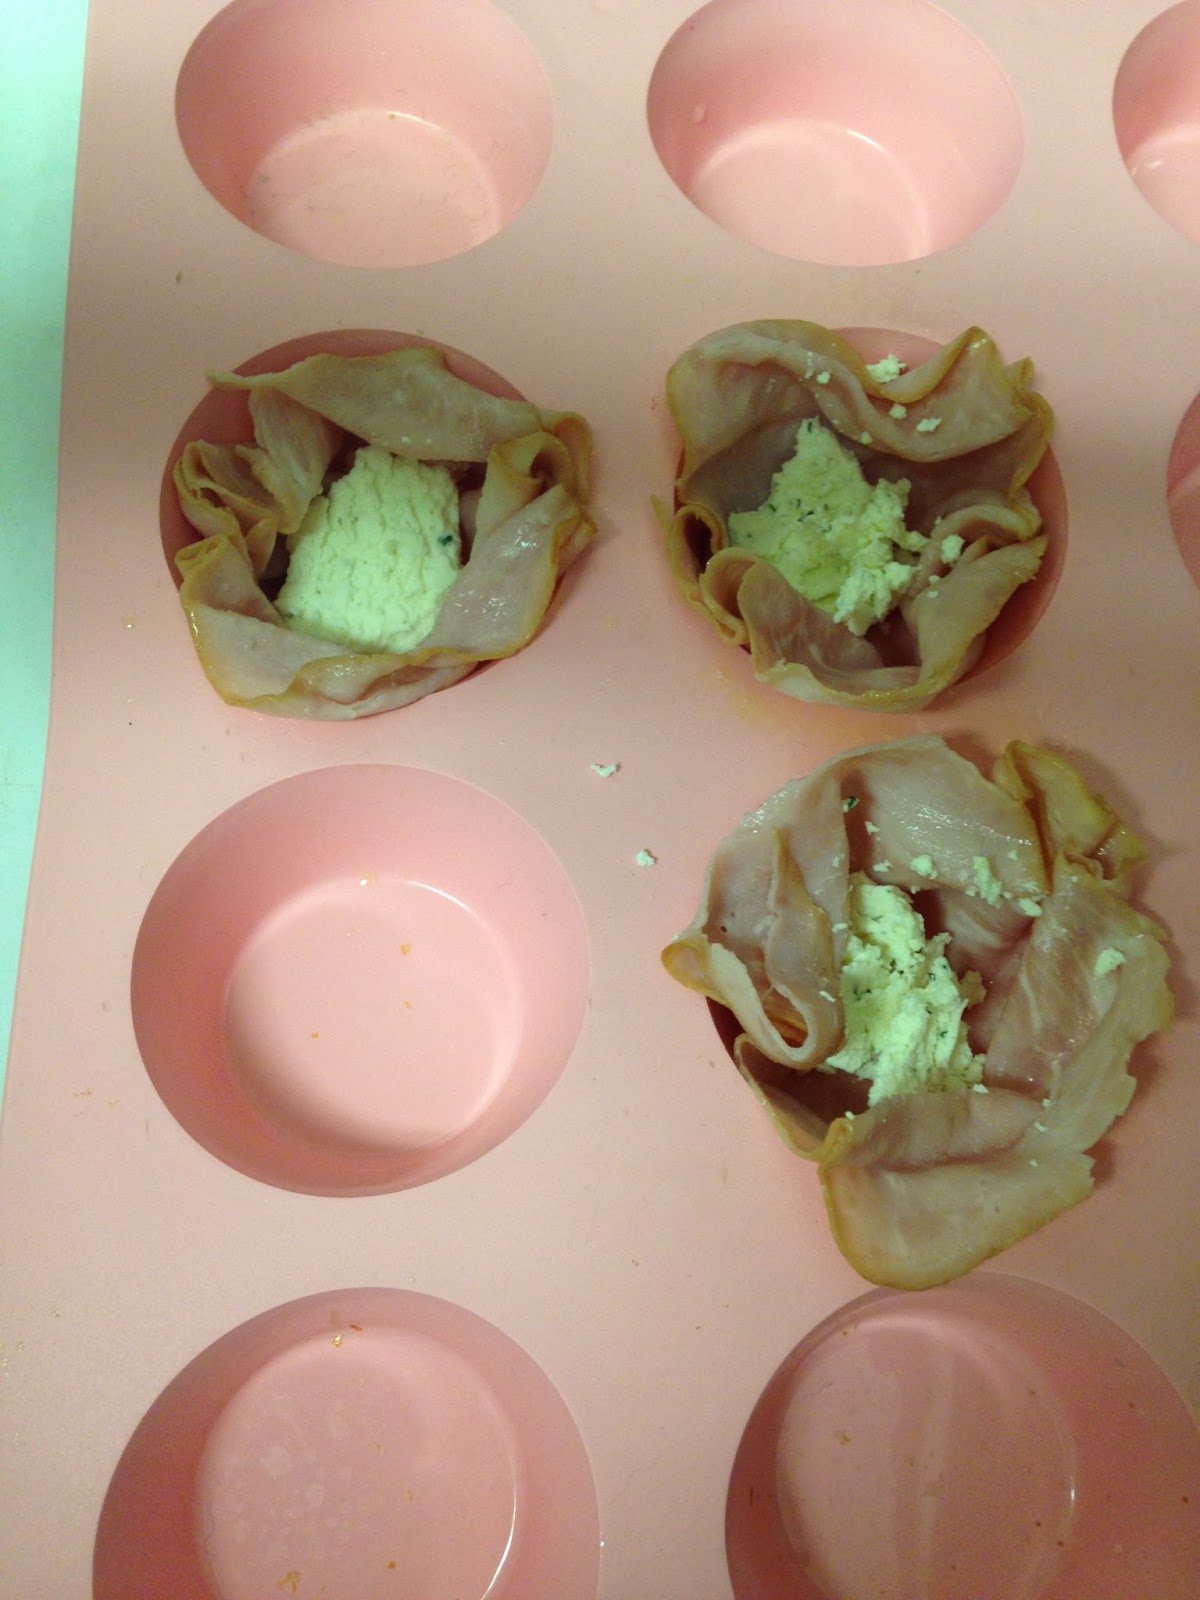
4.  Put one teaspoon of Boursin cheese into the bottom of each ham cup.


5.  Carefully break one egg and slide into the ham cup.  If it is easier for you, you can break the egg into a custard cup first and then slide the egg into the ham cup. Repeat the process for the remaining eggs.


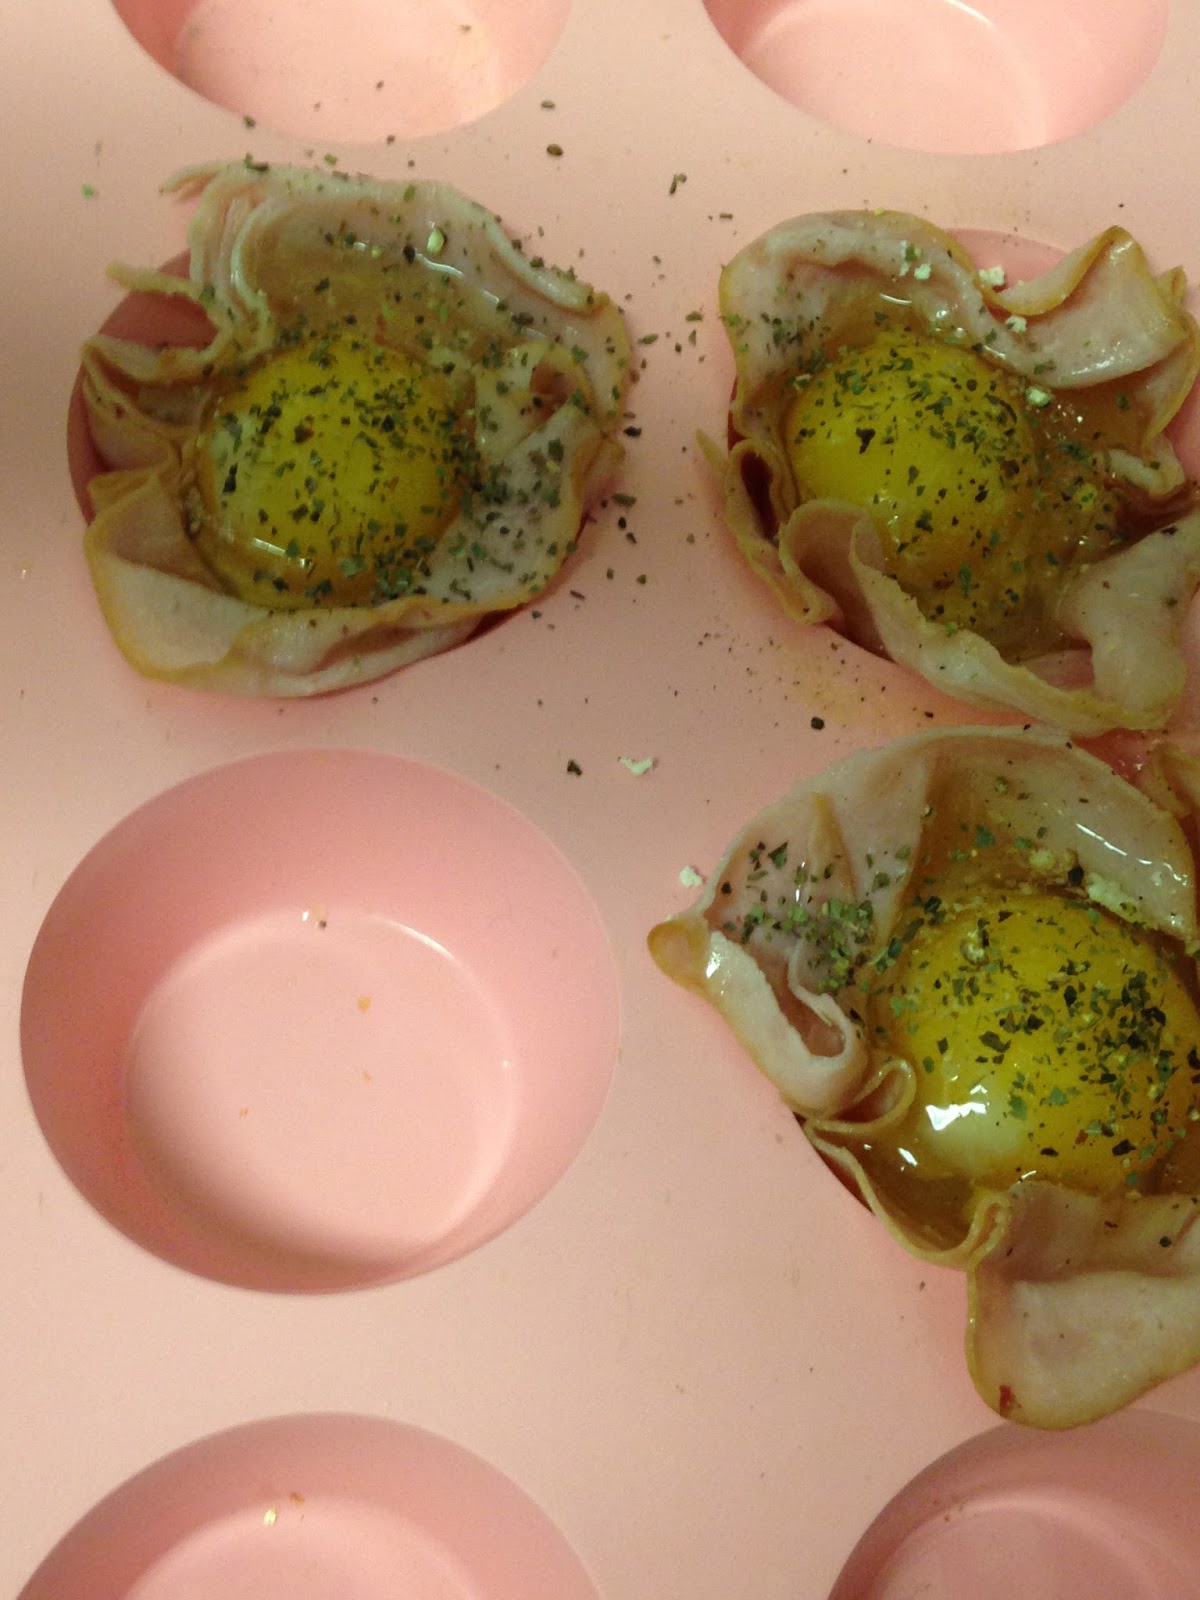
6.  Top the eggs with basil, kosher salt and freshly ground black pepper.


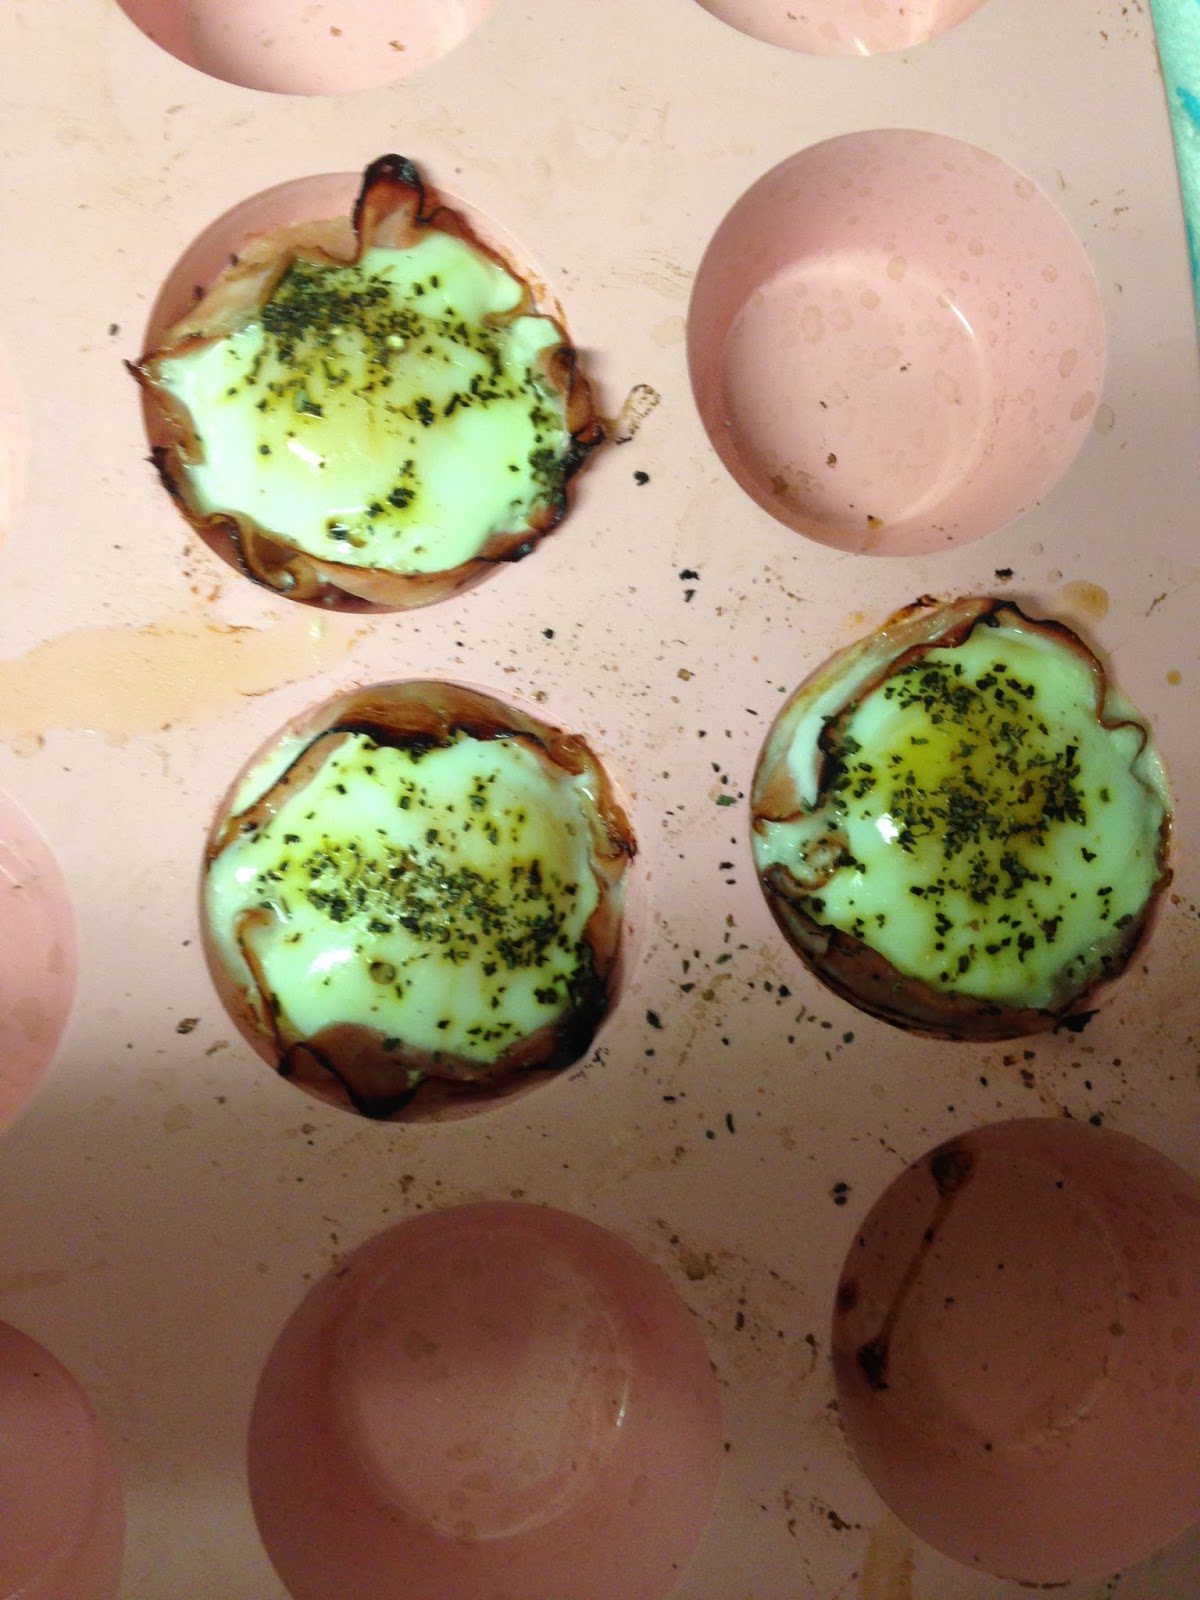
7.  Bake for 18-20 minutes until the egg whites are set and the yolk has thickened.


8.  Let stand in muffin cups for 3-4 minutes to cool.
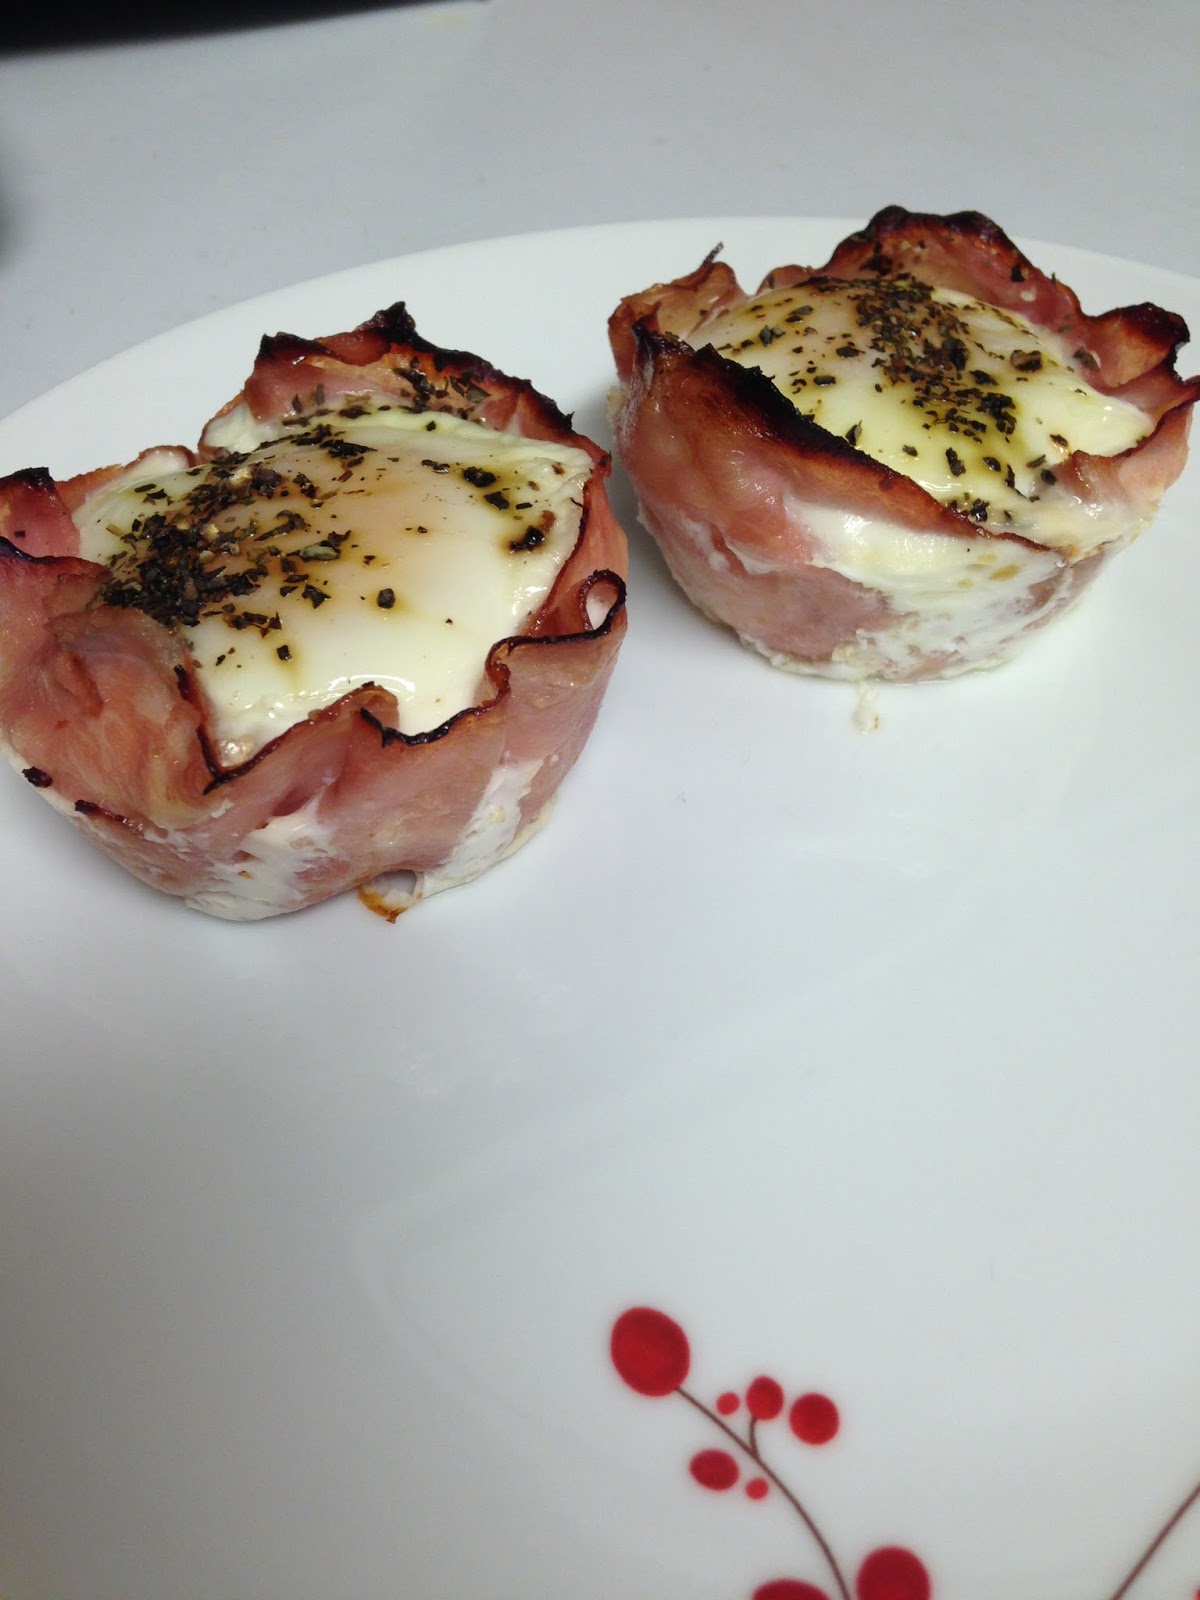
9.  Carefully remove from muffin pan and serve.  (I use silicone pans, so I just gently press from the bottom and it pops right out.)

Aren't these pretty?!?!?!

Variations:  You don't have to use Boursin cheese, any cheese that you like can be used.  Also, this dish goes up to another element if, before baking, you top each egg with 1 tsp. of pesto and place a   cherry tomato sliced in half over that.  So yummy and so pretty!

Tomorrow, we do our final dishes!
 

Monday, May 2, 2016

Ideas and Recipe for Mothers Day Brunches

Hello Everyone!
Oh my goodness this year is going fast. I sat down tonight to continue on my Spring cleaning posts and realized that this weekend is Mothers Day!!!!

Isn't she adorable?  I have a lady vase that looks a lot like her that stores my paint brushes.

I made a promise that I would give y'all recipes for awesome brunches for your mom when I couldn't do them for Valentine's Day and I don't plan on reneging on that promise.  So, we will continue on with Spring cleaning later this week and will focus on brunch for this post.


Making brunch for your mother is a great way for you to spoil mom and save on our pocket book.  Most of the supplies will only cost about $10 (excluding alcohol)  total when you purchase them at the grocery store. That is less than the cost of one brunch meal at a restaurant, let alone two meals, and that doesn't even include if you decide that you would like a Bloody Mary or Mimosa to go with Brunch.
I'm sorry that I don't have pictures for most of these, but the holiday snuck up on me. 
Brunch is, overall, not a difficult meal to create. The hard part comes in the timing of when you prepare the dishes.
My timer actually looks like this, minus the face, and with minutes instead of hours.  I actually use it quite a lot when I am preparing breakfast.

If you are not a frequent cook, for some of these recipe, I would advise that you have breakfast for dinner some time this week and practice your timing so that you get it just right for mom on the big day.
I have broken these down into individual meals, but please feel free to mix and match to your heart's content.  I also have avoided the breakfasts that you may make every week-end such as scrambled eggs, bacon, and pancakes. Instead, I have opted for the brunches that will look prettier and feel more luxurious when eating, so that it feels more like it belongs in a ladies salon than a farmhouse table.

Please note, if I have put a * by the name of the dish it means that you can do it yourself and feel smug about the fact that you are awesome and did everything by hand, but it is more work than most of us are willing to do. I have included the recipes, but I would suggest cheating and just buying them at the store.


Brunch #1  (Easy)  Blueberry Scones* with Clotted Cream & Lemon Curd or Strawberry Jelly
                               "Parisienne" Coddled Eggs
                                Thick-cut Bacon

Brunch #2 (Medium) Ham and Egg Cups
                                 Gourmet Hashbrowns

Brunch #3 (Hard)  Jacques Pepin's Eggs Jeanette  (A dish named after and inspired by his mother)
                               Served over Romaine lettuce and sprinkled with Bacon
                               Crusty French Bread* 

I want both of these outfits.  The be honest, I want this picture to be my life.  But this is the feel that I strive for when making a Mothers Day Brunch.

Brunch #1:  Blueberry Scones with clotted cream (or butter) with Lemon Curd or Strawberry Jelly                                           "Parisienne" Coddled Eggs    and   Thick Cut Bacon               


Blueberry Scones


Although I have baked blueberry scones, to be brutally honest I usually purchase them from the market.  But I am including this recipe for those of you who like to bake.  This is my favorite recipe for blueberry scones and is on a website that truly has some wonderful baked recipes.

http://sallysbakingaddiction.com/2014/07/22/my-favorite-blueberry-scones/

I am not a baker, so I do not come up with my own recipes when it comes to baking, so I thought it only fair that I give all the credit to Sally.

Microwave Lemon Curd

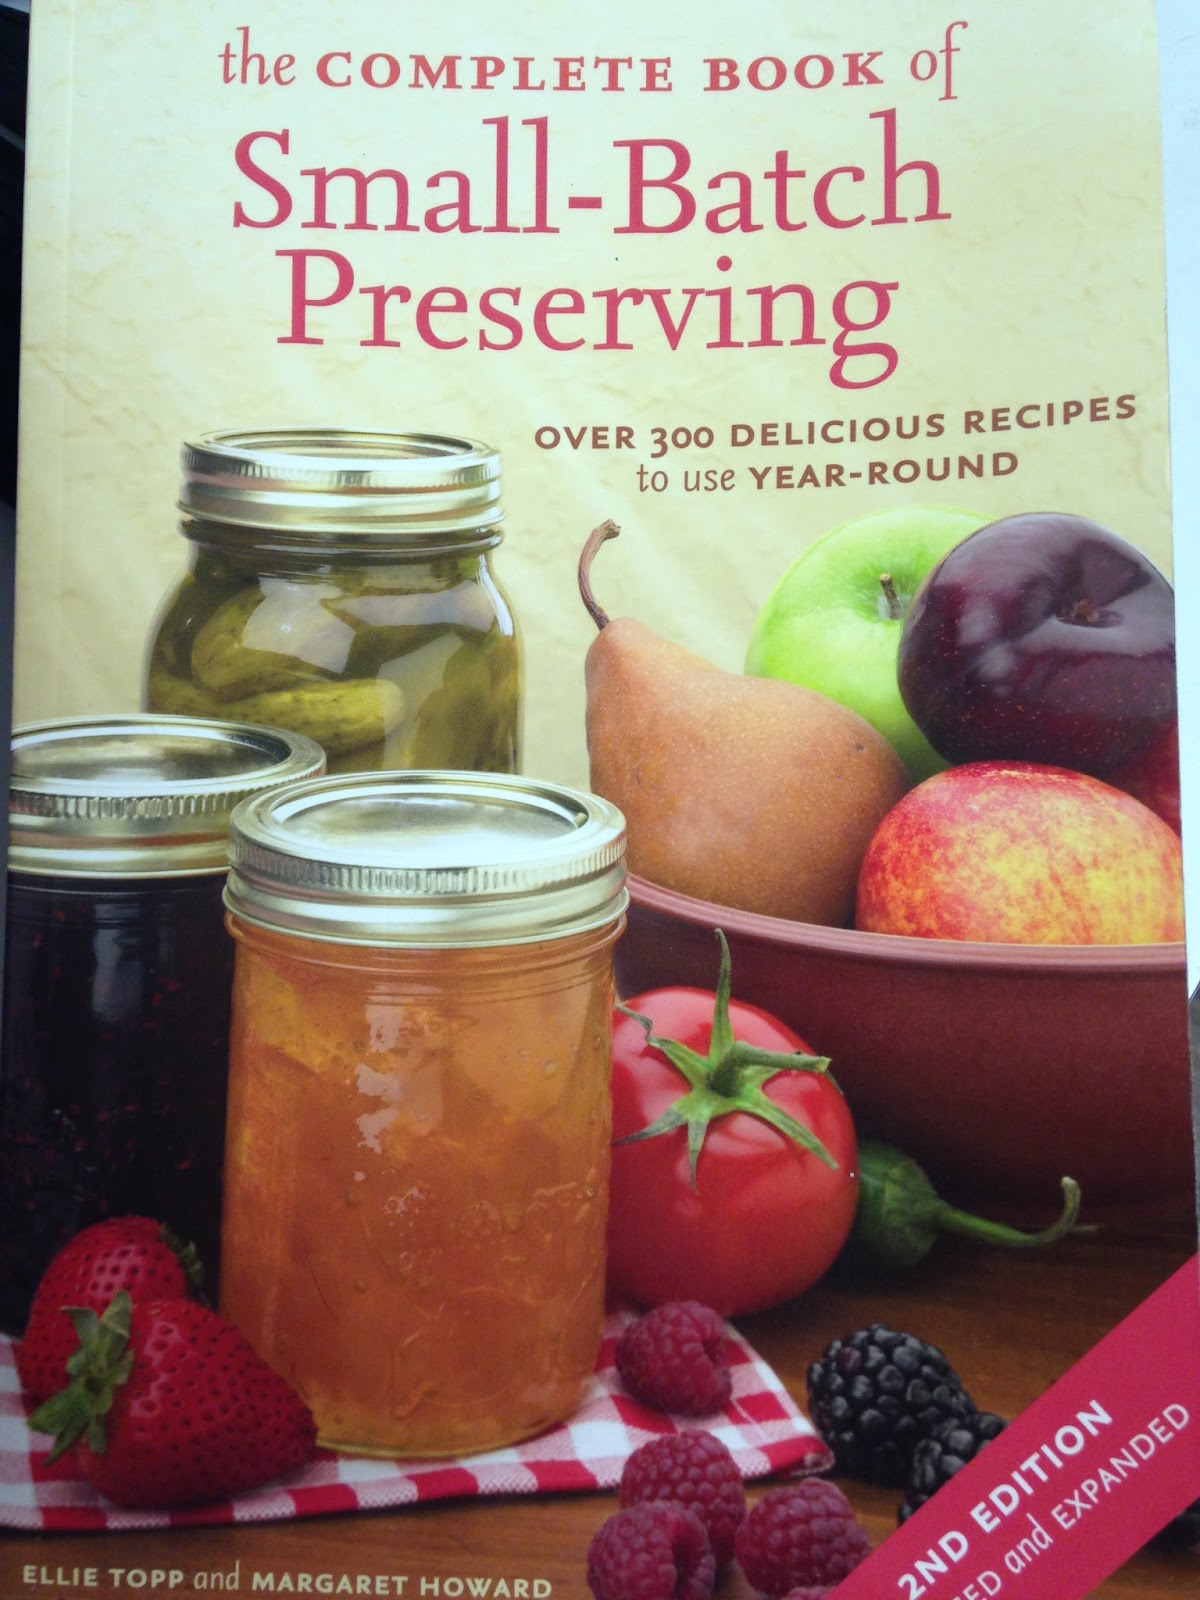
I got this recipe from the book The Complete Book of Small-Batch Preserving by Ellie Topp and Margaret Howard. 

I am not being paid to endorse this book, I just like it.

I found it at the library and loved it so much that I had to go online and buy it for myself.  As you know, I am starting to garden now that I have a house, and I wanted to have recipes for the items that I am growing in my garden.  But I did not want 20 jars of tomato sauce.  This book tells you how to can fruits and vegetables in small batches so that it is more practical for the smaller household. The only hard thing about this recipe is making certain that you monitor the temperature in your microwave.  You have to be careful not to overcook it or it will separate.
I have included this recipe in case you cannot find lemon curd or if the lemon curd that you found is too expensive for your budget.  This recipe is extremely budget friendly.

Ingredients
2-3 Lemons
1/4 cup butter
3/4 cup granulate sugar
2 eggs

Instructions
1.  Finely grate (zest) the thin outer rind of the lemons. 
2.  In a small bowl or juicer, squeeze the lemons until you have about 1/2 cup of lemon juice.  (Please don't try to cheat and use ready made lemon juice.  It won't taste good.)  Pour the juice into a 4 cup microwavable container.  (I have a 4 cup Pyrex measuring cup that I like to use.)
3.  Stir in the grated rind (zest), butter and sugar. Microwave, uncovered, on high (100%) for 1 1/2 to 2 minutes OR until the butter is melted and the mixture is hot.
4.  In a medium bowl, beat the eggs.  GRADUALLY add the hot lemon mixture to the eggs, stirring constantly.  You have to be gradual and stir constantly or the hot lemon mixture will scramble/cook the eggs and you don't want that.
5. Return the mixture back to the microwaveable container and microwave, uncovered, on medium heat (50% power for 1 to 2 minutes OR until just thickened, stirring every 30 seconds. (This was the hard part for me because it took me forever to try to figure out how to get my microwave to half power.)
Do not allow the mixture to boil; the mixture will thicken as it cools.
6.  Let cool.
7.  Pour curd into a container that can be tightly sealed.  In can stay in the refrigerator for up to two weeks or in the freezer for longer.

NOTE:  This will make about 1 2/3 cup lemon curd.  You can make this at least a week in advance or the night before and it is one less thing that you have to worry about the day of your brunch.
If you want to be a little naughty, you can stir 1 tbsp. Amaretto or Grand Marnier into the curd after cooking.

"Parisienne" Coddled Eggs

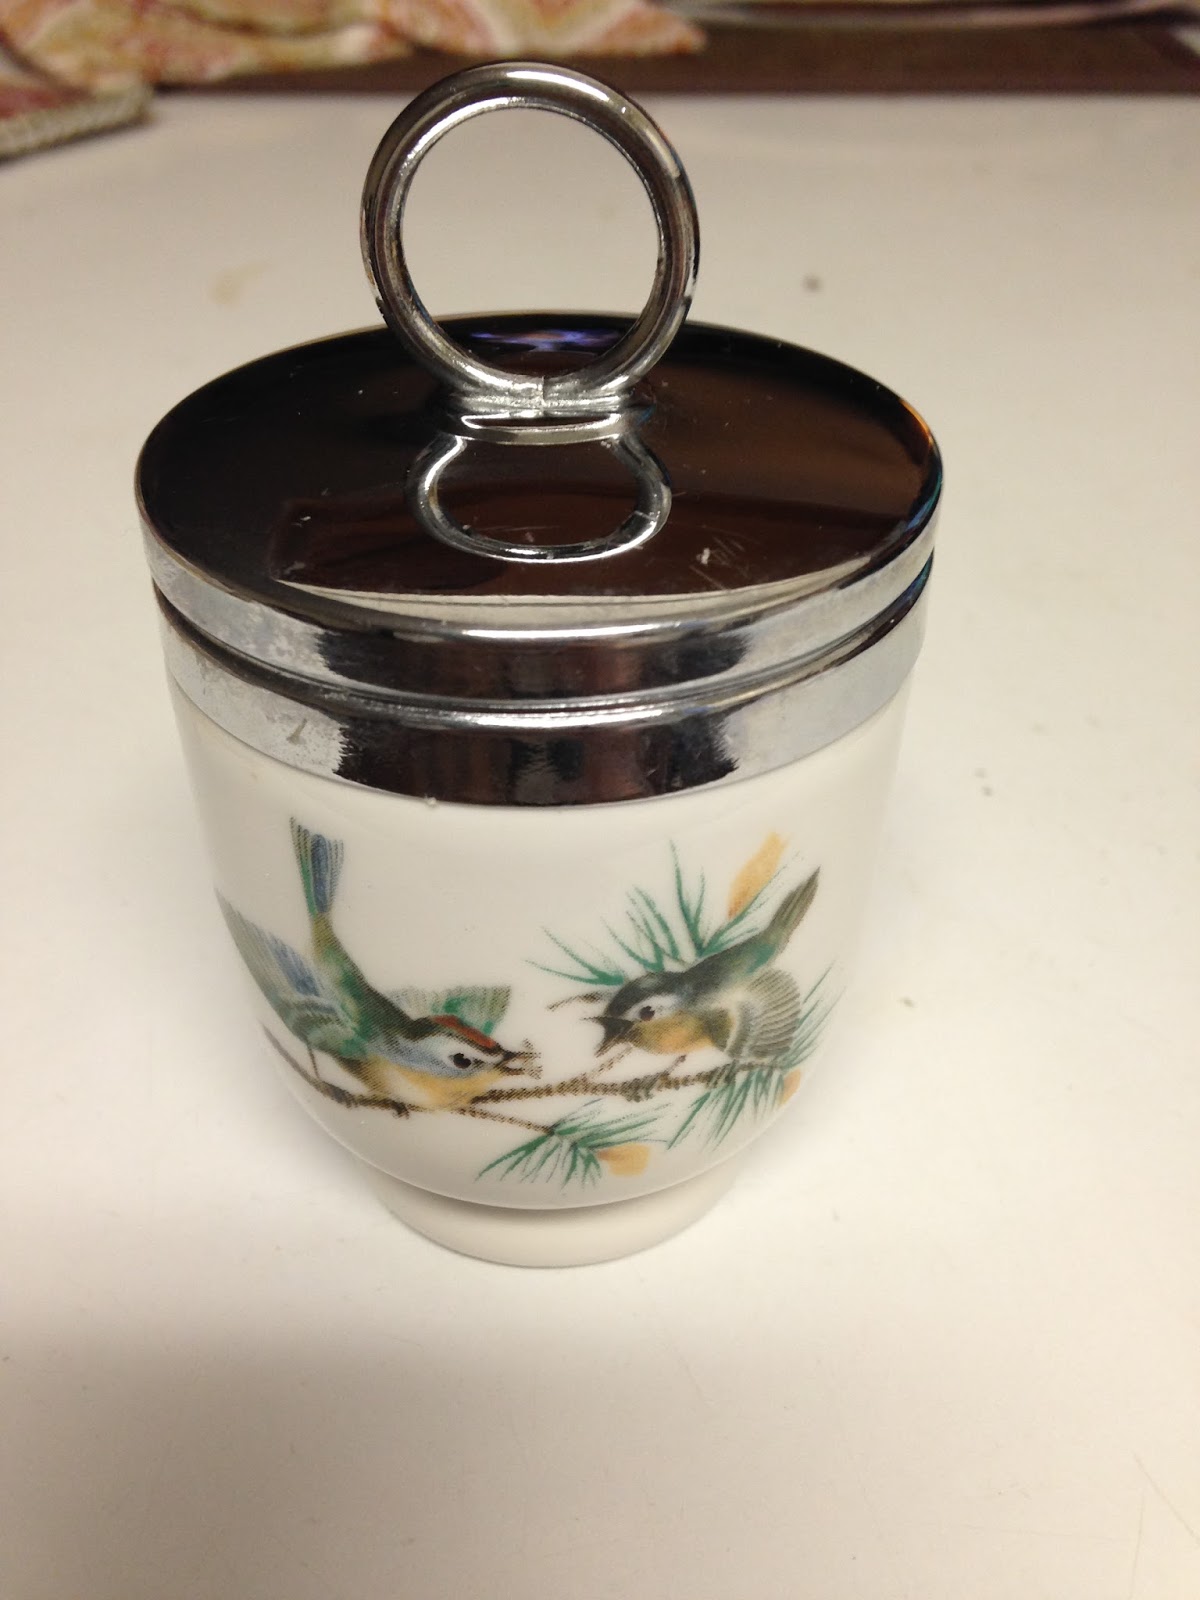
I adore coddled eggs.  I make them for my husband and myself for breakfast at least once a month.  Although it is easier to coddle your eggs in a coddler, I realize that not everyone has this breakfast tool, so I have also included instructions for how to coddle an egg in a teacup.  Both are beautiful in presentation and will make your mom feel like a queen.

This is one of my set of four coddlers.  As you have probably figured out, I love little birds and every time I see these coddlers I get happy.


Ingredients
Cooking spray or melted butter
3-4 large eggs
1/2 tsp. milk or cream each (for each egg)
1 clove garlic, minced
1 tbsp. freshly shredded parmesan cheese.
1/2 tsp. dried herb de provence  (Or, if you have an herb garden, you can use any herbs that are in your garden and that you think would taste yummy on your eggs.)
kosher salt and freshly ground black pepper to taste

Instructions (For Coddler)
1.  In a small bowl, I use a custard cup, mix together the garlic, parmesan and herbs. Set aside.
2.  Spray the inside of each coddler with non-stick spray or brush on melted butter.  Make certain that you cover the inside of the lid as well so that they egg won't stick.
3.  Carefully pour about 1/2 tsp. of cream or milk into each coddler.
4.  Gently break each egg, one at a time, into a coddler.  Unless you have an extra large coddler, one coddler should fit one egg.
5.  Divide the cheese mixture evenly among the  number of eggs you are making (3 or 4eggs) and sprinkle on top of each egg.
6.  Screw the lids on top of the coddlers.
7.  Put the coddlers into a medium sized pot and fill with water up to the silver rim but not over the lid.
8.  Remove the coddlers from the pot.  On high heat, heat the water until it comes to a boil.  Once it comes to a boil, put the coddlers back into the boiling water.
9.  Boil for 6 minutes and remove from heat.

NOTE:  This method will be quicker than the teacup method because, with the coddlers, you can cook the eggs on a higher heat.

Instructions (For Teacups)
1.  Butter the insides of 3-4 teacups with melted butter.
2.  Follow directions 3-5 from the recipe above.
3.  Cut a piece of parchment paper to fit just inside the skillet that you plan on using.  Skillet should also have a lid.
3.  Bring 1 inch of water to a gentle simmer in a large skillet. 
4.  Transfer teacups to the simmering water and cover with the piece of parchment paper you cut.  Reduce heat to medium, and steam, covered with skillet lid until whites are set but yolks are still soft, about 8 to 10 minutes.

Thick cut Bacon


Cook this however you normally would cook bacon.  I actually have a nifty handcrafted bacon mug that I got for Christmas last year that allows me to cook bacon in the microwave in 3-6 minutes.  This literally makes this brunch a 6 minute meal for me.
But you can pan fry it or cook it in the oven as well.


I am going to do a brunch an evening, starting with the easiest and ending with the hardest.  So please keep a look-out for the next three evenings.  On Saturday, I will get back to spring cleaning and show some more homemade cleaning supplies.