Showing posts with label recipe - cheese. Show all posts

Sunday, December 24, 2017

Last Minute Recipes for a Christmas Eve Gathering

Happy Holidays Everyone!
So its Christmas Eve and you have a family dinner/get together that you must attend.  And you find out that you need to bring something for the party.  Oh my! 


Well never fear, the Frugal Femme is here to give you some easy recipes that you can whip up in minutes and have ready for a party!  These are just some tried and true recipes that I have on hand so that I can whip them out for parties - some of them may be modified from your grandmother's recipes. 


Oyster Crackers
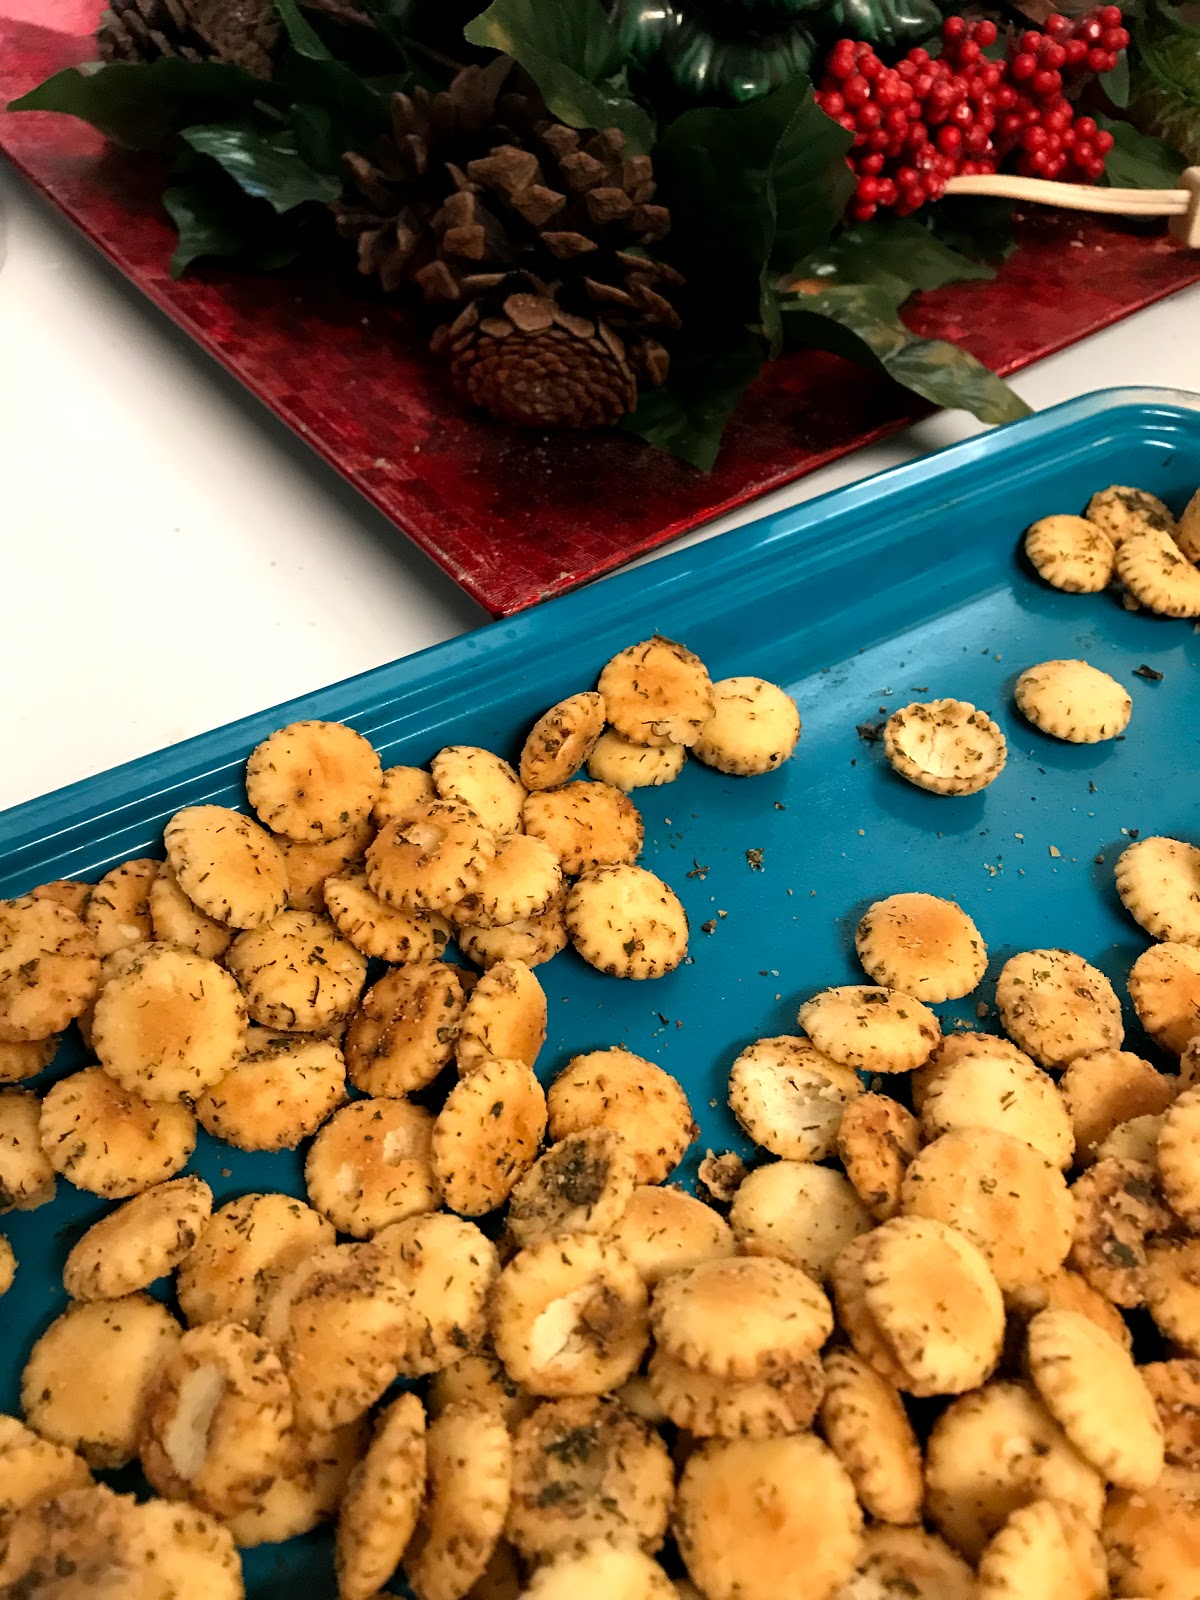

This is one of my husband's favorite things.  So much so that his mother usually makes them every year and includes them as part of his Christmas present.  This year, his parents came down for Thanksgiving and not for Christmas so it was up to me to carry on the tradition.  I don't know who's recipe this was originally, but I'm fairly certain most of us have some version of this recipe, hand written and stashed in a family cookbook.  Me being me, I had to modify the recipe just slightly.  So here is my version of a Christmas Classic.

Ingredients
1 (1 ounce) package Ranch dressing Mix (I like Hidden Valley)
1 tsp. dried dill weed  (If you don't love dill as much as I do, you can put 1/2 tsp and it tastes just as good.)
1/4 cup vegetable oil
1/2 tsp. truffle oil
1/2 tsp. garlic powder
5 cups osyter crackers

Instructions
1.  Preheat oven to 250 degrees.
2.  In a large bowl, combine the first five ingredients.  Whisk with a fork until all of the ingredients are blended together.
3.  Add the oyster cracks and toss with a spoon until all of the oyster crackers are covered with the oil mix.
4.  Spread the oyster crackers evenly on a baking sheet.
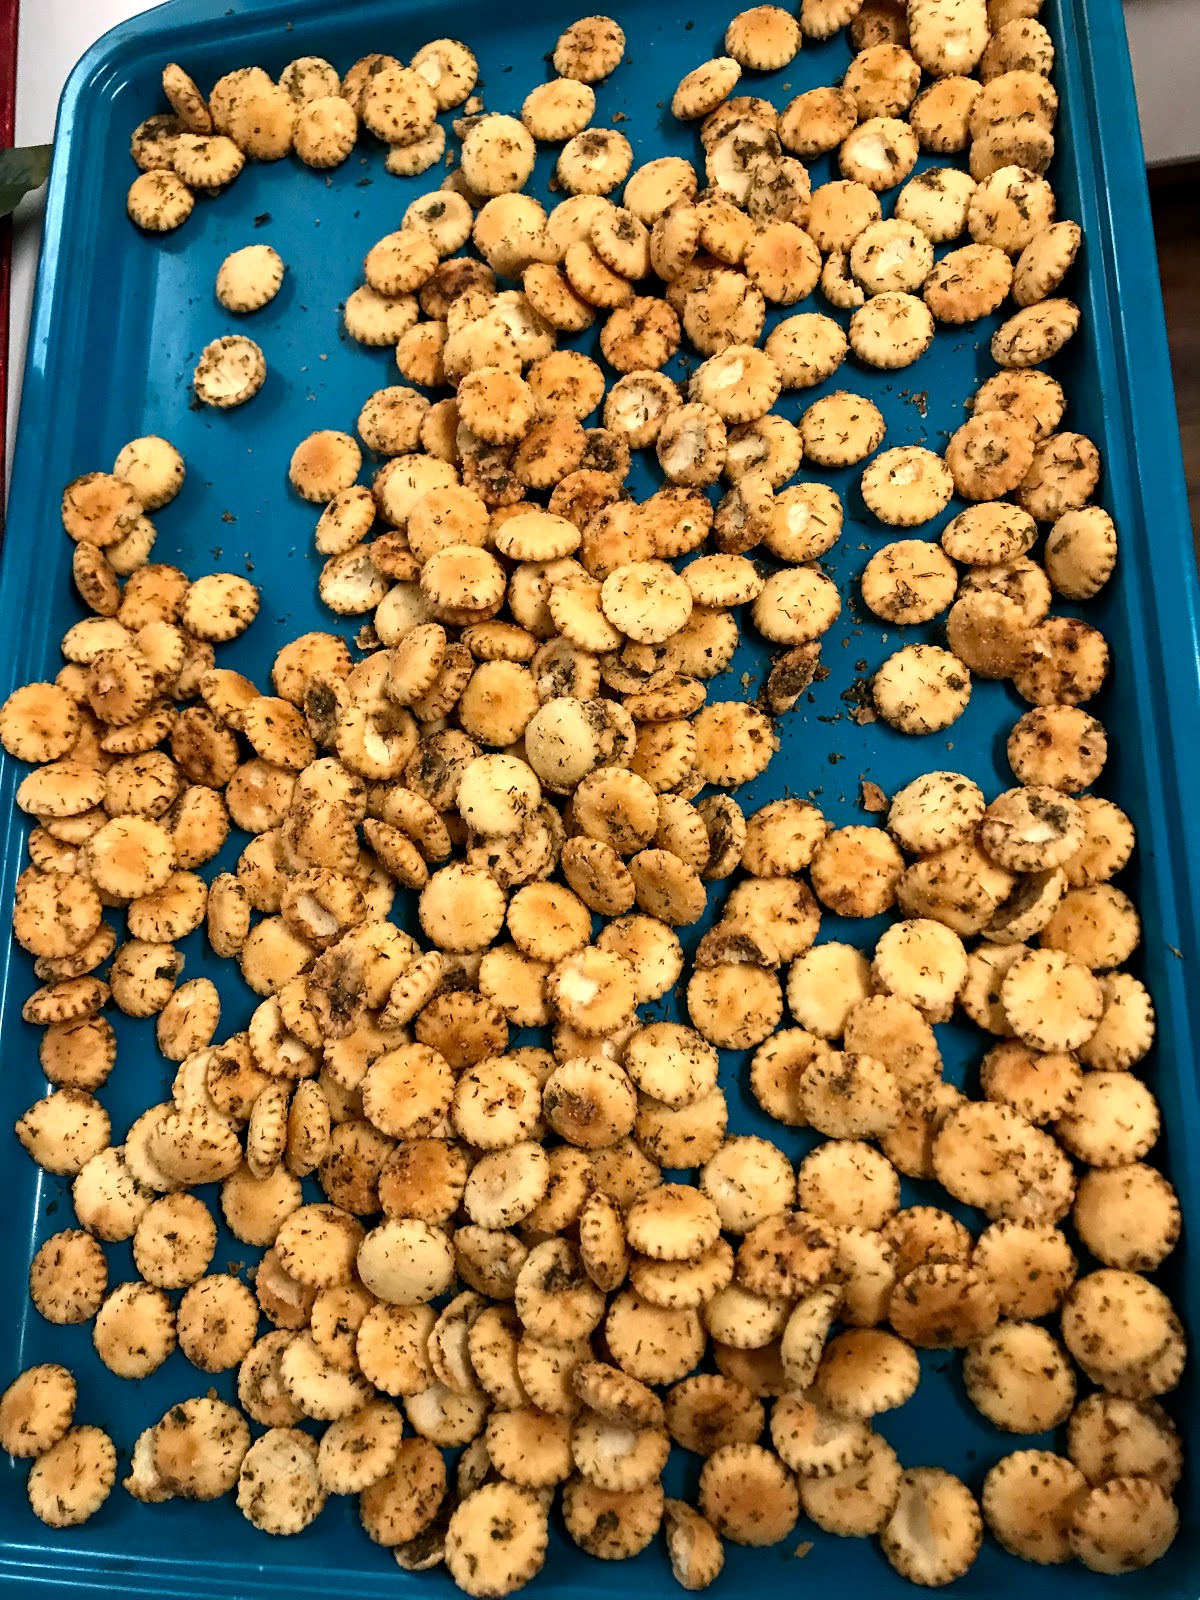
This is after they have come out of the oven, but you get the picture.
5.  Bake for 10 minutes in the oven.  After 10 minutes, rotate the pan and stir with a spoon, redistributing the oyster crackers on the pan.
6.  Cook for another 5 to 10 minutes.  Remove from the oven when the oyster crackers are a golden brown.
7.  Allow to cool completely before serving.  (Put in an air tight container to store.)

So how easy was that?!?!?!

This next recipe is one of my favorite recipes of all time and is a go to for all sorts of functions.  I break it our for parties, holidays and sometimes just because I want to eat it.  I honestly thought that I had already posted this recipe, but when I went back into the Frugal Femme archives, I realized that I have not.  So here it comes, my favorite cheese ball recipe of all time.

Cheddar Cheese Apple Balls
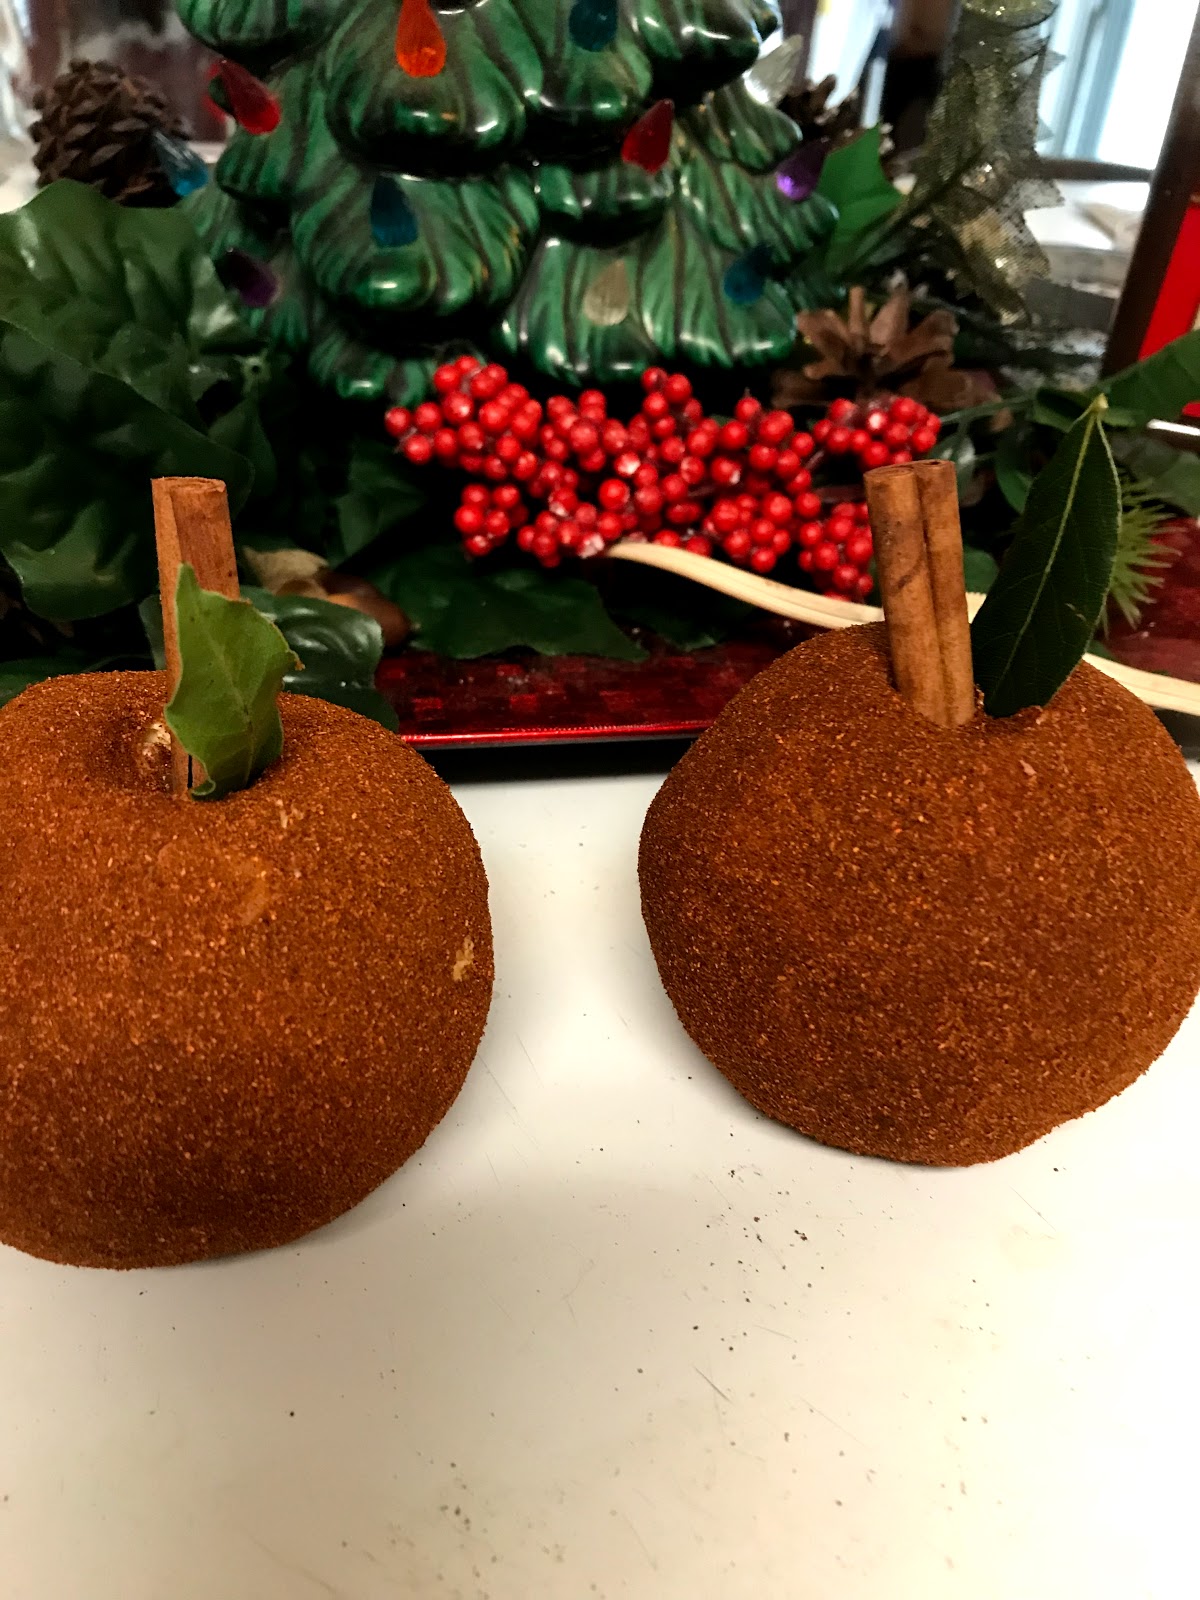

These cheese balls have no apple in them.  They are called apple balls because that is the way that they are shaped.  One recipe will make two cheese balls, you can easily half this recipe and make only one.  I do this all the time so that I can make two different flavors of cheese balls.
This is another recipe that I just slightly modified from a family recipe.  I'm not sure who first made it up.

Ingredients
1 package (8 ounces) cream cheese, softened
2 tbsp. finely chopped onions
2 tsp. Worcestershire sauce
1/2 tsp. ground mustard
2 cups (8 ounces) shredded cheddar cheese
Paprika
Cinnamon Sticks
Fresh Sage Leaves or Bay leaves

Instructions
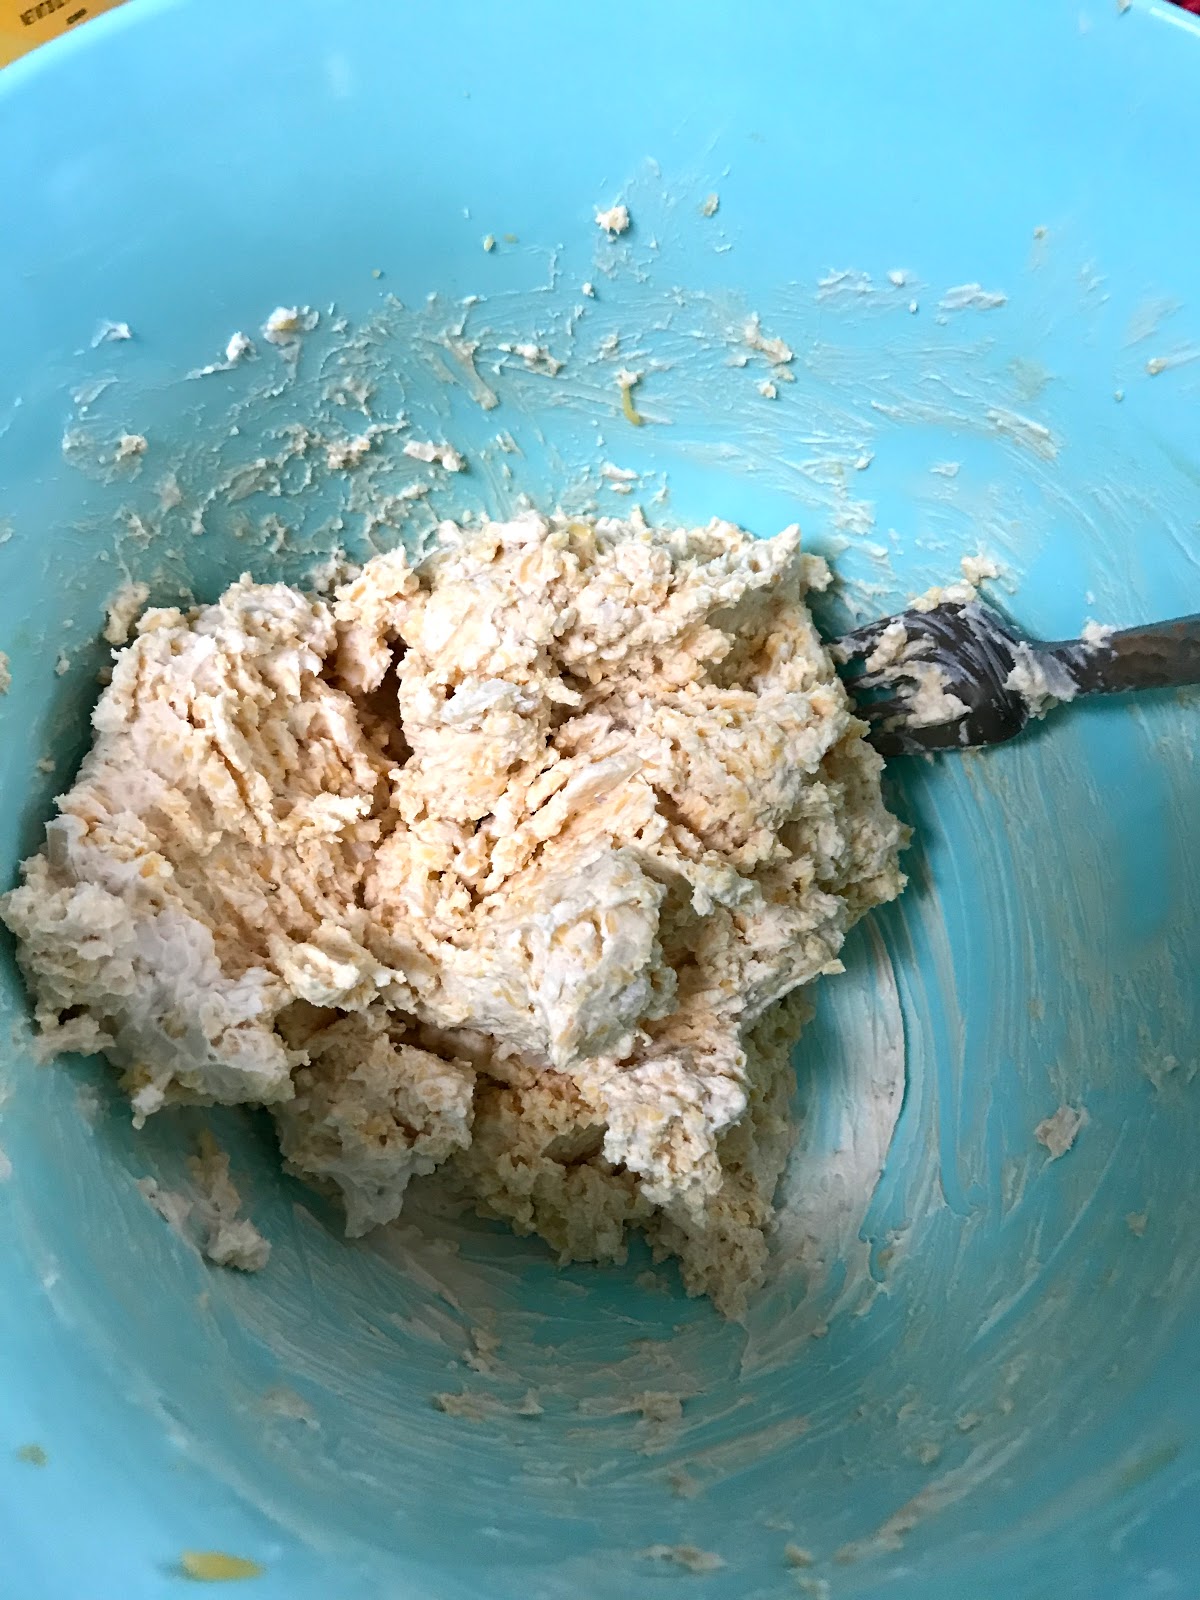
1. In a large bowl, beat cream cheese, onion, Worcestershire, and mustard in a large bowl until blended. 
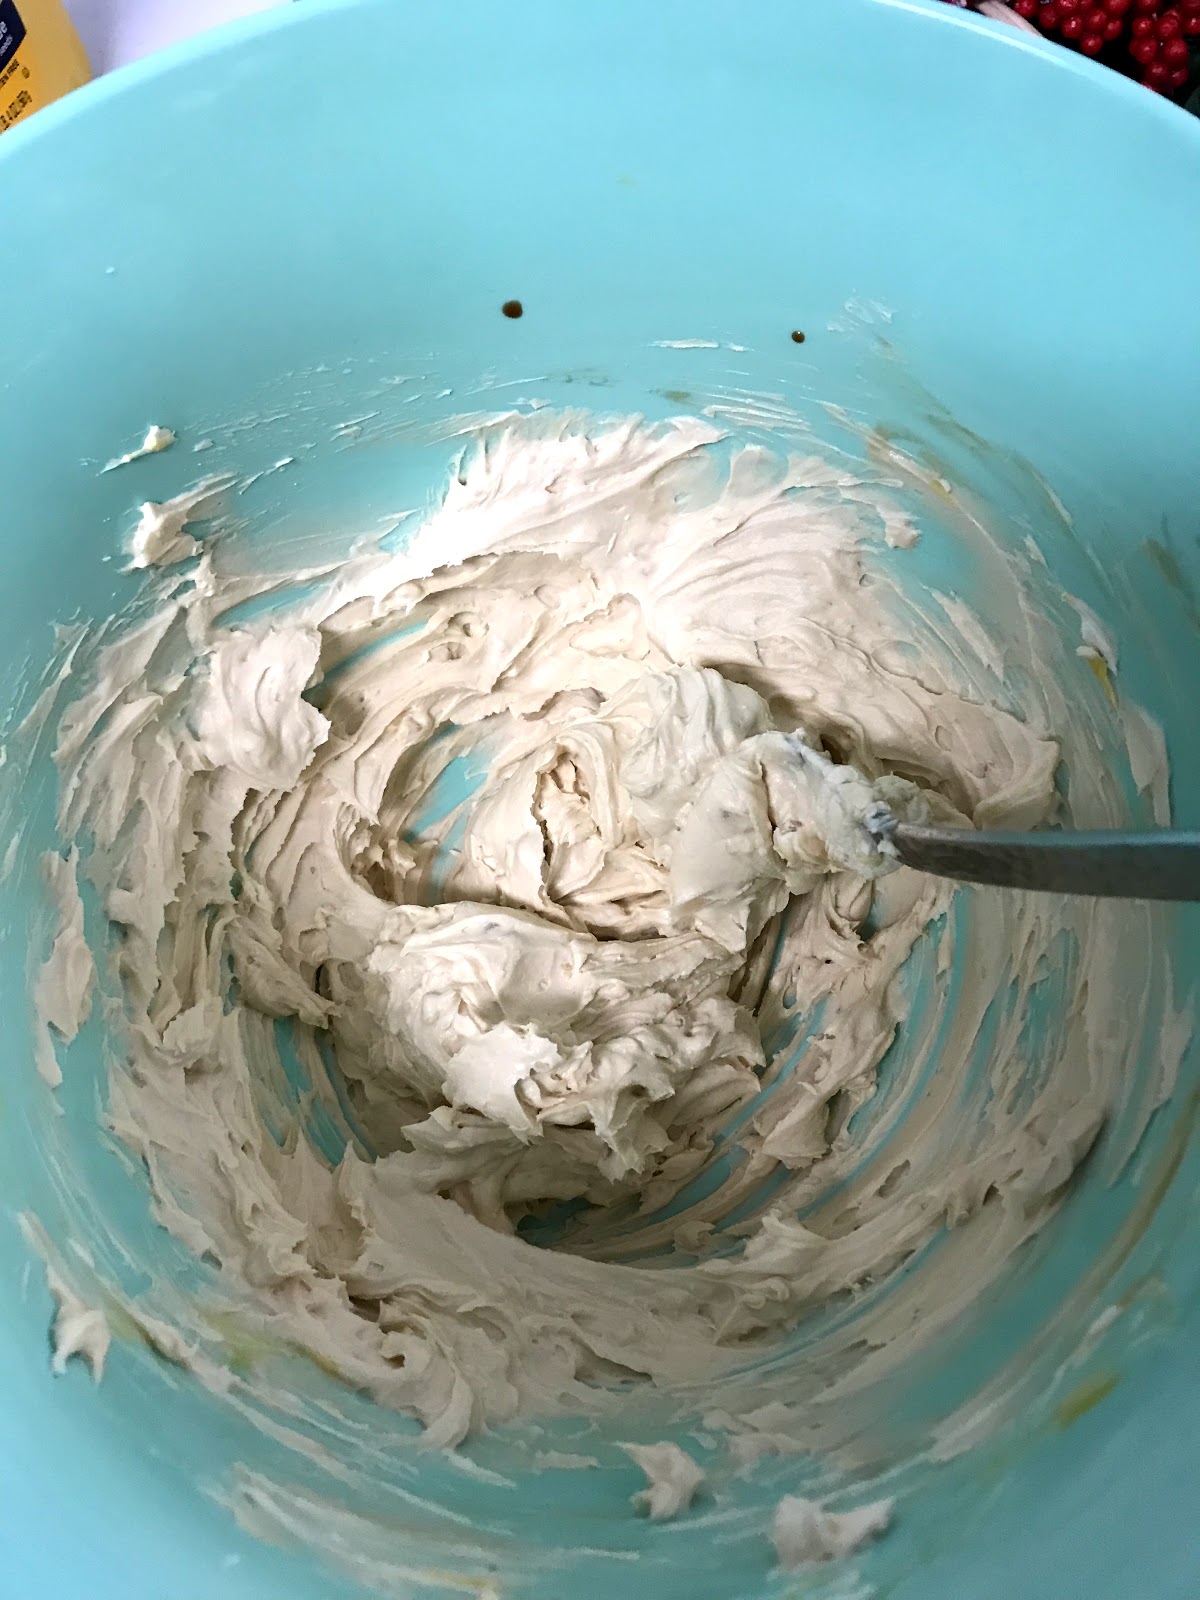

2.  Mix in the cheddar cheese.
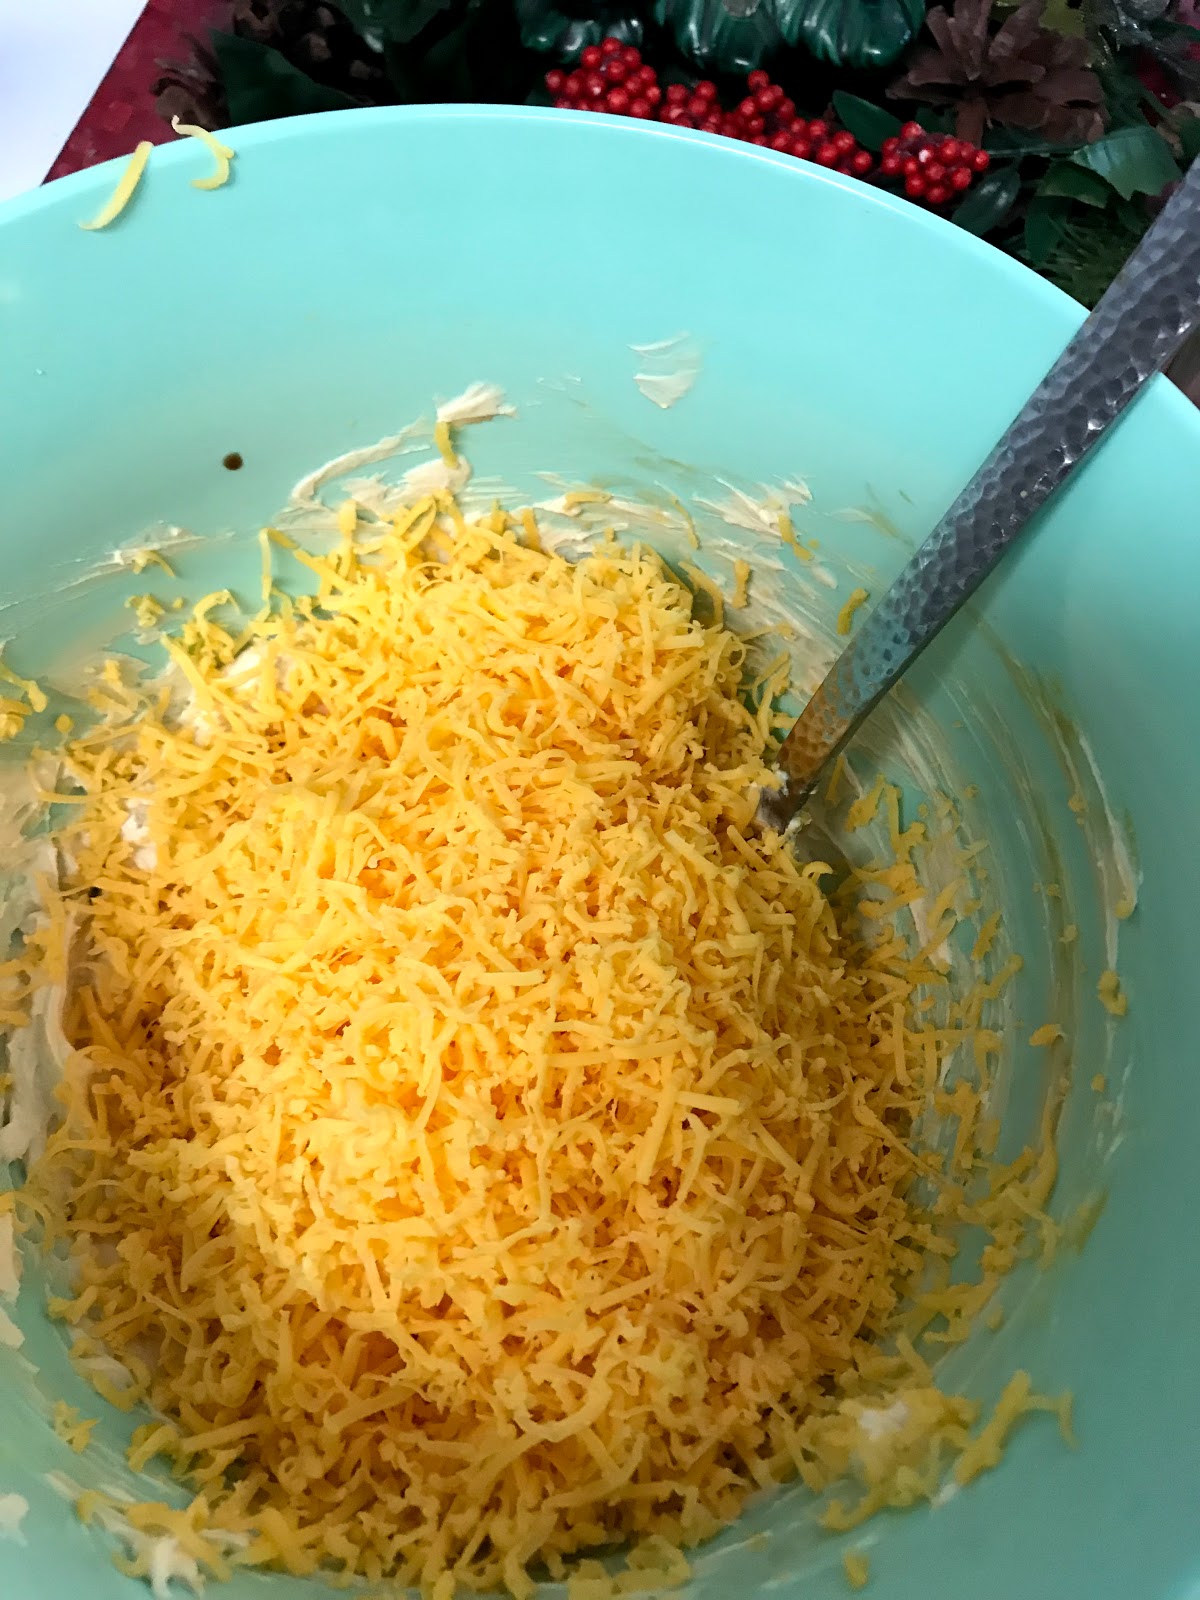


3.  Cover and refrigerate about 2 hours or until firm enough to shape.
4.  Divide cheese mixture into two halves.  Take one of the halves and form into a ball on waxed paper.  Repeat this step on the other half of the cheese mix.
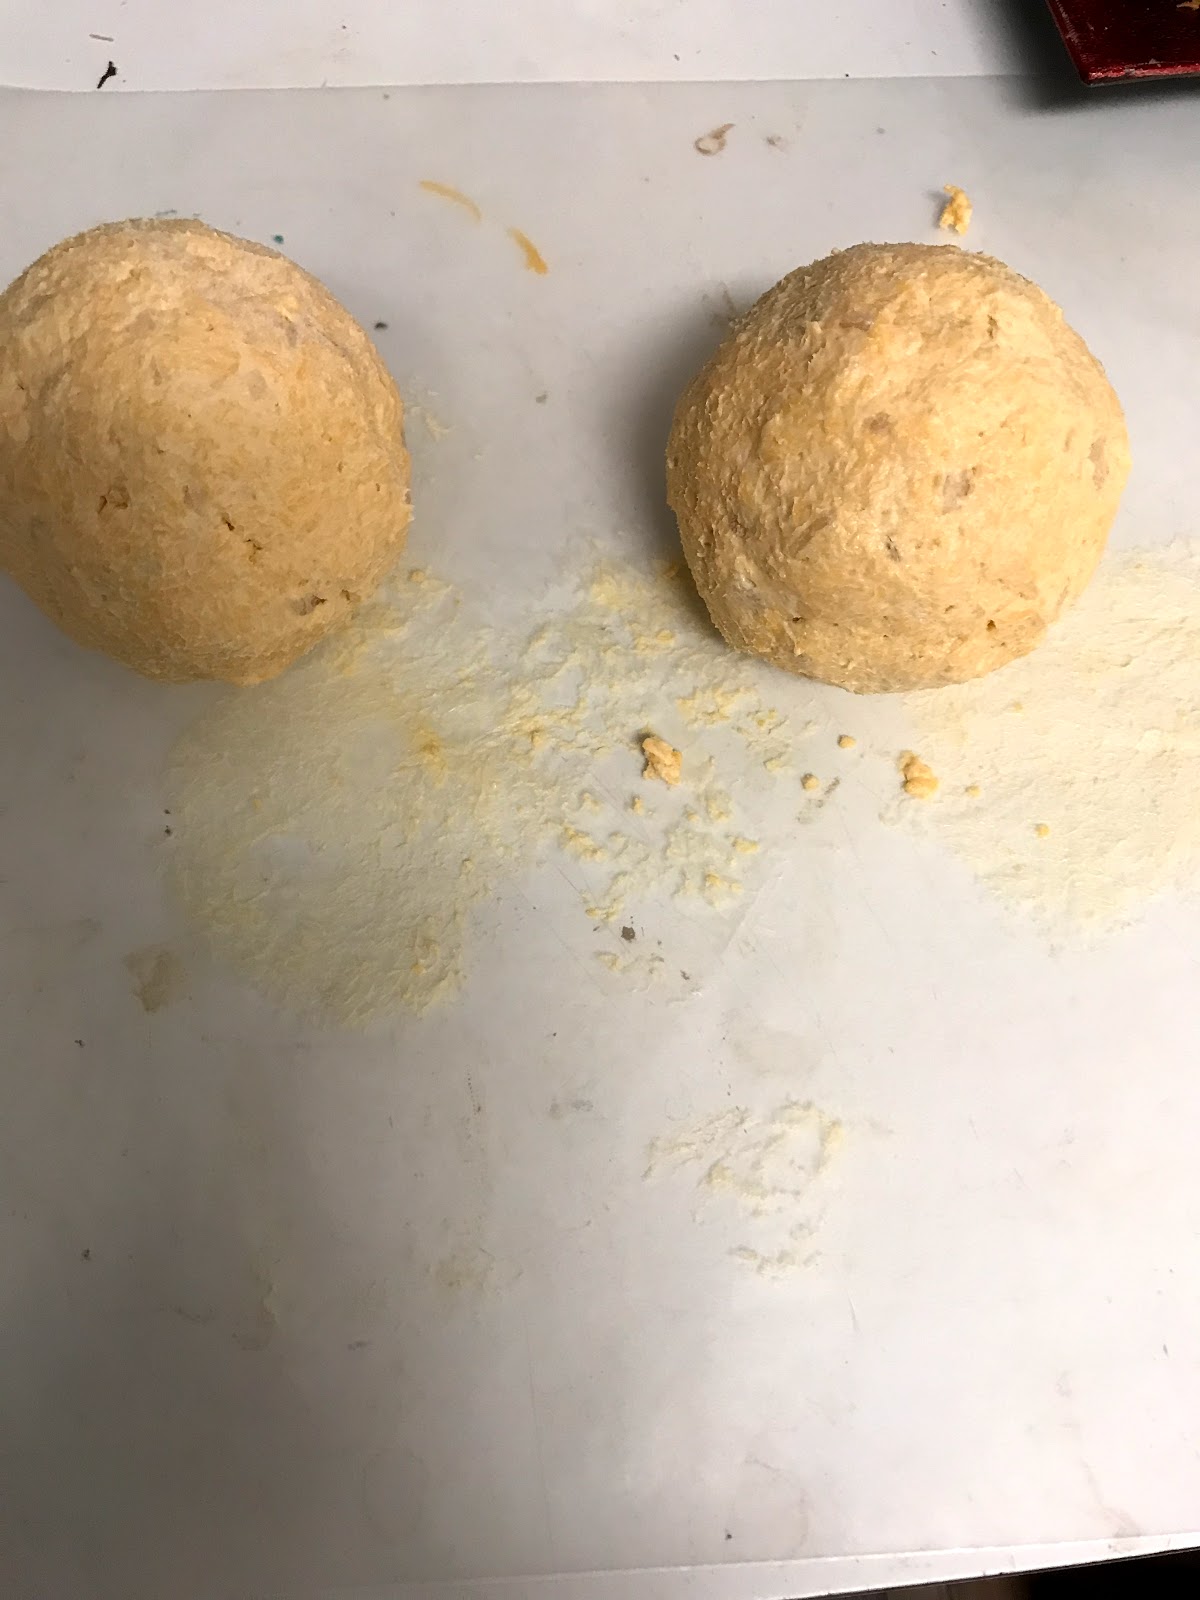

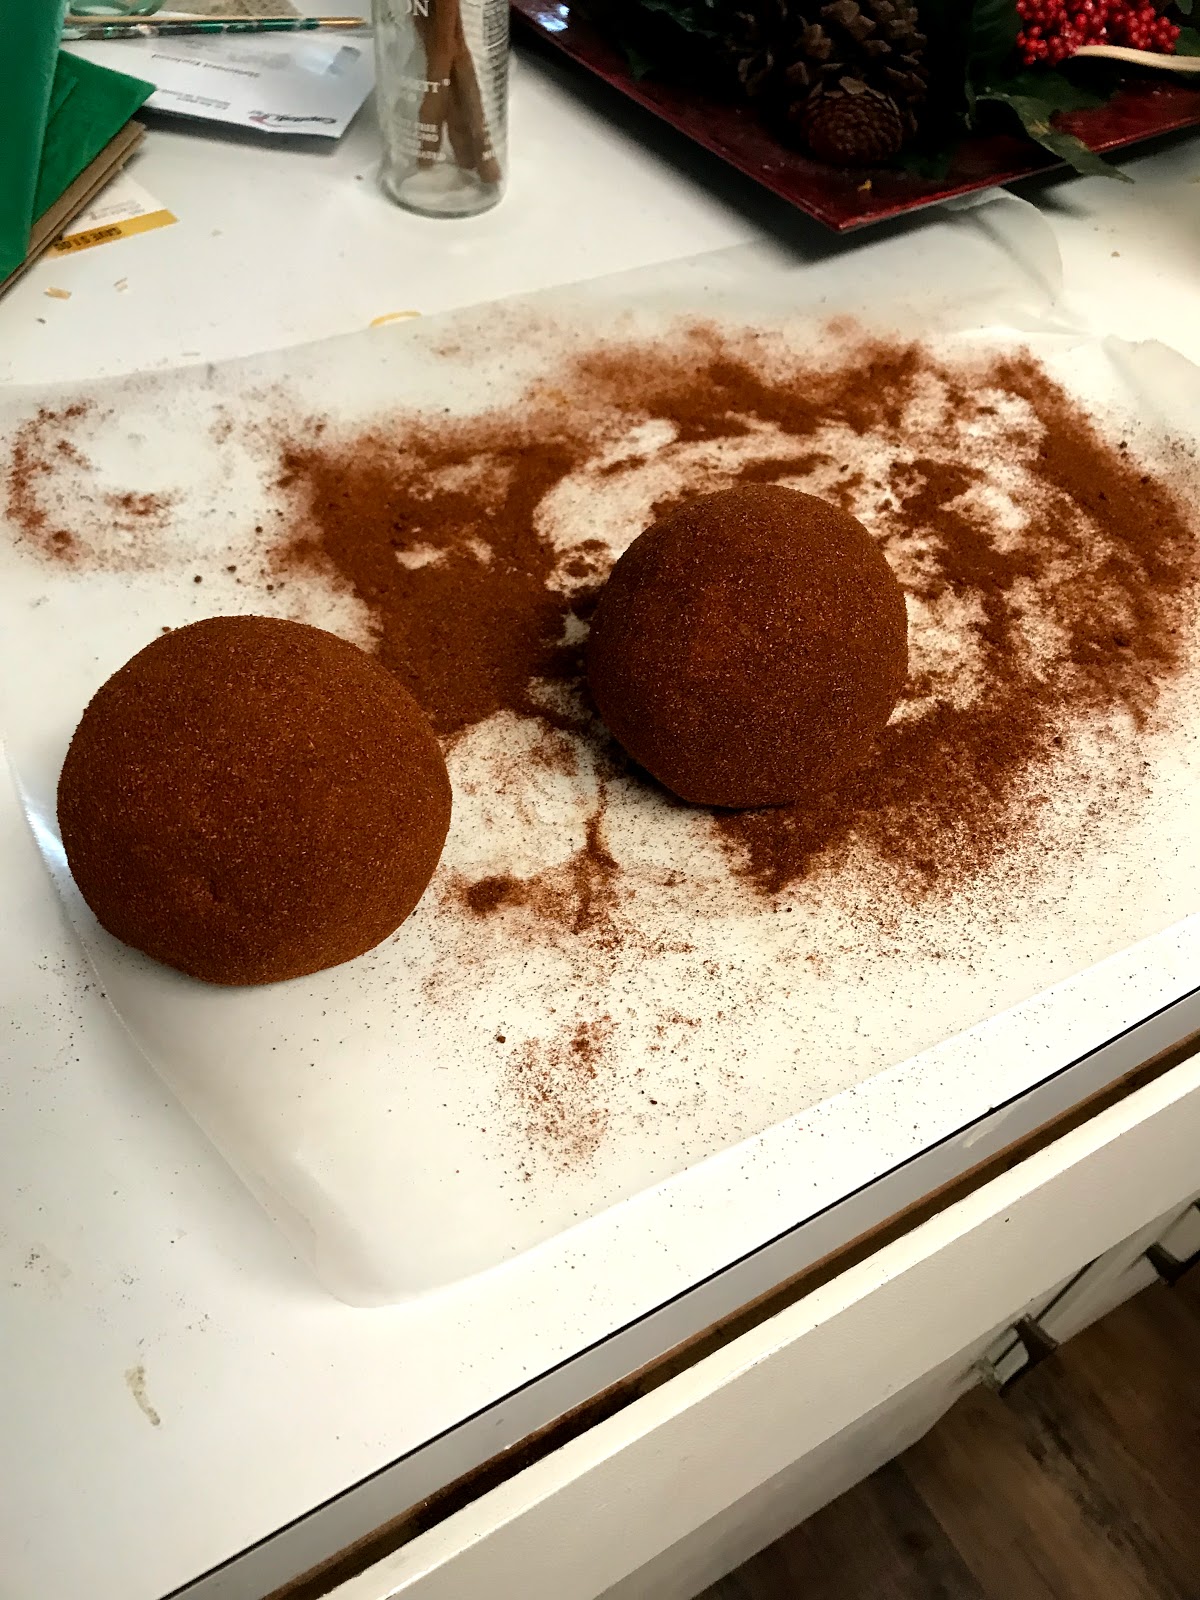
5.  Sprinkle another piece of waxed paper with paprika.  Roll cheese ball in paprika, coating thoroughly.  Repeat this step with the other cheese ball.
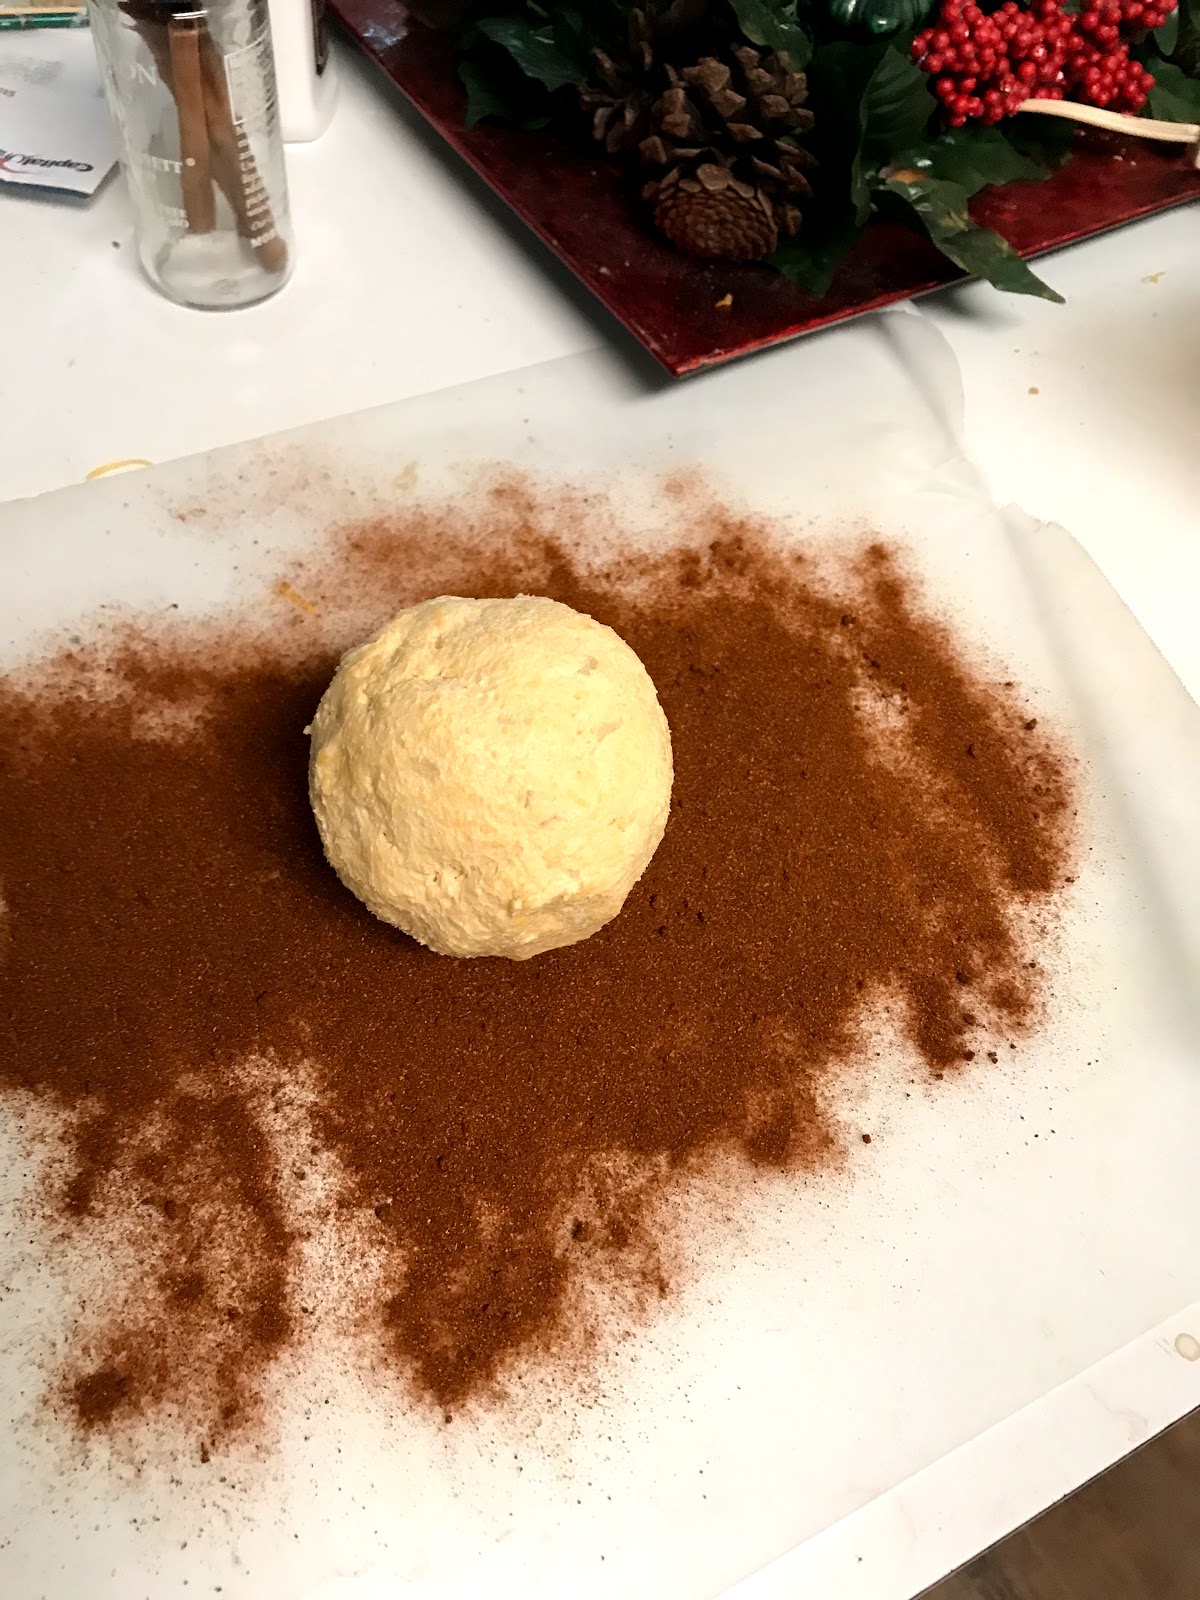


6.  Mold paprika covered cheese ball into an apple shape.  Repeat.
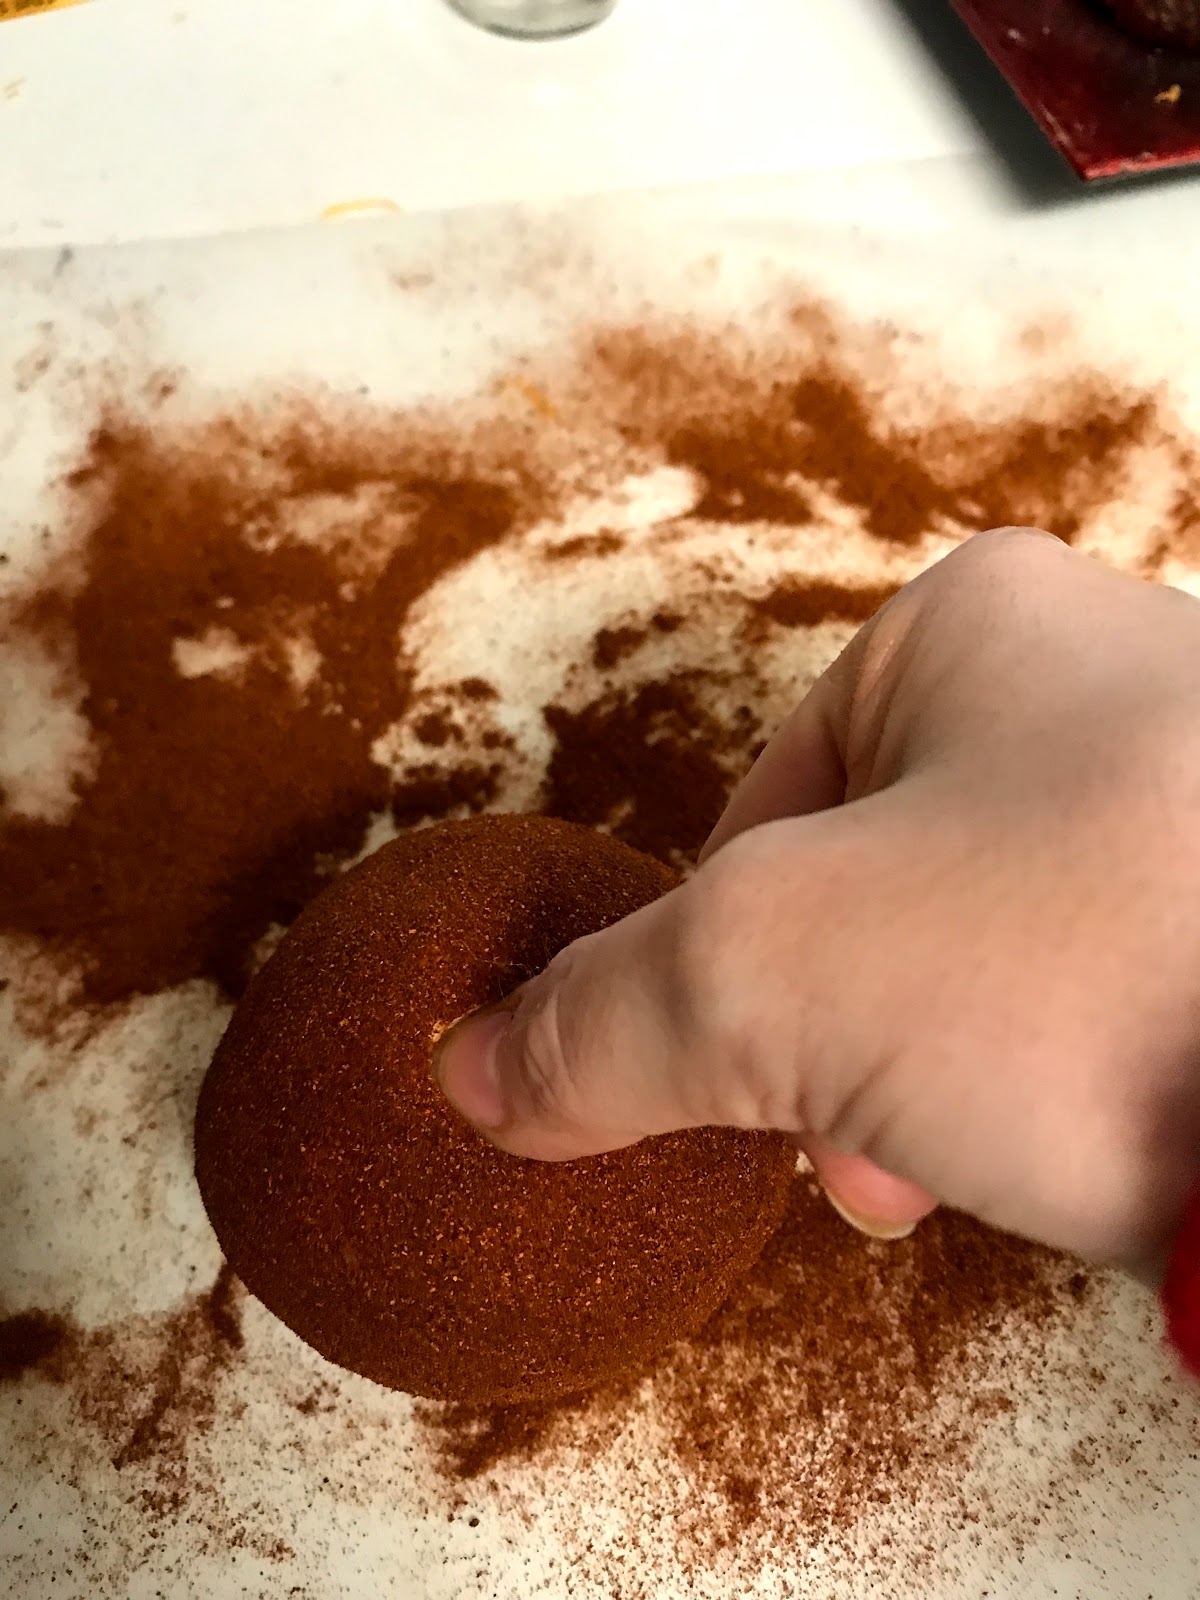
7.  To garnish, make a small depression in the "top" or the stem ends of your apples.
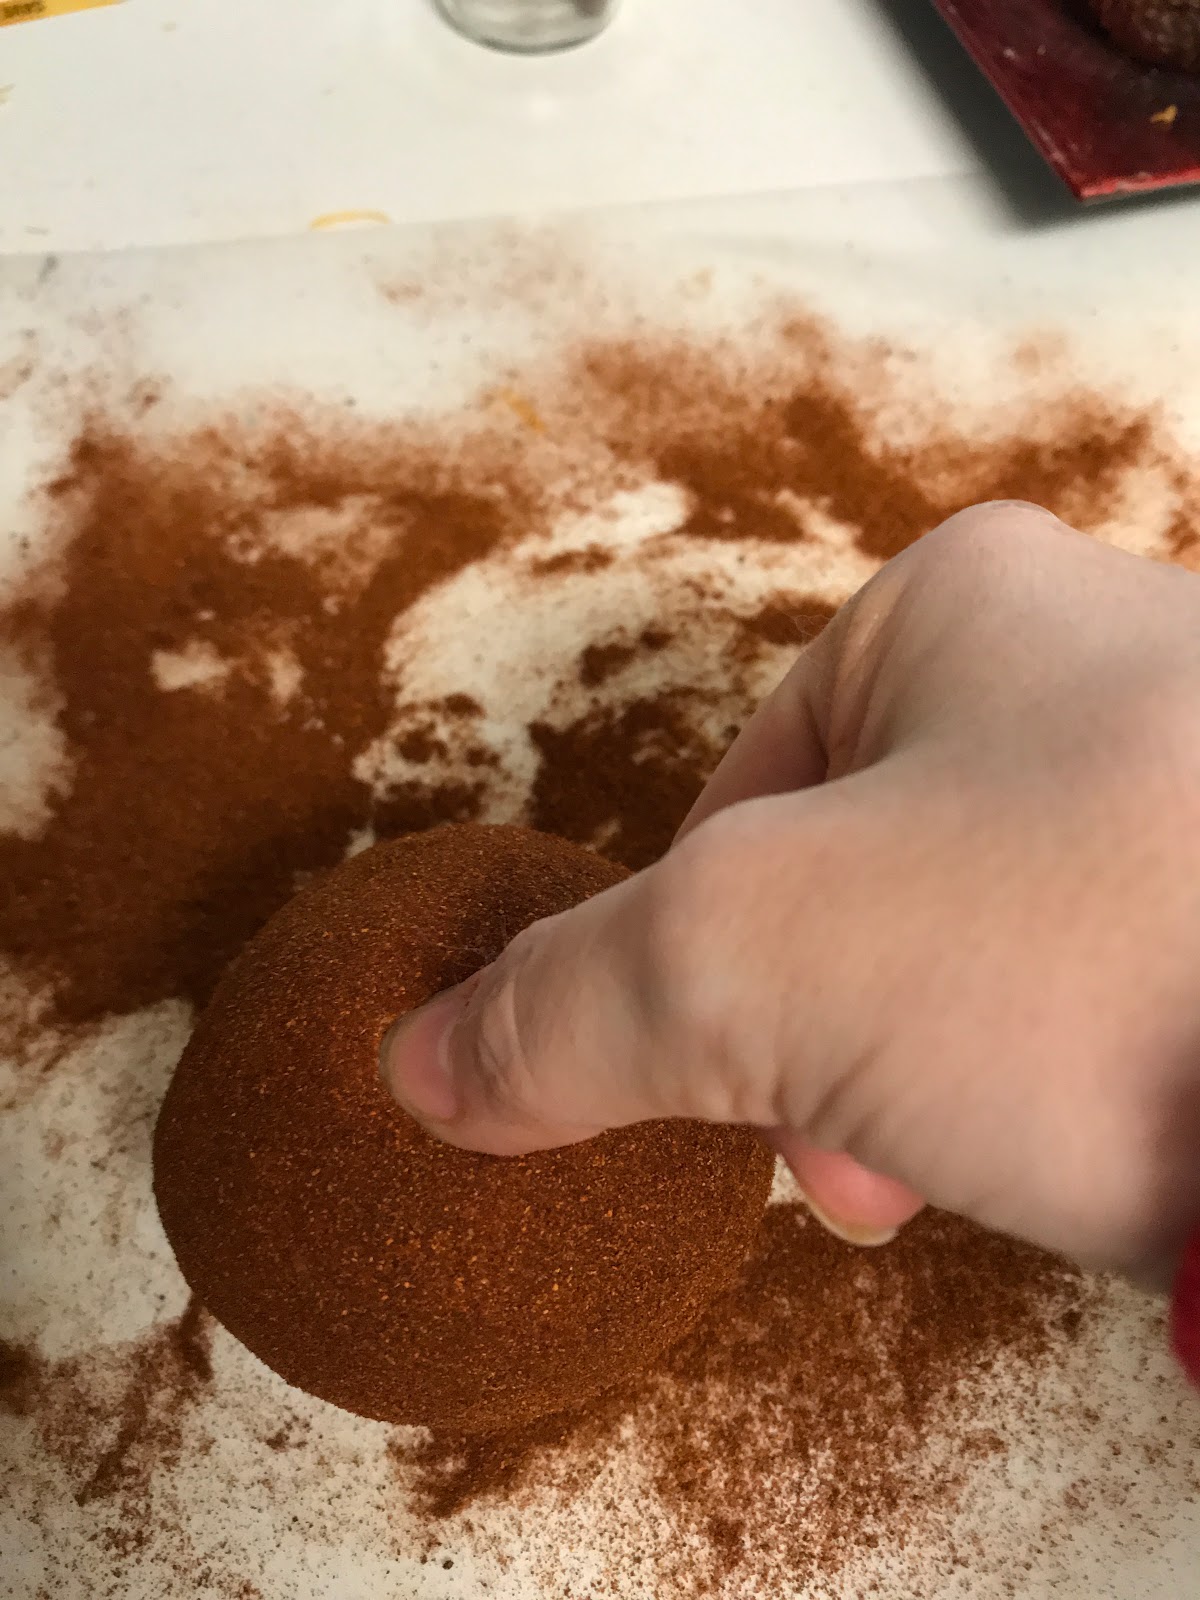


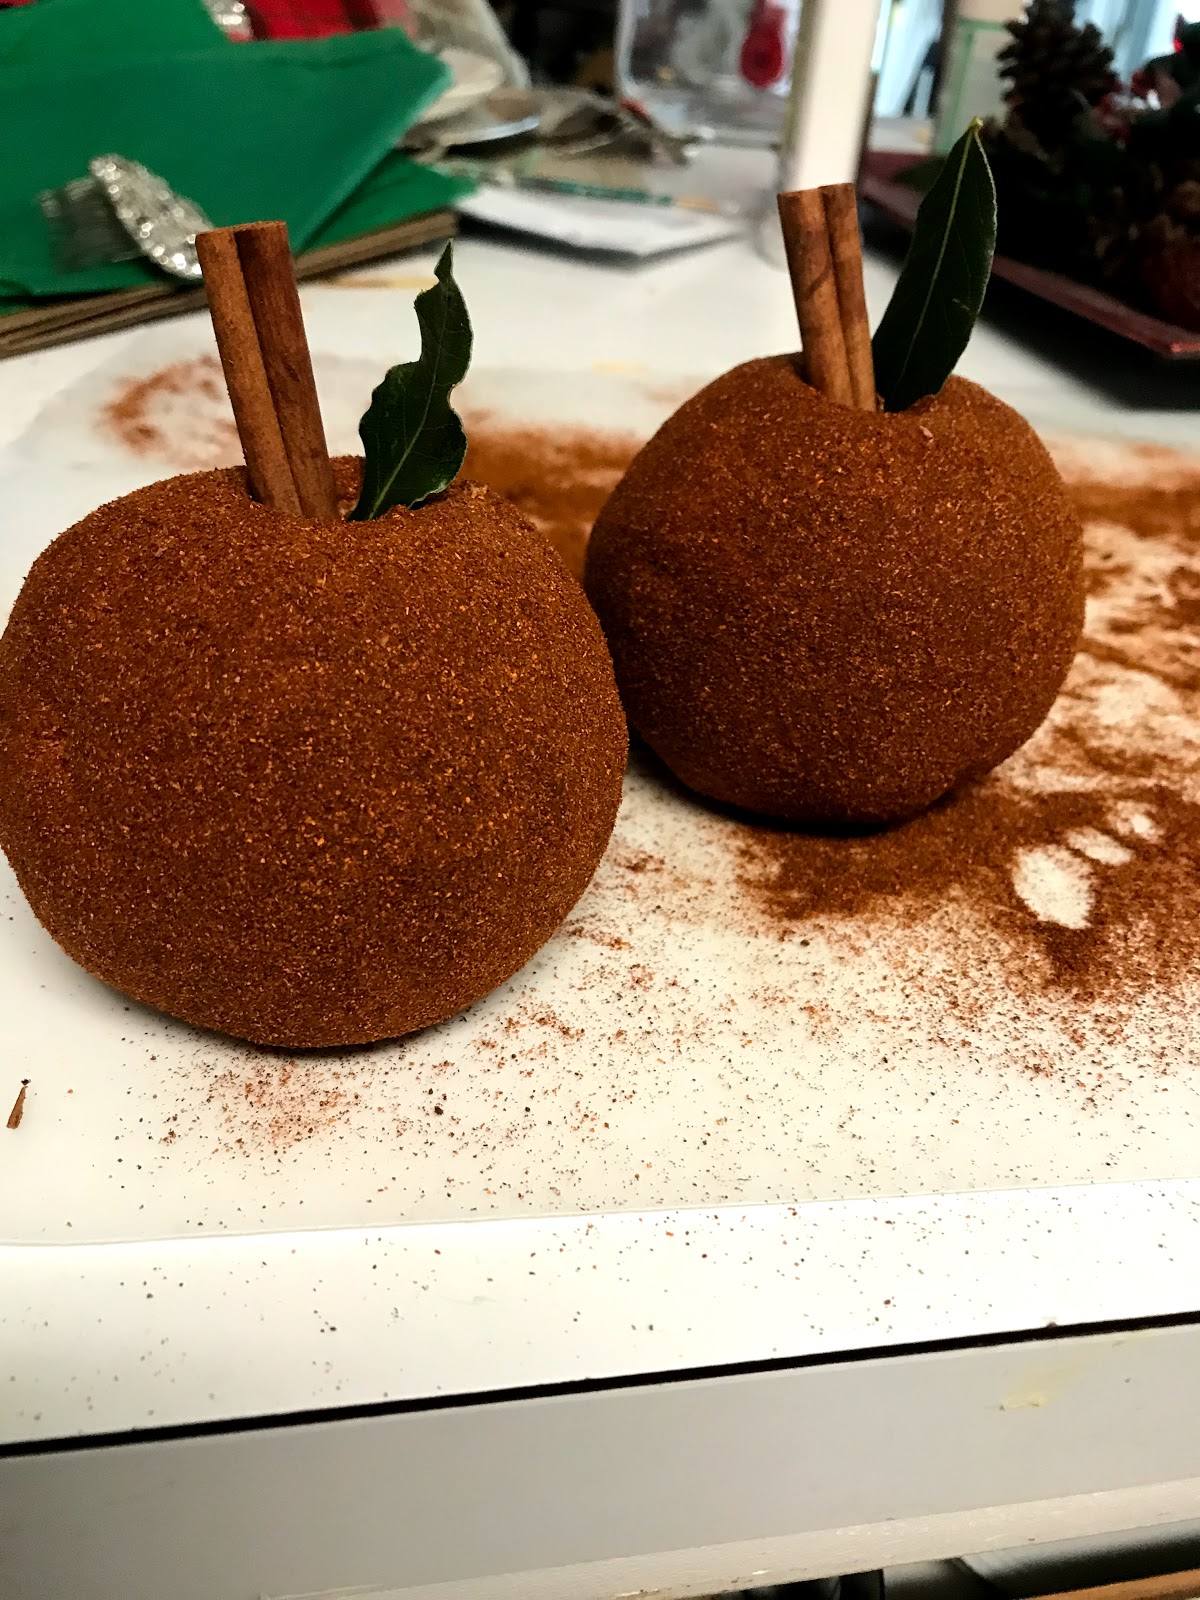
 Cut a cinnamon stick in half.  Insert cinnamon stick half into depression to make the "stem" of the apple.  Insert sage/bay leaf next to the cinnamon stick. 
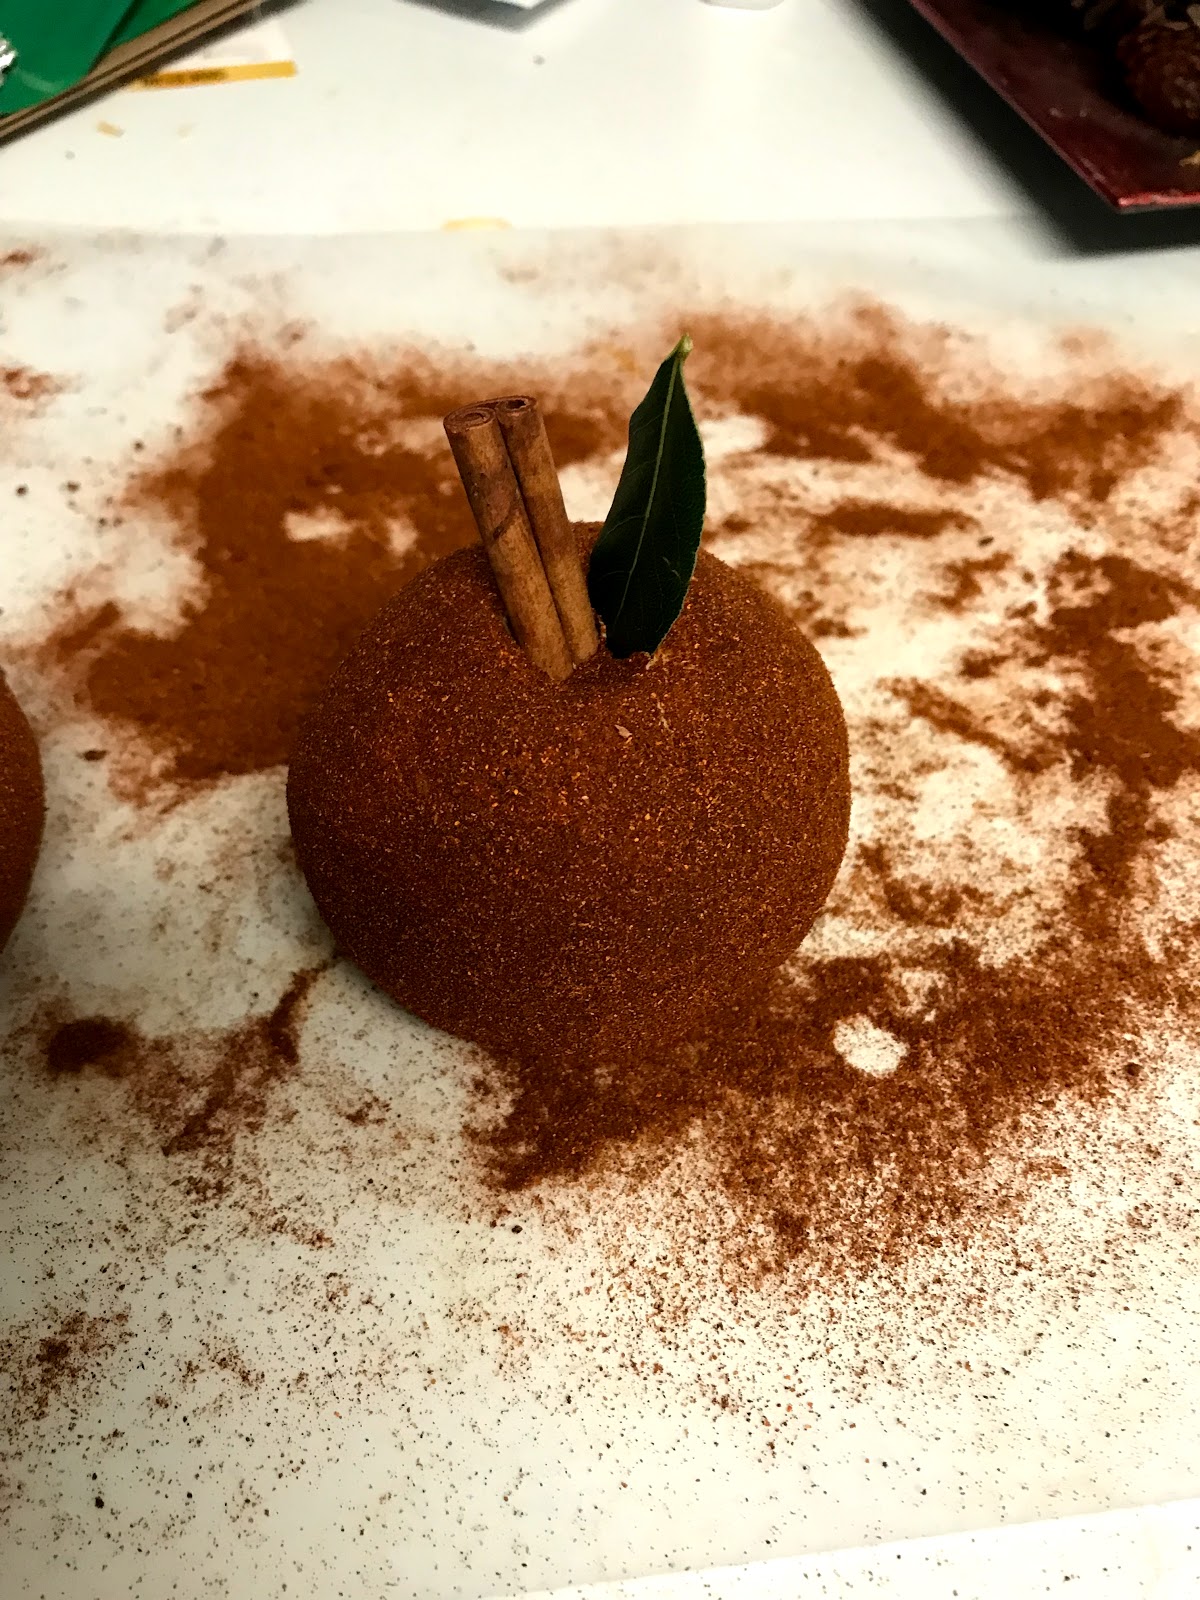


8.  Serve with crackers.

And voila!  You have a beautiful and delicious cheese ball that looks like an apple.  A note of warning for this dish, people find it so pretty that they are afraid to cut into the cheese ball.  I find that, when I put the cheese ball out to serve, I have to make an apple "slice" into the cheese ball.  Otherwise, people don't want to mess up the pretty.

So there you have it!  Two quick and easy recipes to bring to a party that you can whip up at the last minute.

Have a happy Christmas Eve!


Friday, December 22, 2017

Winging our Way Through the Holidays!

Happy Holidays Everyone!
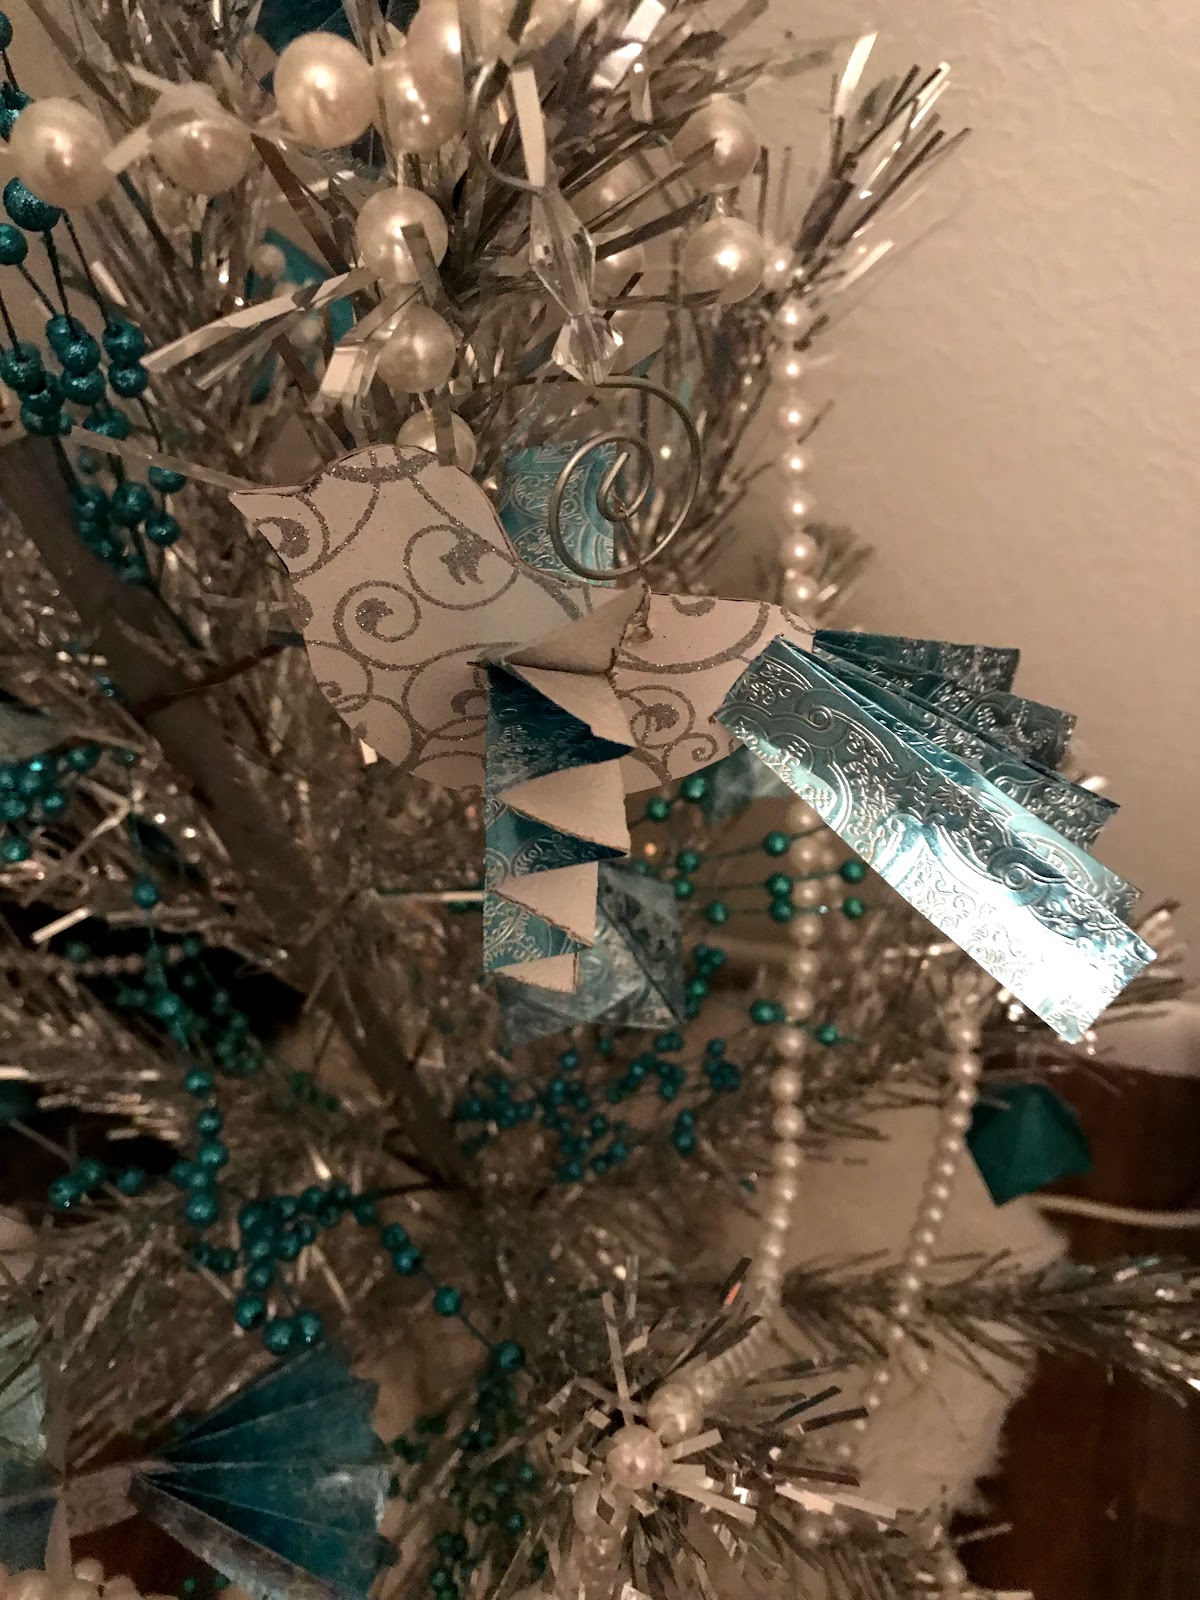
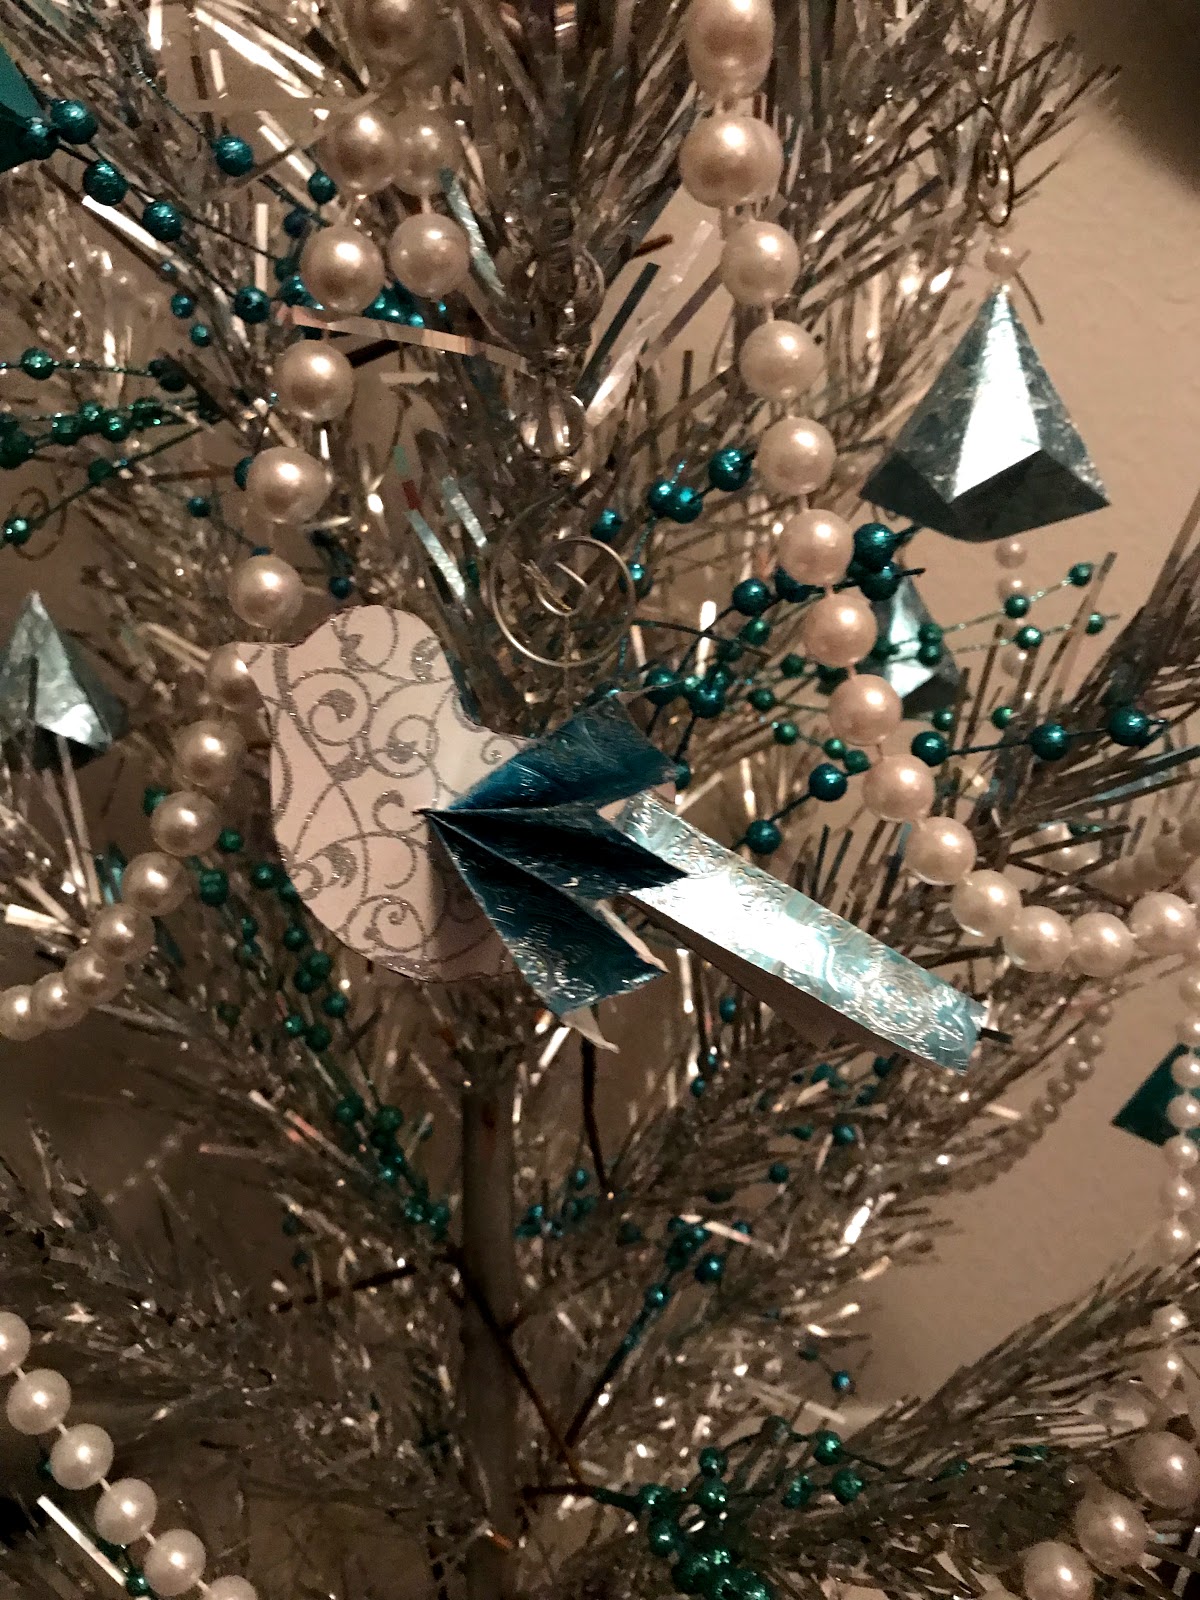
As I promised yesterday, I am back with the instructions on how to make the bird ornaments that I have up on my aluminum retro Christmas tree. 

These birds are very easy to make.  If you can do an outline of a bird and you can still make the accordion style fans that you used to make as a child, you can make these pretty little birds.


Paper Birds in Flight Ornament


Items Needed
1 page of scrapbook paper 12 x12
Pencil
Elmers Glue
Hot Glue Gun
wrapping paper
Ruler
Scissors
Razor or Exacto Knive
Thread

Instructions 
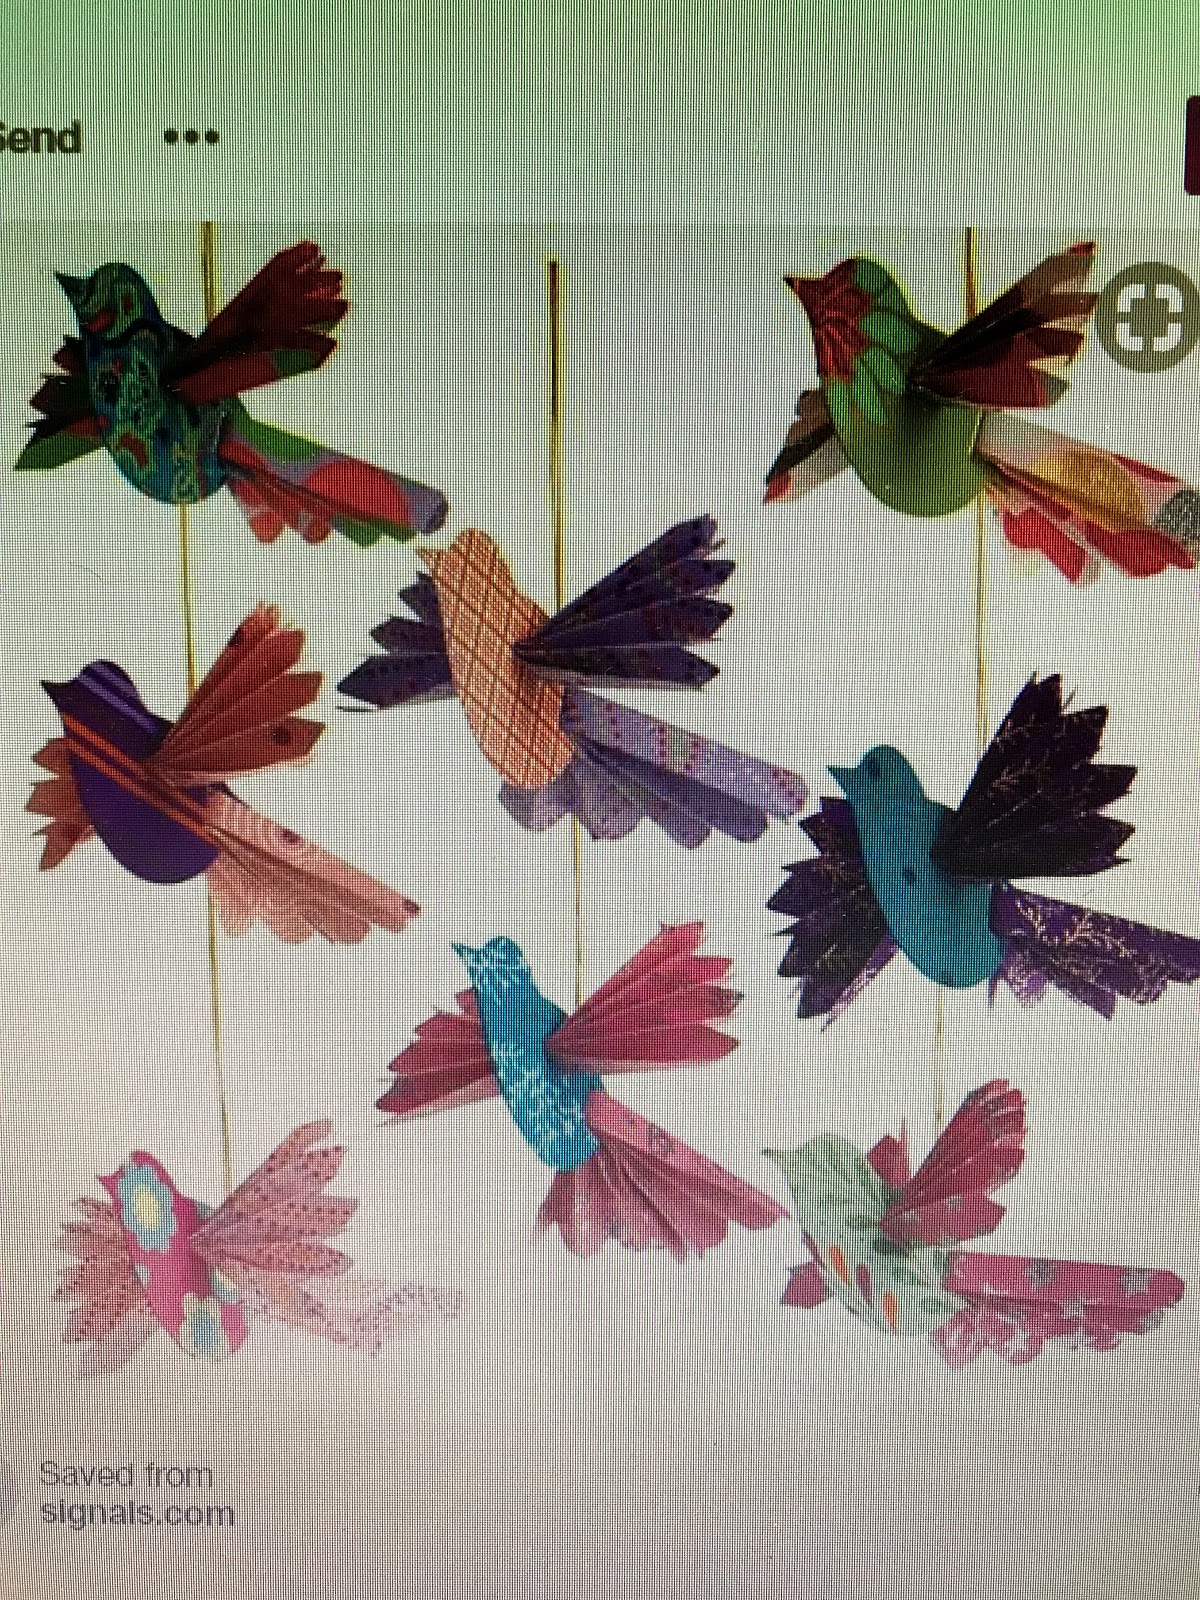
I would like to say that I came up with this idea all on my own, but the truth is that I did not.  As is the case with many of the things that I make, I happened across these bird ornaments while I was looking for something completely different on the internet and I fell in love with them. 


I did not fall in love with their price tag however, and I decided that I could make my own.
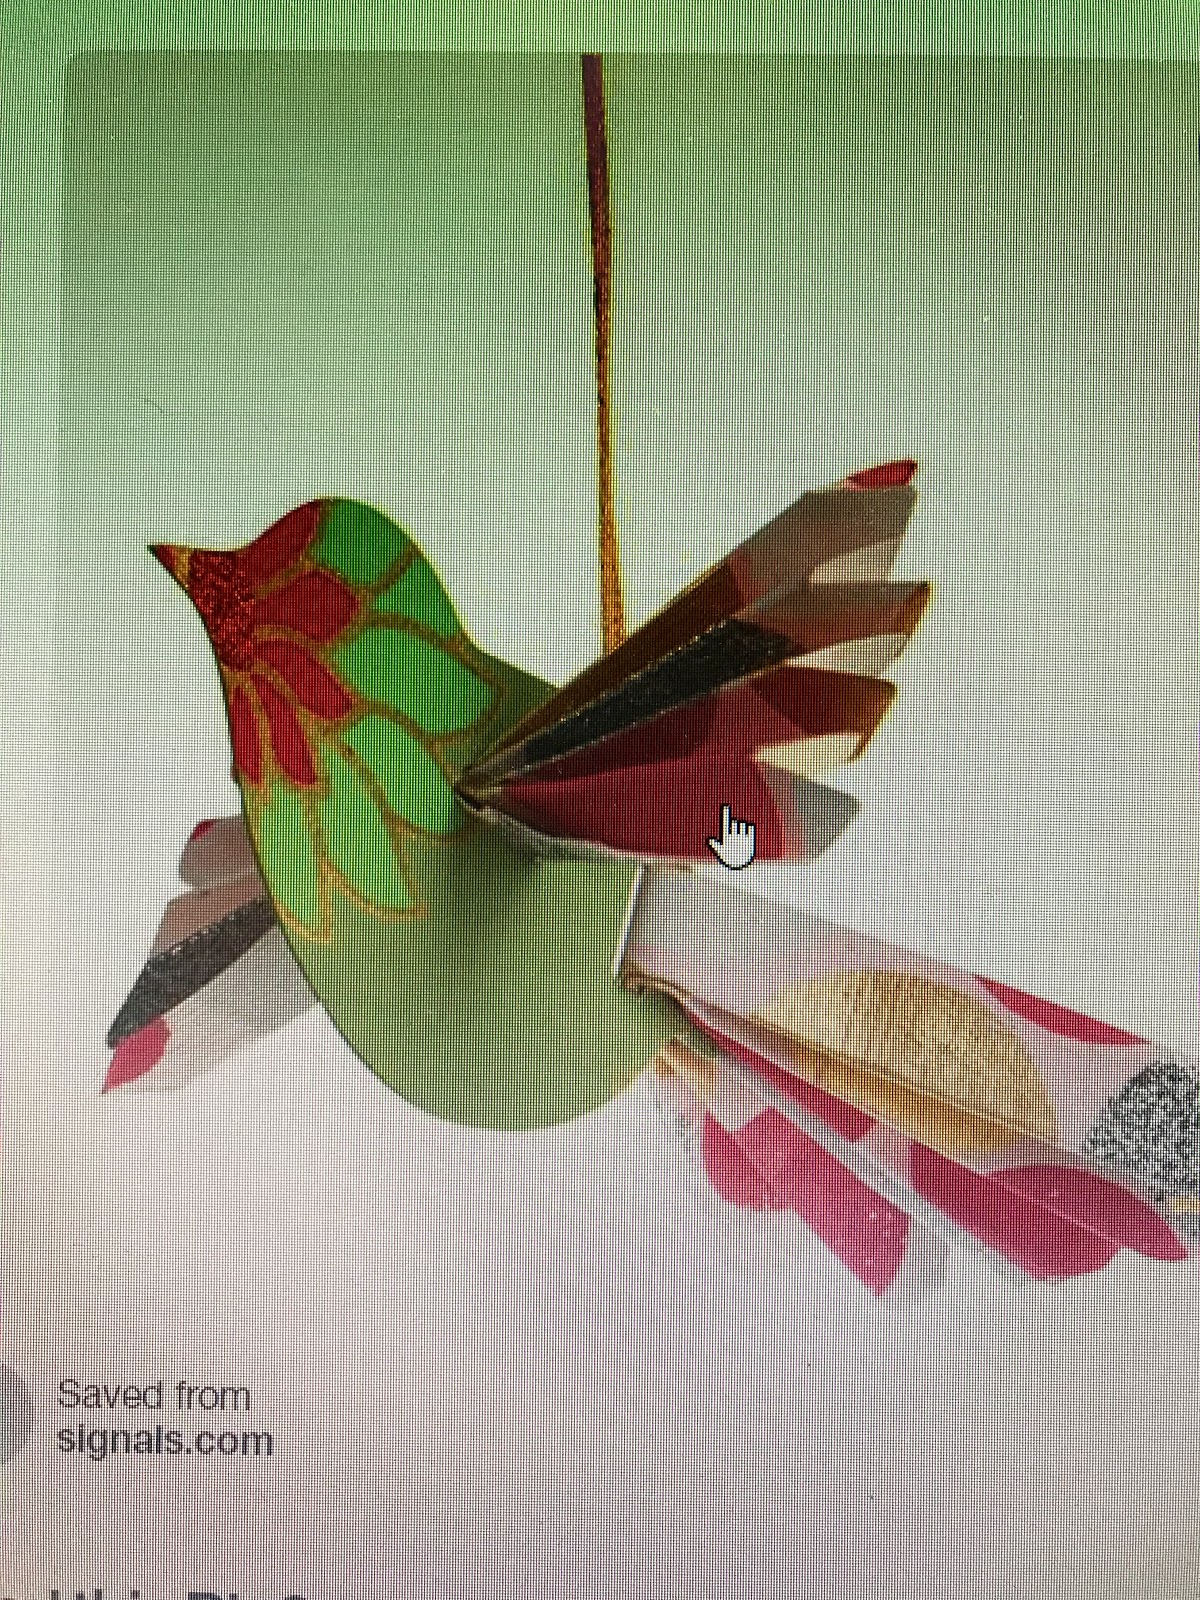
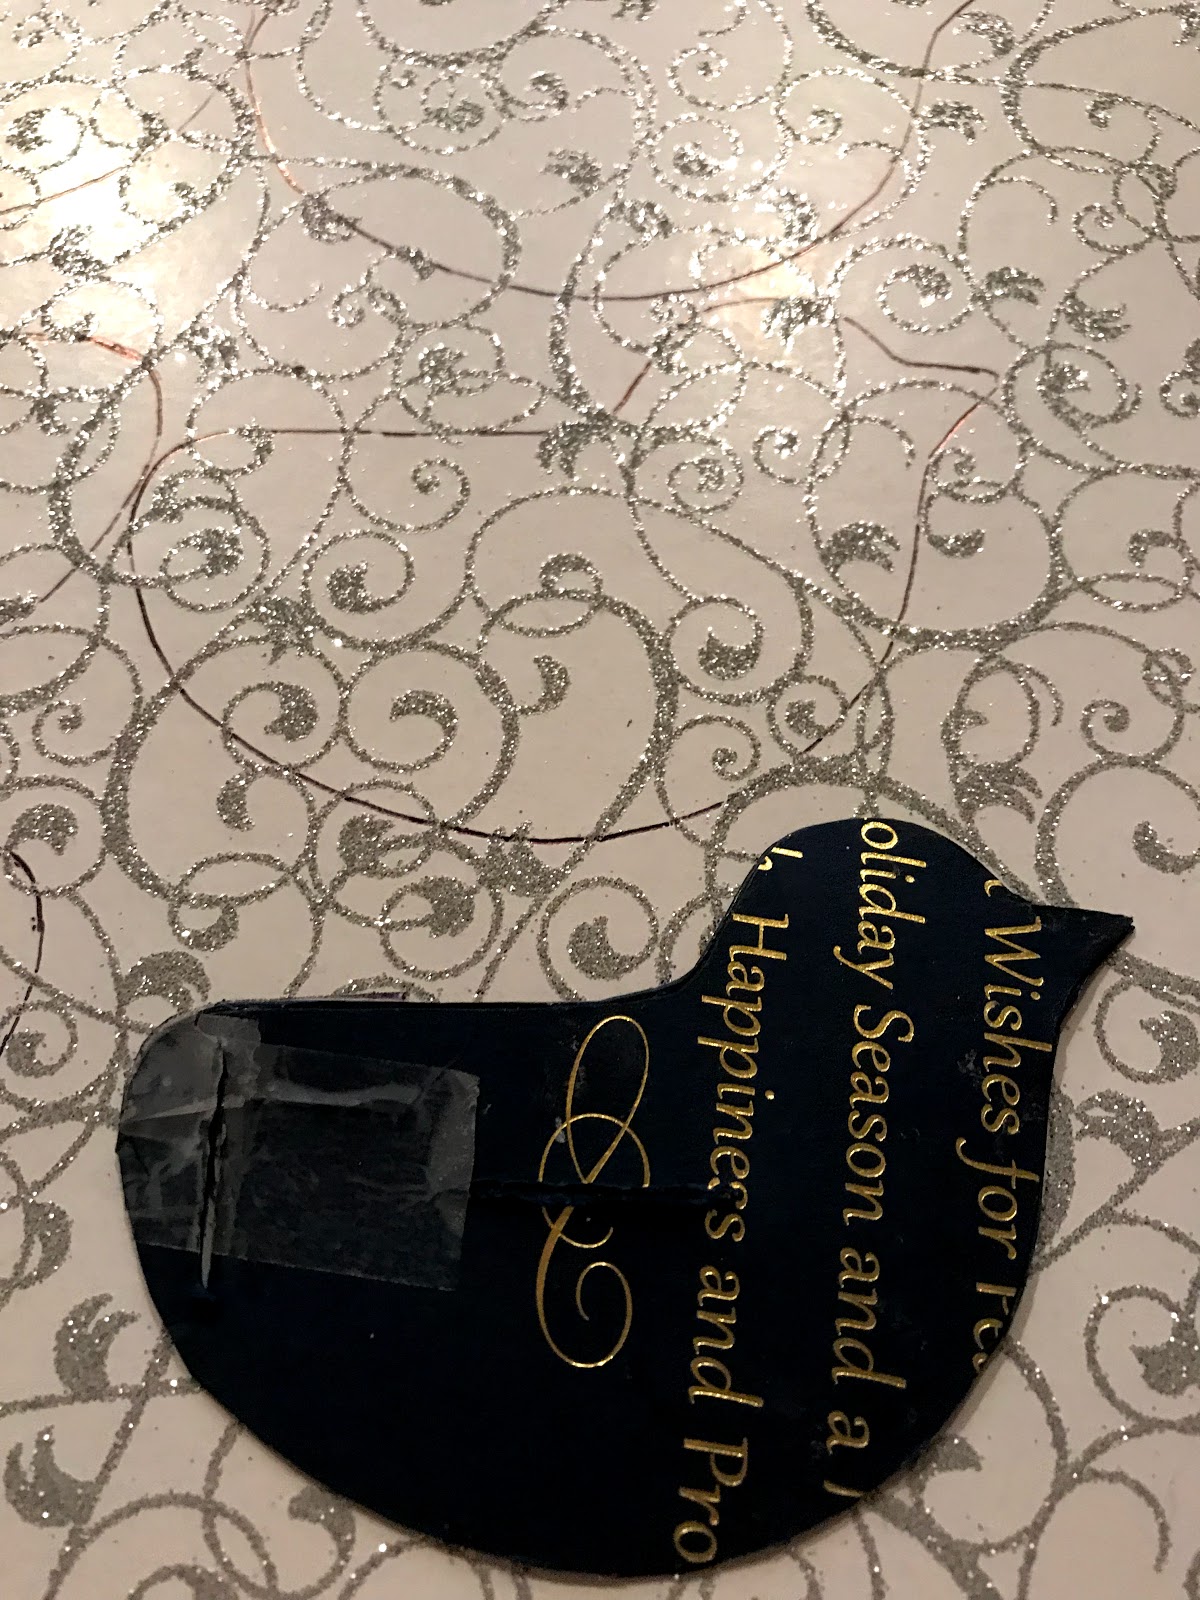
To start, I had to create a template for my bird body.  I did this using the picture above and an old Christmas card and drew my bird free hand, but there are several templates that you can find online if you do not trust your drawing skills.  Just type in bird body template in the search engine and a myriad of options will become available to you.

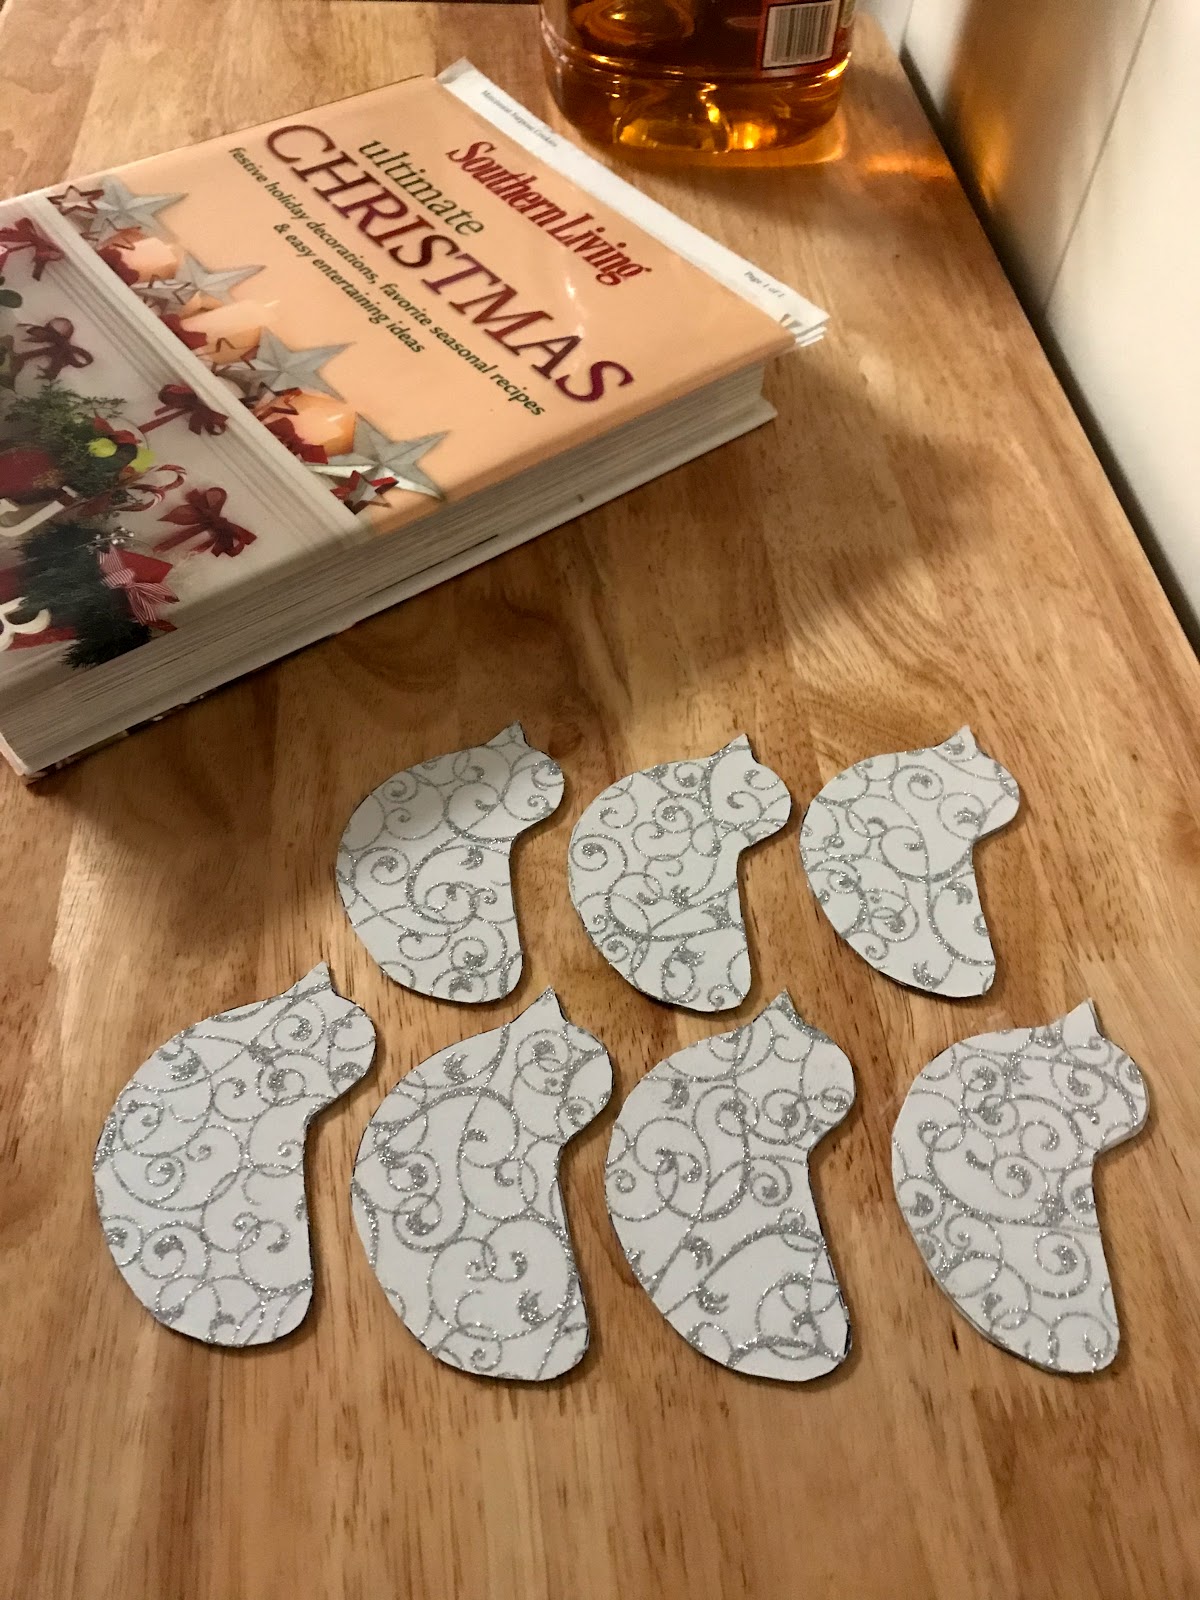
1.  Place your bird template on the scrapbook paper and trace around the bird.  Flip the template over, and place on another part of the scrapbook paper and trace around the bird again until you have a mirror image of the bird you just drew.  Continue these steps, using all of your scrapbook paper until you no longer have any room left to draw birds.
I tried to show this step in the picture below, but it is kind of hard to see with all of the sparkly glitter on this paper all the outlines of the birds that I drew, but if you look closely above the bird template, you will see the outline of my birds.


2.  Using a pair of scissors, cut out all of the bird bodies.

3.  Take one bird body and put glue all along the back of the body.  Take the mirror image cutout of the bird and place them back to back and press together tightly.  Once all of the birds are glued together, line them up and place them under a heavy book to dry so that they will dry flat and as glued together as possible.  


Because of the size of my birds, I was able to make 7 birds that faced right and 7 birds that faced left from one piece of paper, creating a total of 7 birds.  You may be able to make more or less depending on the size of your birds.  Let the glue dry completely before you move on to the next step.  I let mine dry over night just to make certain they had dried completely.

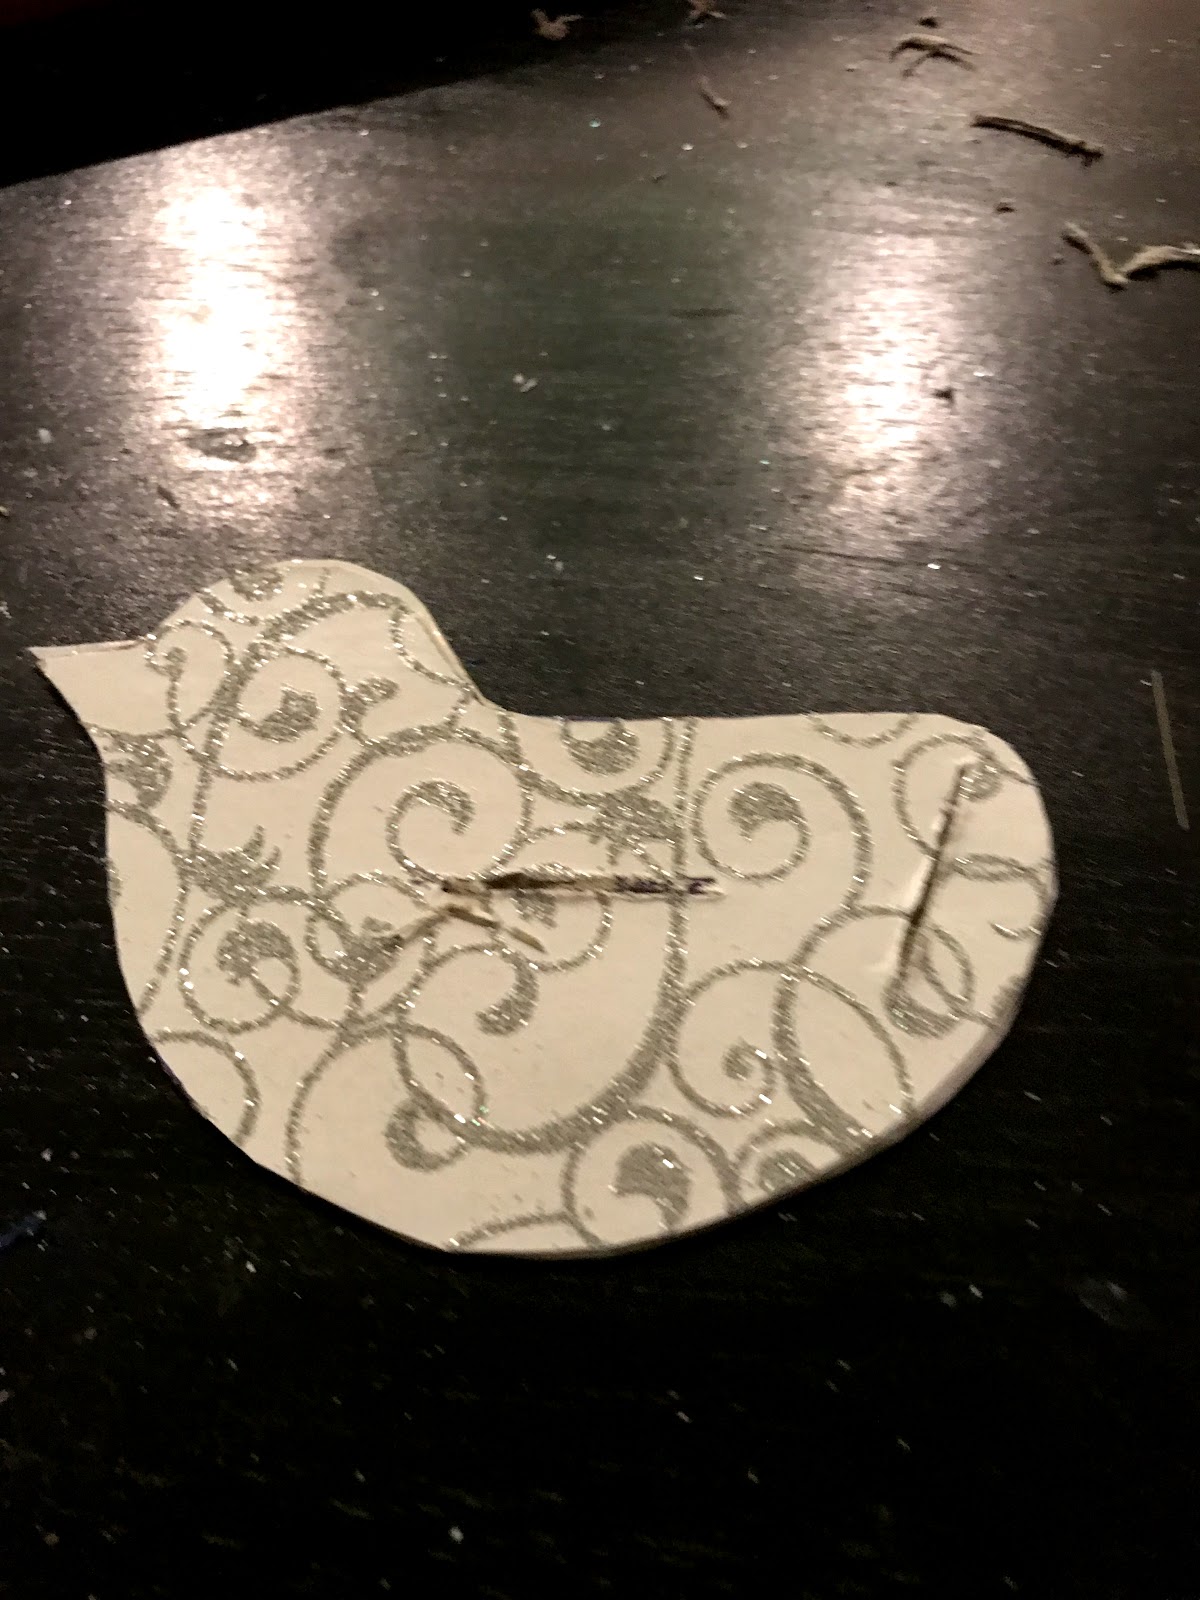
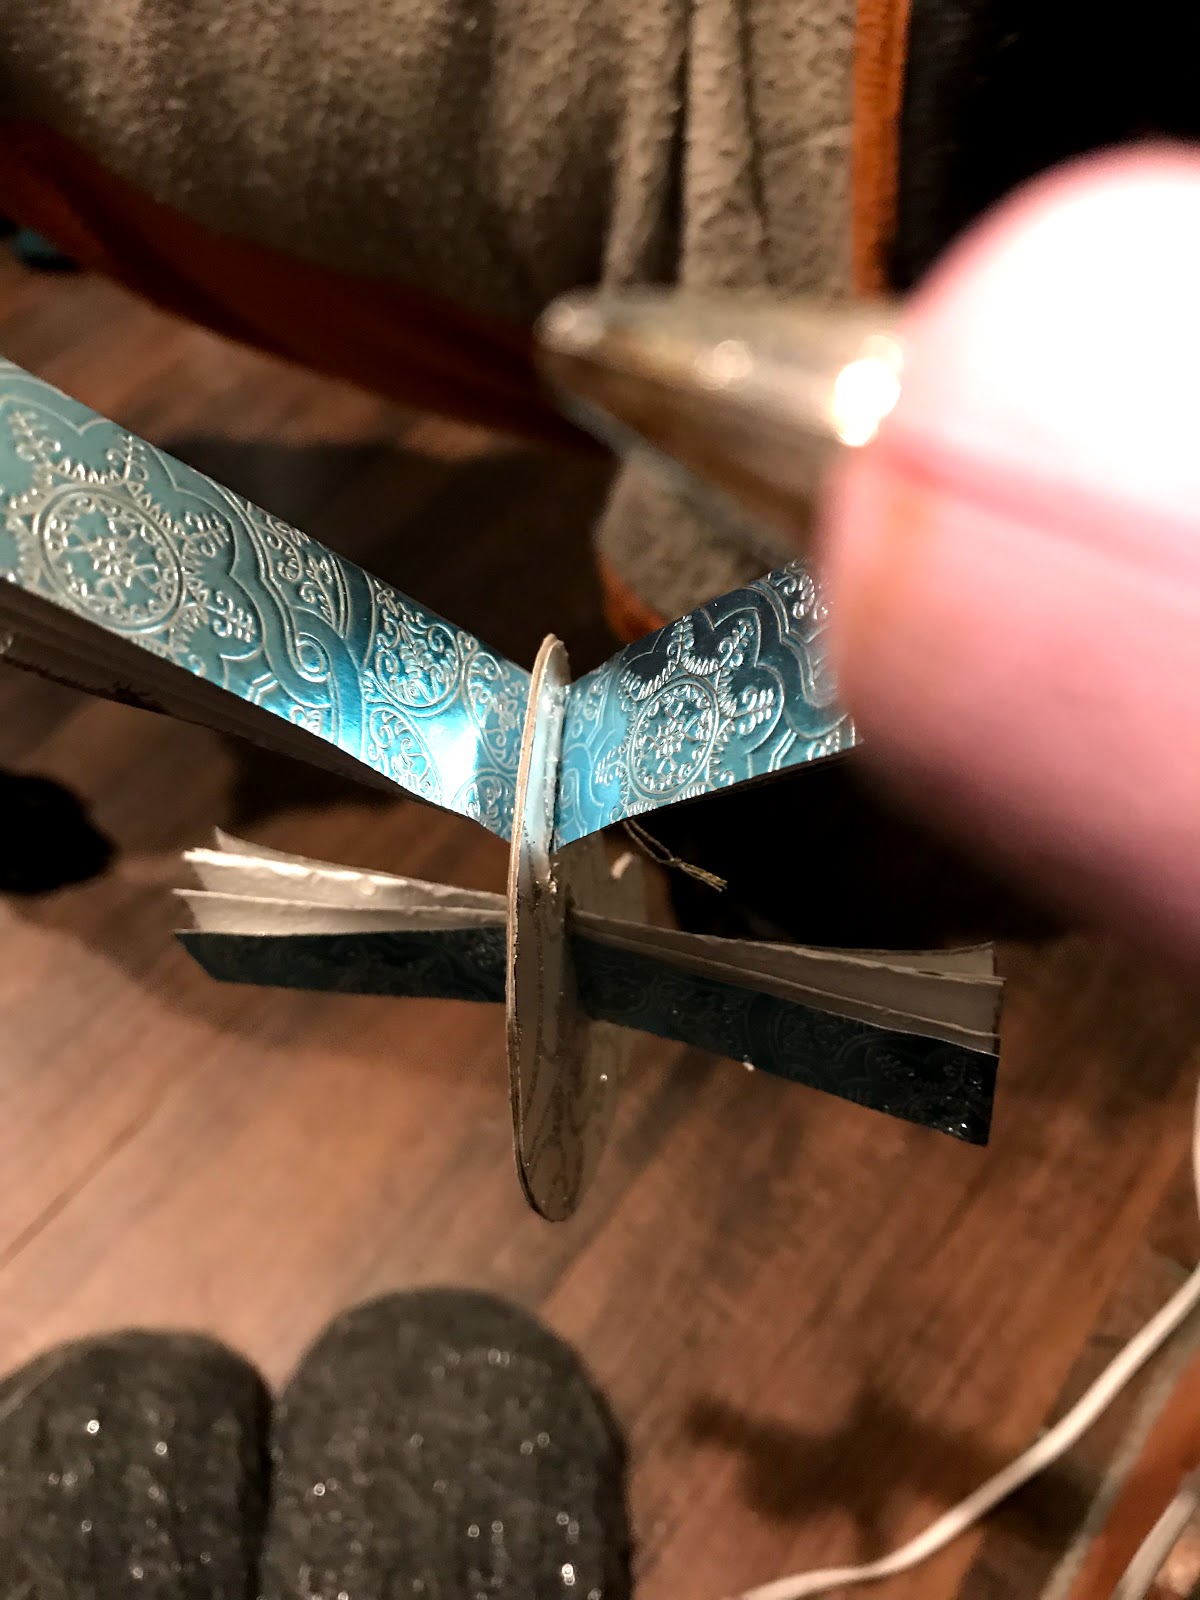
4.  Using a ruler mark a 1.5 centimeter horizontal line in the middle of the glued together bird body.  Toward the back of the bird, do a 1.5 centimeter diagonal line, with the diagonal moving down to the left.  Use the picture below to get an idea of where the lines should be drawn.


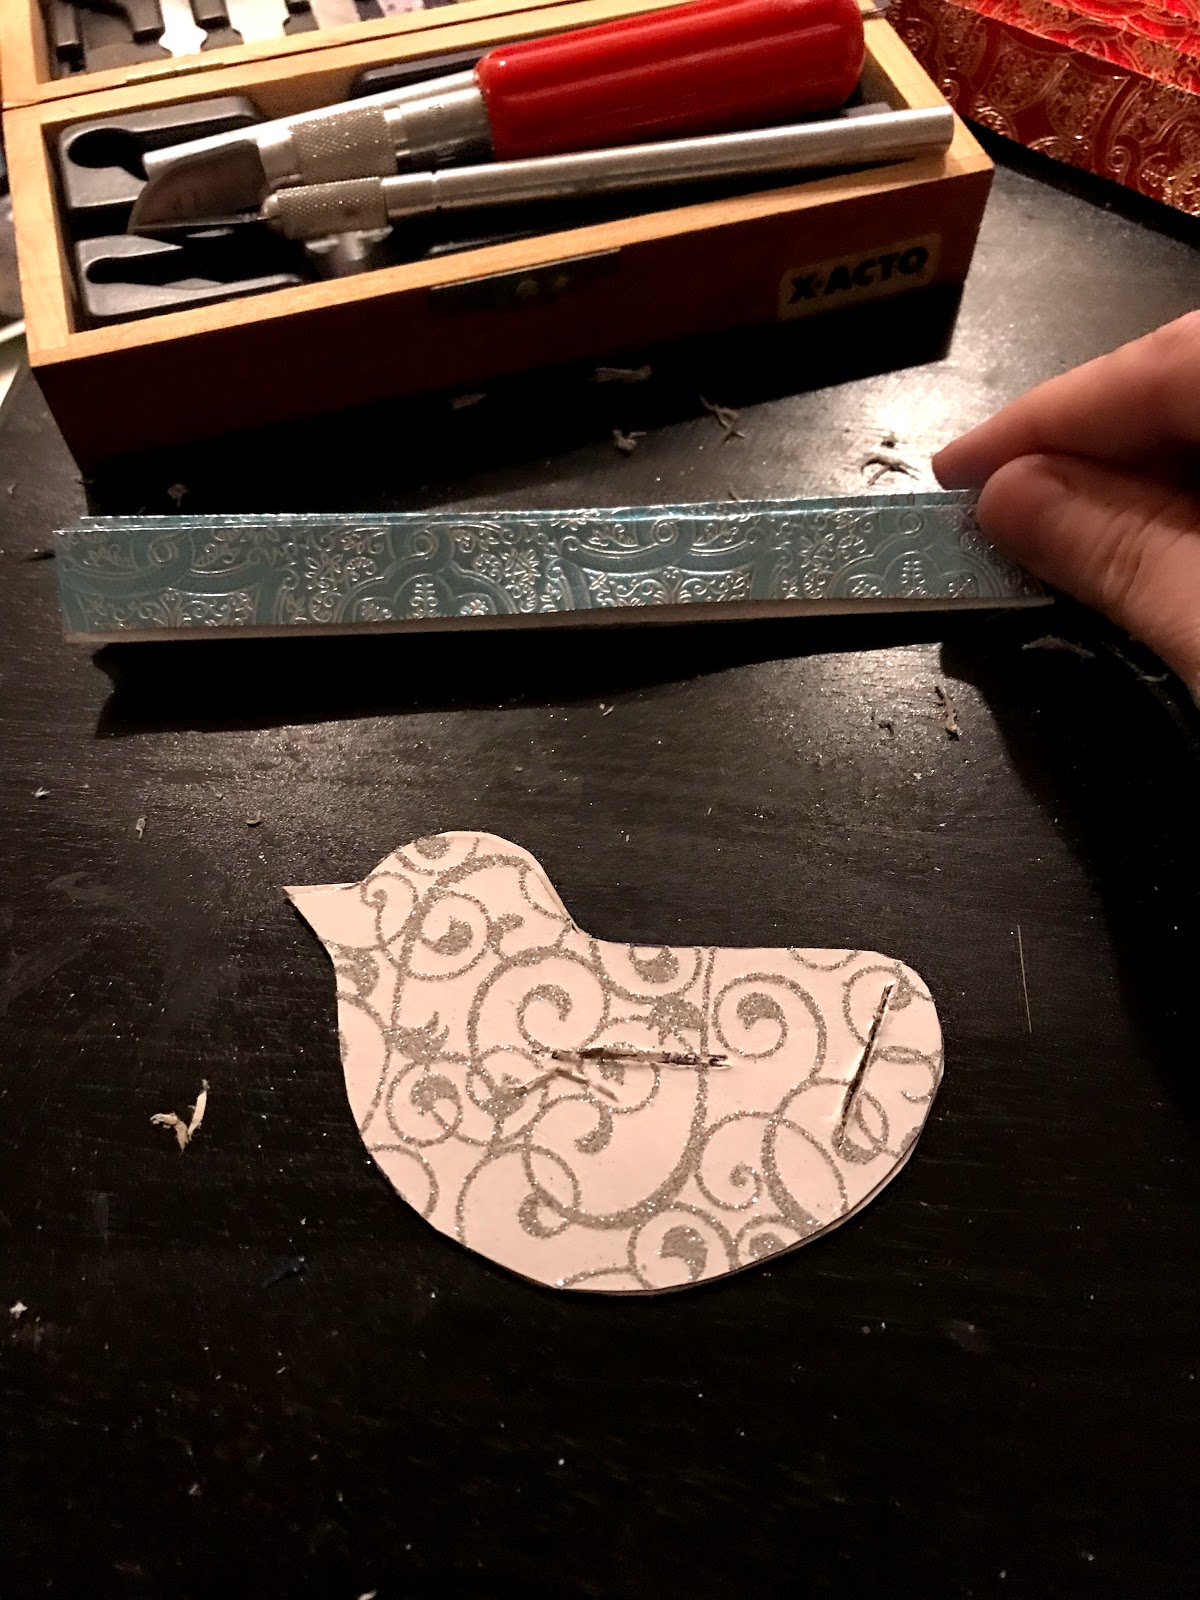
5.  Using an Exacto knife or razor, cut the lines until you have a space just wide enough for a folded piece of paper to fit through.

6.  Using the ruler measure out the length and width of the wings and the tail on the wrapping paper.  Using the scissors, cut these out of the wrapping paper and make as many as you need.  For me I needed enough to complete seven birds
My tail was 6 inches long and 4.5 inches wide. 
Start the first fold lengthwise and make the fold one centimeter in width.  Flip the paper to the opposite direction and make another fold.  Basically, use the same technique that you would use to make a paper fan. 
For the tail, with the measurements that I gave you, there should be five total folds in the tail.

For the wings my paper was 14 centimeters in length and 9 centimeters in width. 
Again, fold the paper lengthwise to one centimeter in diameter and fold back and forth using the fan technique.  Using the measurements given, there should be a total of 7 folds in your wings.


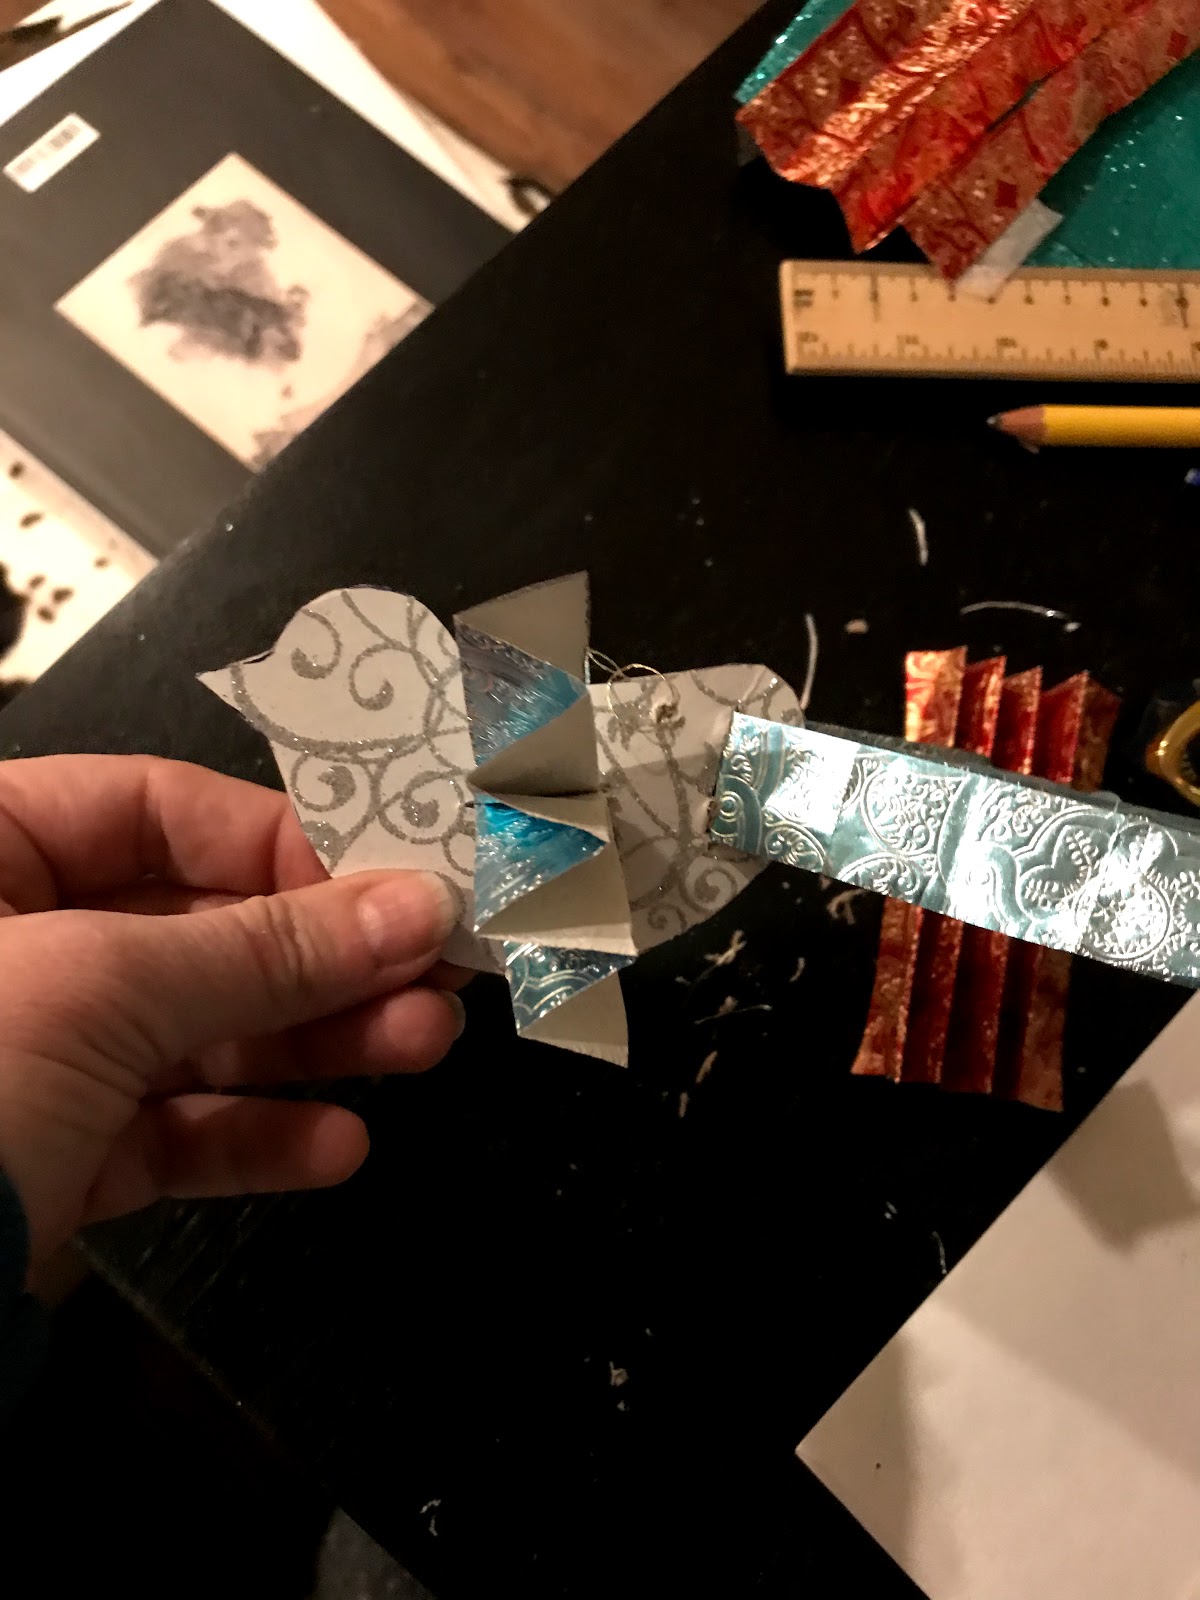
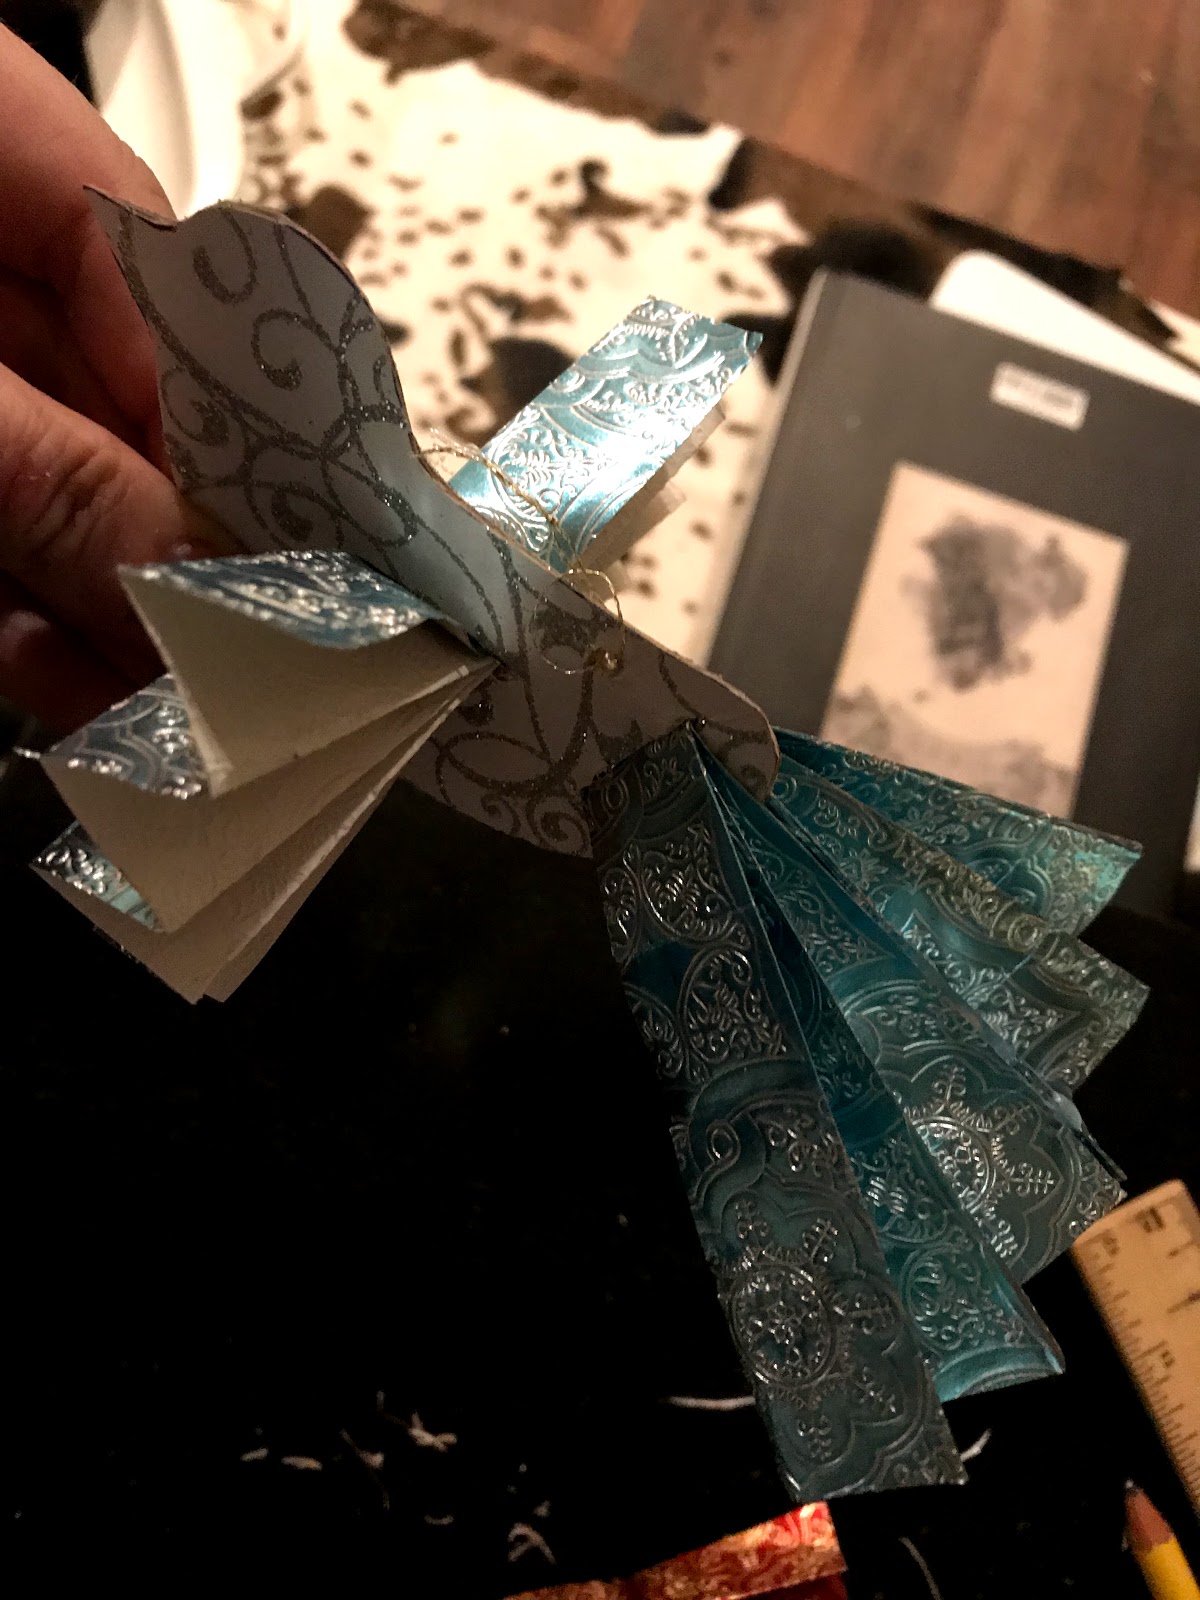
 7.  Take your "wings" and gently slide them into the horizontal slot you have made in the bird body, sliding them so that they are split in half by the body forming two wings of equal length.  (The colored part of the wrapping paper should be facing toward the bird's head.)

Take the "tail" and gently slide it into the diagonal slot.  Slide until your tail is evenly split in half.  (The colored part of the wrapping paper should be the top, the white should be the bottom.)


8.  Fold the tail so that the two halves are pressed together.  Using the hot glue gun, glue the two end folds together forming one single tail.  (If this seems confusing, look at the picture for clarification.)


9.  Once the glue has dried, "fluff" your wings and tail so that they are spread wide to look like a bird in flight.

10.  Using the tip of the Exacto knife, put a small hole in the bird directly behind the wings.  String some embroidery thread to make a loop.  This will be how you hang your ornament.


And there you have it!  A beautiful ornament that cost you pennies to make.  

I also promised you a recipe!
This is not one of my recipes, but it is one of my favorite for the holiday season.  As the holidays progress and you host/attend and gift your way through the many holiday parties,  you may find your self with a multitude of little cheeses that aren't enough to keep out on the cheeseboard or to use in a recipe, but are too big to throw away.  A couple of years ago I found this recipe from Alton Brown and it has been one of my go to recipes ever since.  I have the link below but, just in case it doesn't work, I have included the recipe as well.


Fromage Fort


Ingredients
1 lb left over cheese*, at room temperature
1/4 cup dry white wine
3 tbsp. unsalted butter, softened
1 tbsp. dried dill weed  (This is my change, Alton uses 2 tbsp. fresh parsley leaves)
1 small clove garlic

Instructions
1.  Remove any rinds form the hard cheeses.
2.  Grate the hard cheeses.  Cut the softer cheeses into 1/2 inch cubes.
3.  Place cheese, wine, butter, herbs and garlic in food processor and blend until smooth, approximately two minutes.
4.  Serve immediately or refrigerate for at least one hour for a firmer consistency.

This can be stored in the refrigerator for up to one week.

* You may use any left-over cheese you wish, such as cheddar, parmesan, provolone, fontina, camembert or St. Andre.  Make certain that you use a combination that is not too salty

Frugal Femme NOTE:   You do not have to use dill or parsley.  I have used Herb de Provence and Italian seasoning depending on the cheeses that I had on hand.  Rosemary, basil and chives are also good choices, but go light on the rosemary as it can overpower if you put too much.
I have also taken out one tablespoon of the butter and replaced it with 1 tablespoon of flavored olive oil.  My personal favorite is a Tuscan Herb olive oil.  What I am saying here, is don't be afraid to deviate from this recipe.  Use it as a template and use the items that you think will taste good.

Well, that is it for this post, but I'm not done with the holiday fun yet.  In an upcoming post, I will tell you how to make a truly elegant meal for ten people for under $85.

Happy Holidays!


Saturday, February 4, 2017

Are you ready for some football?!?!?!?!? Super Bowl Party Recipes

Hello Everyone!
I have missed posting so much.  But I am back and plan on doing at least one blog a week until I have the chance to put up my next two week menu.  I'm going to make a horrible confession here...... I don't care for NFL football.  I do, however, love the Super Bowl.  Not the game so much, but I love to watch the commercials and the half time show.  As long as my husband and I have been together, and he doesn't really love football either, we have watched the Super Bowl.  Sometimes we go to other's homes and participate in their game day festivities and sometimes we decide to watch with just the two of us at home.  Whether at home or as a guest, I always make Super Bowl food and, over the years, we now have our own traditional dishes.  I would love to call it a meal but, the truth is, that none of the food is healthy enough to qualify as a meal.

Its an unfortunate truth for people in Louisiana, that the Super Bowl and Mardi Gras are almost as big a holiday on the calendar as Christmas and Thanksgiving.  Because of this, many of us don't even try to start our "New Year's" diets until after Ash Wednesday, it would just be pointless and miserable and require far too much self control.  With this in mind, I am going to give you some of my favorite Super Bowl recipes.  I apologize that I will not have any pictures to go with these recipes but, sadly, I will not be making these dishes this year because I will be at the theatre rehearsing for a show.  If I can't eat them, sharing them with you will be the next best thing.

One thing to note, these recipes, as written below, are written assuming that you are preparing for a Super Bowl party with more than two people.  If there are just two of you, these recipes are the rare exception where you can half the amount of ingredients and they come out just as delicious.

Bacon and Cheese Dip


I have had this recipe from the beginning.  I am sure that I pulled it from somewhere and doctored it to fit my own personal taste, but I couldn't tell you where I first found it.  This is one of my husband's favorite foods. It is so unhealthy and decadent that I only make it once a year. (Although I do try to use healthier alternatives in this recipe - so as not to have an immediate heart attack.)

Ingredients
2 packages, 8 ounces each, reduced-fat cream cheese, softened and cut into cubes
4 cups (16 ounces) shredded, reduced fat sharp cheddar cheese, shredded OR 4 cups shredded Colby Jack cheese  OR two cups of each
1 cup evaporated skim milk OR 1 cup half and half
2 tbsp. yellow mustard
1-2 tbsp. onion, diced
2-3 tsp. Worcestershire sauce
1/2 tsp. salt
1/4 tsp. hot pepper sauce (If you're feeling brave, do 1/2 tsp. hot pepper sauce)
1 pound bacon cooked and crumbled (You can use turkey bacon if you are trying to make this healthier.)

Instructions
1.  Place all ingredients, excluding bacon, in a large slow cooker.
2.  Cover and cook on low, stirring occasionally, 1 hour or until cheese melts.
3.  Stir in bacon and adjust seasonings as desired.

Serve with crusty bread or fruit and vegetables dippers.

NOTE:  This cheese tends to get thick very fast after it melts, even when kept on warm in the crock pot.  Depending on how long the cheese will be out, you may have to thin with a liquid.  I have done several variations of thinning the cheese and here are some of my favorites:
Stout Beer
Port Wine
2% Milk
The amount you will want to add to the cheese mixture will depend on how thick the cheese mixture has become.

Buffalo Chicken Dip


I only discovered this recipe about three years ago at a friends party.  I loved his version, but it was a little spicy for me, so I made a few adjustments and came up with this recipe.  This recipe still has a kick, so you can always cut the heat by adding more Ranch and Blue Cheese dressing after the dip is done baking.

Ingredients
2 packages, 8 ounces each cream cheese, softened
1/2 cup blue cheese dressing
1/2 cup Ranch dressing
1 cup buffalo wing sauce (I like Louisiana Buffalo wing sauce.)
3 skinless, boneless chicken breasts, boiled and shredded
2 cups cheddar cheese,  shredded

Instructions
1.  Preheat oven to 375 degrees.
2.  In a large bowl, combine softened cream cheese, Ranch dressing, blue cheese dressing and buffalo wing sauce.  Using a mixer (or a heavy duty spoon) mix until smooth and creamy, about three minutes.  (Longer if you are mixing by hand.)
3.  Fold in shredded chicken and one cup shredded cheddar cheese.
4.  Pour into a baking dish.  Top with one cup of remaining shredded cheddar cheese.
5.  Bake for 20 minutes, or until dip is warmed through.

Serve with tortilla chips, crusty bread, crackers or celery.


Corned Beef Dilly Dip

This is my FAVORITE dip.  I think I found it in a party cookbook published in the 1950's.  Everything about this recipe sounds horrible, but when you put everything together it is AMAZING.  To be fair, my husband likes it alright but thinks that it is a total waste of corned beef - he thinks that the corn beef could be better served in a hash with an egg with runny yolk served on top.  I have used leftover corned beef roast in this recipe, but it actually works better with canned corned beef.

Ingredients
1 can (12 ounces) corned beef
2 cups (16 ounces) sour cream - you can use low-fat sour cream
2 cups mayonnaise - you can use low fat mayo, but DO NOT use Miracle Whip
2 tbsp. onion, finely chopped (I usually mince mine)
2 tbsp. snipped fresh dill or 2 tsp. dill weed
1/2 tsp. Zatarain's Creole Seasoning (You can also use Tony's but I find that makes the dip too salty)

Instructions
1.  Crumble corned beef into a large bowl.
2.  In a separate small bowl, combine the sour cream, mayo, onion, dill and Creole seasoning.  Stir until combined.
3.  Pour sour cream mixture over beef, toss to coat.

Serve with crackers or vegetables

So there you have it!  Some awesome dip recipes for Super Bowl Sunday.  I'll be back very soon to do some posts for Mardi Gras and Valentine's Day.

Monday, December 12, 2016

Leftover Roast Turkey Pasta Soup - Wednesday, One Week Menu

Hello Everyone!
Still playing catch-up and on my second blog of the day.
I know that I have already shown you how to make gumbo and that is a type of soup, but I REALLY love soup, and I love to make soup out of leftovers.  This recipe can also work with chicken.  In fact, I may have already posted it with chicken, but it was really meant for turkey, so I thought that I would add it again.


Leftover Roast Turkey Pasta Soup

Ingredients
1/2 cup onion, diced
1 medium carrot, diced
1 stalk celery, diced
1 tbsp. olive oil
2 cups homemade chicken broth, or one can 14.5 oz. each chicken broth
2 cups water
1 envelope Good Seasonings Zesty Italian Salad Dressing Mix
2 cups leftover turkey, cubed
1/2 cup bite sized pasta of your choice, uncooked

Instructions
1.  In a large, heavy bottomed stock pot, heat oil over medium heat until the oil starts to "shimmer".  
2.  When the oil is ready, add the onion, carrot and celery and cook until the vegetables are tender, about 3 to 5 minutes, stirring occasionally.
3.  Stir in chicken broth, water and dressing mix.  Bring to a boil.
4.  Add the turkey and the pasta and cover.  
5.  Reduce heat to medium-low; simmer 10 to 12 minutes until pasta is tender.


Grown-Up Grilled Cheese Sandwiches with Cheddar Cheese and Shallots


I always have leftover, non-cooked shallots when I do my pan roasted shallots, this recipe helps make certain that they are used before they go bad.  This recipe is not my recipe, I got it from America's Test Kitchen in their free recipes.  I tried to find it online again but I guess it is too old or I looked up the right name.  So I am going to put their recipe here, but I also thought that I would include ten other grown up grilled cheese sandwiches from the queen of diy-Martha Stewart.


Ingredients
7 ounces aged cheddar cheese, cut into 24 equal pieces; at room temperature
2 ounces Brie cheese, rind removed (or the mini Trader Joe Brie with the rind)
2 tbsp. dry white wine or vermouth
4 tsp. minced shallot (can also use green onion)
3 tbsp. butter, softened
1 tsp. Dijon mustard (I like the ones that have dill or champagne in them)
8 slices hearty, white sandwich bread

Instructions
1.  Process cheddar, Brie and wine in a food processor until a smooth paste is formed, 20 to 30 seconds.  Add shallot and pulse to combine, about three to five pulses.
2.  Combine mustard and butter in a small bowl.
3.  Spread the mustard butter mixture evenly over one side of slices of bread.  Flip four slices of bread over and spread cheese mixture evenly over slices.  Top with remaining four slices of bread, buttered side up.
4.  Preheat 12 inch nonstick skillet over medium heat for two minutes.  Place two sandwiches in the skillet; reduce heat to medium-low; and cook until both sides are crispy and golden brown, 6 to 9 minutes per side, moving sandwiches to ensure even browning.
5.  Remove sandwiches from skillet and let stand for two minutes before serving.
6.  Repeat with remaining two sandwiches.

Two more  days of recipes left to go.  I will keep trying to post more than one a day so that I can do some of my Christmas posts.