Showing posts with label recipe - eggs. Show all posts

Sunday, May 3, 2020

Ideas for a lazy Sunday or day in Quarantine. Including:French Country Omlette Recipe and Homemade Natural Mosquito Repellent

Hello Everyone!
I have been working on a post for this site since the official quarantine date of March 13th.....
This is not that post.
I am just drawing a creative blank on how to wrap up my "I Tried My Great Grandmother's Skincare Routine".  The words just are not coming.  So, to try to get my writing juices flowing again, I thought I would do another post of things that you can do on a lazy Sunday.  Or, in this crazy world that we are currently living in, things that we can do during Quarantine.


Yesterday, I spent the day deep scrubbing the kitchen, therefore I felt that I could laze around this Sunday and not feel guilty or like I should do something more industrious.  Thus the inspiration for this post.

I started out the day by making brunch.
My husband took Moss, our adventurous French Bulldog, on a trip to the coffee house to get me some fancy froo-froo coffee and I started preparing an omelette.
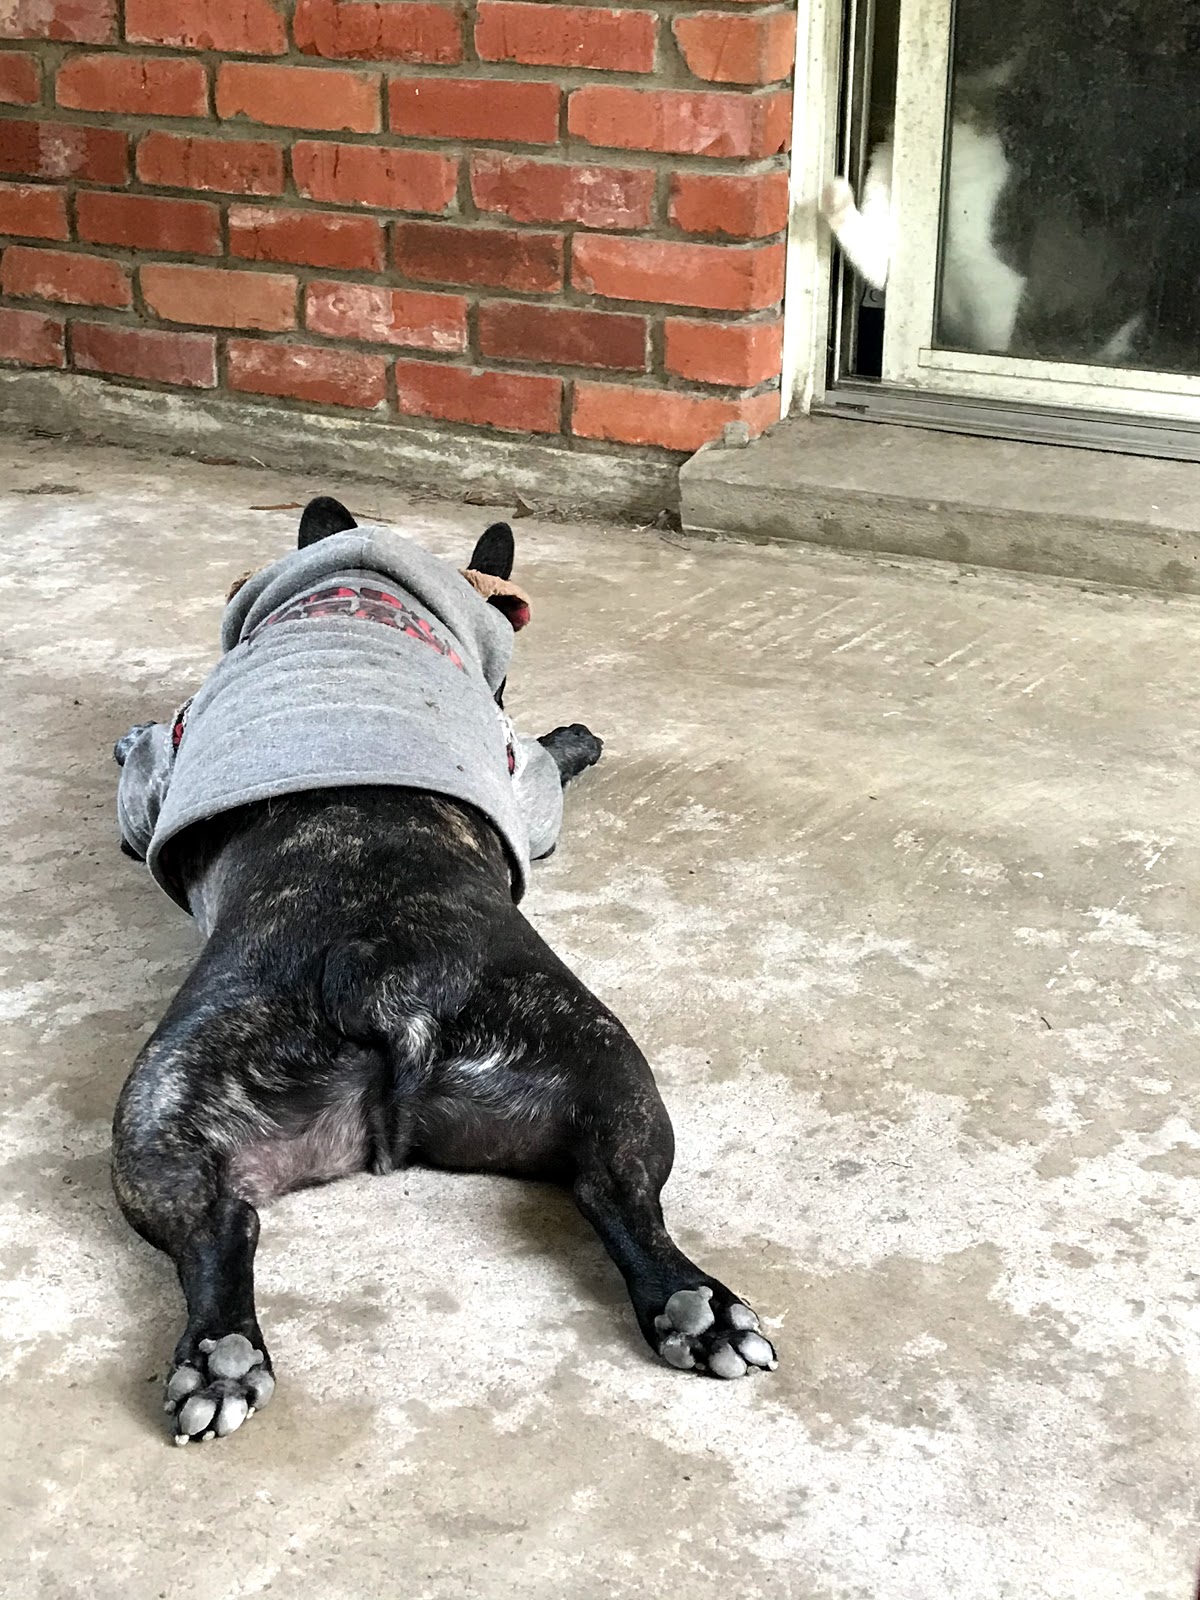
This is Moss splooting and tormenting the cat at the same time.  He is a professional splooter.

Here is what I created....

 French Country Omlette


This recipe was inspired by items that I had in my refrigerator that needed eating and my driving need to pretend like I am eating healthily even when I am not.

Ingredients

1/4 -1/3 cup cooked chicken, diced
1 slice cooked bacon, diced
3 eggs
Half a celery stalk, diced
1 green onion, diced
1 tbsp. onion, diced
2-3 baby carrots, diced
2 tbsp -1/4 cup Caramelized Onion Cheese, Shredded
1/4 tsp. dry dill
1/4 tsp. Herb de Provence
1/4 tsp. dry Basil
Salt and pepper to taste (Or Creole seasoning)
1 tbsp. milk (optional)


Instructions

I find that it is easier, since eggs cook so quickly, to get all of my ingredients ready before I start cooking.  So, technically, preparing all of your ingredients should be your first step.
1.  In a small bowl whisk eggs, milk, salt, and pepper (or Creole seasoning) together until eggs are a pale yellow color and look creamy. Set aside.
2.  In a small, non-stick omelette pan, melt butter, bacon grease, or olive oil on med heat.  Once the oil has heated and is slightly shimmery, add the green onion, onion, carrots, and celery. Stir to mix ingredients.
3.  Add dill, Herb de Provence and Basil to the vegetable mixture and stir to mix.
4.  Cook the vegetables on medium heat, stirring frequently until the onions are sightly caramelized and the carrots and celery have become crisp tender.  (About five-10 minutes.)
5.  Add diced chicken and stir into the vegetable mixture, cook until the chicken has been heated through.
6. Spread the chicken and vegetable mixture along the bottom of the pan.
7. Pouring slowly and carefully, so as not to dislodge the vegetable chicken mixture, add the eggs to the pan.
8.  Let the eggs sit undisturbed for a little bit to help set the bottom of the egg.  Once the sides of the eggs can be lifted from the pan, use a spatula to separate the egg from the side of the pan, then carefully tip the omelette pan so that uncooked egg goes under the cooked egg mixture.  Do this on all sides of the pan until most of the uncooked egg has been distributed under the cooked egg.  Cook for about 30-45 seconds to set the egg.
9.  Now comes the tricky part, flipping your eggs.  Some people, and I am not one of them, can flip an omelette in the pan.  If you are one of these people, I am jealous and wish I had your skill.  But for those people, like myself, who have not mastered the flip, take two spatulas and using them together, very carefully flip your eggs, trying your best to keep the egg in one piece.
10.  Once the egg is flipped, sprinkle the cheese and the bacon, making certain to keep the cheese and bacon to one side of your omelette.
11.  After about 15-30 seconds, depending on how wet your egg was before you flipped it, gently fold one side of the egg mixture over the other half.  Covering the cheese and bacon and forming a half circle omelette.
12.  Slide the omelette out of the pan and onto a plate.
Bon Apetit!

This really is very good and you're starting the day with vegetables, so you can pretend that you are starting your day in a healthy way.

While we were eating, I played a Spotify list that I discovered thanks to the show "What We Do In the Shadows".  Which is one of my favorite shows to watch right now and really is just as good as the movie, which I didn't think was possible.


If you haven't seen the movie or the show, the basic premise is that you watch a household of vampires who live together in one house.  The format is very much in the same moc-umentary style that you can see in "The Office" or "Parks and Recreation" and follows the mundane life of vampires.  It is weird and zany and is one of the things that is helping to keep me sane during quarantine because it is something to look forward to each week.
One of the things I love about the show, is the soundtrack, which is very interesting and contains songs and artists I have never heard of before.  I love the opening theme song and in one of the episodes they end the show with a vintage song called "The Devil Caught me Nappin" which has quickly become one of my favorite songs and will be added to my Halloween mix every year simply just because it mentions the devil.  (It really has nothing else to do with Halloween and isn't paticularly spooky.)  I had to hear this song in its entirety after listening to part of it during the credits and found a Spotify channel that has the song.  It also has some other great vintage songs that I adore so this was quickly added to my library as one of my favorite "channels".


You can just go to Spotify and search for "The Devil Caught Me Nappin".  But, if I did it right, there should be the link underneath to my creepy collection and the song should be there as well.
https://open.spotify.com/?_ga=2.37865443.1189384008.1588544767-191395943.1588544767

After breakfast, one of my super-awesome neighbors had purchased a New York Times for herself and was able to get another one for free.  She thought that my husband and I would like the other copy, rightly so, and left it outside of our door for us to peruse.

Can I just say that the New York Times is doing a stellar job, and least in its Sunday paper, of coming up with puzzles and things to keep the housebound individual entertained.  My husband and I worked together on the crossword puzzle. (Which together we finished.)  And then I decided that I deserved a mani/pedi.


I don't know about other people, but doing my own manicure and pedicure is a very time consuming activity, so it is not something I usually do if I plan on doing other activities.  I did do my manicure while working on the crossword, because my husband was the one writing the answers we were coming up with,  so I could let my many layers of polish, etc. dry while trying to figure out the clues for the various numbers, but I decided that I would do my pedicure in my hammock along with working on this blog.

HOWEVER, the last time that I hung out in my hammock, I got eaten alive by mosquitoes.  (Little blood-sucking monsters.)  One mosquito had the gall to land on my face and leave a bite on my forehead!  Not wanting to add even more bites to my already abused body, I decided that I needed a mosquito repellent.  I am of the generation that has heard all my life that DEET is bad.  I don't even really know what DEET is, or why it is bad, but I remember the campaign and I knew that it was an active ingredient in OFF, so I decided I wanted to make my own version of off, but without the evil that is DEET.

I get a kick out of the name of this repellent.

So I went online to see if I could find anything that would really work.  After a few hours of research, yeah that was fun rabbit hole to go down, I decided that the ingredient that actually works, according to many studies and articles is eucalyptus lemon essential oil.  Great!!!  And I actually had some because it came in a set of essential oils that I had purchased previously to make room deodorizer spray.  Next, I had to figure out how I would apply it.  I saw that some people used alcohol, (um, no) others put it in olive oil, (a little more oily than I am comfortable with and harder to apply than I wanted), and others used witch hazel.  Eureaka!

This is a 1940s ad for mosquito repellent.  I love the name, but having never heard of it, I doubt it is something that still exists.

I love witch hazel and use it as a facial toner before I go to bed and when I wake up in the morning.  In a perfect world, I would have lavender scented witch hazel because lavender also repels mosquitoes as they do not like the smell.  But this is not a perfect world, and I did not have lavender scented witch hazel - but I did have regular non-scented witch hazel, so that is what I used to make my repellent.  I then went to go sit outside and relax in my hammock for a minimum of four hours while I dared mosquitoes to bite me while wearing short shorts and a sleeveless shirt , doused in my natural mosquito repellent to see if my concoction actually worked.  For Science!!!


(Not because I wanted to relax in my hammock during unseasonably nice Louisiana weather.)

I also decided to do this during peak mosquito times, between the hours of 4pm and 8pm, right around dusk when mosquitoes seem to come out enforce.  I also felt that, living in Louisiana, that I was already in mosquito infested territory, so I did not go out to a swamp or anything searching for mosquitoes as my backyard had already proven itself worthy.
To my absolute astonishment, it worked!
I actually saw a mosquito hover above my arm go in to land, think better about, go into land somewhere else, think better about it, and then fly away!  I was stunned.
It only lasts for about four hours and then you have to reapply, but I don't feel that is all that awful as that is about the same amount of time that you have before you have to reapply sunscreen.  The smell also is fairly pleasant as well.  I do think, with the lavender witch hazel it may smell even better, and I may try that the next time I make it, but, then again, I may not.
Want to try it?
Here you go.

Natural Mosquito Repellent 

From Private Snafu vs. Malaria.


Warnings:
1.  This should be tested on the skin first to make certain that you are not allergic to the essential oil or the witch hazel.  (I have never heard of anyone being allergic to witch hazel, but I am certain that is a thing as well.)  So put a small amount on your skin and wait an hour to make certain that you do not have a reaction.
2.  I don't think this should be used on children that are three years and under.  I don't know for sure that it will be harm them, but I know that some essential oils are not good for small children and I would rather be safe than sorry.

Ingredients

45 drops lemon eucalyptus essential oil
6 ounces witch hazel
Spray Bottle

Instructions

1  In a six ounce spray bottle, i had one made of aluminum that I had purchased to make homemade poo-pouri but that I had not used yet, but I am certain that any small spray bottle will work, pour a small amount of witch hazel into the spray bottle.
2.  Add 45 drop of lemon eucalyptus oil.
3.  Add more witch hazel until you reach close to the top of the bottle.
4.  Screw the spray cap onto the bottle and then shake to mix the oil and the witch hazel together.

To Use:
Spray on any part of your skin that would be exposed to mosquitoes.  I even sprayed it on my face and experienced no problems, but again you may want to test this before you go crazy spraying it on your face.
The witch hazel works like an emulsifier, but it would not hurt to shake the mixture every time that you use it.


While I was writing this post and testing the mosquito repellent, I was watching/listening to YouTube.  Here are some of my favorites that I am listening/watching (depending on what I am doing) right now:
(Quick disclaimer.  I found the images for these channels on the internet.  I do not know who took them, so I am not sure who to credit with them.  I hope no one gets angry that I am using them since I am not profiting from this blog, I just do it for fun.)


Timeline Channel


This YouTube channel contains many differently historical documentaries.  Personally, I love the ones about ancient civilizations, but there are also videos for WWII buffs and more.

BuzzFeed Unsolved


Hosted by Ryan Bergara and Shane Madej, this one makes me smile every time that I watch it.  Despite the fact that many times the two hosts are talking about grisly murders.  I like to watch both their true crime unsolved and their supernatural unsolved for very different reason.  The crime one has very interesting crime stories that one aspect of them still remains unsolved.  The supernatural one they go places that are reported to be haunted and try to prove the existence of ghosts.  These are arguably the funniest because Ryan is a fervent believer in the supernatural and Shane is the most  skeptical of skeptics that I have ever seen.  The interaction between the two of them during their supernatural videos makes me laugh out loud.

TwoSet Violin


Hosted by two classical violin musicians, Brett and Eddy, these guys are hilarious to anyone who does some sort of performing or knows even a tiny bit about music.  They have a variety of videos where they roast movies where the actors "play" the violin badly, violin charades, and many other videos.  If you start watching them regularly, you will be using Ling Ling in your daily lexicon.  My husband and I have gotten so hooked on this duo we even bought their merch.

Here are Knick and I in our Two Set t-shirts


Poppen Atelier


She posts every Friday and all she does is repaint dolls.  (Usually from the Monster High Doll series.)
I know, it doesn't sound that interesting but it so is!!!
This one I came across as a fluke while I was trying to figure out how to fix my vintage Barbie and the Rockers curly hair,  and ended up watching her videos for three solid hours.
It's so soothing and relaxing.  I can't explain why, and I have no intentions of ever painting dolls, but I love this channel.


Baumgartner Restoration


I really don't know how I found this channel, maybe because I was watching some Bob Ross videos, but once found, I was hooked.
I find his videos fascinating.
His whole channel is just him filming the steps he uses to restore old paintings brought to his studio, and it is amazing.  You would not believe the difference between the paintings as he receives them and what they look like when he is finished.  The picture above gives you just an inkling of an idea, you really have to watch his videos.  This is another one that I have sucked my husband into watching and we now watch together.


Rachel Maksy

Rachel probably took this picture for her Instagram - its just a guess, but....there you go. This is from one of my favorite of her videos where she embroiders Ron Weasley's sweater......poorly, but with enthusiasm - which is why it is one of my favorites.

Without a doubt my favorite channel.
Her channel used to be known as the Pinup Companion and I found her because she also dresses vintage like me and does vintage lookbooks.  After watching a few videos I became obsessed with her.  I find her hilarious, her dog Frodo is super cute, and she does a multitude of different types of videos.  Some of my favorites are her craft videos. She isn't afraid to do videos where she has no idea what she is doing.  Which is the complete opposite of what I try to do for this blog, but I find very entertaining when it is not myself.
My husband says that I should include some of my fails so that people don't think that everything comes easy.   I might....... I'm thinking about it.
But back to Rachel!
I have, literally, spent an entire day just watching/listening to her videos, so, yeah there is that.

And that was, pretty much, my Sunday.
So those are some of my ideas for spending a relaxing Sunday OR day in quarantine.  What are yours?  Is there anything that you enjoy that you think I should take a look at?

I hope you found this post helpful or entertaining and I promise I will try to be back soon!


Tuesday, July 3, 2018

Fourth of July Fried Egg and Black Garlic Burger

Hello Everyone!
I am all excited because the Fourth of July is tomorrow.


 I love fireworks, swimming at the lake, music by Sousa and, this should a surprise to no one, eating the food!  Although its not the holiday most associated with food, I love to plan an Americana menu to celebrate the day.  And there are so many options to choose from - YUM.  You can grill and do hot dogs and hamburgers with potato salad and coleslaw.  Or you can do fried chicken with mashed potatoes and biscuits. Oooo.  Or ribs with broccoli salad.  The options are delicious and limitless.
As limitless as they are, for this post, I have decided to share a recipe for a hamburger with you.  This recipe was inspired by three things steak and eggs, Bob's Burgers, and McCormick's Black Garlic Powder.  For those of you who don't watch Bob's Burgers there are two things that you need to know: #1.  The show is hysterical and you really should watch it.  #2.  Bob always has a special burger of the day with a pun-ny name.  The burger that I most wanted to try was the Bet It All on Black Garlic burger that was made during season five.  For a person who loves food and garlic I had never heard of black garlic.  So the first thing that I had to do was go online and see if that was a real ingredient -- it was!  The second thing that I had to do was make that burger. 
Fortunately for me, my husband was 100% behind me wanting to make this burger and even got me the cook book so I could have one version of the recipe for us to try.


It was delicious. 


Black garlic is delicious and a taste sensation that I can't describe - but is nothing like you would expect.  Unfortunately, black garlic is expensive and doesn't last long.  If you don't use it almost immediately after opening it goes bad.  And the flavor is strong.  So using it every day for a week was more than I could do - no matter how delicious it was.
Which meant that I was thrilled when I found a black garlic alternative that actually gives the taste of black garlic without the shelf life of black garlic.  McCormick makes a black garlic powder!
I bought this on Amazon for way less what I paid for real black garlic.  I was skeptical, but I started to experiment.  And one of the things that you can make with this that is delicious is black garlic butter.  So I started putting the garlic butter on everything - including the steak and eggs I made for breakfast one morning.  Which then started me to thinking about doing steak and eggs in a more portable version.  And thus, this recipe was born.


Fried Egg and Black Garlic Burger


Ingredients
1 lb ground chuck
1 egg
1 tsp. Worcestershire Sauce
1/4 cup Garlic and Herb bread crumbs
2 tbsp. minced shallot
Creole seasoning, to taste
1 tsp. garlic powder
black pepper, freshly ground to taste
black garlic powder, to taste
2 tbsp.butter
1 egg (per burger)
1 brioche bun, per burger

Instructions
1.  Prepare the garlic and herb bread crumbs.  There are two ways that you can go about doing this, you can make homemade bread crumbs or you can doctor bread crumbs that you can buy in the store.  Personally, I like to make my own and you can find several recipes to make your own online.  But if you don't have the time or the inclination to make your own, then just put about 1/8 to 1/4 teaspoon of the black garlic powder into 1/4 cup of the store bought prepared breadcrumbs.  Mix together well and taste.  You can add more black garlic powder if you feel the black garlic flavor is not coming through enough.
2.  Put two tablespoons butter into a small microwave-safe bowl and microwave until the butter is completely melted, about 10 seconds.  Sprinkle with black garlic powder and stir until the butter and garlic powder are well blended.  Set aside.
2.  In a large bowl combine the ground chuck, 1 egg, Worcestershire sauce, 1/4 cup bread crumbs, shallot, creole seasoning, garlic powder and pepper.  Mix with your hands until everything is completely combined.  If the burger is to wet to hold together, then add more bread crumbs.
3.  Split the meat mixture into four equal portions and form into patties.  Make sure to press the center down with your thumb to create a divot in the center of the burger- this will help the burger to stay flat as it cooks.
4.  Cook the burgers the way you prefer the burgers to be cooked.  They are good cooked on the grill or on a griddle.  I personally like to cook them so that they are medium to medium well and I like to cook them on a grill pan on the stove top so that I can make them in the air conditioning but still have some grill flavor.
5.  While the burgers are cooking, start frying the eggs.  For this burger, I like to cook them sunny side up with a runny yolk.
6.  Once the burgers and eggs are cooked, its time to assemble the burgers!
     First, place the meat patty on the bun.
     Then put the fried egg.
     Drizzle the black garlic butter over the egg and the burger.
Because of the egg yolk and the black garlic butter, you don't really need any other dressings for the burger.  But if you are worried that you need something more or the burger will be dry, then you can always add the black garlic mayo from the Bet It All On Black Burger recipe I pictured above.

Well, that is it for today's post, I hope that y'all have a safe and happy Fourth of July and get the chance to enjoy the burger!

Monday, May 21, 2018

A Great Week! Turkish Inspired Eggs, Enjoying My Outdoor Space and Basil in a Hammock!

Hello Everyone!
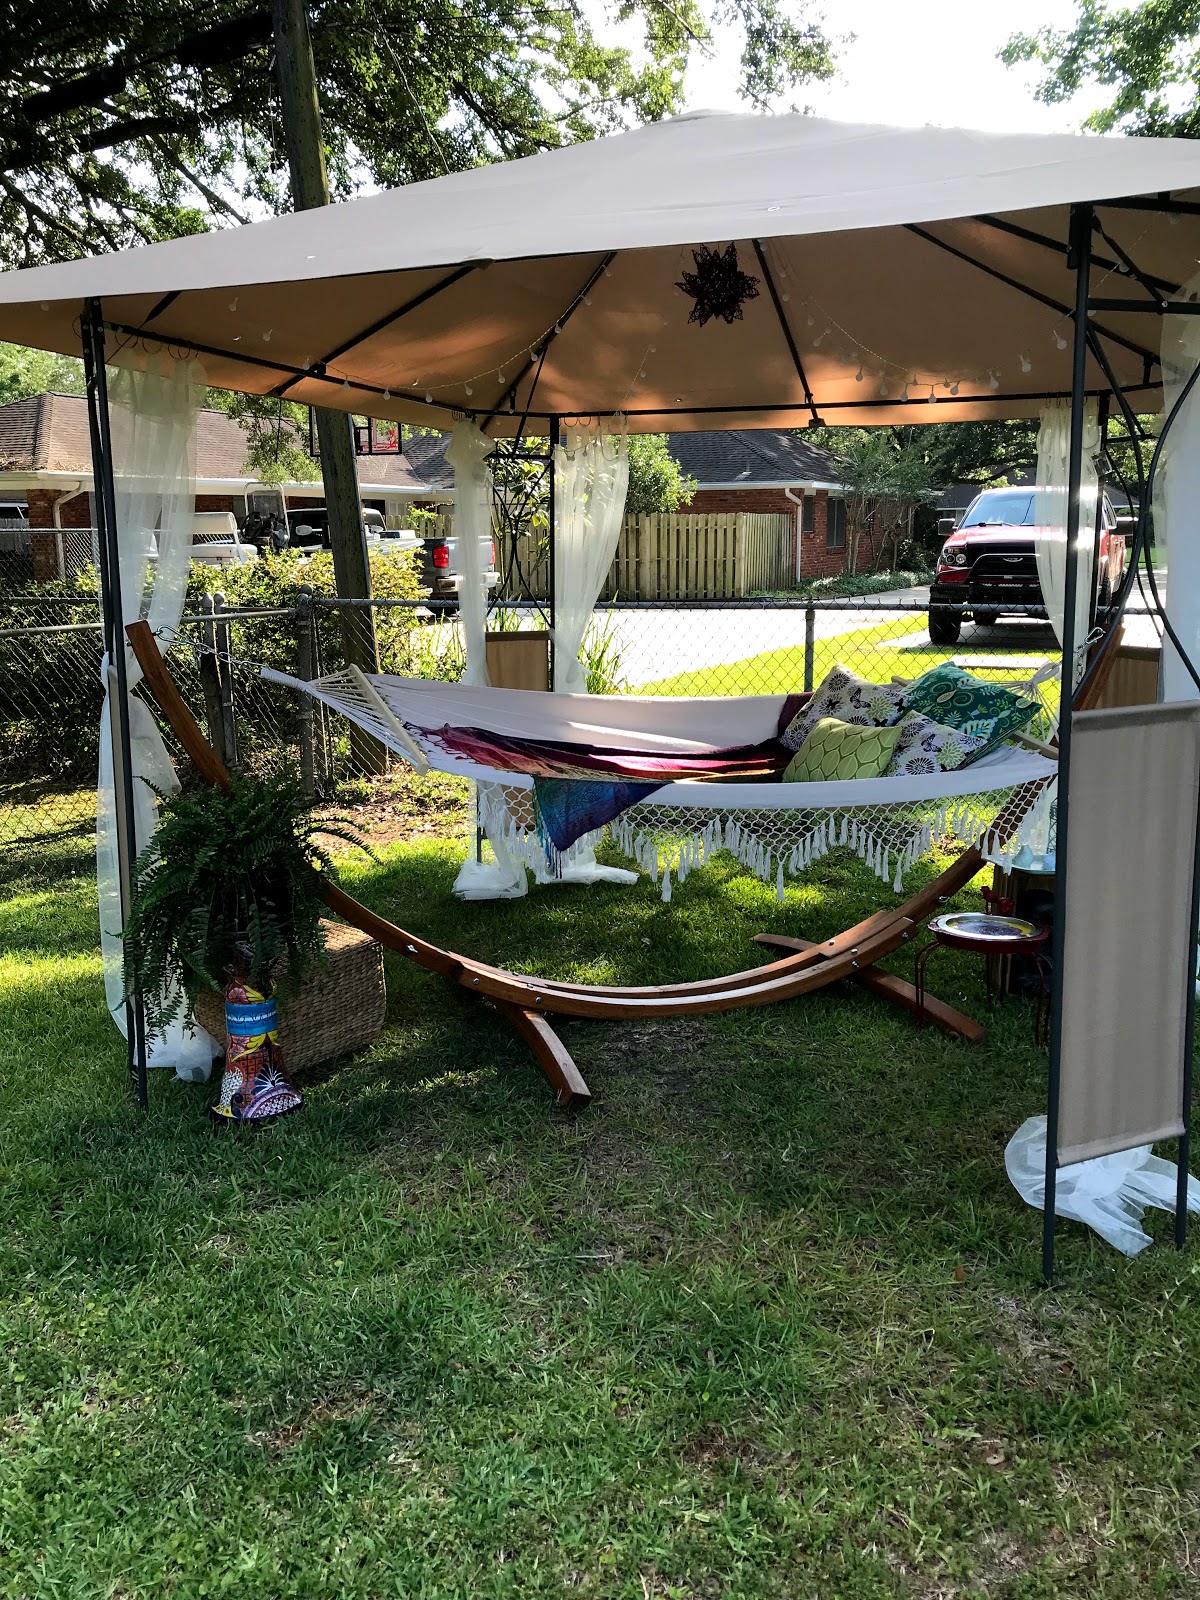
So, it turns out that, I love my outdoor space even more than I thought that I would.  In fact, I am typing up this post while lounging in my hammock. 

Listening to my shows on my iPad while working on a blog in my hammock.  Life is good.

I feel so decadent.  And I am definitely going to make some modifications to the decor so that I can use it in the fall and winter.  (I am picturing chunky knit throw blankets, sweater pillows, a chiminea, and hot chocolate in a thermos.  I think that it will be marvelous!) 
Even Basil is getting in on the hammock action.  ( I tried to get Minnie to try it, but she doesn't trust a piece of furniture that sways.)
Isn't he looking great!?!?!  You can't even tell he has a blind eye.

He actually chilled with me on the hammock for quite a while.  I worried about him getting too hot, but this will be great when the weather starts to cool.


Chillin' and relaxin'.

Two things this "temporary" outdoor space has taught me is that I definitely want to be able to have electricity in my permanent outdoor space - if for no other reason than that I would like to have a ceiling fan.  If I could have a constant breeze, it would make lounging so much nicer. 

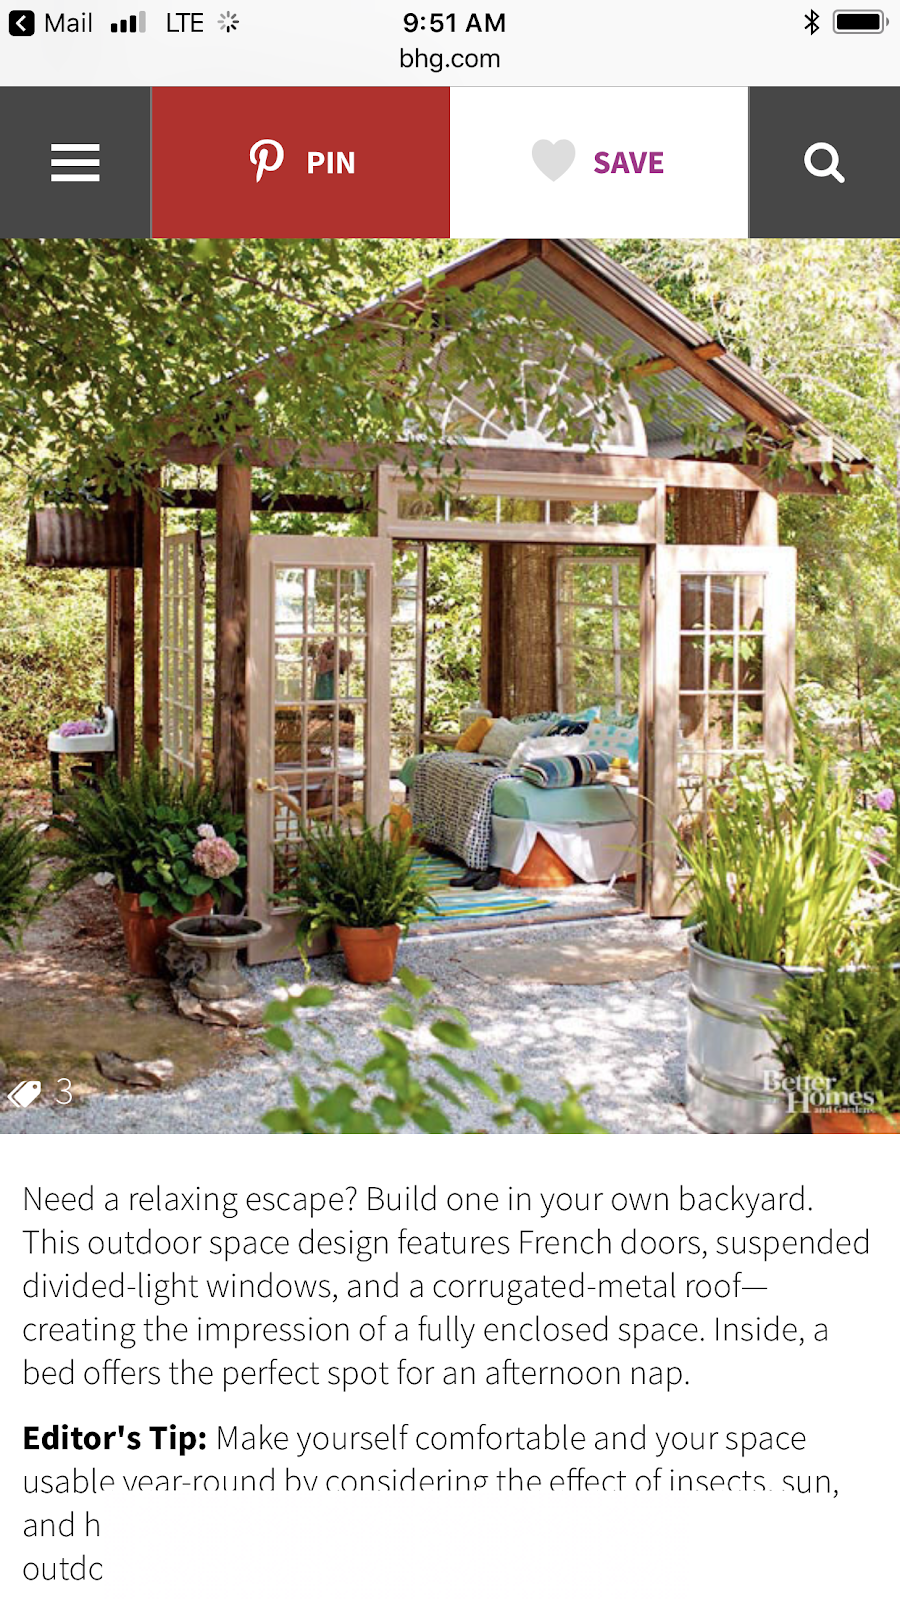
How awesome is this?!?!  It looks like a closed in space, but if you look closer its all faux walls and doors.  I love this as a thought for the mare permanent structure.

And that I need to spray/seed for ants.  (Something that I need to take care of sooner rather than later before they overrun my oasis.) 
But I'm thrilled to know that I have internet access even this far back in the back yard.  I'm going to watch movies on my kindle outdoors and have come out door meals here once I add a table and chairs - which may be as simple as painting the bistro table and chairs I already have - I'm not really sure as I think the table may be a little large for the space. 

I have actually had a good week last week - and considering the year that I have had- I am going to take that as a win. What has made it good you may be wondering? Well....  I discovered a new, healthy-ish, breakfast that I love and that I am trying to figure out how to make portable so that I can make it at work. (I am including the non-portable recipe in this post.)
The first week of the May Sumo tournament in Japan was last week and the bouts have been pretty interesting and intense.


I found a new anime cartoon that cracks me up called Pop Team Epic.

I captured this image on my phone from Amazon because I want to make a shirt with these two girls.  It will be my second sumo shirt that I can where when I am watching Sumo tournaments.  It just cracks me up that they are doing classic sumo poses here.

My car had to go back into the shop because something was up with the exhaust and I was sounding like a teenage boy without a muffler whenever I would drive - but it ended up being just a couple bolts that fell out and needed to be replaced, so it cost me very little to fix - much better than the over $1000 I had to put in it the beginning of this year - which is why it is going down as a win rather than a problem. 
This is the classic mini logo in Great Britain.  I don't know who to credit, so sorry!

I got to watch a royal wedding - always a plus for me. 


And I found out my place that I buy my specialty flavored olive oils and vinegar - Season to Taste- is moving just down the street from my house. 
http://www.seasontotastebr.com/oilsandvinegars/
Huzzah!  This means that I no longer have to plan a special trip to refill my olive oil and vinegar.  I can't tell you how happy that makes me because going there before really was appointment shopping.
These little things all added up to a very good week.

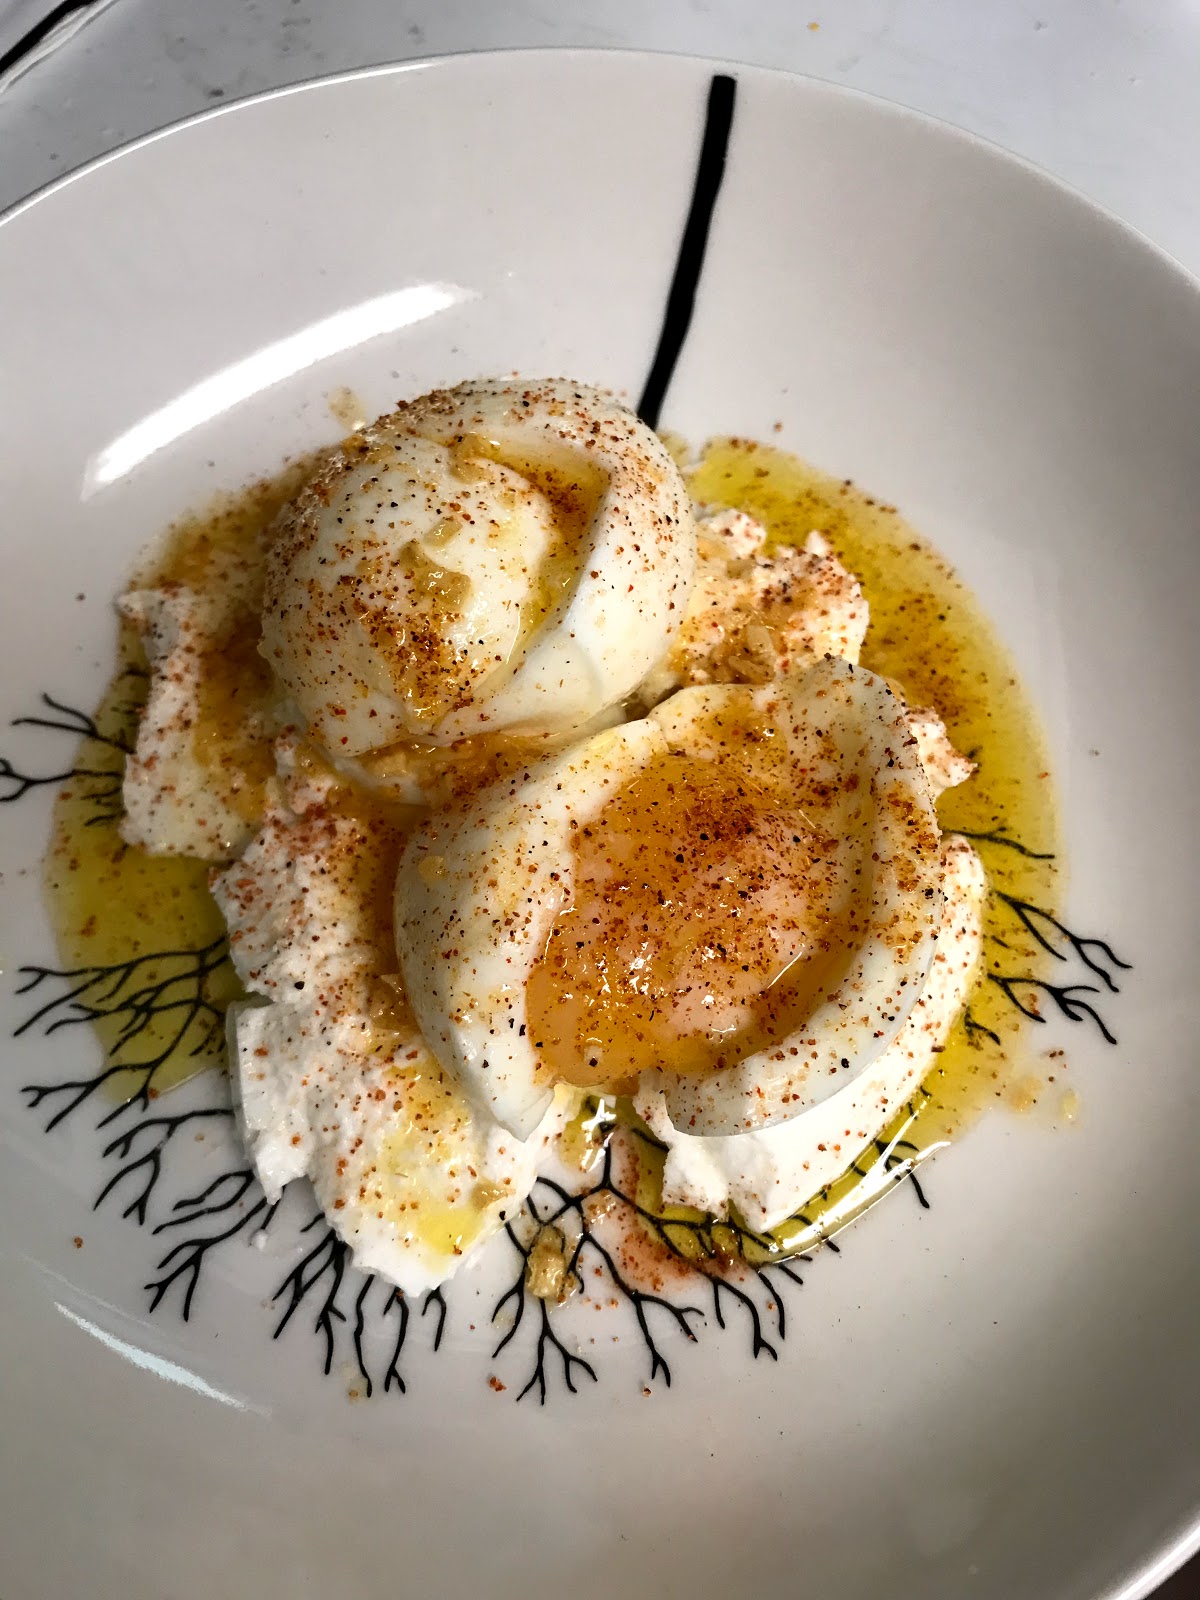
Turkish Inspired Garlic Yogurt Eggs


This recipe was inspired by a classic Turkish breakfast.  I believe that I saw the first recipe for it in my Milkstreet magazine.  But I soon went online to see what the variations on the internet were.  This one from Saveur is one of the ones that sound the best and that I want to try, but I didn't have all the ingredients to do it, and I wanted breakfast NOW. 

https://www.saveur.com/article/recipes/cilbir-turkish-poached-eggs-in-yogurt

So I decided that I would improvise.

Even this much simpler variation on the recipe was delicious!!! 
Though I will warn about two things:  If you are used to sweet yogurt, this savory yogurt may come as a shock to you - but I didn't mind that at all, I loved the tang it had with the garlic, butter and egg yolk. The other thing that may get you is that the yogurt was colder than the egg - so I had moments where I was eating hot and cold at the same time.  I didn't care for that.  I think the solution to that problem is just to pull out the yogurt you are going to eat and let it get to room temperature before you eat it. (Most of the research that I did said that you can leave yogurt out of the fridge for up to two hours before you have to worry about harmful bacteria starting to grow.)

Ingredients
2 eggs
1/2 container of single serving plain Greek yogurt (I like Fage)
1-2 small cloves garlic, minced
1 tbsp. butter
Creole Seasoning (I used Zatarain's)

Instructions
1.  In a small sauce pan or frying pan melt the butter over low heat.  Add the minced garlic once the butter is melted.  Make sure your heat is about as low as you can get or you will burn your garlic and it will get bitter. Stir frequently.
2.  While the garlic is in the pan on low, bring a pot of water to boil.
3.  Once the water is a rolling boil, carefully add the eggs.
4.  Cook the eggs for 5 minutes.  After they have cooked for five minutes, remove them from the boiling water and place into a cold water or ice bath.  This will prevent the eggs from cooking any further.
5.  Assemble your breakfast:
    --  Put the yogurt in the bottom of the bowl, make a small "nest" with a spoon so that you have a small "bowl" in your yogurt to slide your eggs into.
  --  Carefully crack the eggs and peel them.  You have to be delicate with this or you will break the yolk.  This is not a hard boiled egg or a jammy egg that can take alot of abuse, this is a soft boiled egg and it will be very squishy once you start peeling it and the shell begins to come off.
--  Once unpeeled, place the eggs in the yogurt "bowl".
--  Pour the garlic butter mixture over the egg and the yogurt.
--  Sprinkle with Creole seasoning to your taste. 
6.  Serve with toast for dipping.

Once you break the egg, the egg yolk, butter, garlic and yogurt start to mix.  It is so delicious!

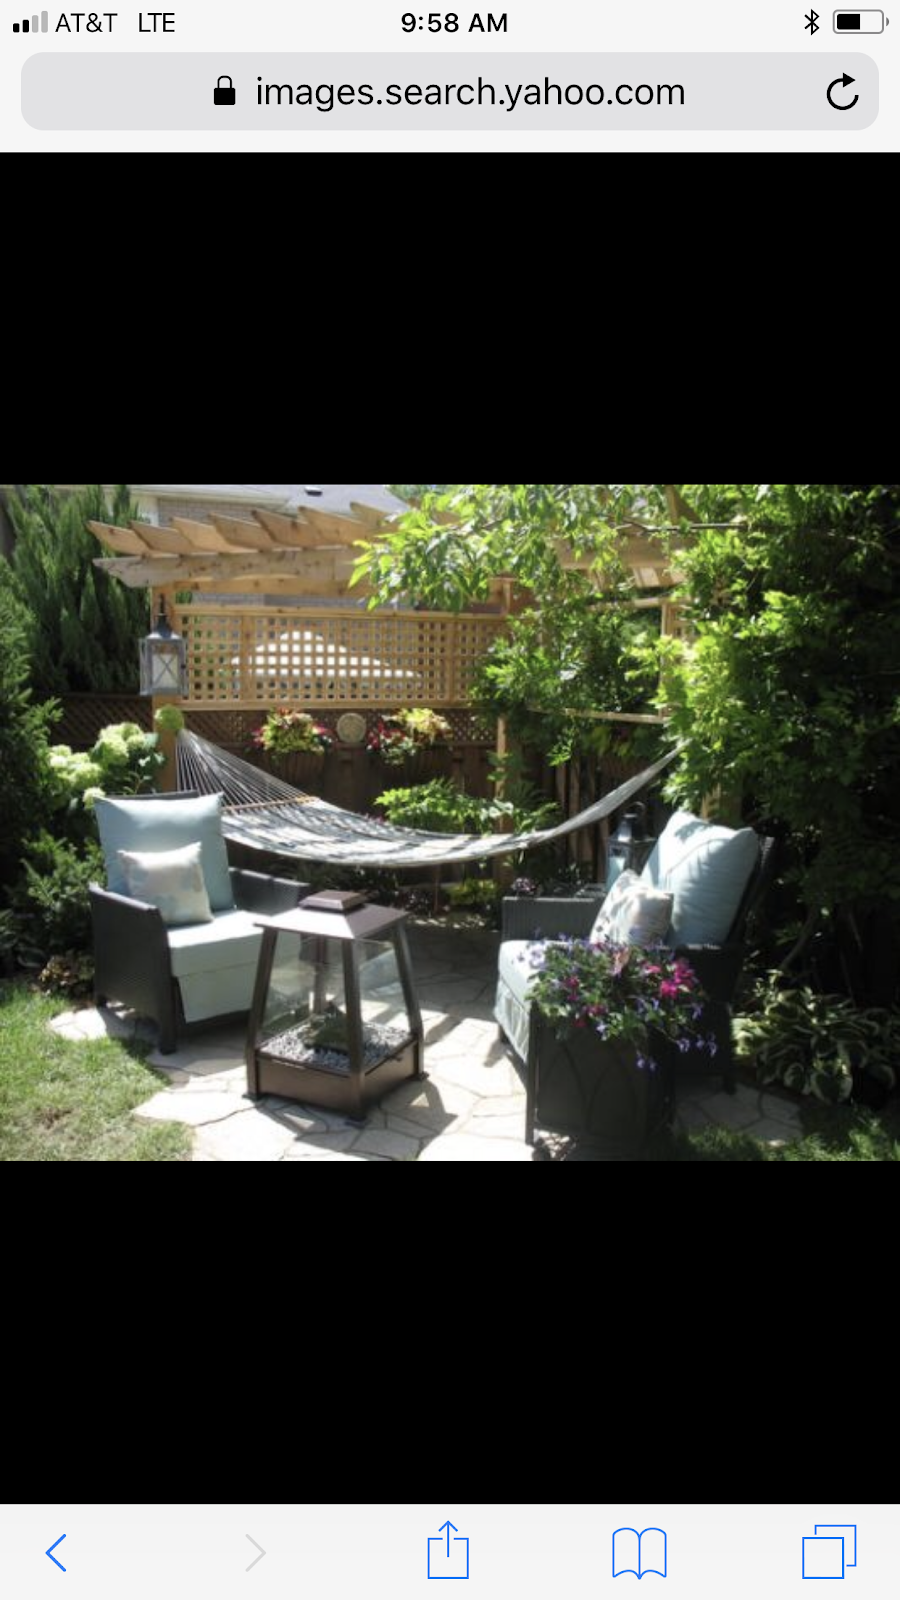
As a bonus for this post, since so many people were enjoying the photos of my hammock outdoor space, I thought that I would share my inspiration photos. I took these from the internet, so these photos are not mine.
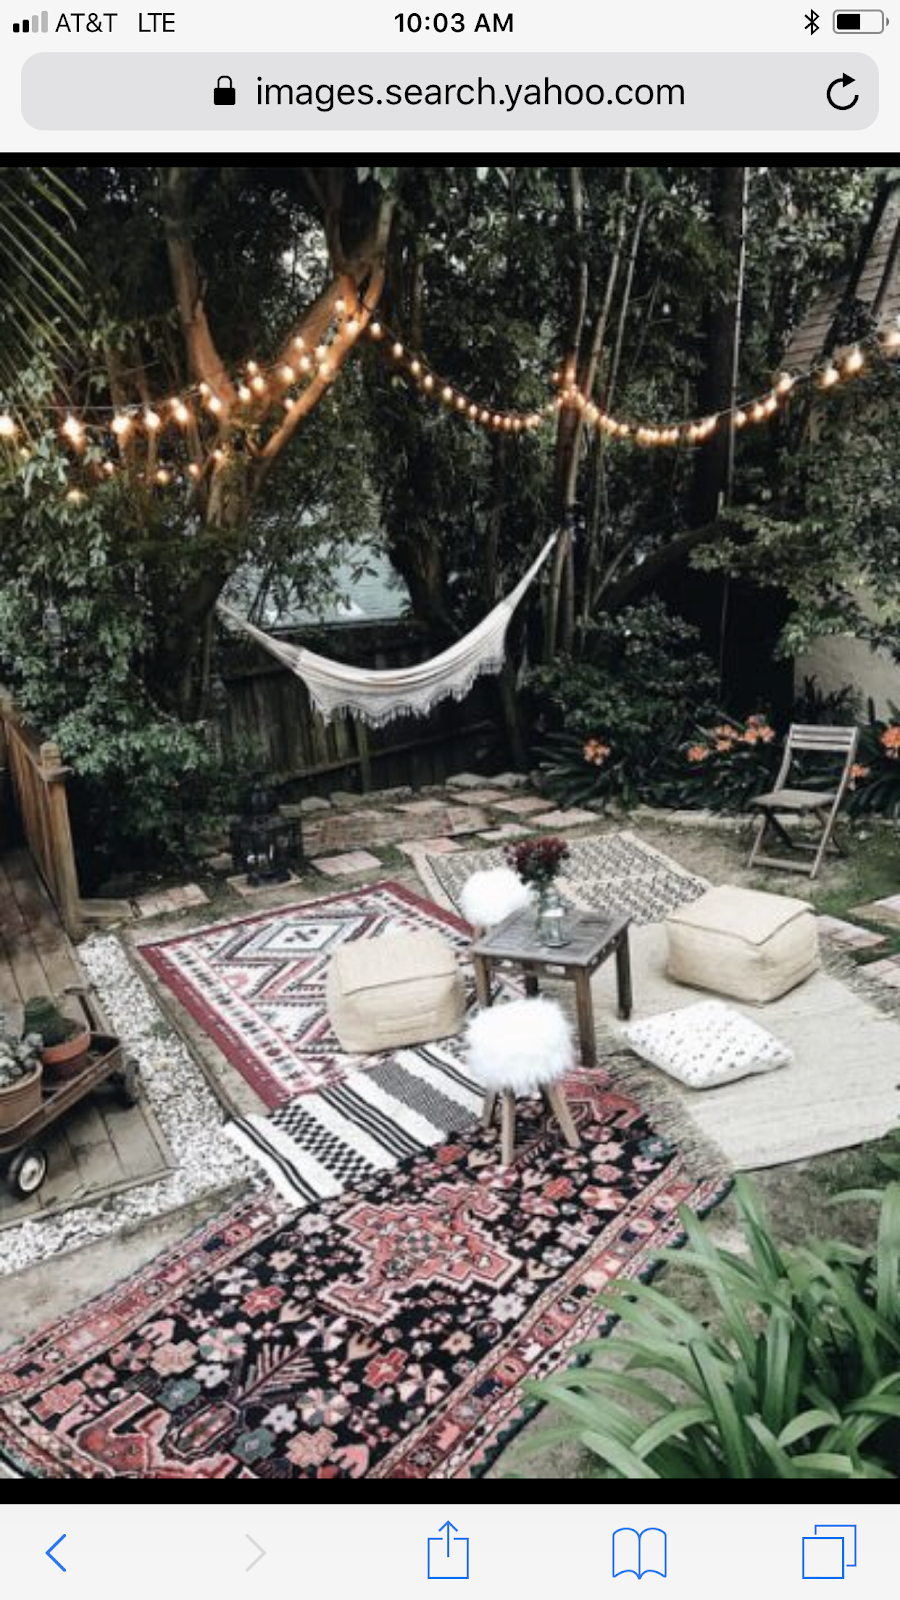
I love the rugs and the lights.  Since I didn't have the concrete patio, I only did the lights from this inspiration photo.

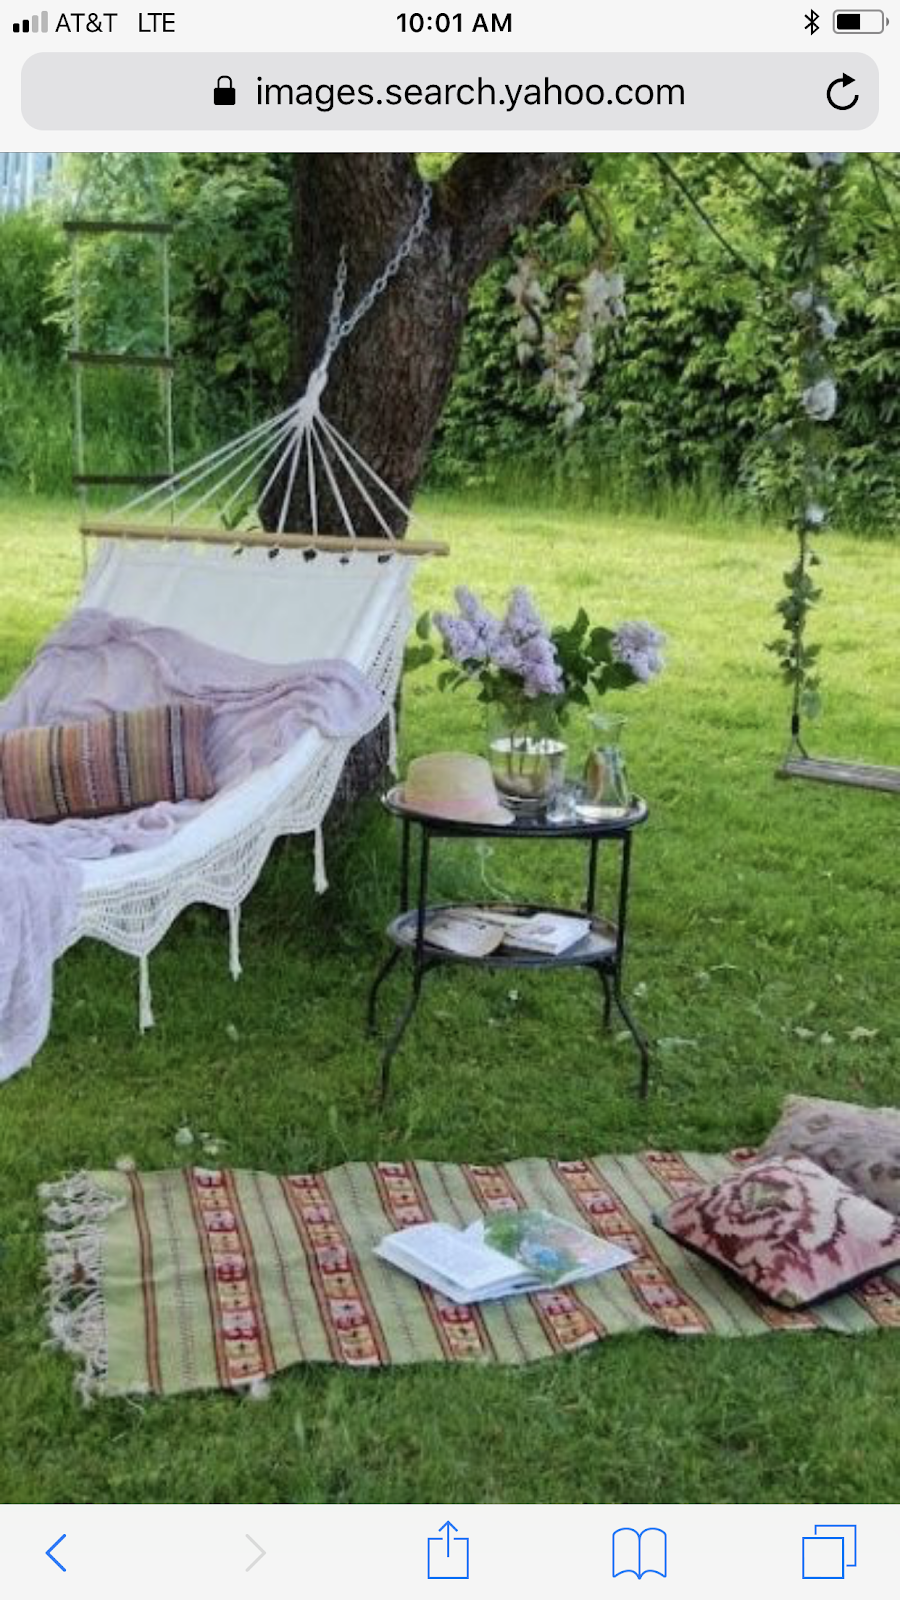
I love this hammock and the tiny table.  I feel that my hammock and table look remarkably like this.

This has the fireplace thing and a sitting area.  I think I want to see if I can create this when it starts to get cold.

Loving the baskets, pillows and birdcages in this one.  I also love the straw footstool/poof.  I haven't tried it yet, but I have found instructions how to recreate that poof using an old tire and rope.  Its on my list of things to do.  I'll let y'all know if works. :-)
I have added a throw rug since I took this picture.  I pick it up when I am not using the space because I don't want to kill the grass.

So, what do you think, did I channel my inspiration photos?


Well, that is it for this post.  Hope to post again very soon!

Thursday, April 19, 2018

Easy One Minute Egg or No Excuse to Miss Breakfast

Hello Everyone!
In the attempt to live a healthy lifestyle, and lose about six (ahem, realism check - 3) inches of my waistline, I have been making a conscious effort to eat healthier.  I don't believe in diets and banning foods from myself.  From what I have observed in my personal life, these types of diet plans may work for a short time but they, usually, never work out in the long run- mostly because you are denying yourself everything delicious. 

Yes, this was a real ad at one time.  Don't eat food! Smoke cigarettes instead.  Ummmm.  I think I'll pass.

Instead I prefer to try to make certain that the foods that I am eating are the right proportions according to the Food and Drug Administration.  I also try to make certain that I eat at least three meals a day - and a light snack. This means that there is no missing breakfast - which may be the most important meal of the day but is absolutely the easiest meal of the day to skip. 
To that end, I have been trying to come up with easy breakfasts that I can take to work that aren't just yogurt.  So far, my favorite is what I am calling the one minute scrambled egg. In fact, I love it so much that I thought that I would share it with you.

The One Minute Scrambled Egg


I call this recipe the minute egg but sometimes it can take less or more time, depending on how cold your fridge is and how powerful your microwave runs, but I have never had it take less than 30 seconds or over 1 minute and 15 seconds, so I have averaged the time and call it the minute egg.  This recipe can be easily modified to suit your personal taste - but my recipe is very low in fat, although it doesn't taste like it, so, do yourself a favor and don't make it with egg whites to try to reduce calories.

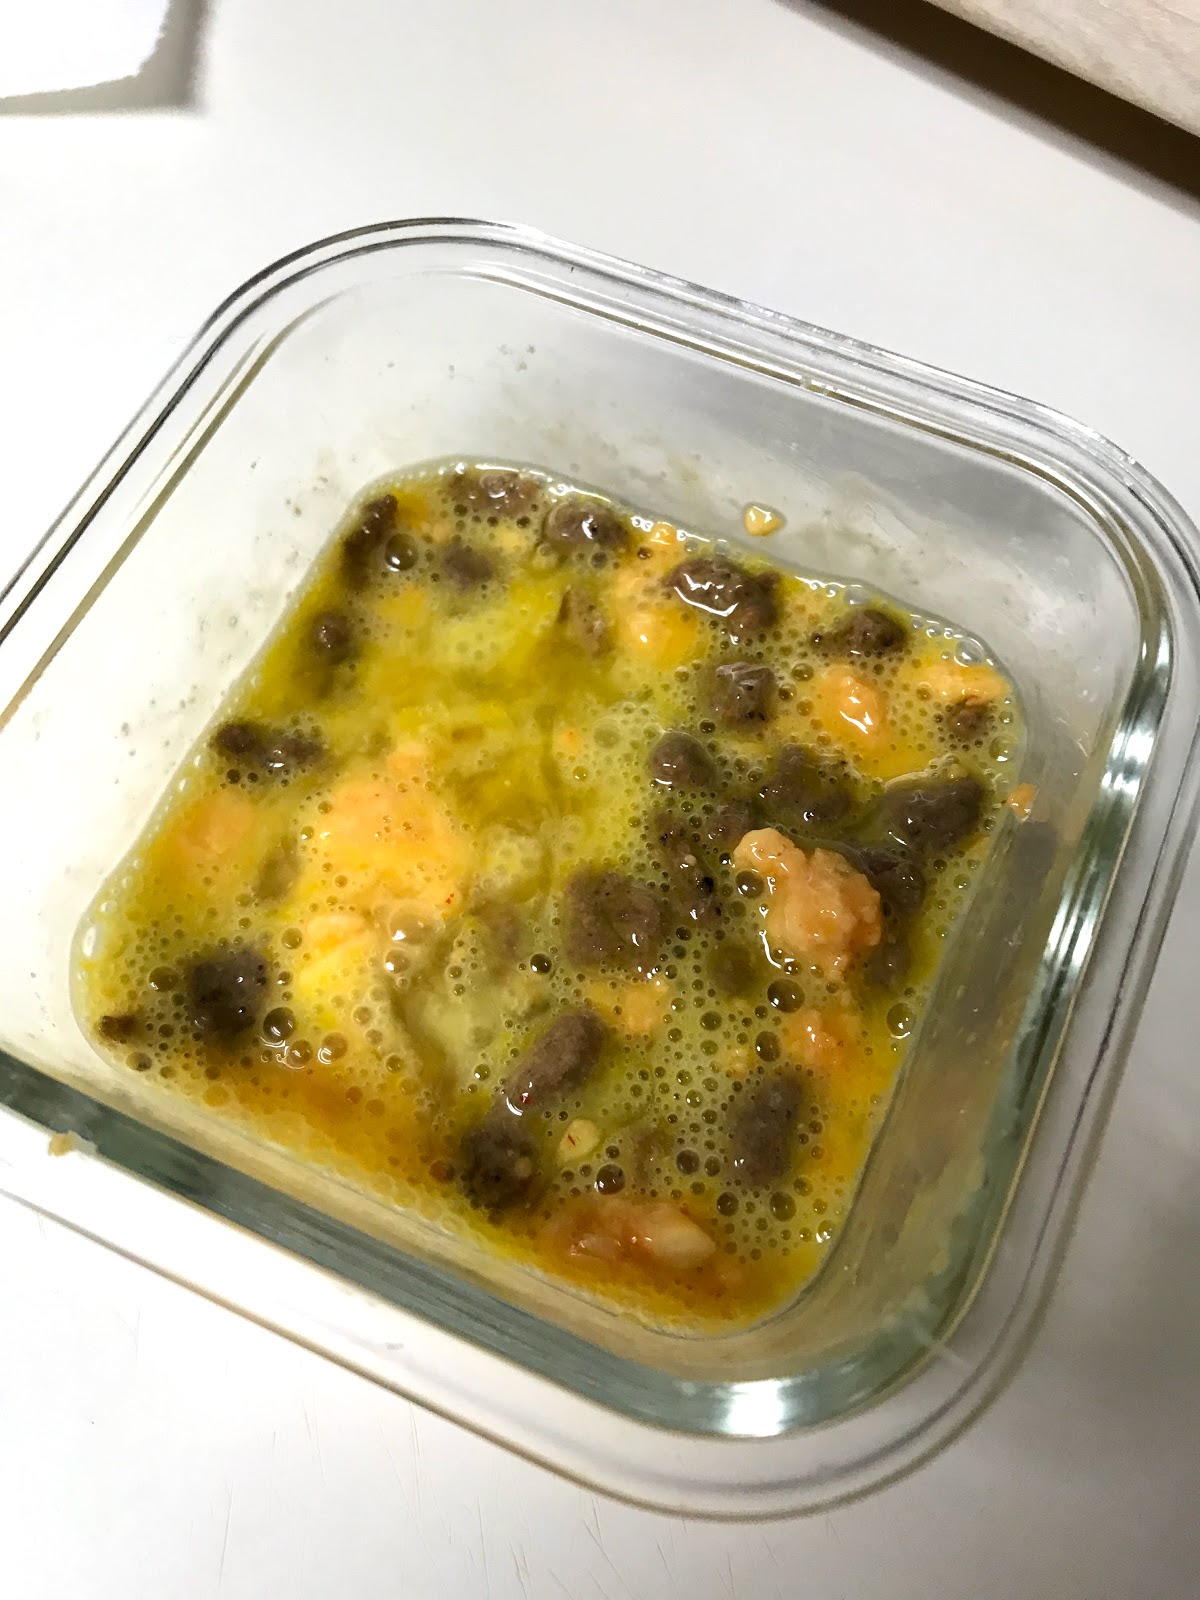
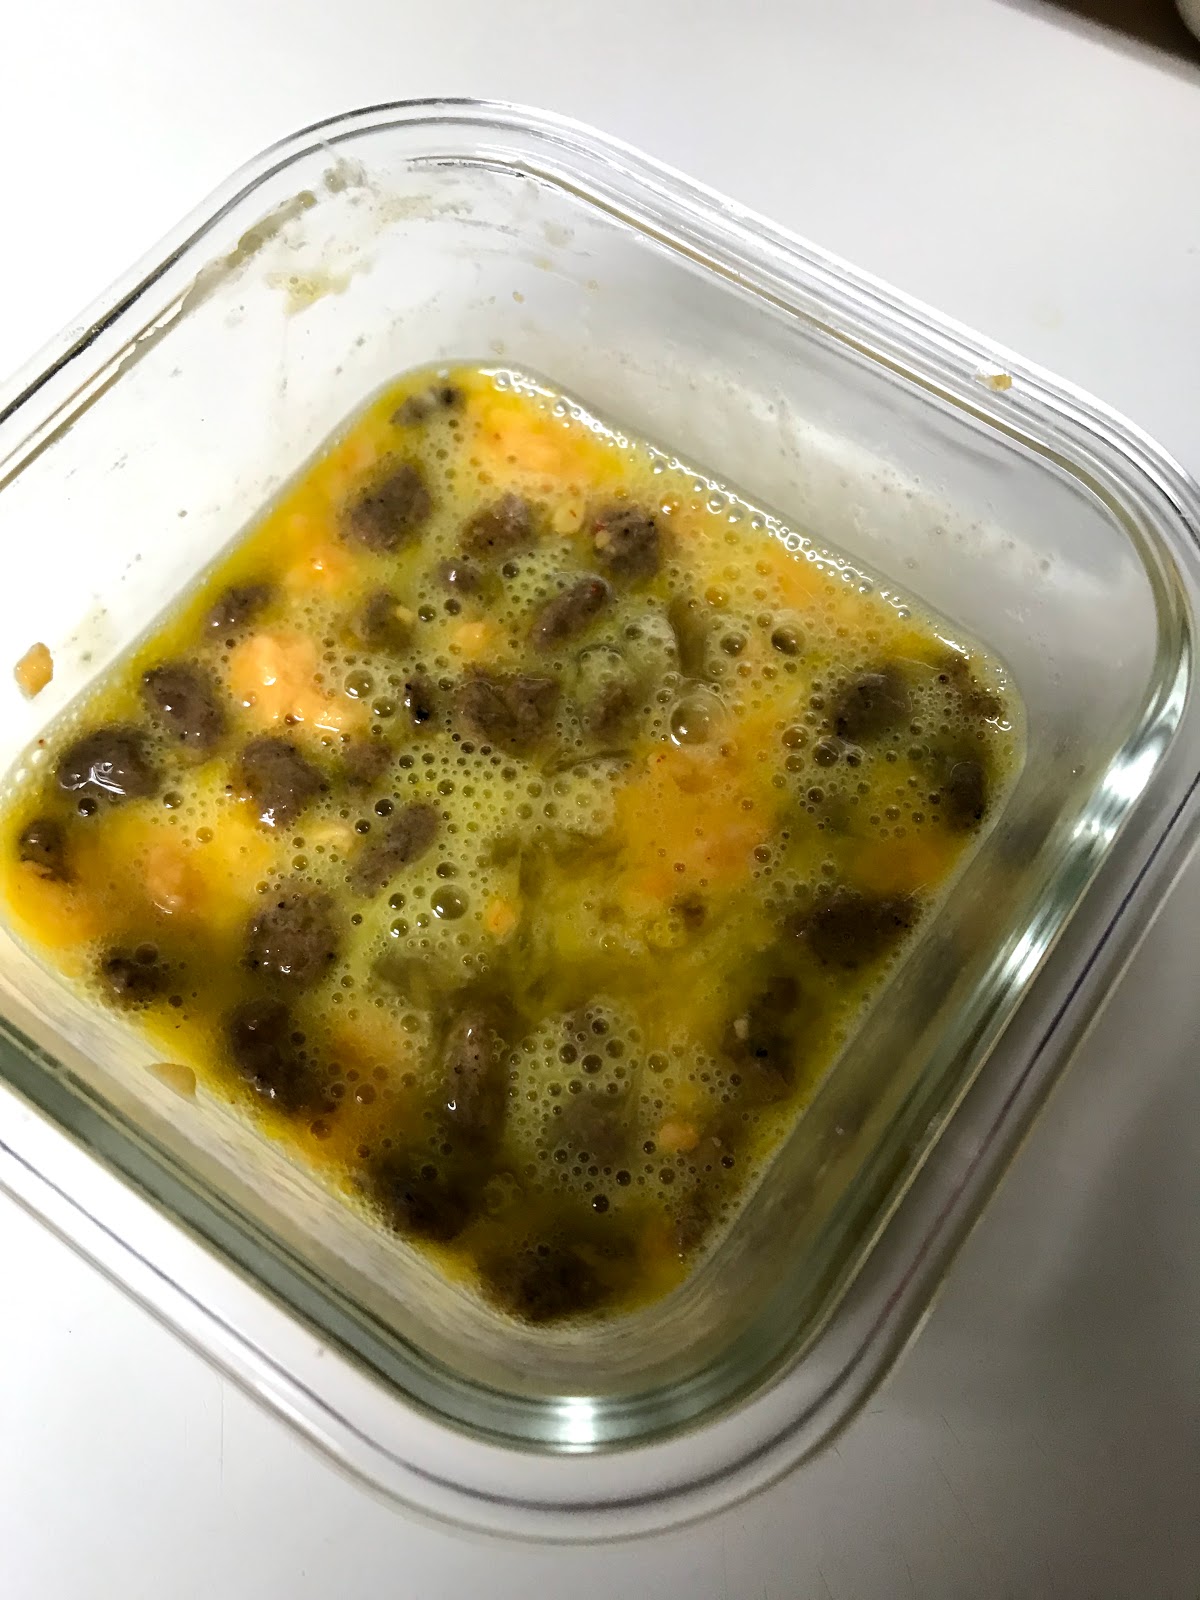
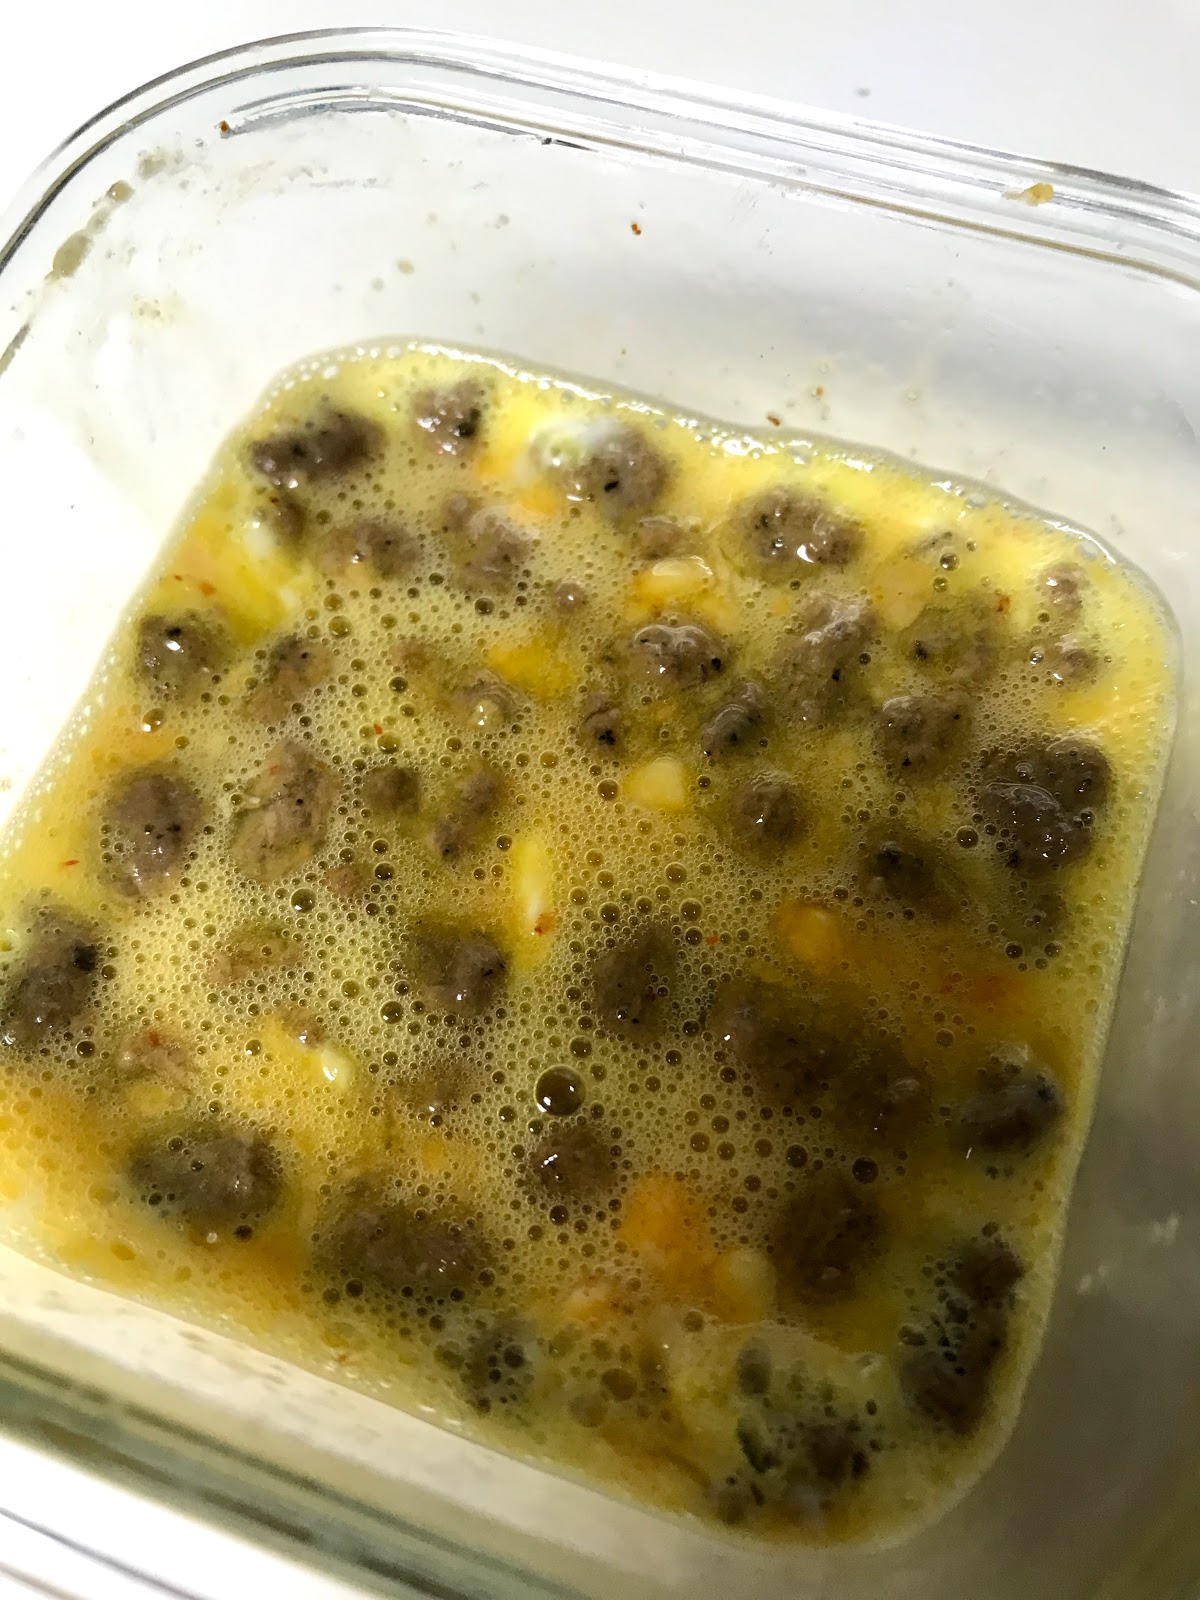
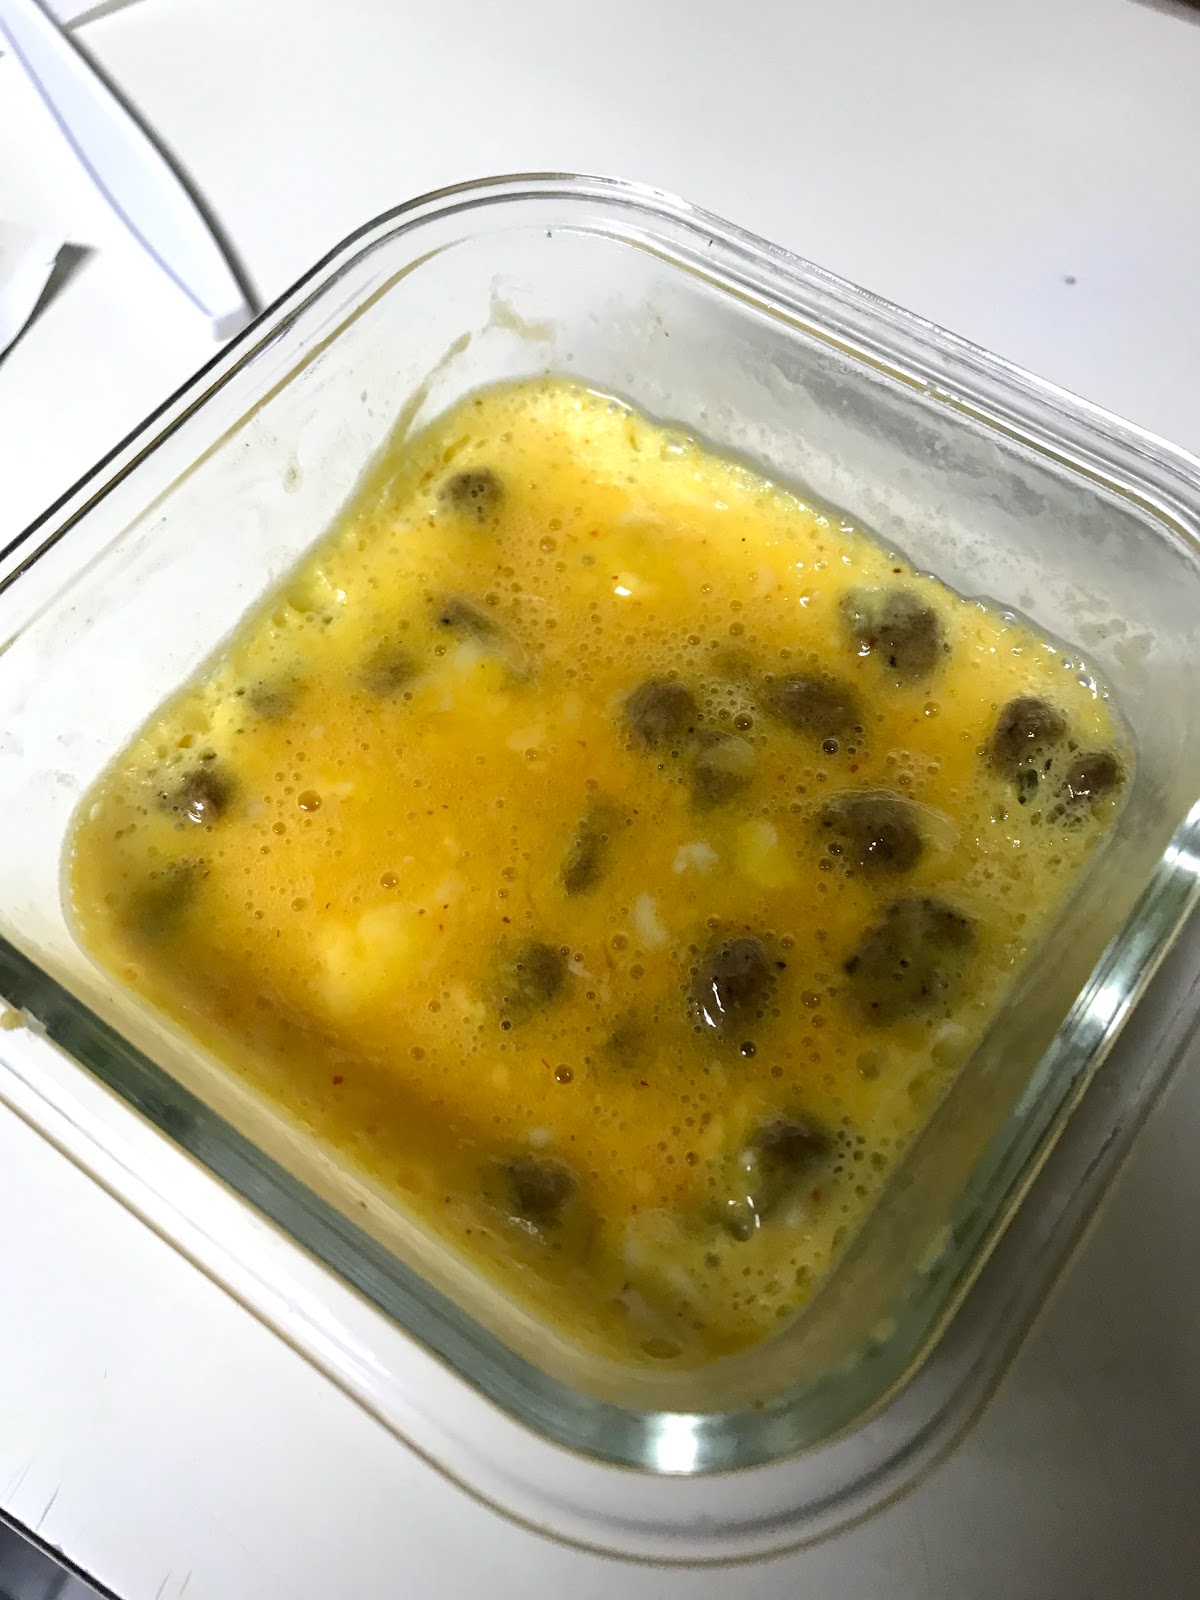
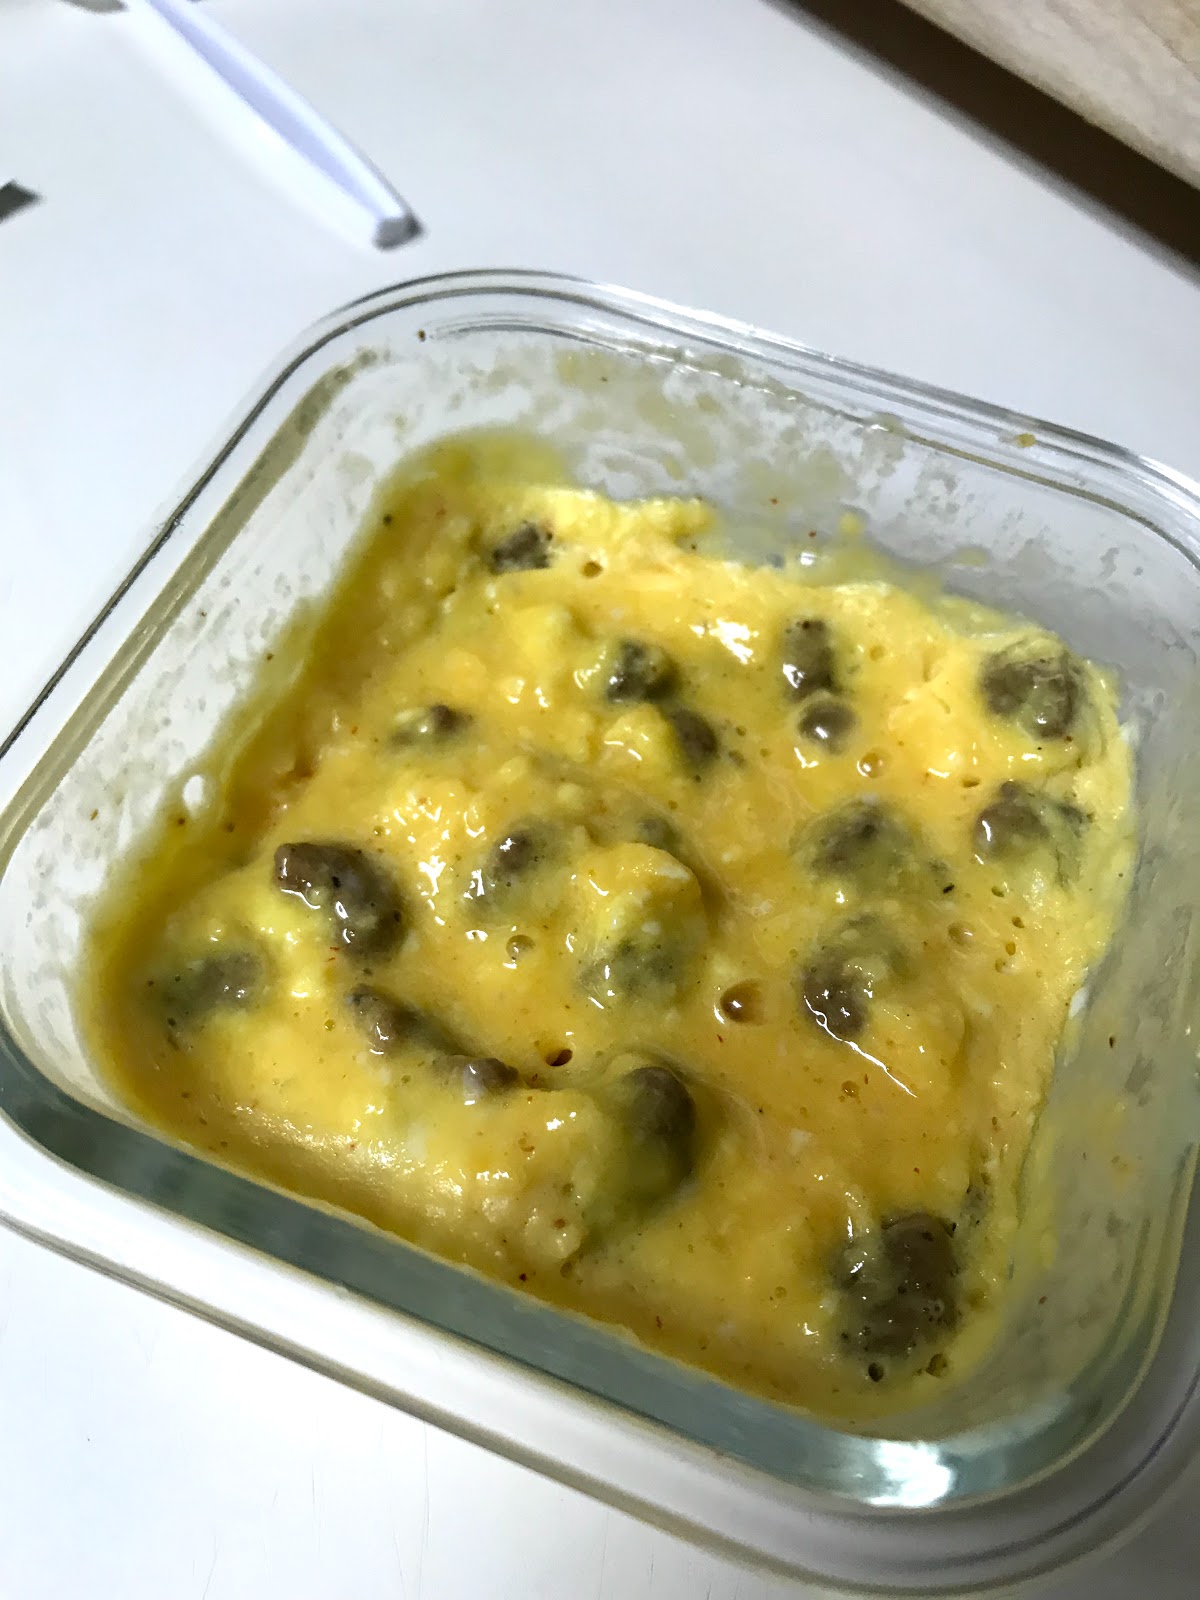
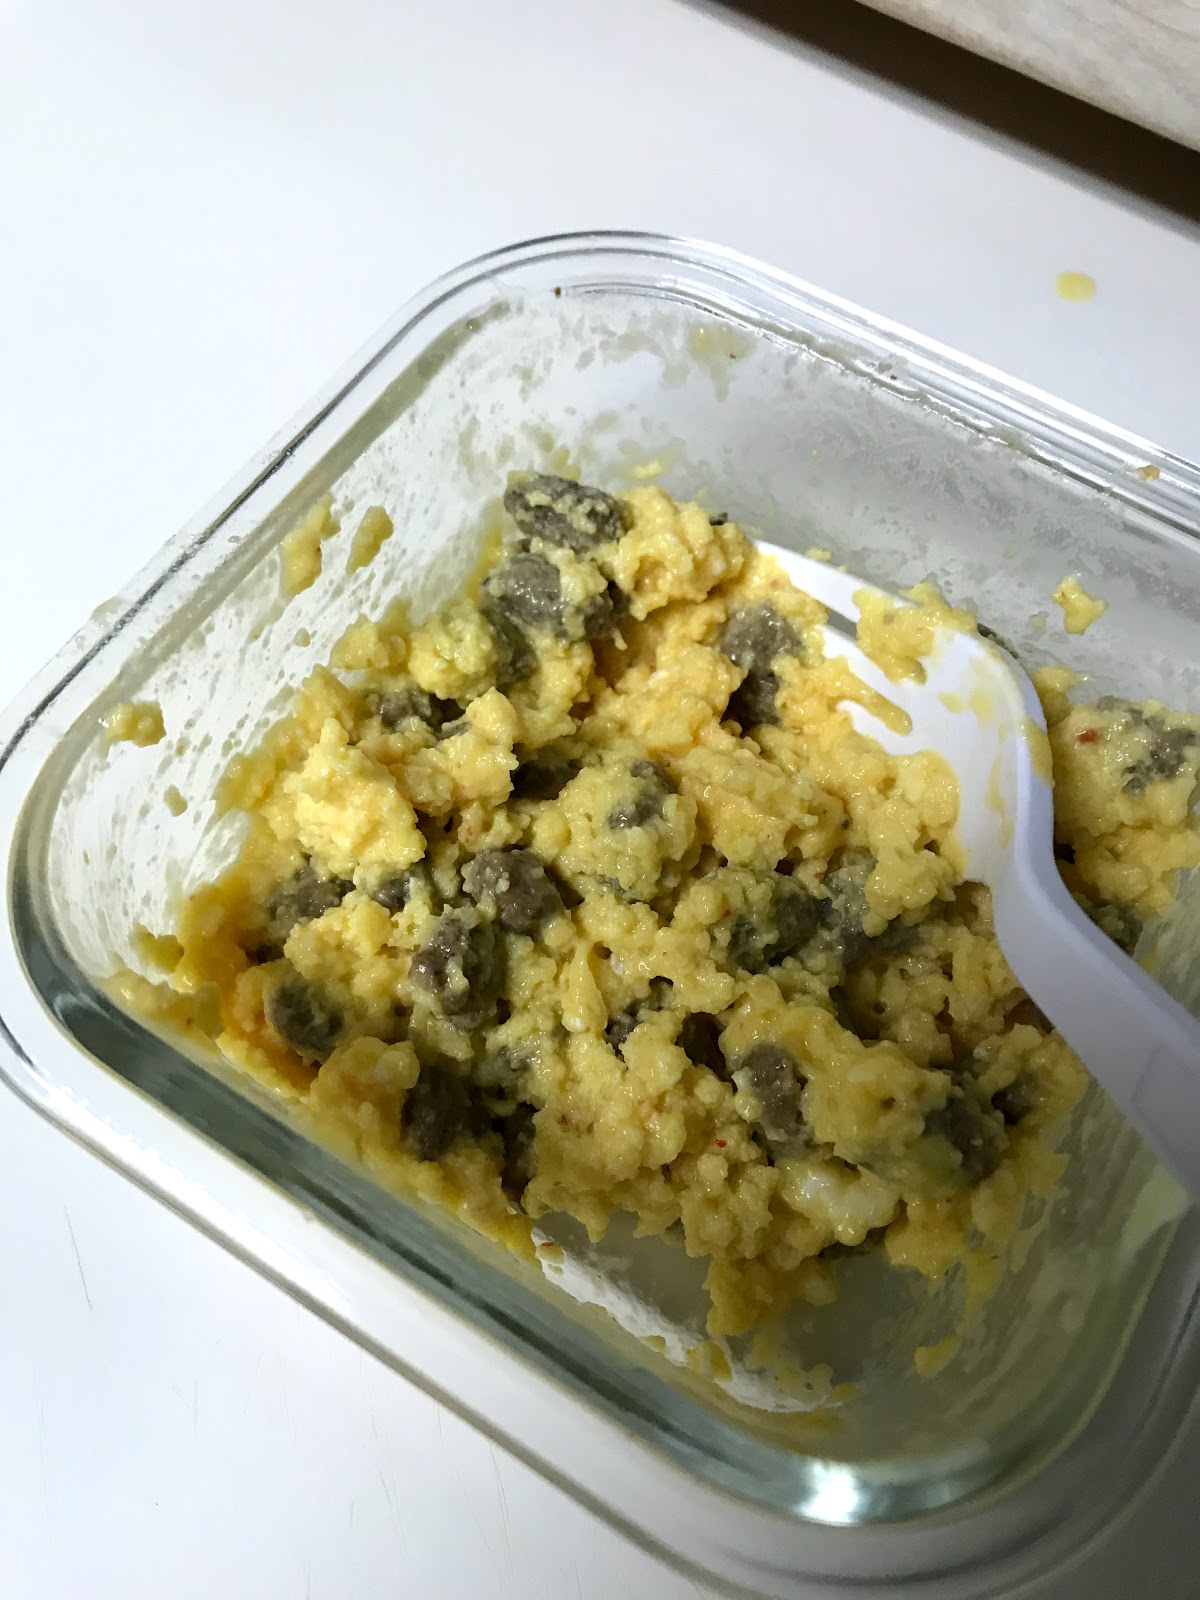
I have included pictures so you can see what the eggs look like during the different stages of cooking.

Ingredients
1 egg
1 tbsp. crumbled sriracha cheese (I get mine from Trader Joe's and I get the smallest block I can because a little goes a long way.)
1-2 tbsp Jimmy Dean turkey sausage crumbles (I freeze mine.  They come in a bag that contains too much for me to eat before they go bad, so I store mine in the freezer.)

Instructions
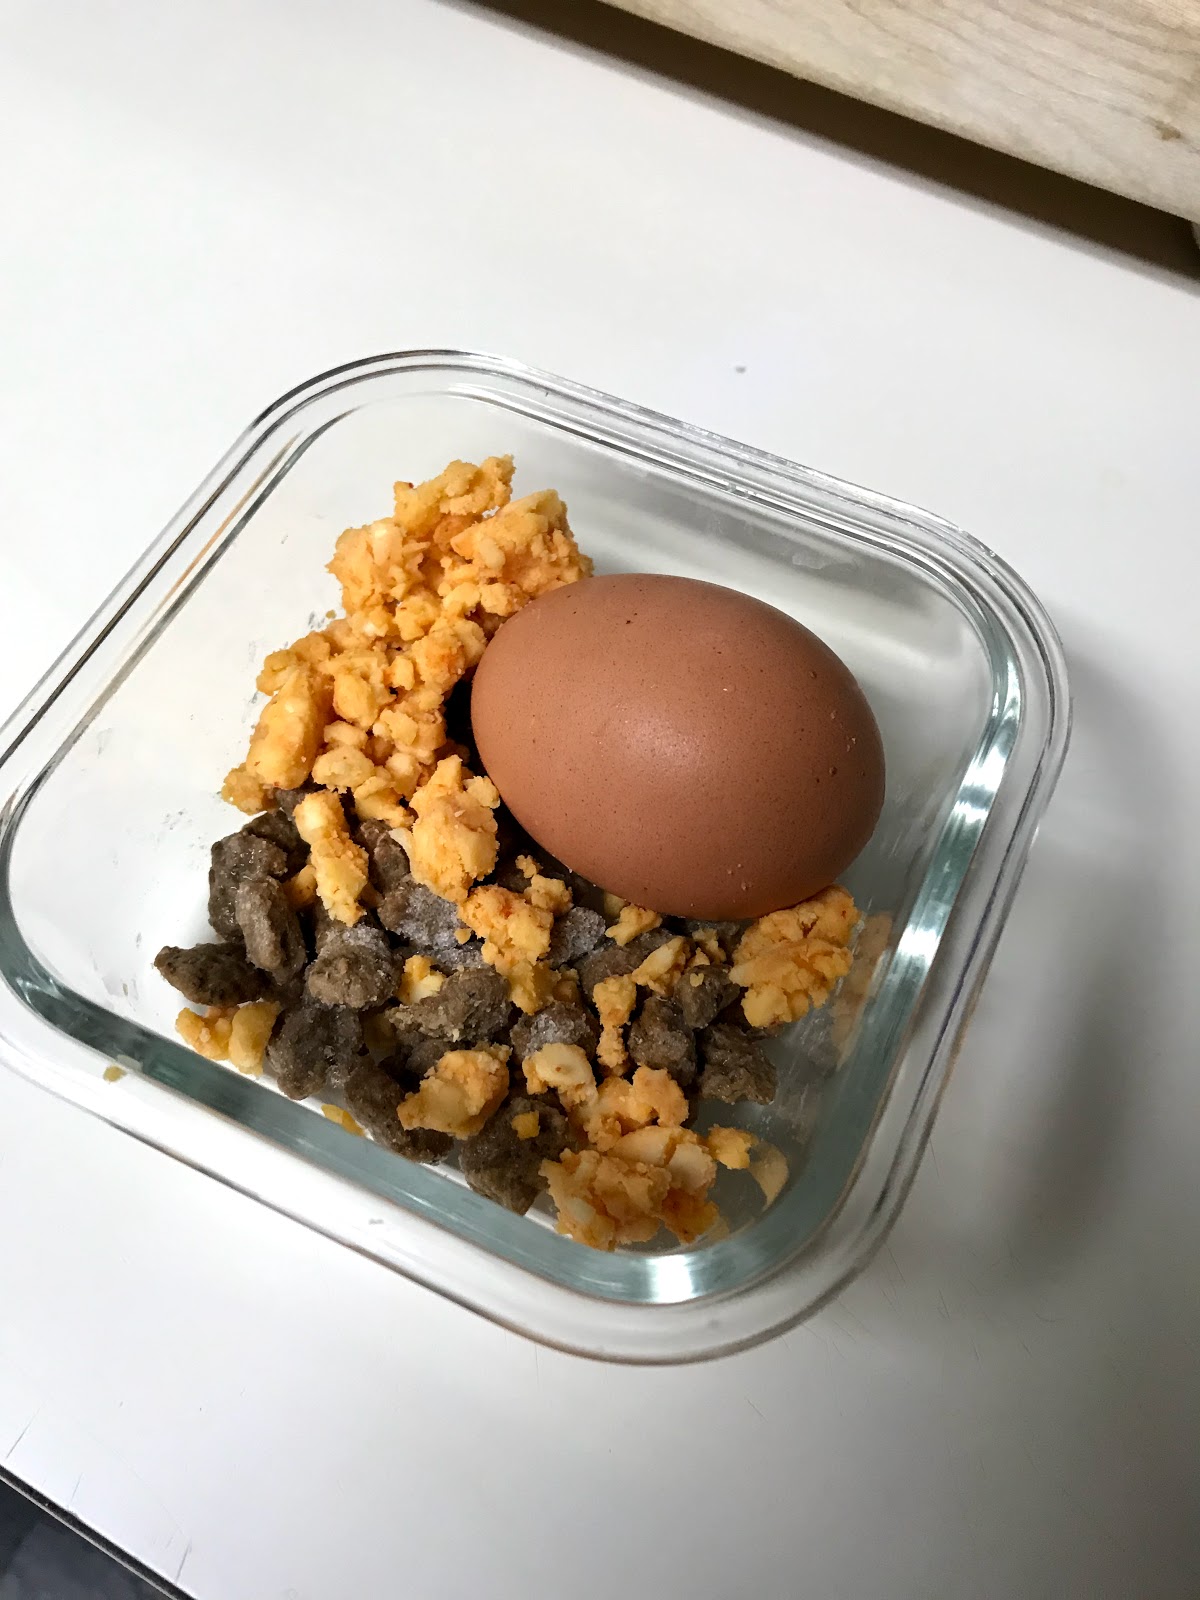
1.  The night before, or in the morning, put all of your ingredients into a small, glass dish. (Don't crack the egg.)  I like to use the small, square, single serve, dishes that are made by Systema and you can get for about $3.00 at Marshall's.  But any microwave safe dish that has a lid and is about the size of a tea cup will work. I have actually made this dish in a tea cup.  It looks so cute!!!
I just leave the egg like that, but if you're nervous, you can always wrap it.

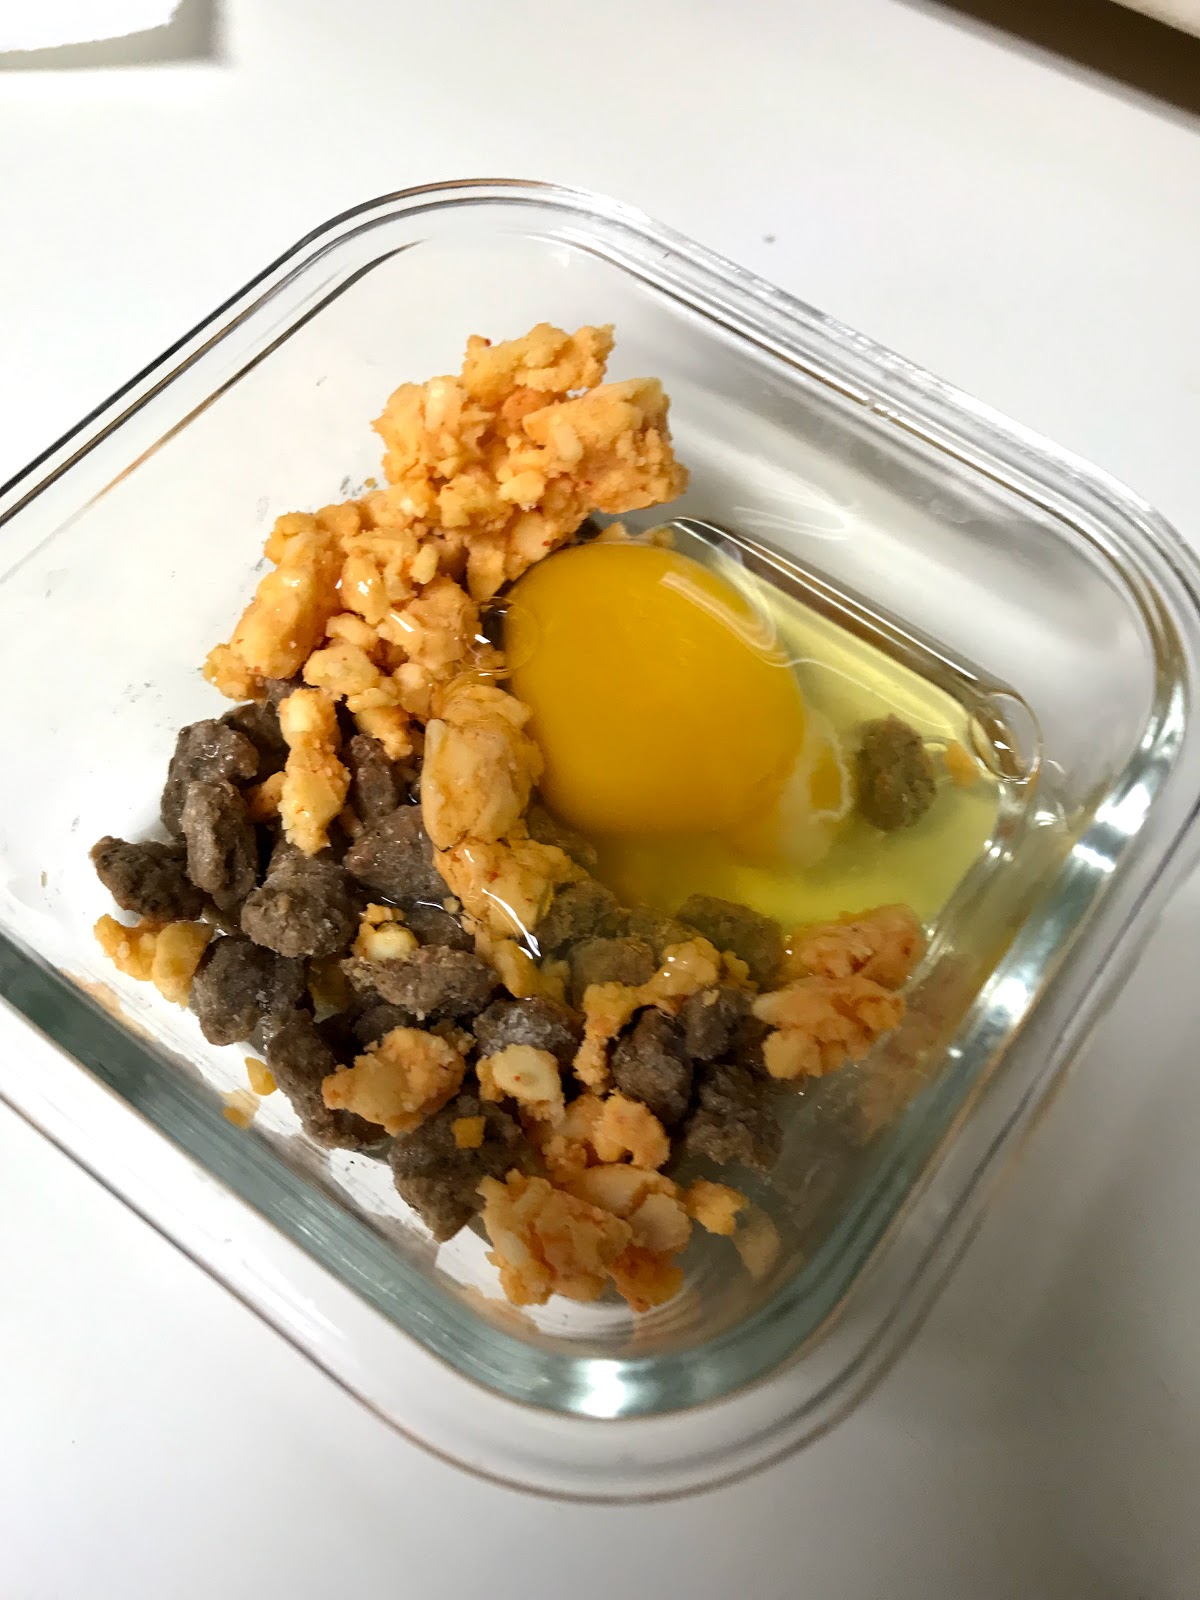
2.  Once you are ready to eat your breakfast crack your egg into the dish.  (You don't have to worry your egg will stick if you follow these instructions, so you don't have to worry about "greasing" the dish.


With a fork, lightly beat the egg, sausage and cheese until they are "mixed" together.


3.  Put in the microwave  and cook on high for 15 seconds.  Stir with a fork.

4.  Put back in the microwave and cook on high for another 15 seconds.  Stir with a fork.  Pay special attention to the sides as the egg will be warmer here than in the center.


5.  Put back in the microwave and stir for another 15 seconds.  Stir with a fork.  The eggs will really start firming at this point.  In fact, in some microwaves your eggs will be ready.


I know its kind of hard to see, but the sides are firming in this picture.

6.  Put back in the microwave and cook for another 15 seconds.  At this point your eggs will, in most cases be ready.  You will know it is done when your eggs look cooked around the side but are still wet-ish in the center.

 I know this sounds wrong, but once you stir the egg with a fork, the heat from the rest of the egg will finish cooking the eggs.

This will produce lovely, moist, fluffy eggs.  If you like your eggs drier, you can cook them for another 15 seconds.  I like to have these eggs with fruit - either a banana, half an apple, or grapes and Mrs. T's Bloody Mary Mix in the can.  Yum.

Whatever you do, don't put the eggs in for one minute and skip the stirring.  This will end up in very rubbery, slightly gross eggs.

Do y'all have any breakfasts to go that you like to do for a workday?  If you do, I would love to hear what they are!