Sunday, November 20, 2016

Thanksgiving Table Hardware - How to Make a Beautiful Table Using Items from the Hardware Store - Candle Holders and Copper Napkin Rings

Hello Everyone!
Thanksgiving is fast approaching and it is time, if you haven't already started, to start preparing for your holiday meal.  In my opinion, that means not only planning a menu full of family, traditional favorites, but also planning out how you are going to decorate the table and make it beautiful.


This is often a skipped step among many for Thanksgiving.  After all, your guests are usually family and if anyone will forgive you a blank, non-decorated, table its family.  But, I think that this is a grave mistake.  Studies have proven that food actually tastes better if you are sitting in an inviting environment.  Scientists still don't know why the human brain works this way, they just know that it does.  (I just heard this on NRP a couple of days ago, so if you want to look for this study, that is where to start.)  Also, the Thanksgivings that I remember the best are the ones that my family pulled out Grandma's good silver and china and made Thanksgiving an occasion and not just an excuse to stuff your face with turkey and dressing.  We actually dressed nicely and sat down to a table that was elegantly dressed and enjoyed a grand meal in a grand style.
I firmly believe that more people should do this.
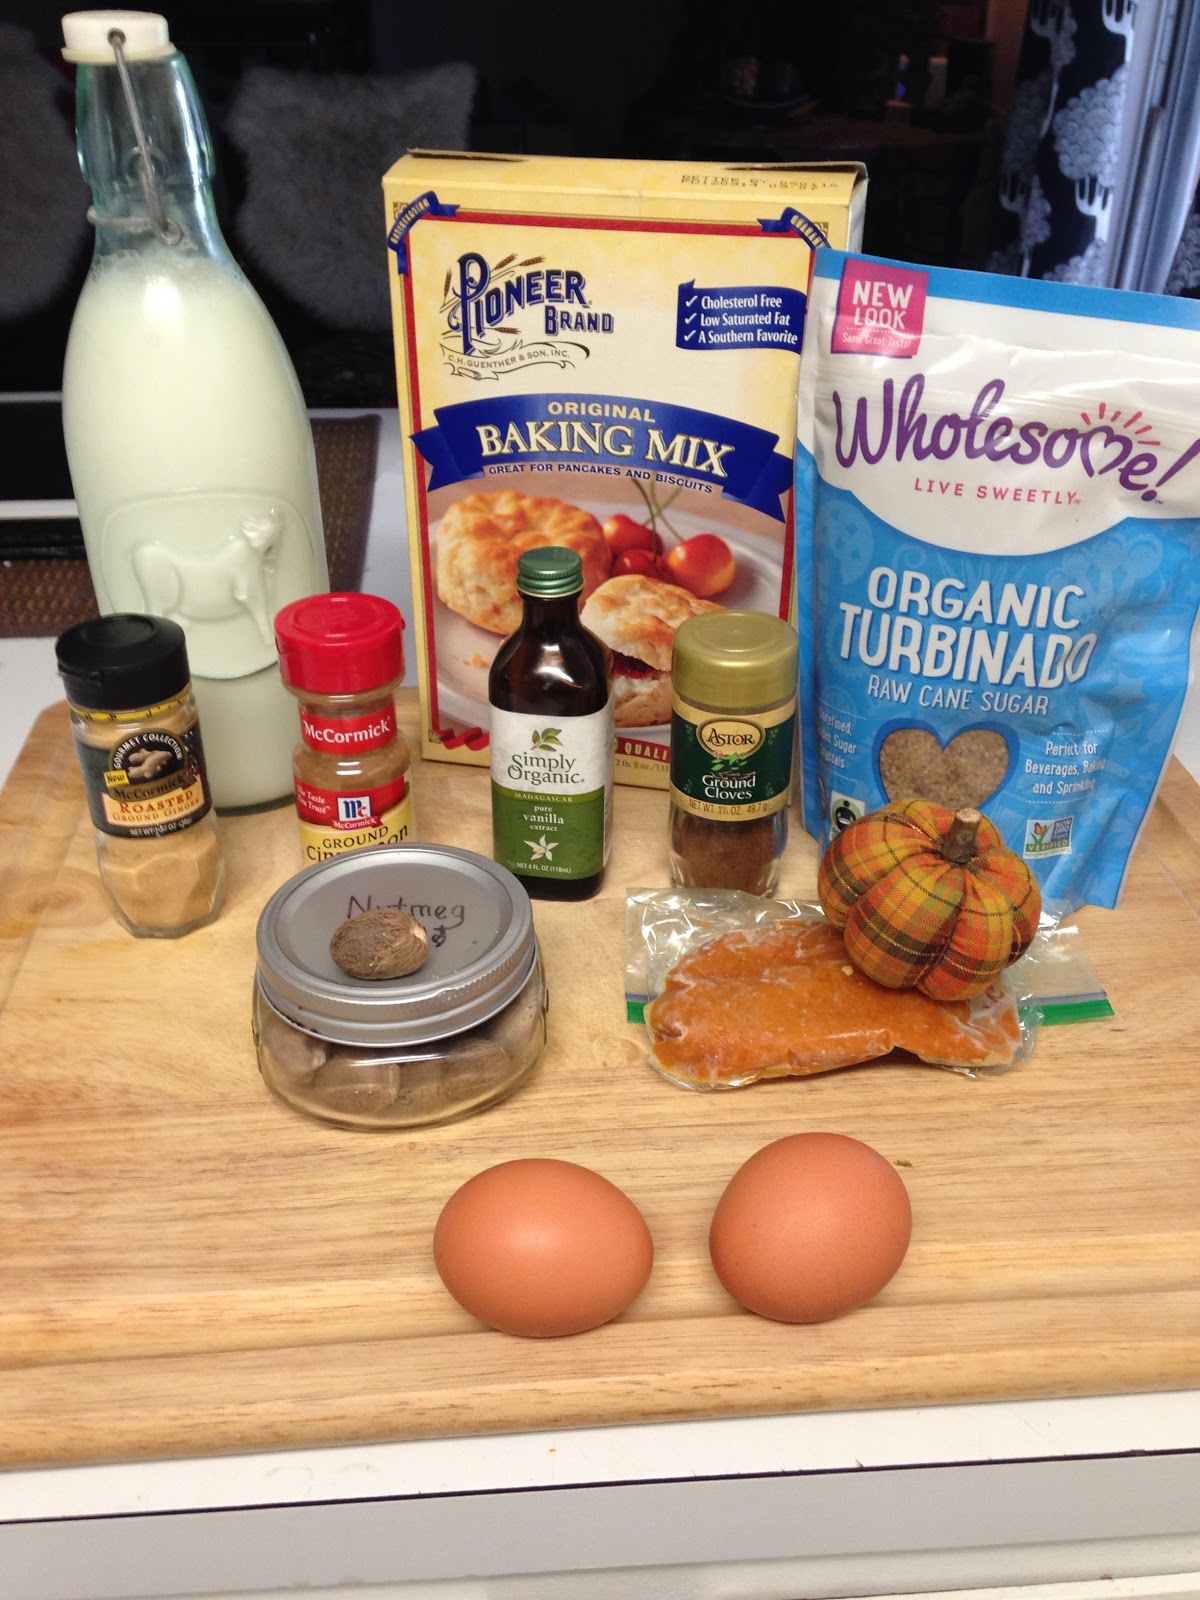
Now, I know that not all of us are lucky enough to have inherited grandmother's good china and silver. (I know that I was only lucky enough to get the good silverware.) I also know that napkins, tablecloths/table runners, place mats, napkin rings, candle stick holders and center pieces can add up and be very expensive.  So, in the next few posts, I am going to show you how you can create a beautiful table using items that you can find in the hardware store, your local Goodwill, and the craft store.  The goal that I had for these items was that they had to be significantly less expensive than if you bought the items retail.  Otherwise, it didn't make any sense to craft an item when you could go out and buy them.
To cost compare, I will include a retail item that is similar to the one that I am showing and will show the price.  I will also do the same for my homemade version and will add up our savings!
So lets get started!

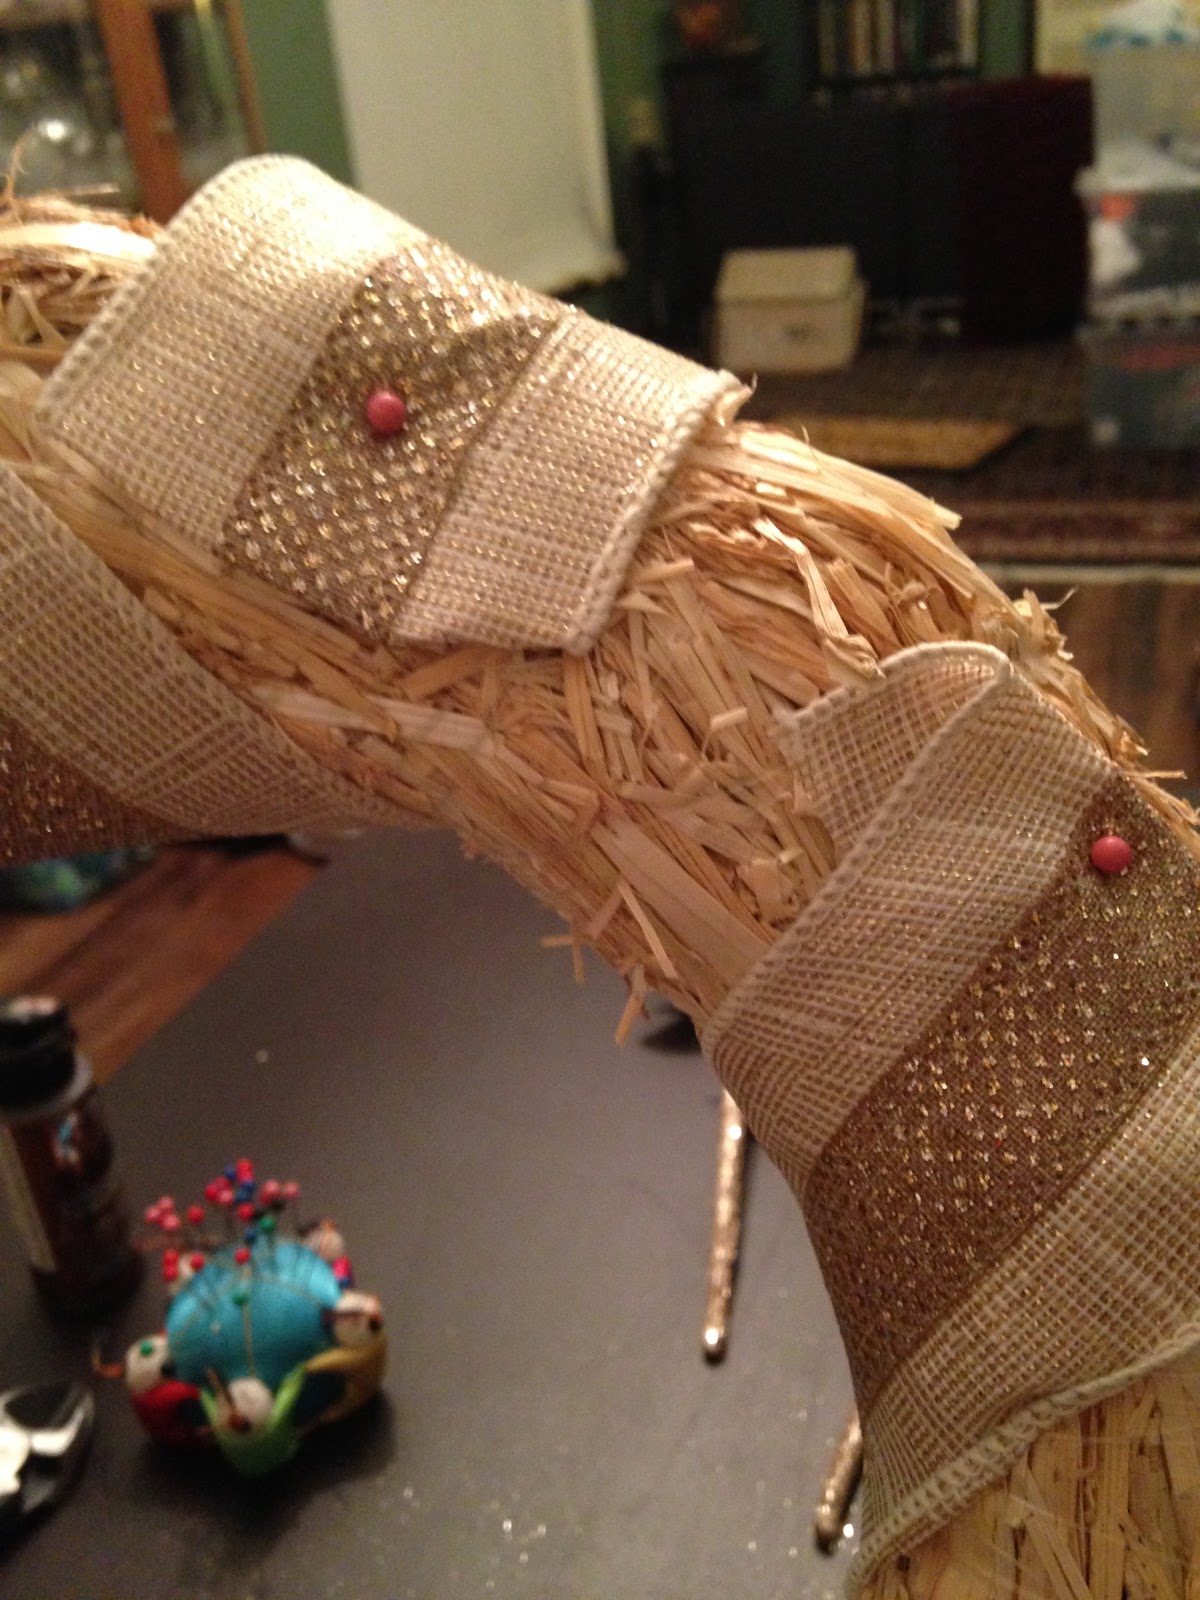
Contemporary Copper Block Candle Holder

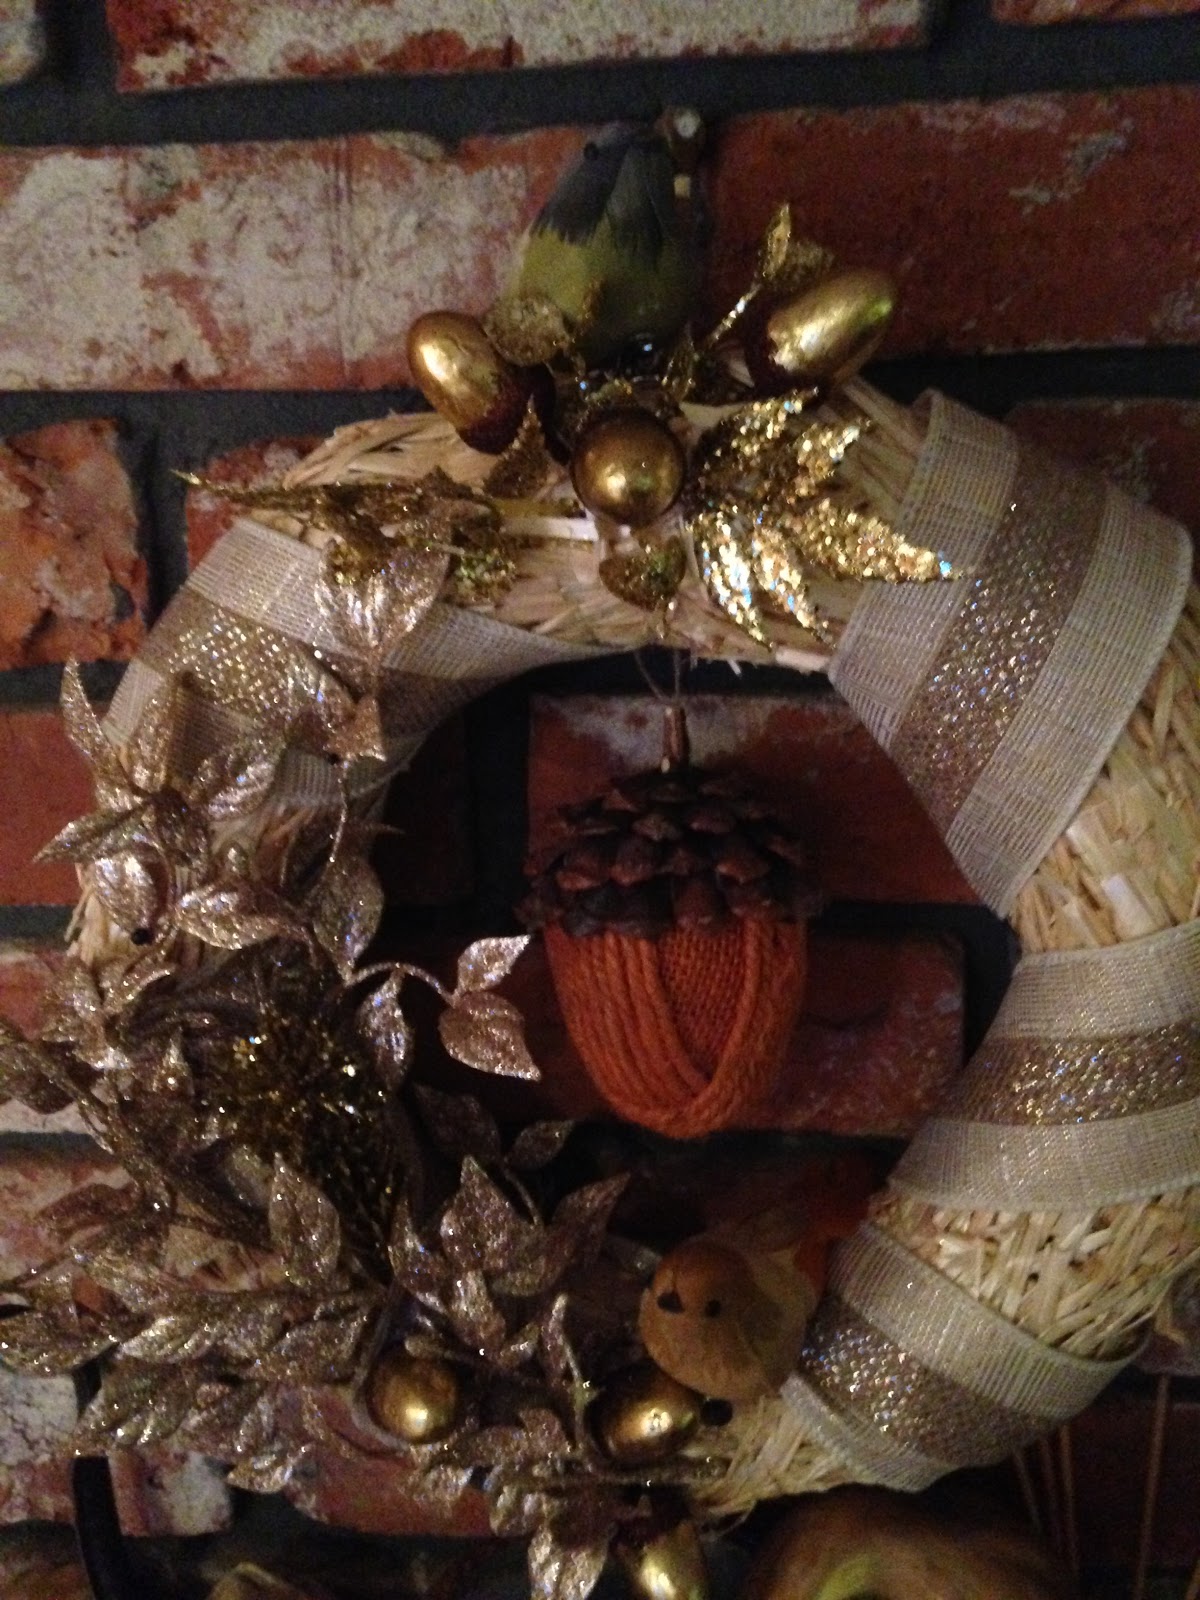
I am in love with all things rose gold and copper right now, so I wanted to decorate my table using copper. However, my fine china, that my husband gave me as an awesome birthday present, is white and silver.  
This is what my fine china looks like.  It is Parchment by Mikasa and I adore it.  My husband got it for my birthday when Macy's was running a crazy good sale.  Which is good, because it has since increase in price by ALOT.

So I had to figure out a way to make silver and copper live together on my table, one of the ways that I decided to do this was with candlesticks to help out as part of my center piece.  

I went online, looking for inspiration and was appalled by the cost of copper candlesticks and nothing tied in my silver.  Always trying to problem solve, I combined two of my favorite candle sticks and made them into one!
Below are the two candlesticks that inspired my artistic vision.

Ebony Wood Block Candle Holder

https://www.amazon.com/Stone-Candles-Candle-Holder-3-5-Inch/dp/B01DOSC7IW/ref=sr_1_1?ie=UTF8&qid=1479694920&sr=8-1&keywords=Block+Candle+Holder

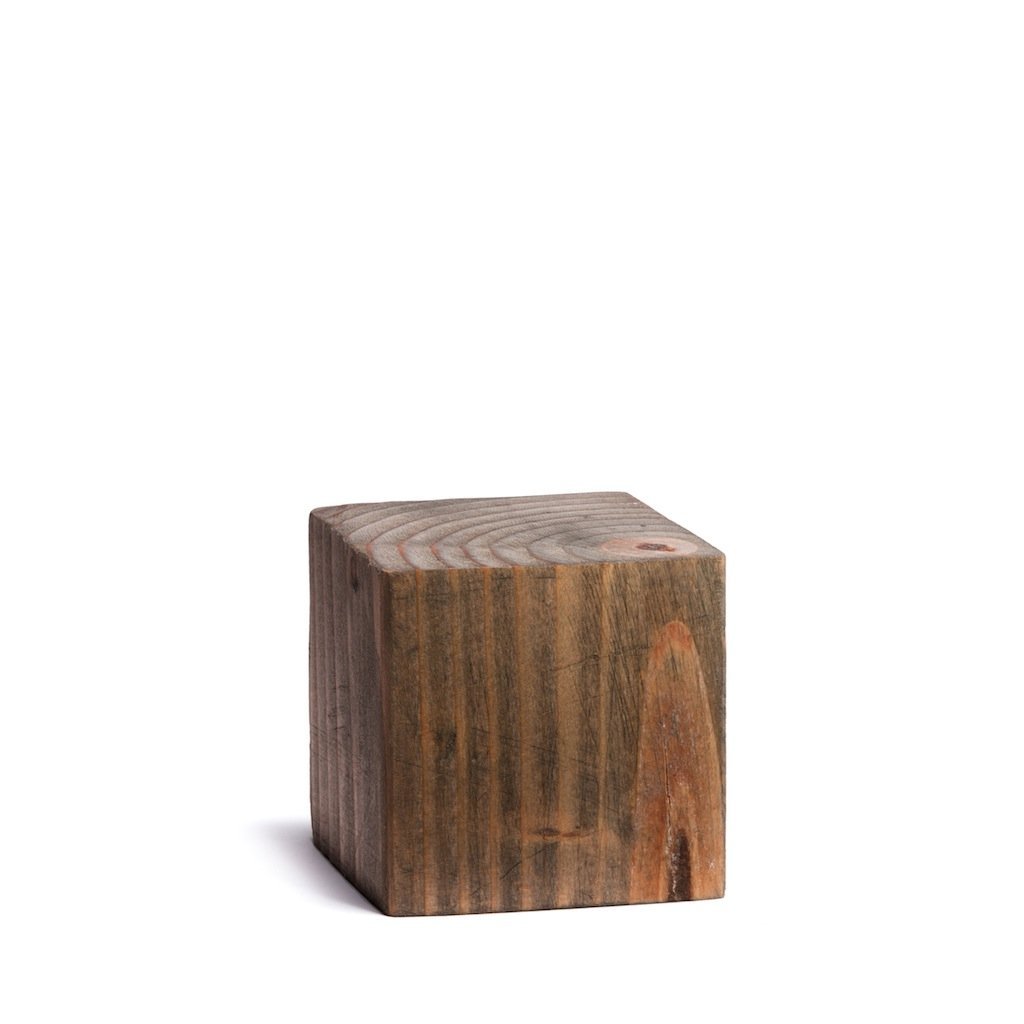
This little block candle holder you can get on Amazon.
It is made of ebony, so that explains some of the price.
It currently is $7.00 per block plus $7.50 shipping.
Two of these, at a bare minimum would cost me $21.50 and that is assuming they combine shipping.


Contemporary Polished Copper Candle Holder


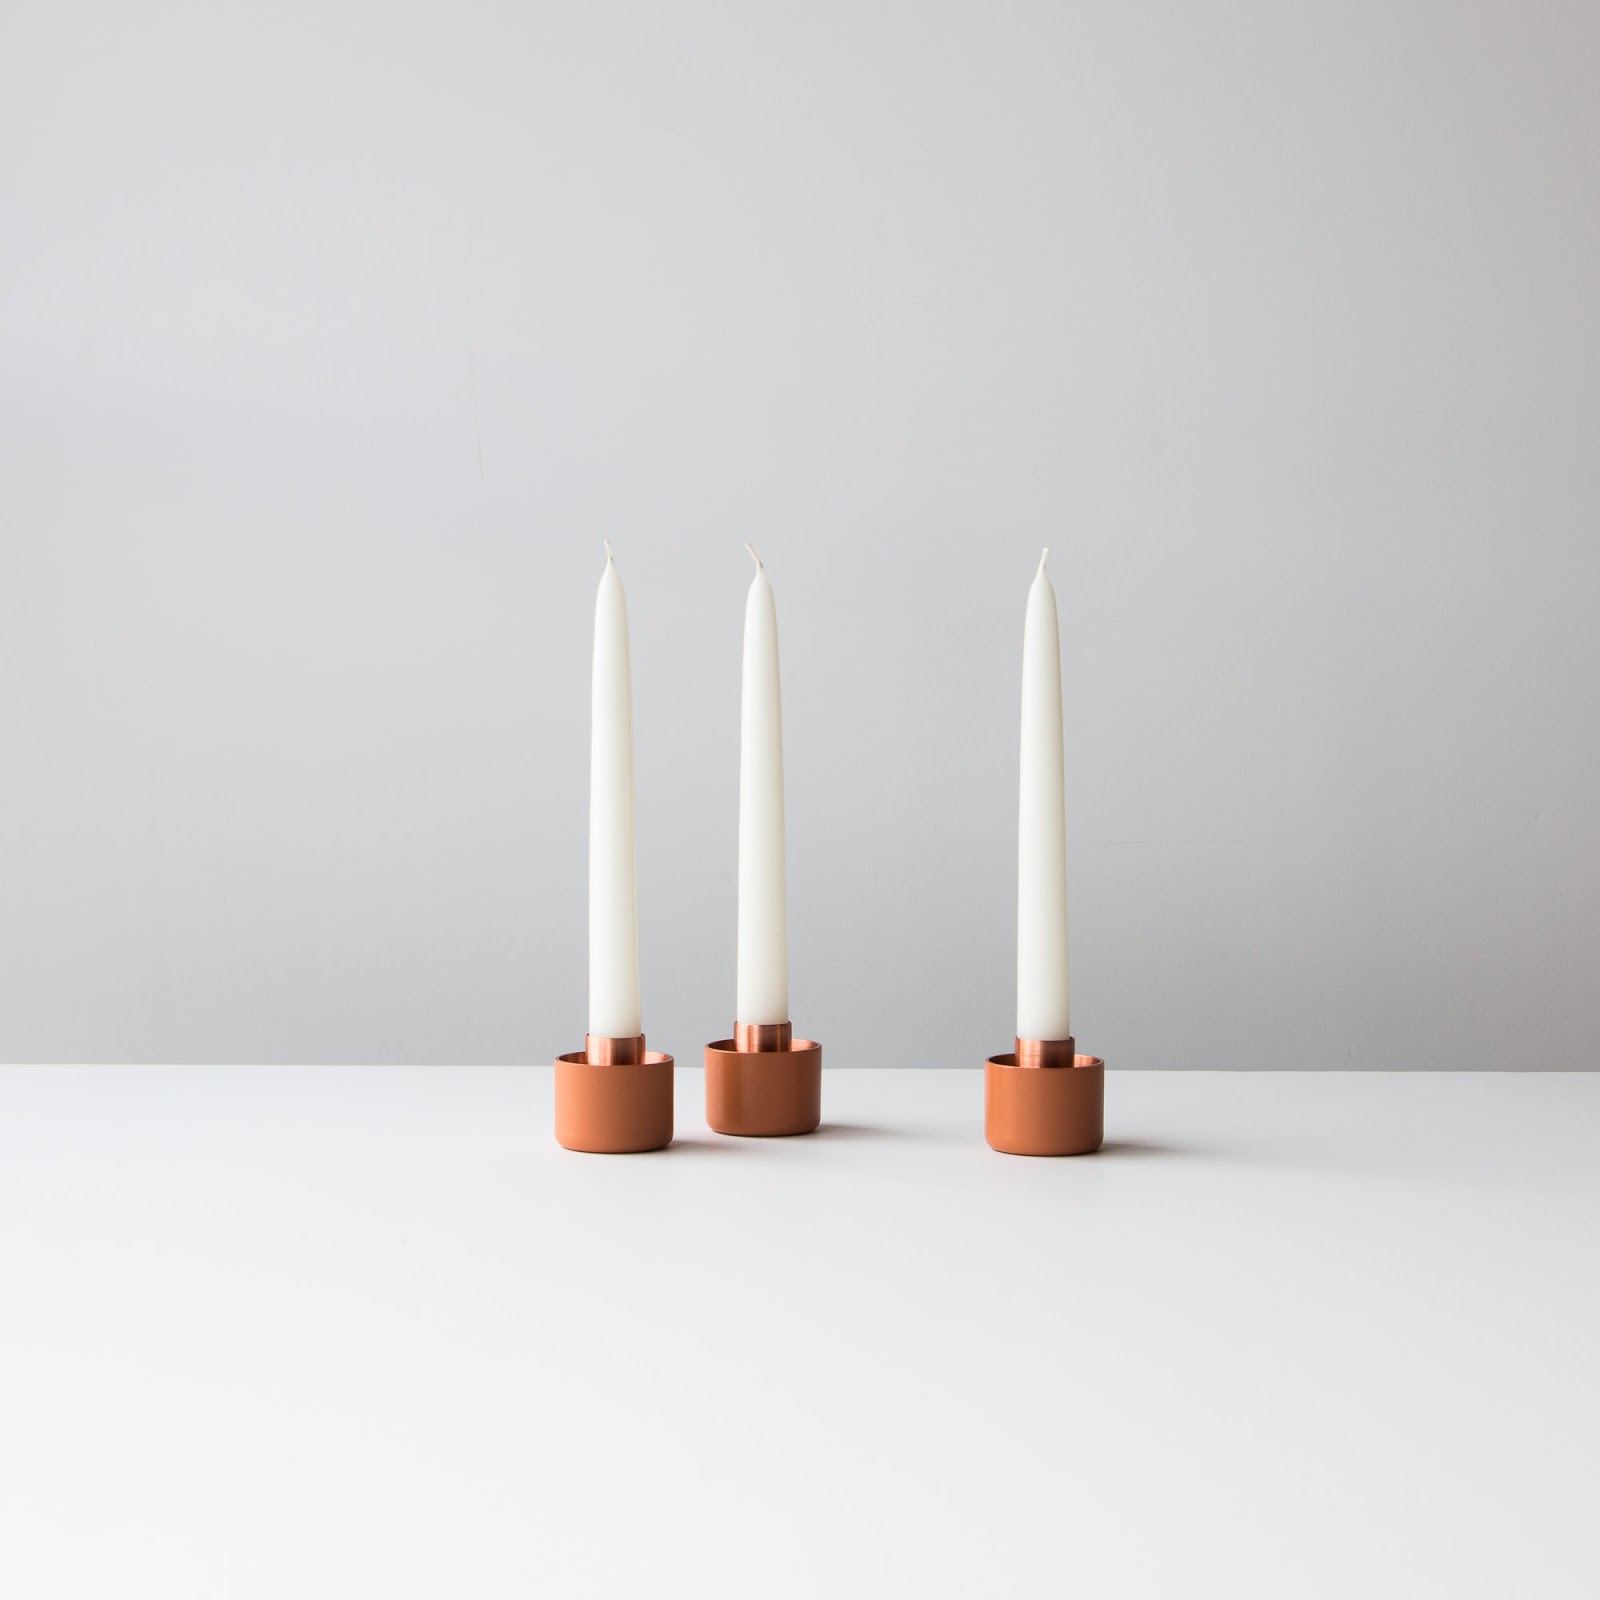
https://www.chicbasta.com/products/polished-copper-candleholder


You can get these candle holder from www.chicbasta.com.  And they are beautiful.
These candle holders are handmade so this usually means the price will go up because they are not mass produced in a factory.
I still have yet to be able to figure out if the pricing on this is for a single candle holder or more.  But I'm pretty sure that the cost is per holder.  So the cost per holder is $29.00 per candle plus shipping. I did not price shipping because, I figured that know that two of these would be $58.00 was enough.

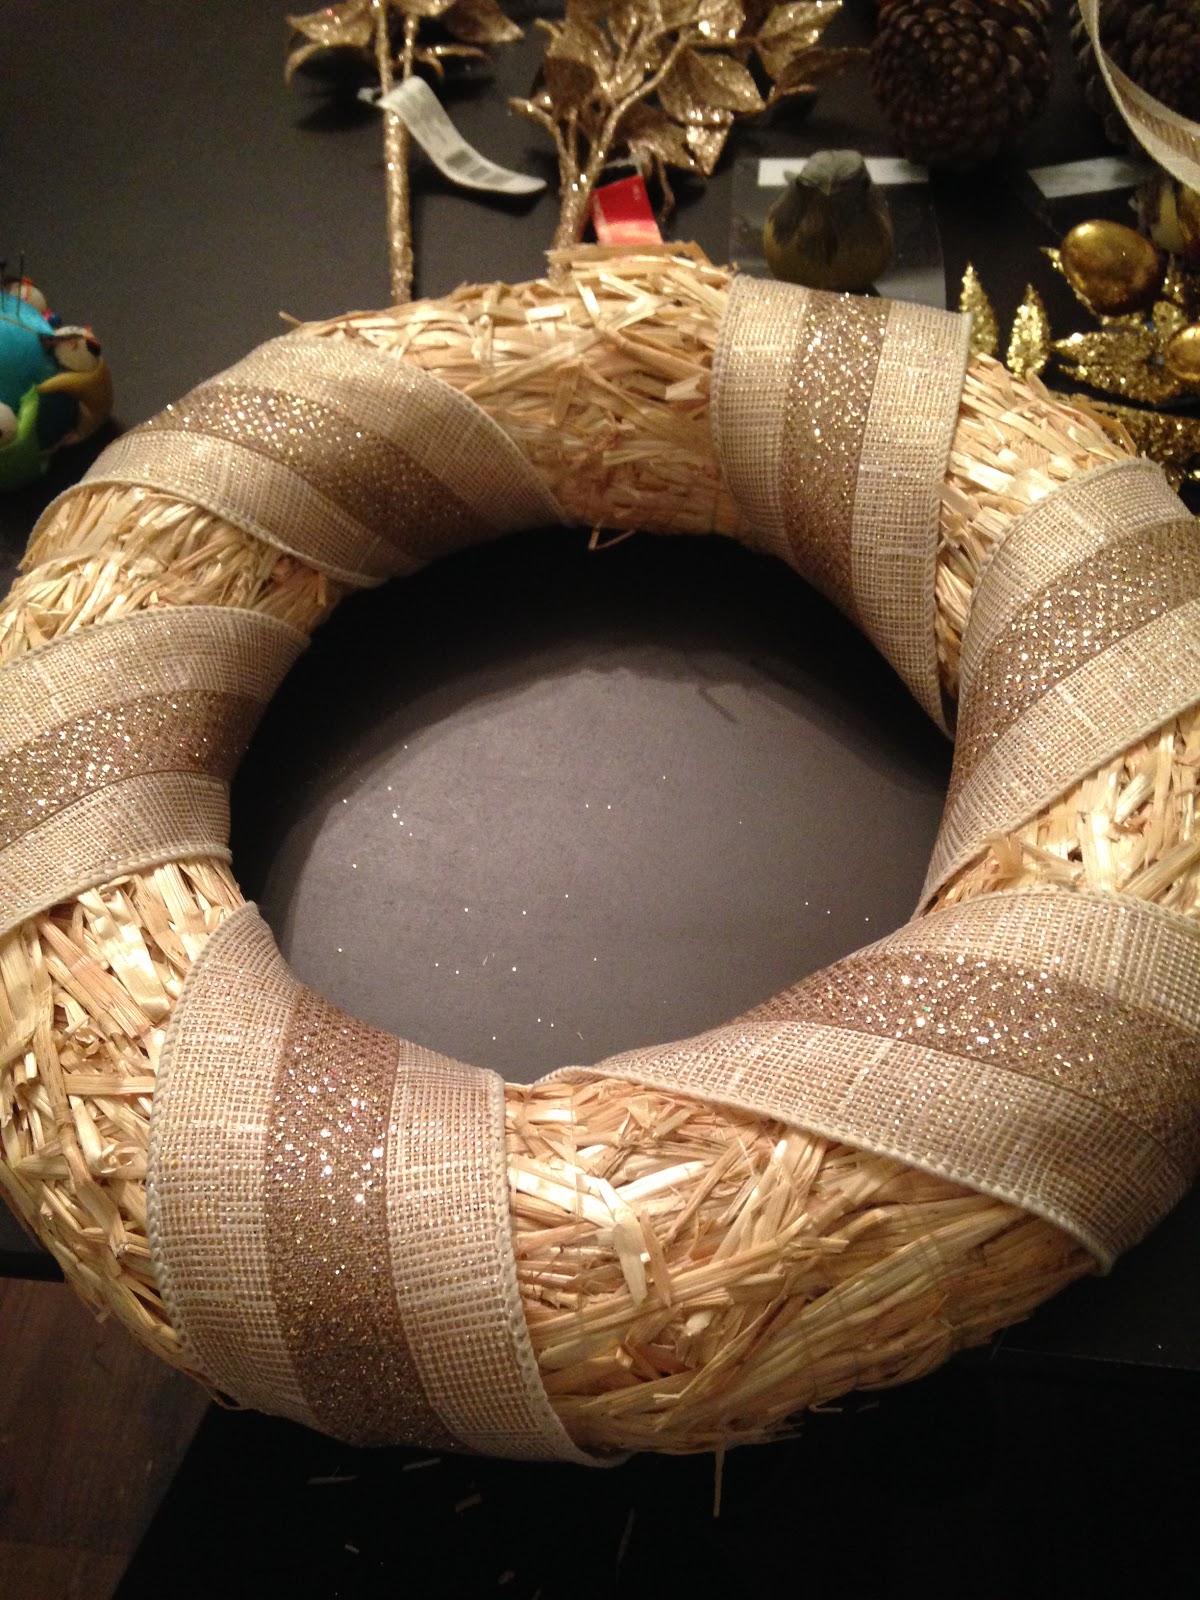
And here's mine.  The pictures aren't as pretty, but I'm not a professional photographer.
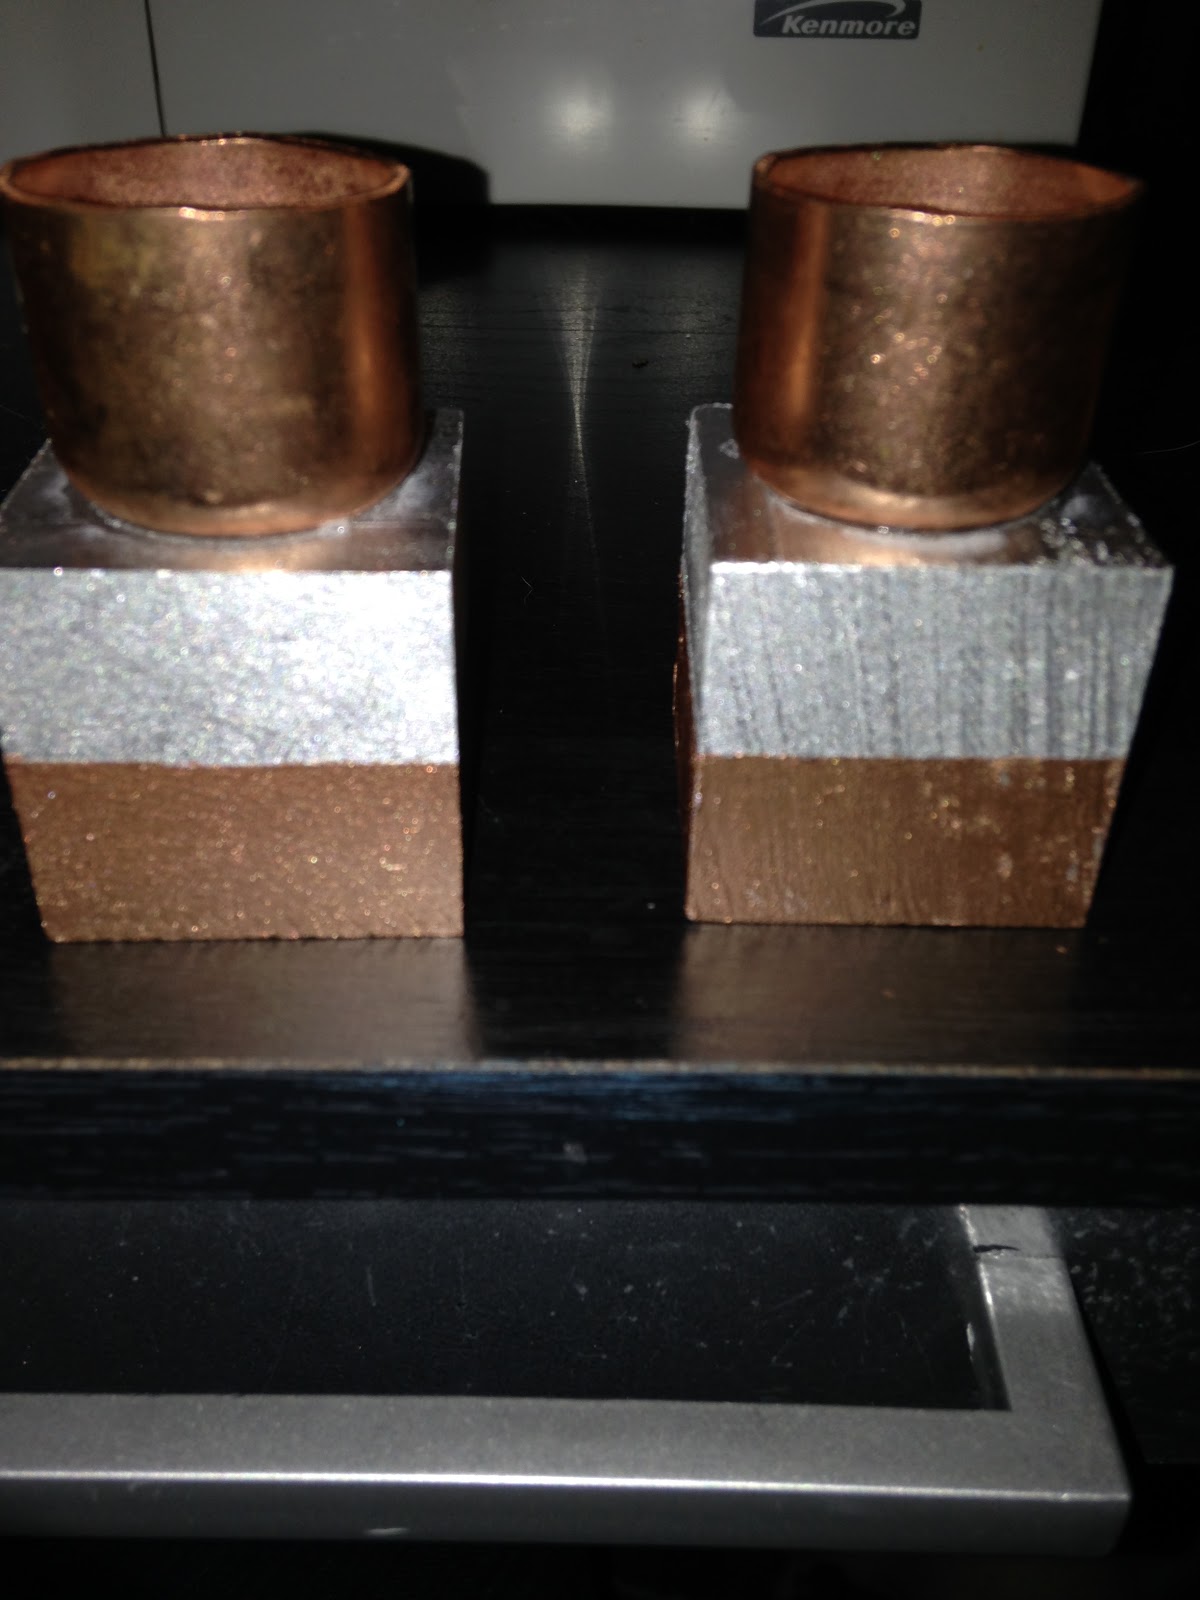
Contemporary Copper Black Candle Holders


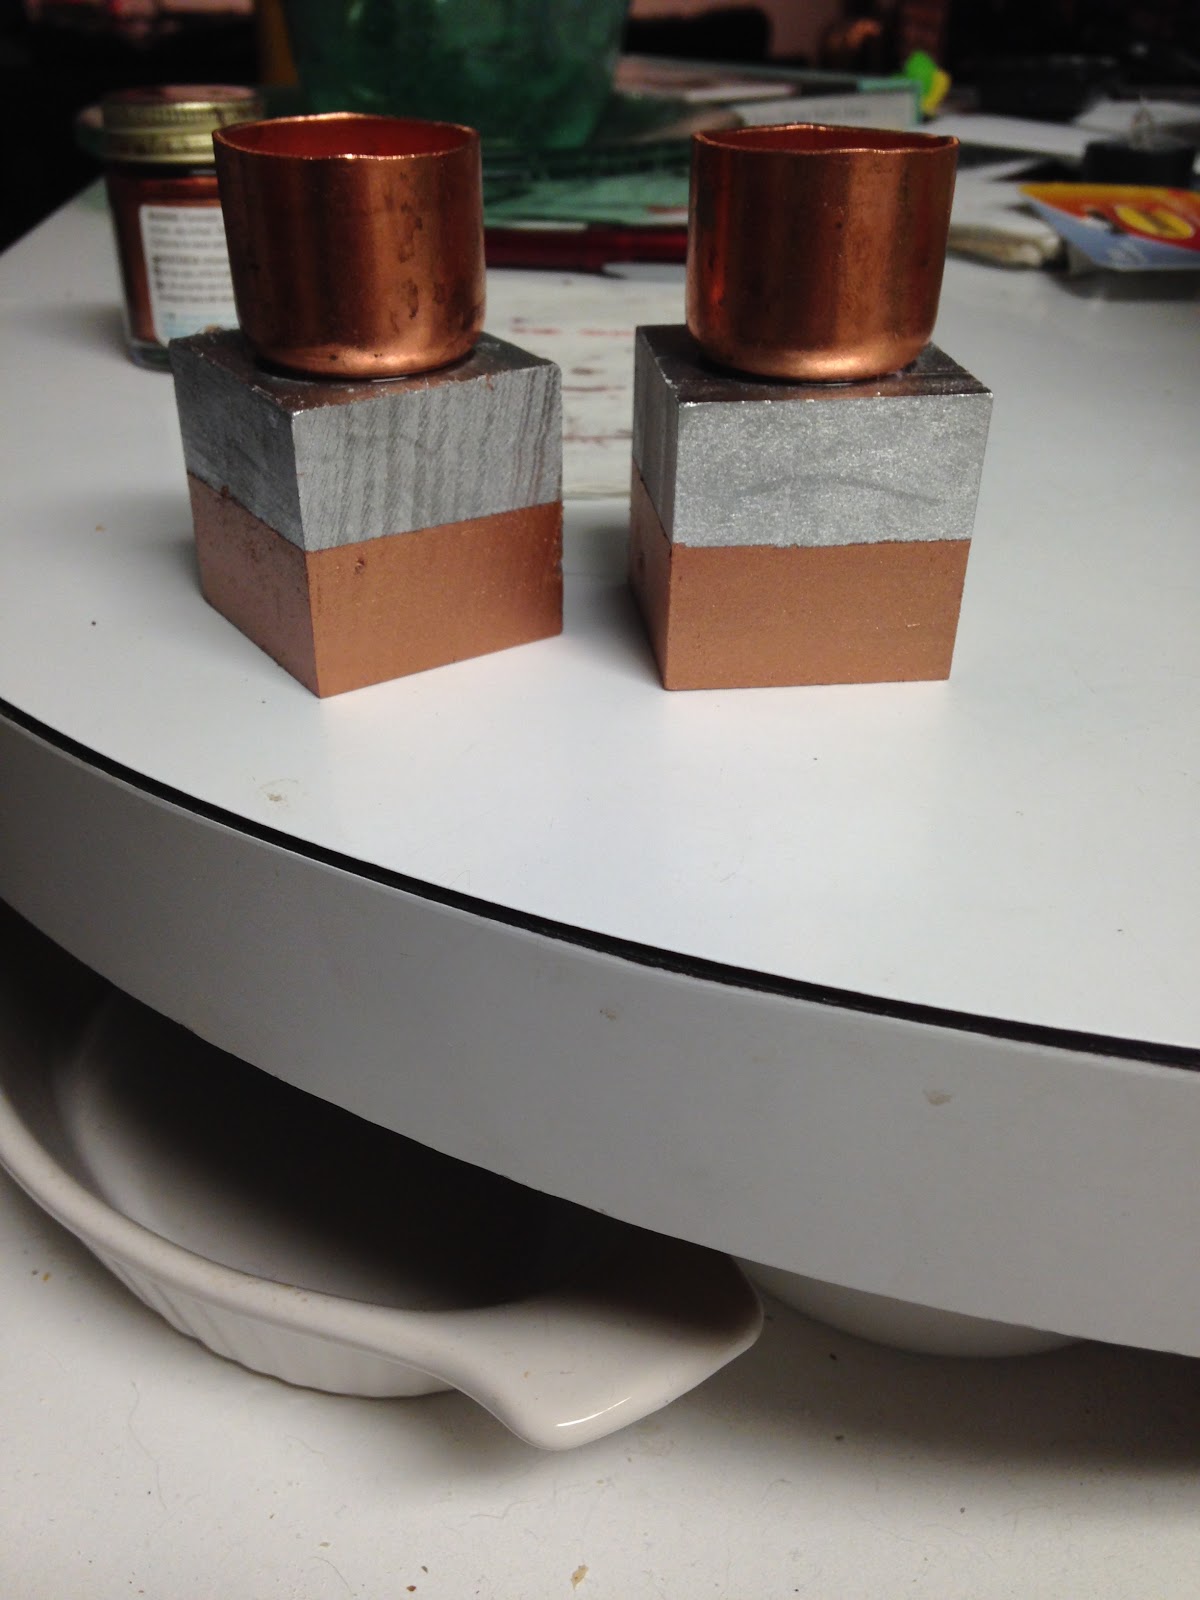
I think these turned out pretty cool.

Materials
2 Copper End Caps (Lowe's $1.25 each)
2 Wooden Blocks (Michael's $1.30 each)
Painters tape (Already had on hand)
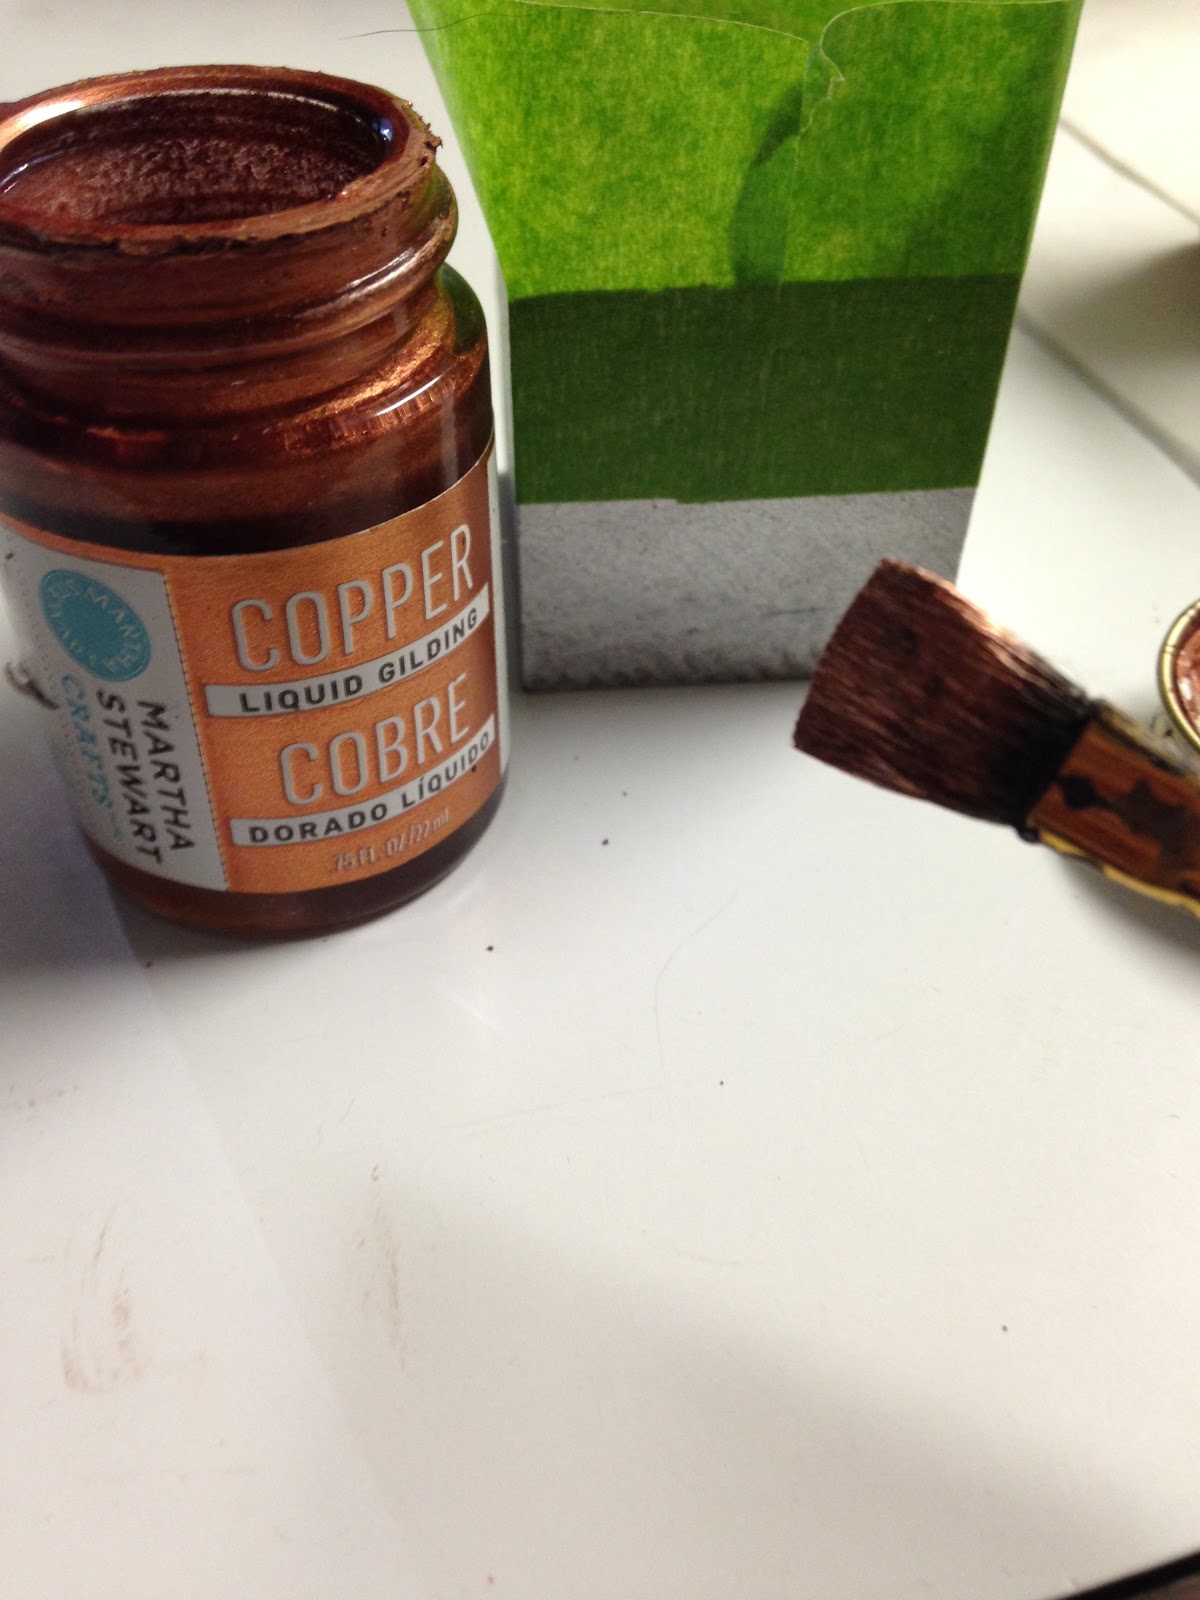
Rustoleum Chrome Spray Paint (Already had on hand but $3.00)
Martha Stewart Copper Liquid Gilding  (Already had on hand $5.00 or get copper acrylic paint for $1.50)
Super glue (Already had on hand - don't even know the price.)

So, for me, the total cost was $5.10 for two.  If you have to get the paint, the total cost will be around $10.00.
Still better than the two above.
NOTE:  The least expensive way to get candlesticks is to get them from a garage sale or Goodwill, but most of these are very traditional and are made of brass.  Its also hit or miss if you will be able to find them.

Instructions
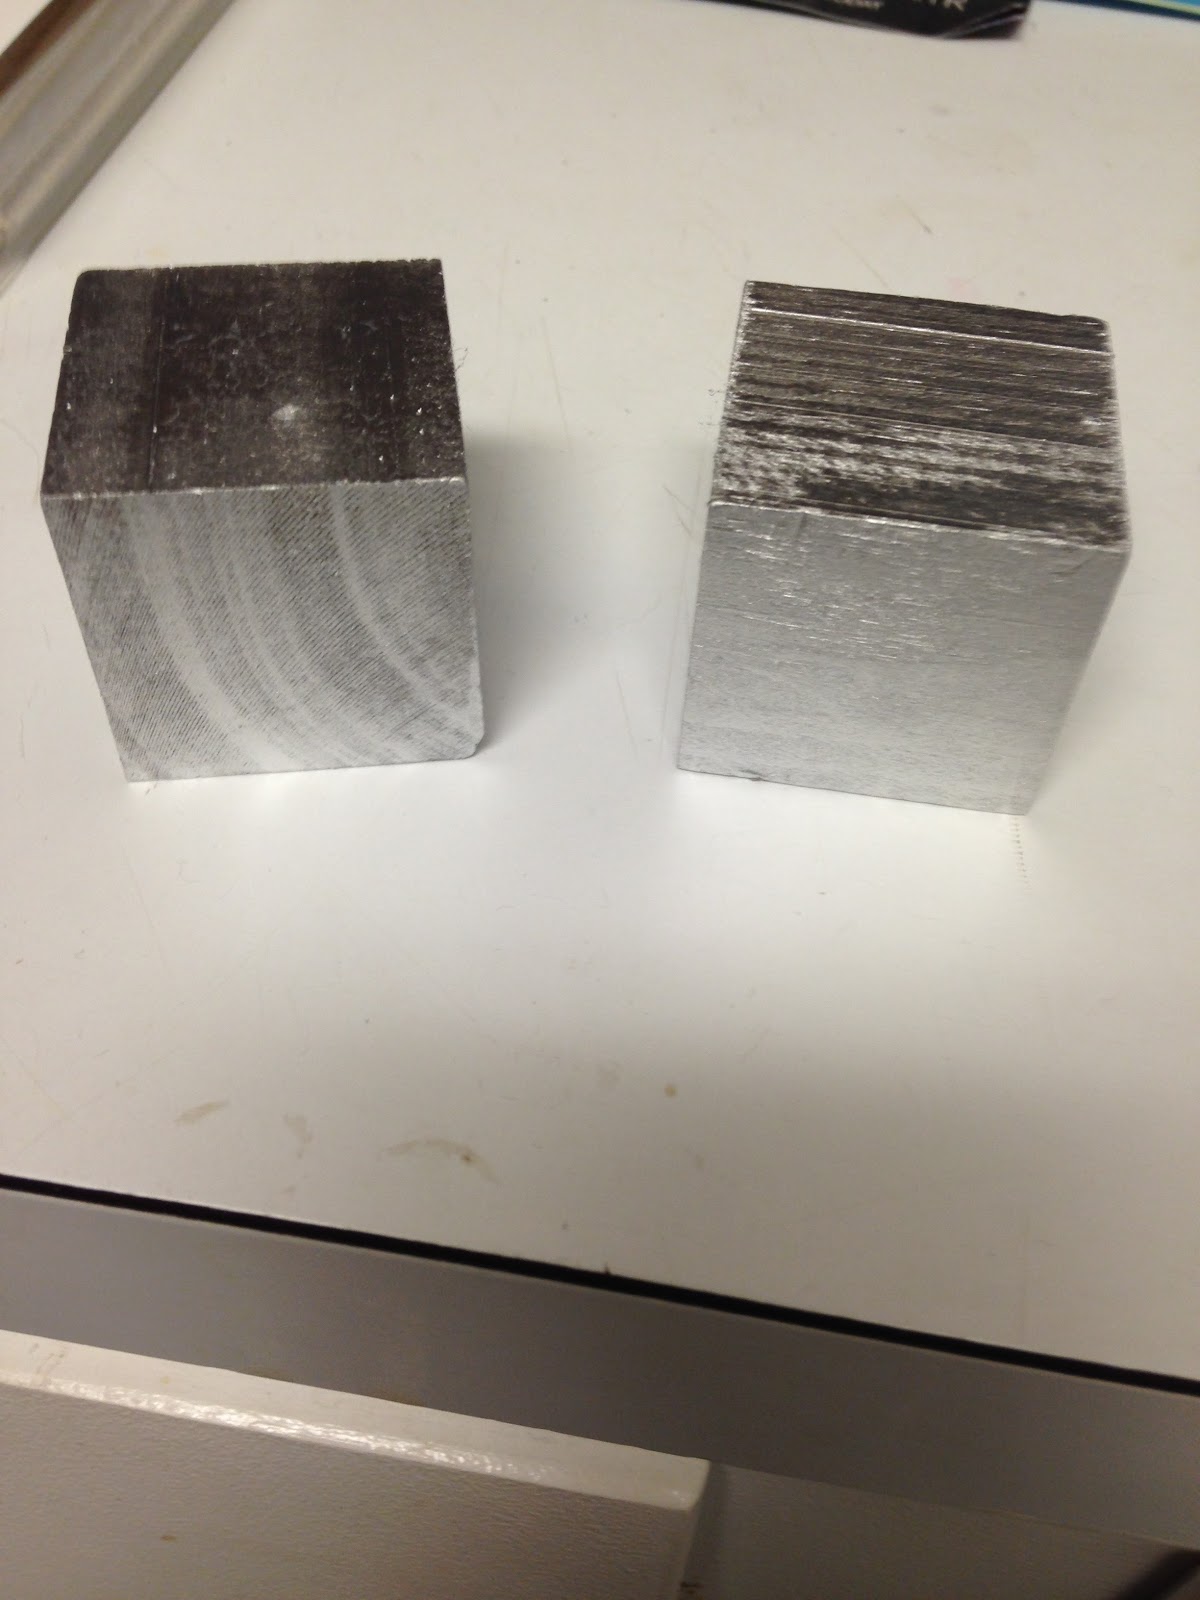
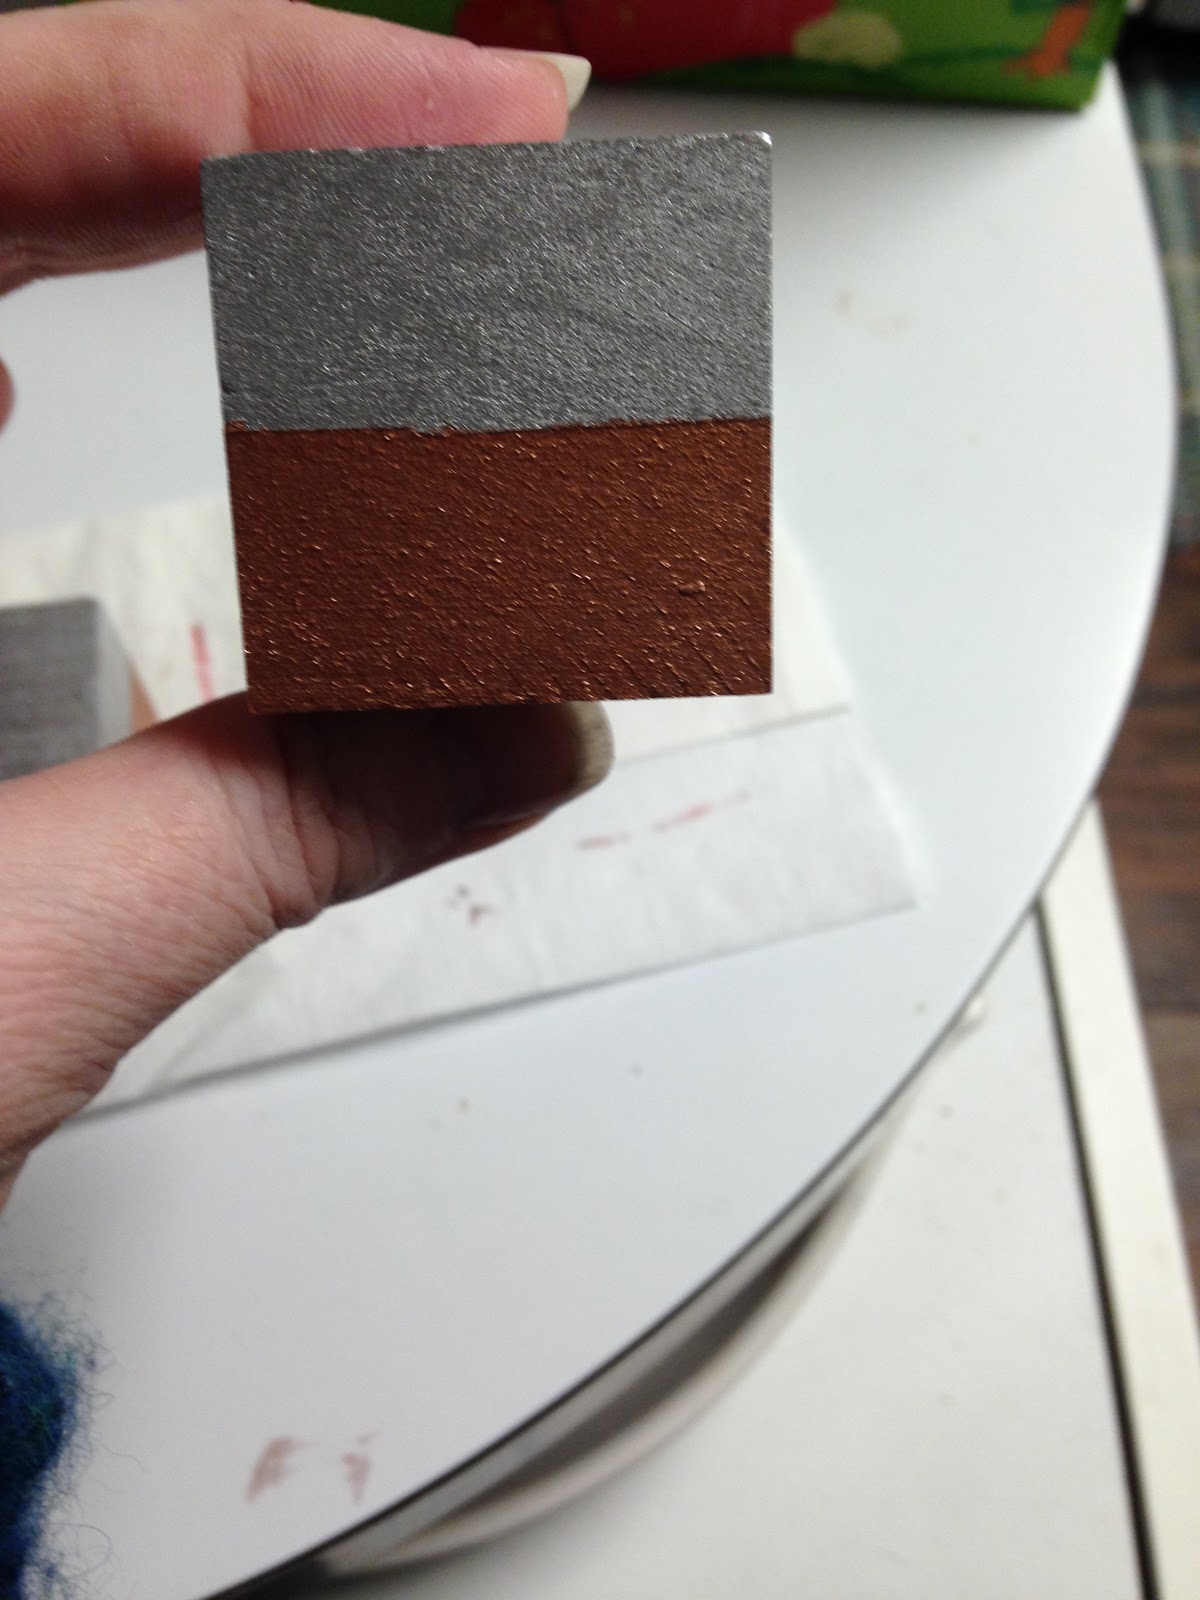
1.  Spray wooden blocks with chrome spray paint leaving the bottom unpainted. OR paint the blocks using silver acylic paint.  (I find spray painting easier.)


2.  Once the silver paint has dried, put painters tape on the blocks, leaving whatever part you want to paint uncovered.  I chose the bottom that I wanted to paint copper.


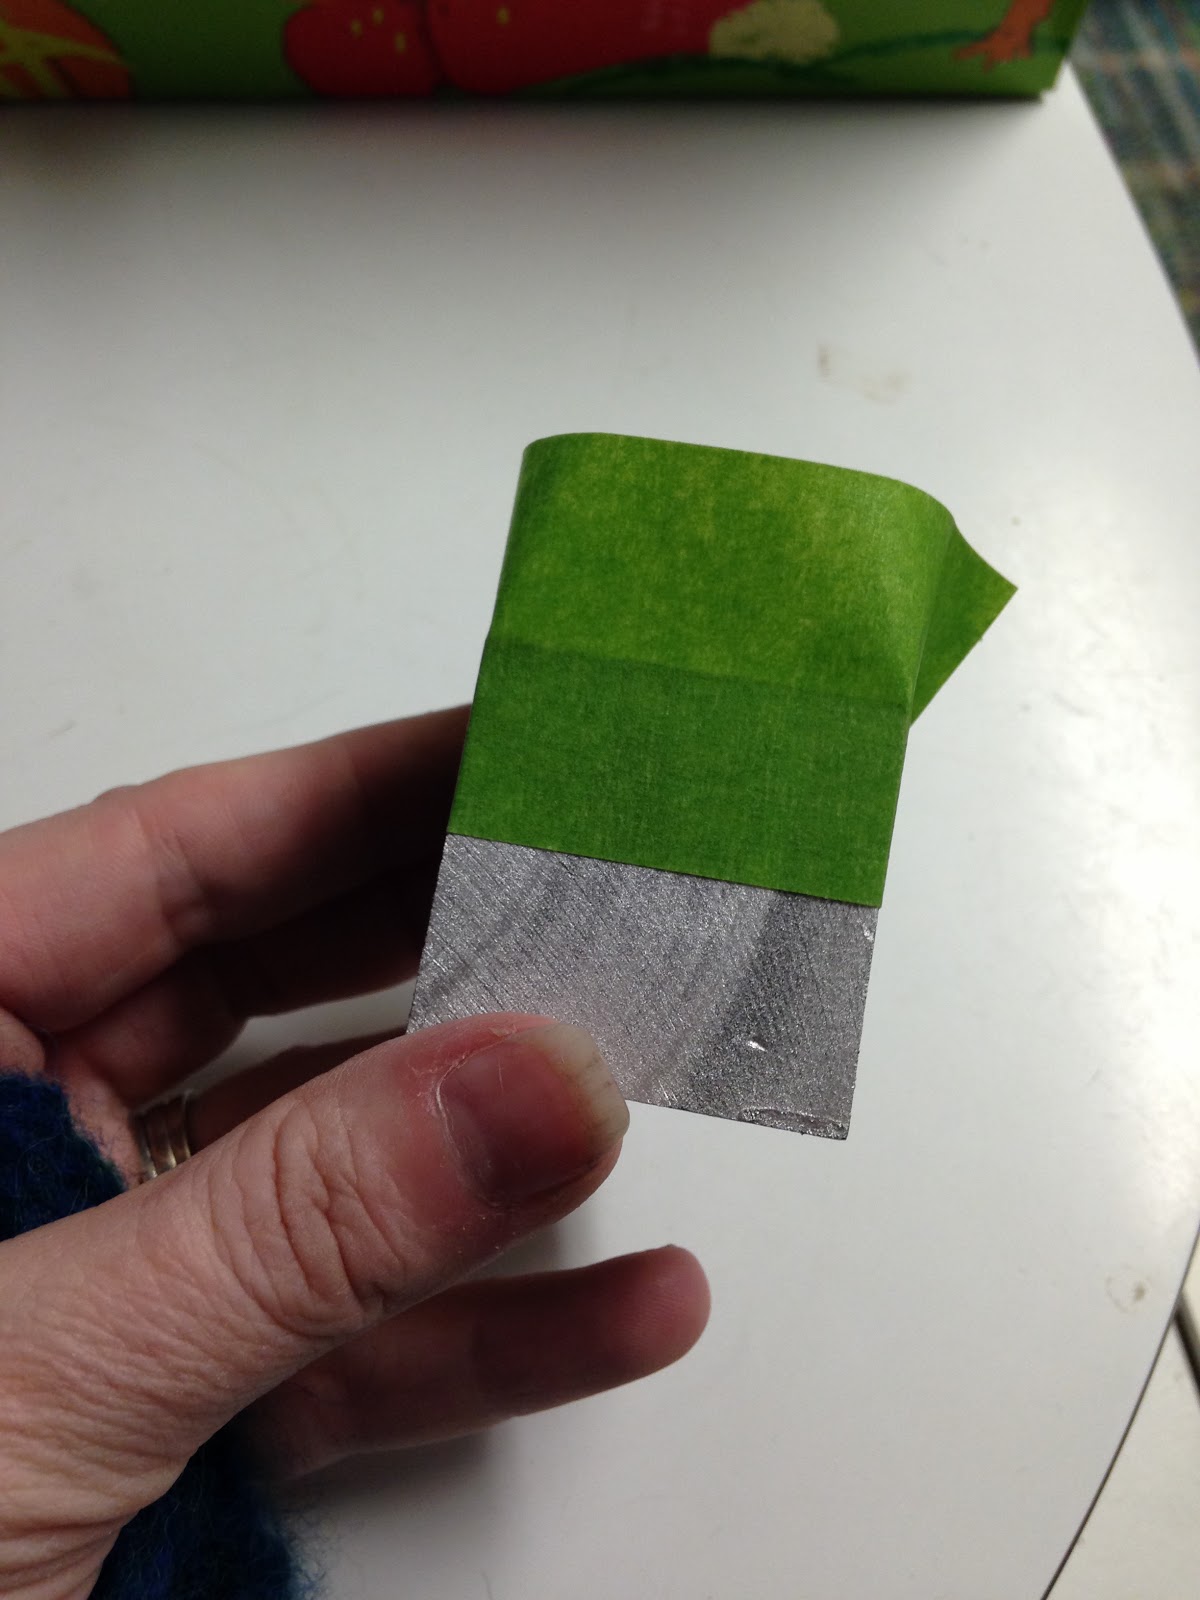
3.  Make sure to match the tape on the second block so that they candle holders will match.


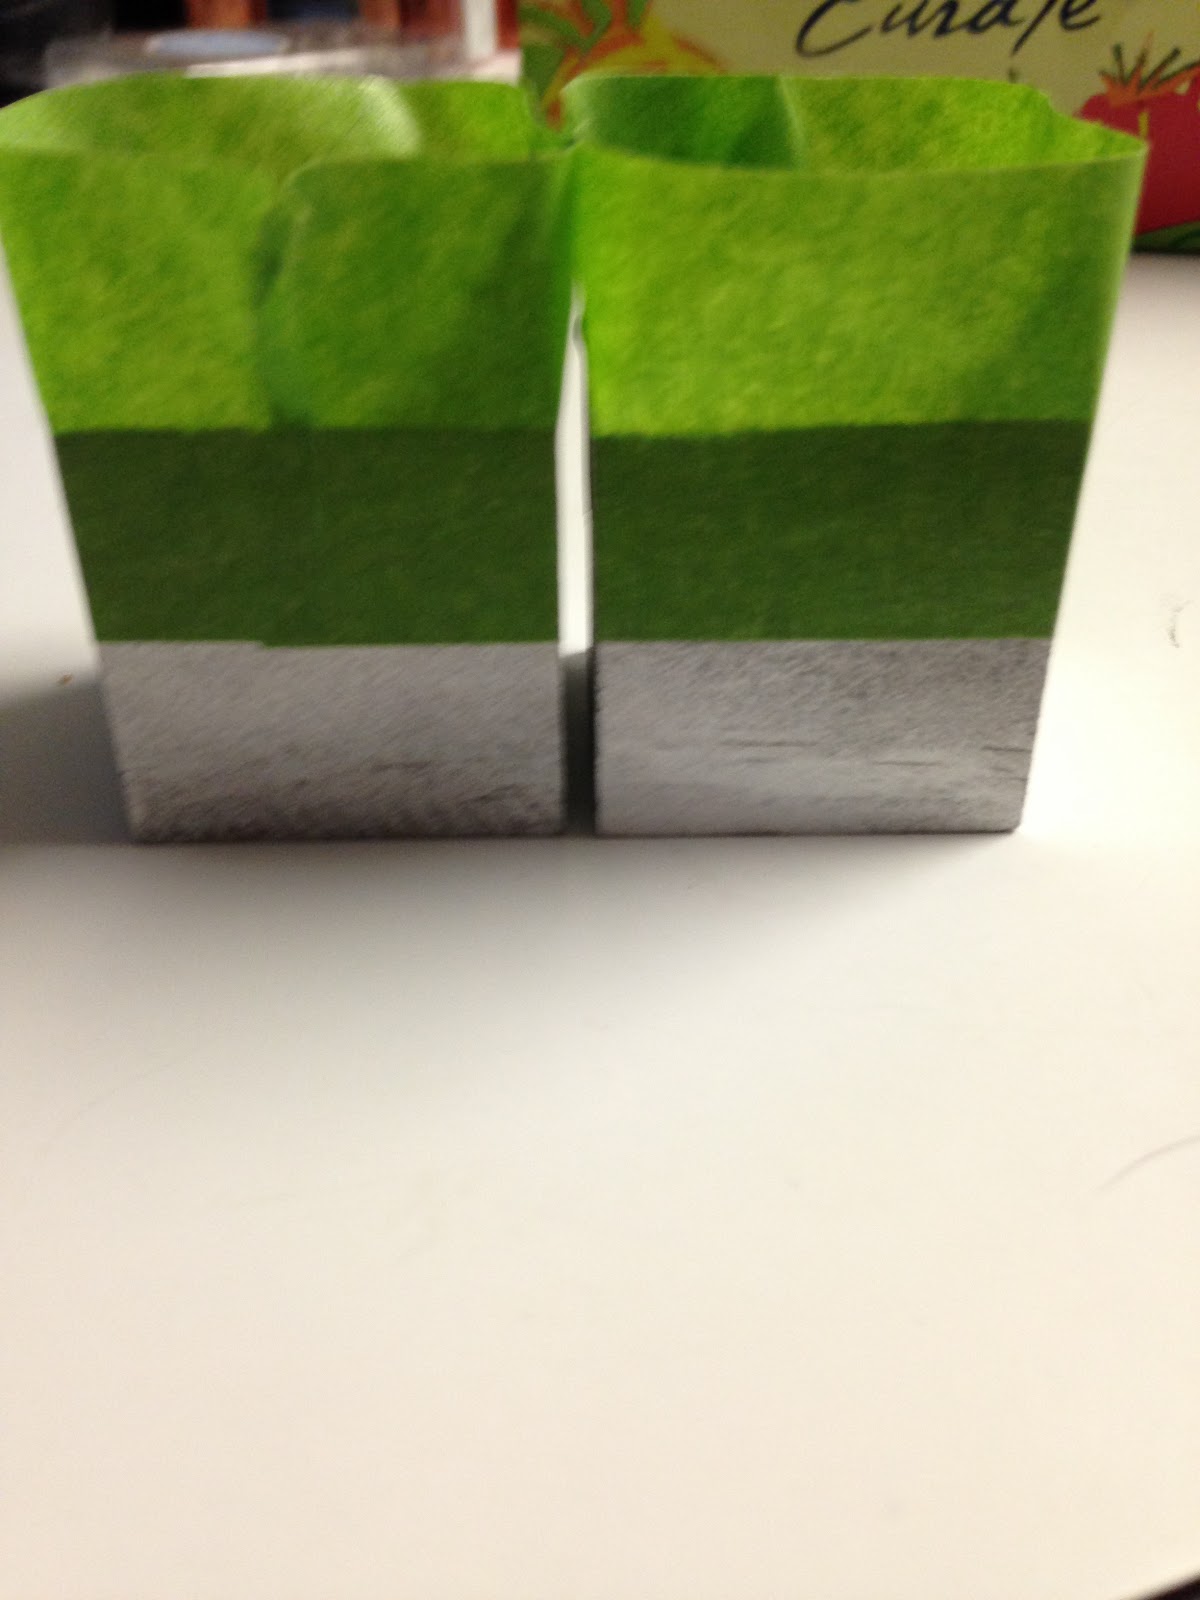
4.  Paint the un-taped parts of the blocks copper.


5.  Once the paint has dried, peel off the painters tape.

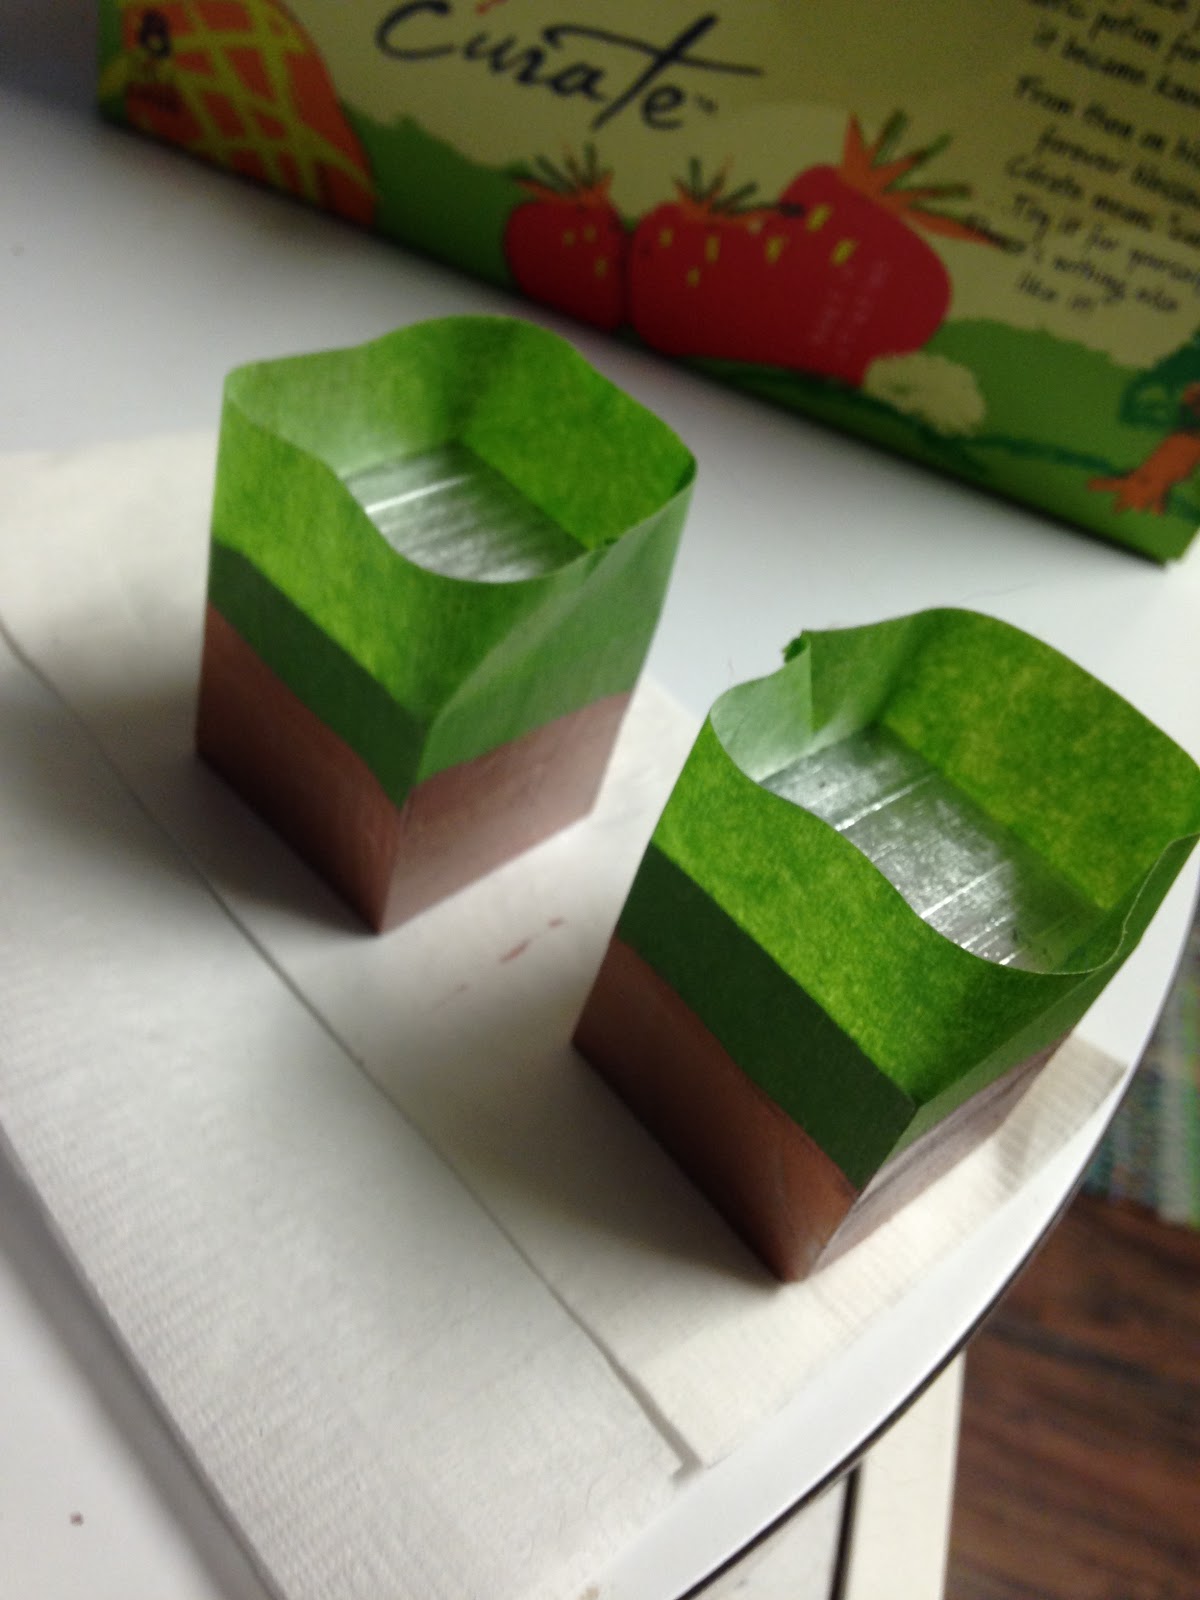
We're more than halfway there!
6.  Put an even, thin film of super glue on the bottom of the copper caps and place on the top of the block trying to be as centered as possible.  (You have about 15 seconds of time that you can move the cap around. After that, it stays where you glued it.)


These are going to be larger than a taper candle.  I do have a few solutions for you.
A.  Glue a smaller copper coupling into the copper caps.  They have a size that will fit a taper candle perfectly.  This will also look more like the handmade candle holders in the picture above.
B.  Put silly putty around the bottom of the candle the width of the space between the candle and the copper cap.  This has the advantage of being fun.
C.  Use a lighter and slightly melt the wax on the bottom of your candle.  Before the wax gets cold and hardens again, push gently into the candle holder.


Voila!  Contemporary candle stick holders!

Now we move on to napkin rings.
Keeping with the copper theme, I decided to do copper napkin rings.  Again, not inexpensive.
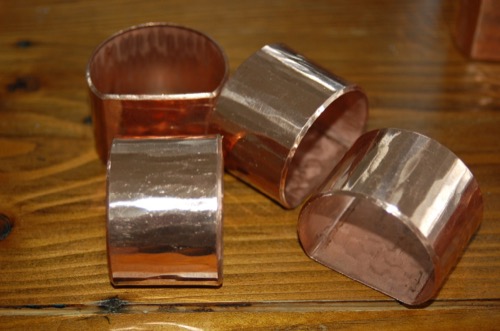
Copper Napkin Rings

I am going to show you two ways to make copper napkin rings as one way requires a tool that almost none of us have and I wanted you to be able to have options.
But first, I will show you my price comparison napkin ring holders.


http://www.ozmeximports.net/index.php?app=ecom&ns=prodshow&ref=113200&sid=4lorf013khcq96105sy4646kh27ob267

These copper napkin rings are flat on the bottom and are handmade in Mexico.  As far as I can tell, they do not come in sets but have to be purchased individually.
The cost is $7.60 each plus shipping.  So $30.40 for a set of four.


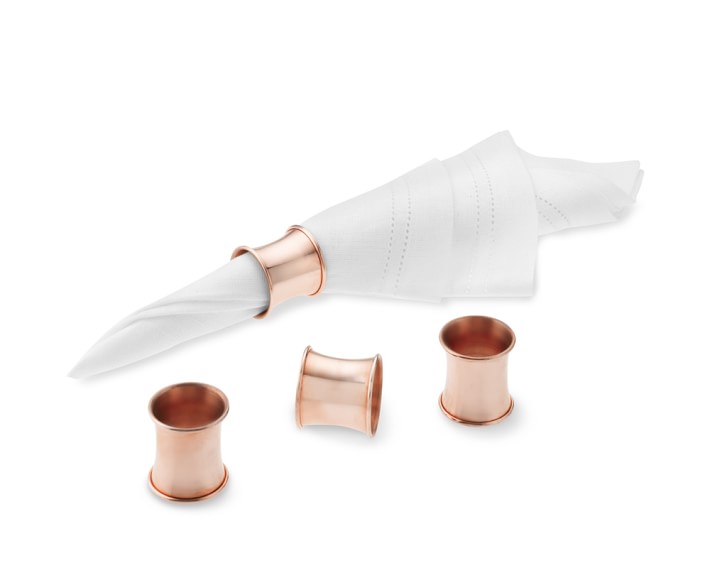
http://www.williams-sonoma.com/products/2423601/?catalogId=27&sku=2423601&cm_ven=Google_PLA&cm_cat=Shopping&cm_pla=default&cm_ite=default&kwid=productads-adid^45527543503-device^c-plaid^83089552903-sku^2423601-adType^PLA&gclid=CjwKEAiAsMXBBRD71KWOh6fcjRwSJAC5CNE19wlpZw_eZknPvpmlLg3z4KXe8e1qkgN97AudG7zZVhoCQfvw_wcB

These copper napkin rings have a lovely beveled edge.  So these are fancier than the ones that I will show you how to make.
Cost for four is $31.96 at Williams-Sonoma.

And here's mine!
This is the first option made out of toilet paper rolls.  They cost me a total of $6.48.
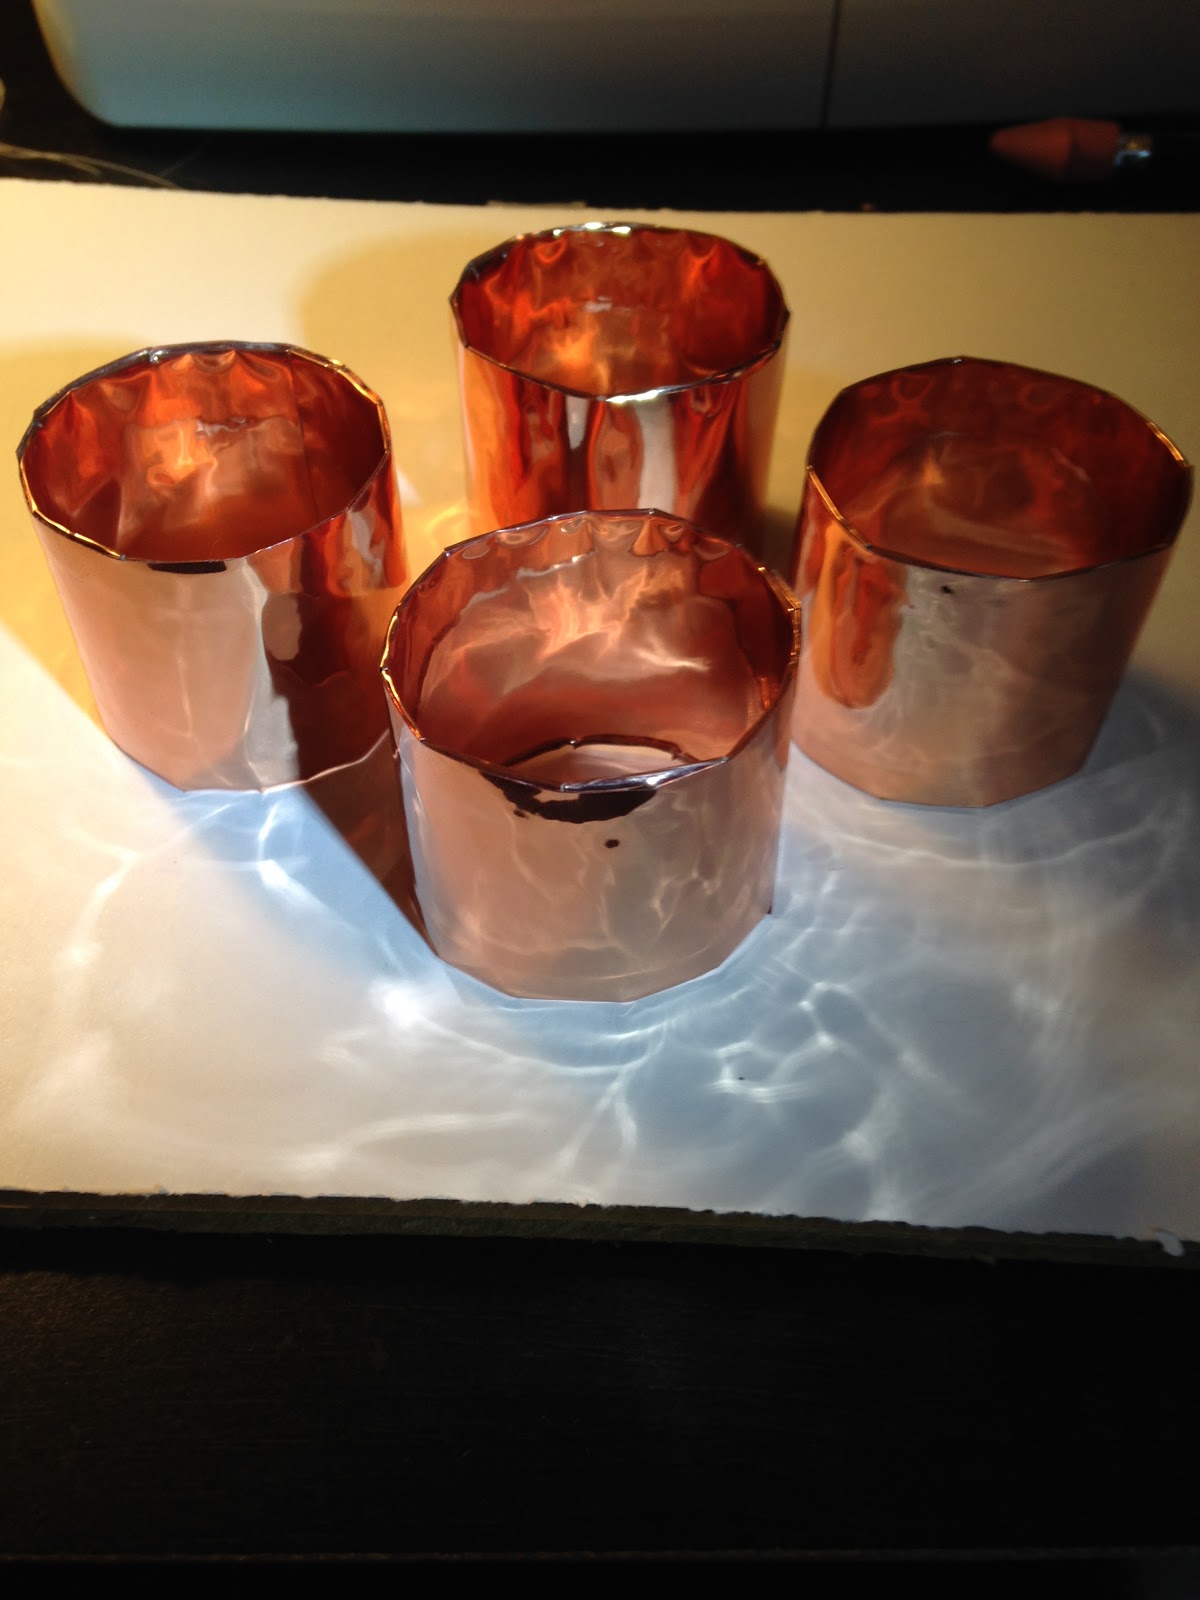
These may be my favorite thing that I have ever made from a toilet paper roll.
Materials 
2 toilet paper rolls
1 Sheet Self-Adhesive Chrome Sign Vinyl in Copper (I got three sheets on Ebay for $6.48)
Ruler
Dressmaking tape measure
Scissors
Exacto Knife

Instructions
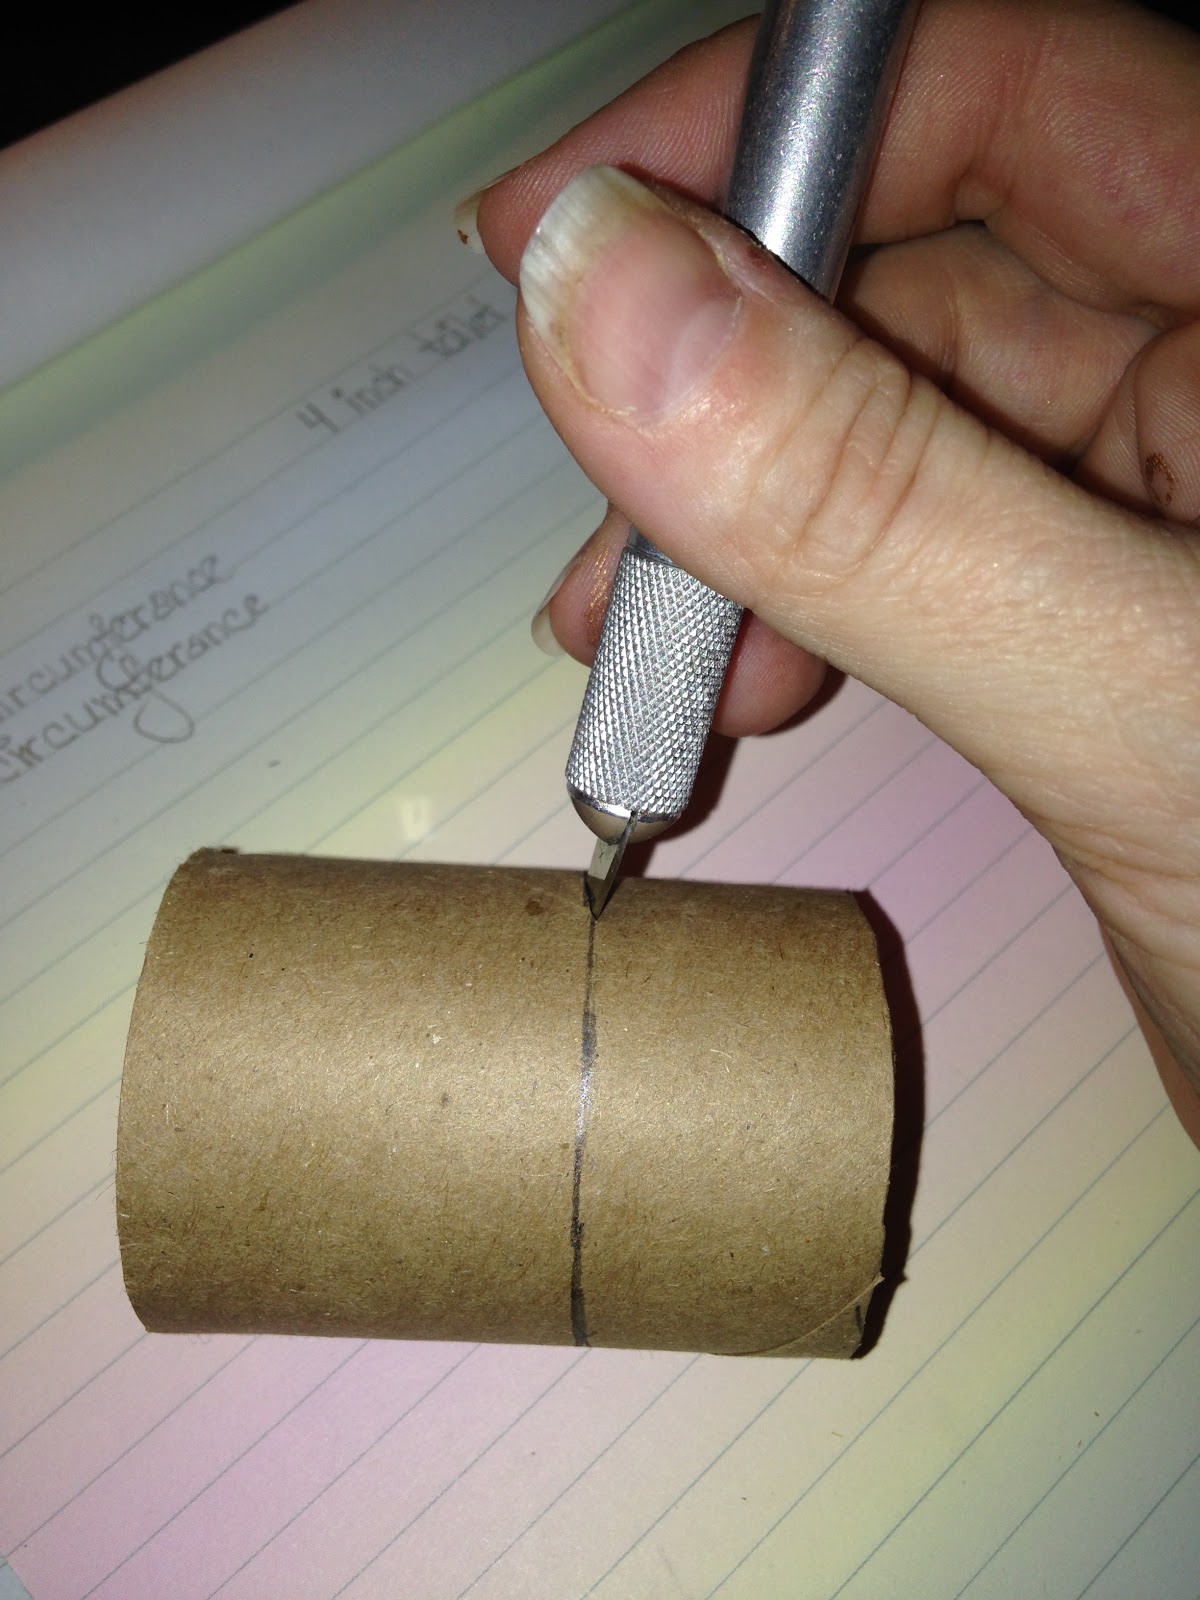
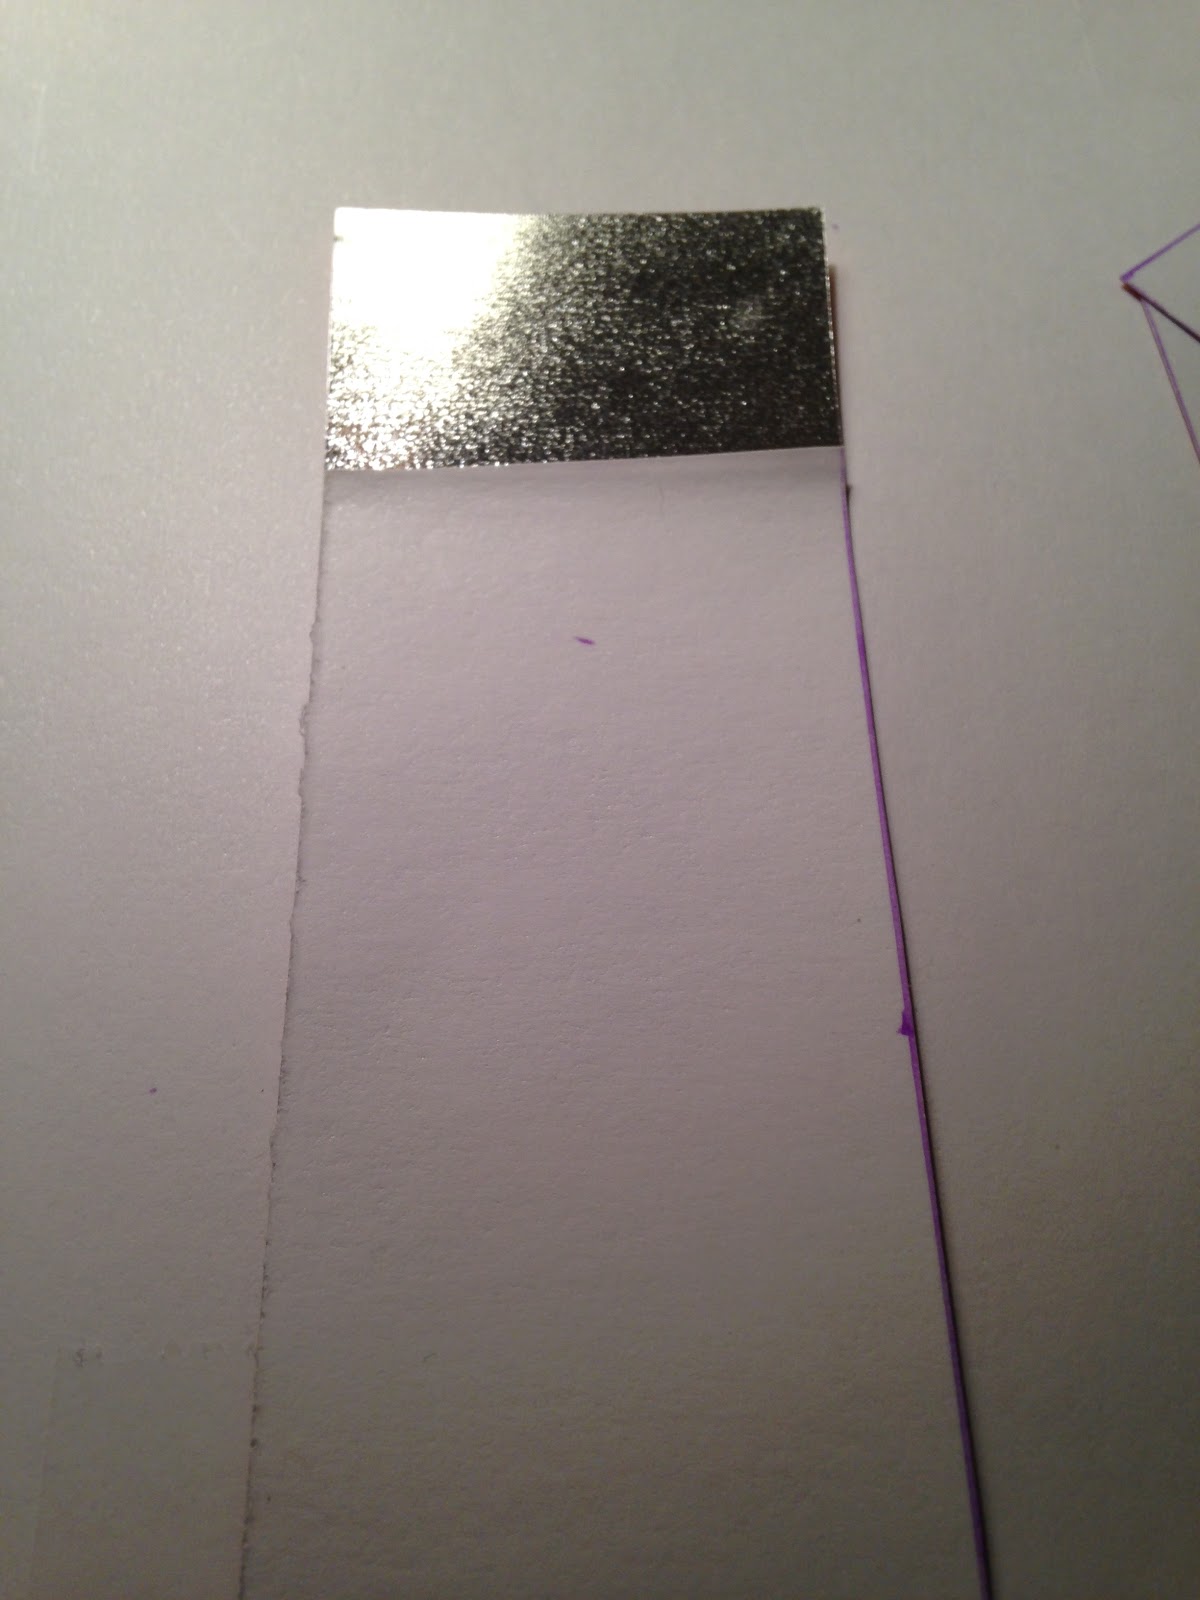
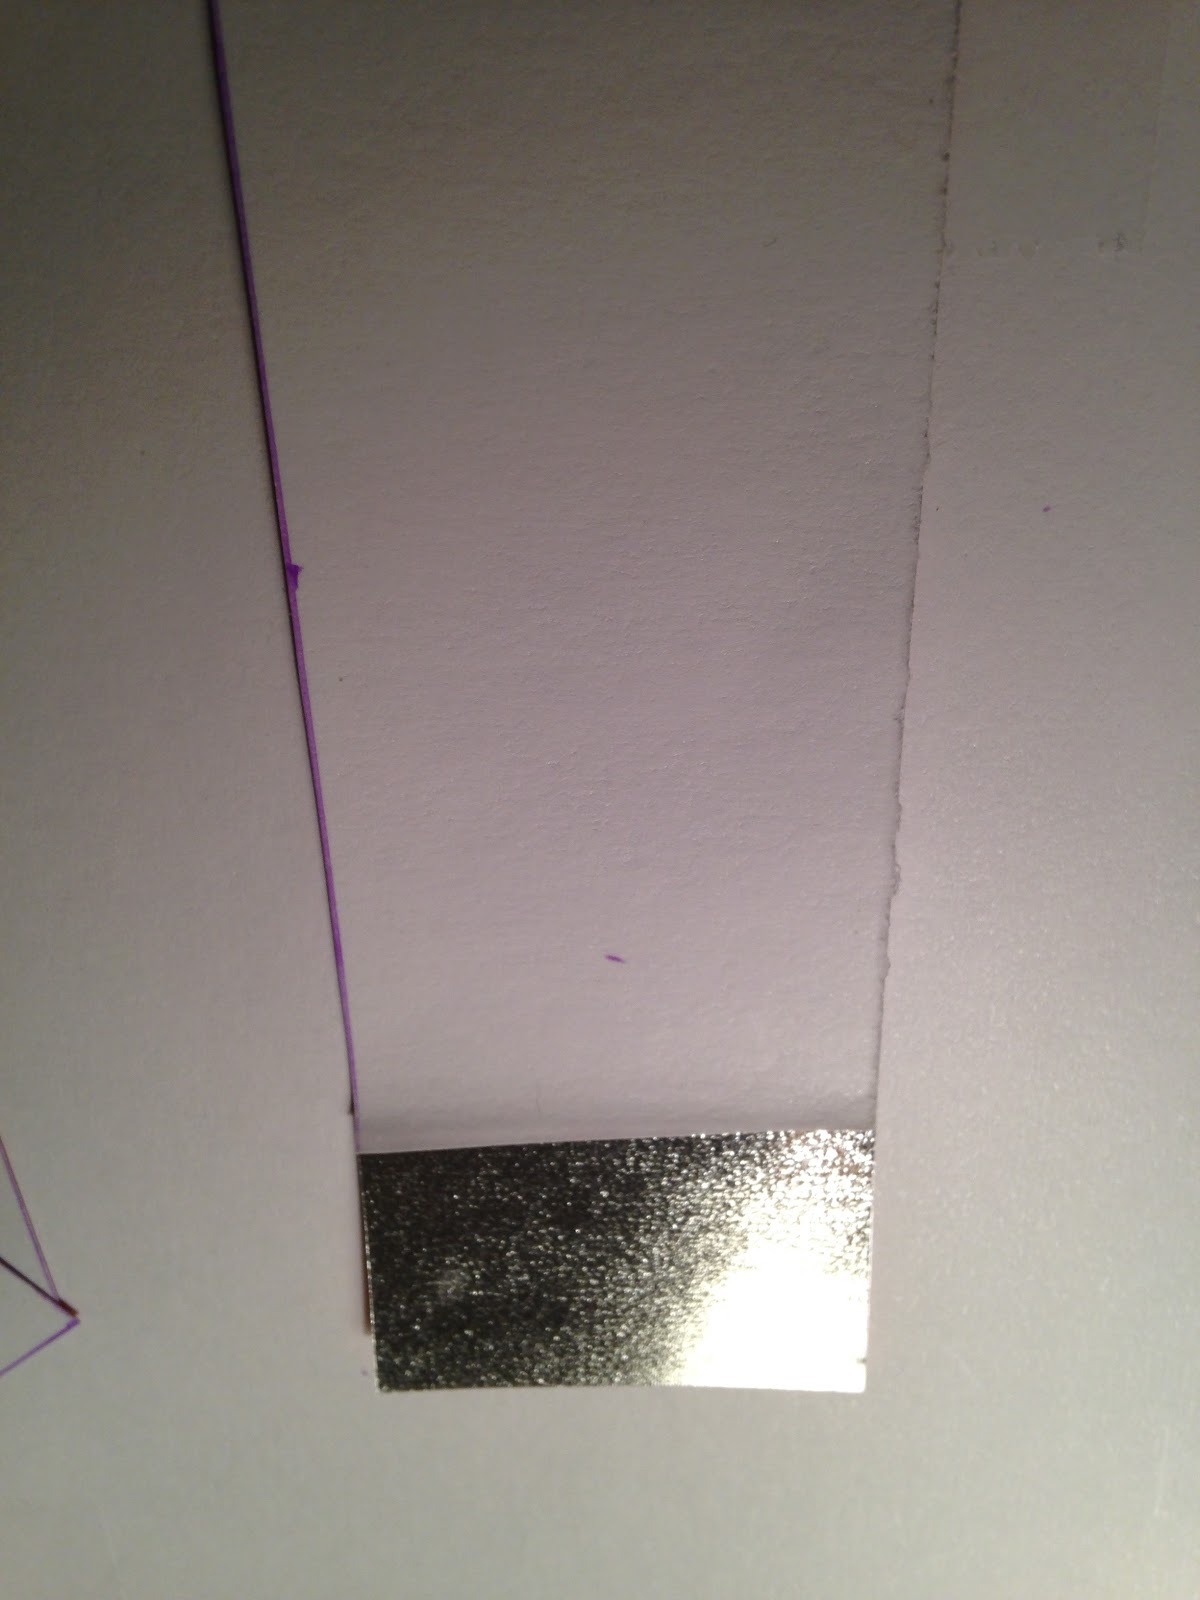
1. First, determine how wide you would like your napkin rings to be.  I like a width of 1.5 inches for my napkin rings.  This meant that I needed two toilet paper rolls.  If you would like your napkin rings to be 1 inch thick, you only need one toilet paper roll because a roll is 4 inches long.
Then, using a ruler or tape measure, mark the width of your napkin rings on the toilet paper roll.

Make marks about an inch apart.  Once the tube is marked, use the tape measure, line it up with you marks, and trace a line around the tube.
2.  Using an Exacto knife or scissors, cut the tube along the line.

3.  Repeat steps one and two three more times.
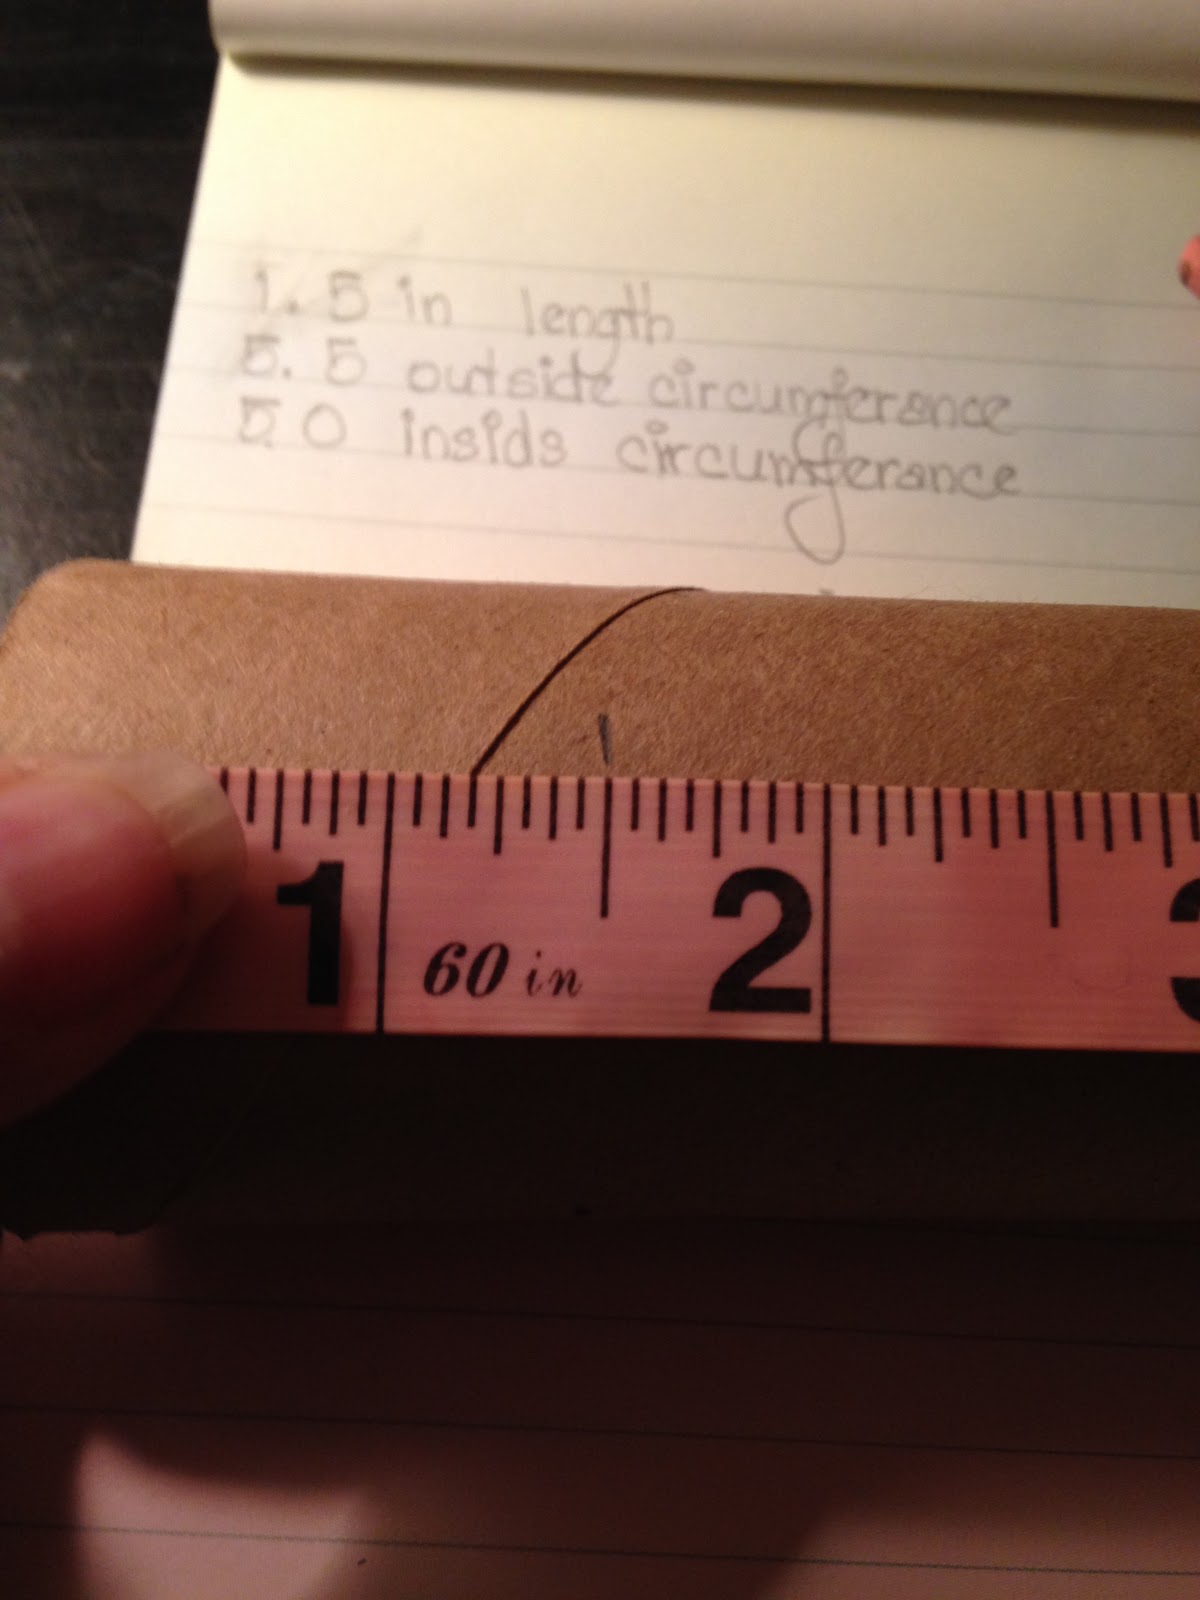
4.  Measure around the toilet paper tube using the tape measure.  The outside measured 5.5 inches.  The inside of the tube measured 5.25 inches.  These will be the lengths of the vinyl to cut.
Using a ruler, mark your vinyl on the back with the measurements.


The width of the  outside vinyl to cut is 1.5 inches or, whatever width you cut your napkin rings to.
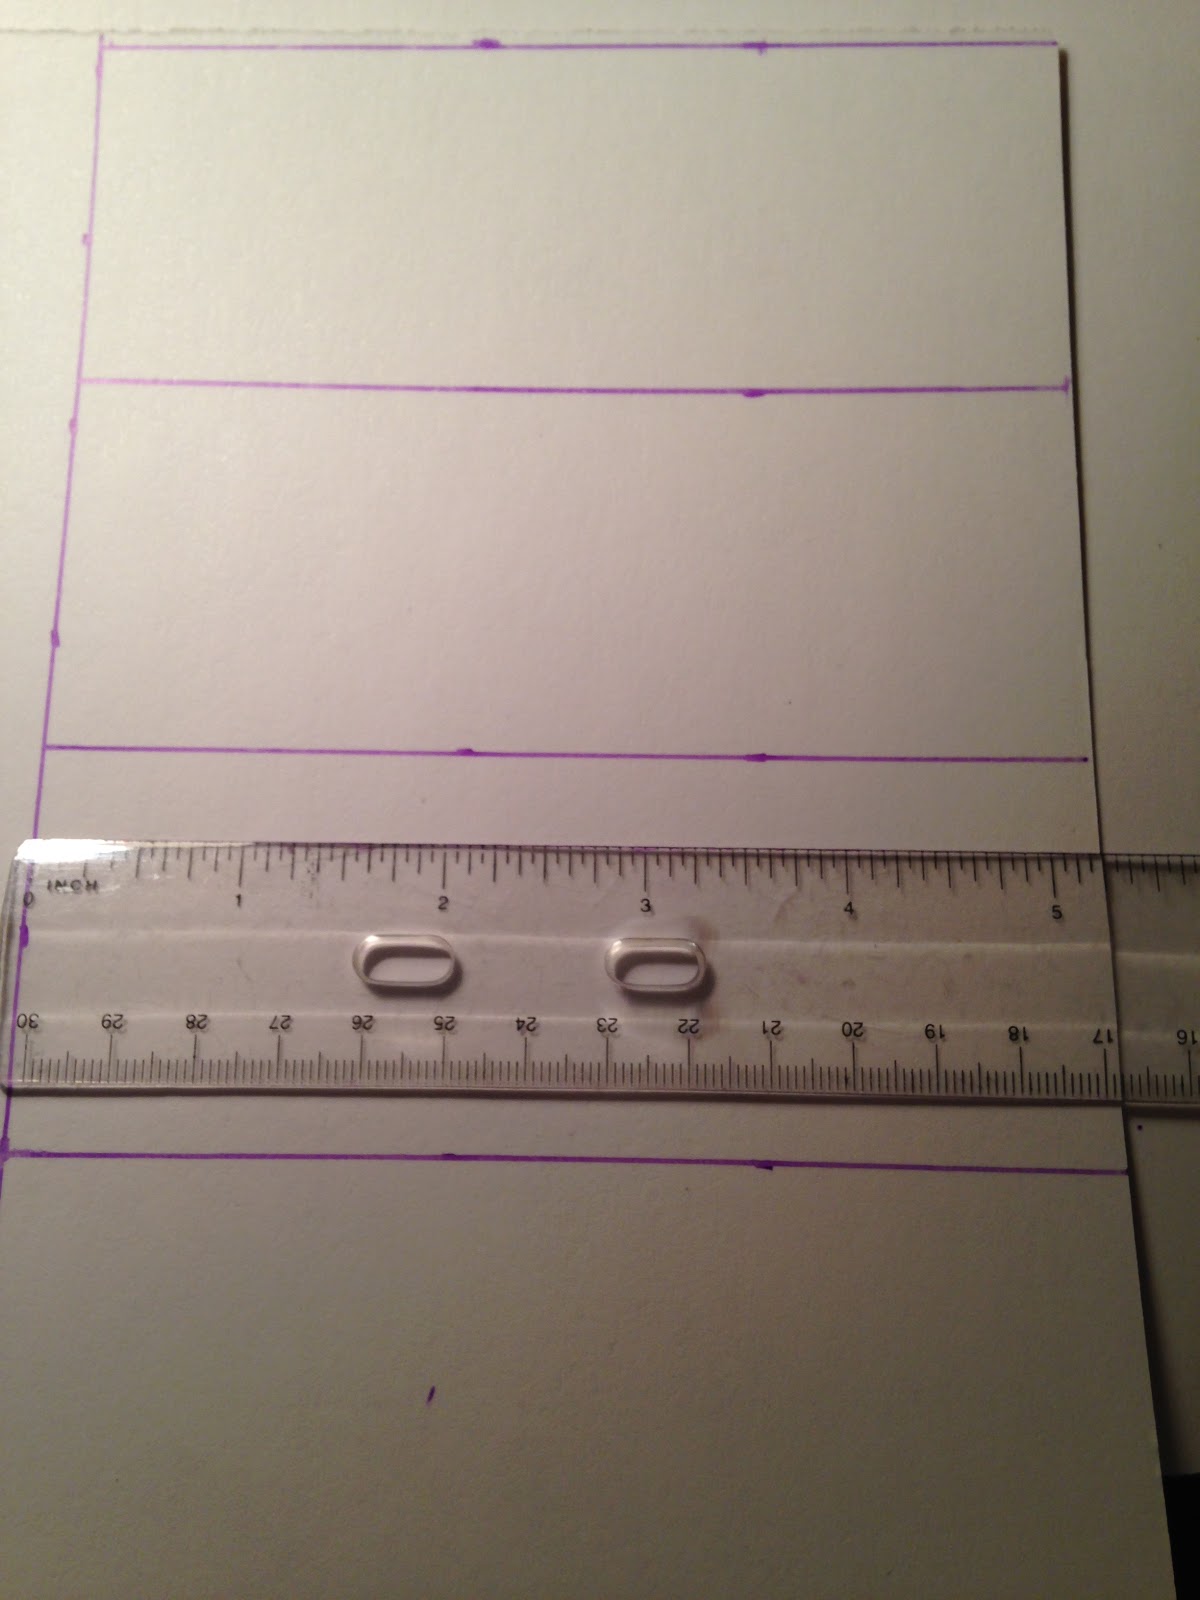
The width of the inside vinyl needs to be wider than the outside so you can fold it over.  I did 2 inches.

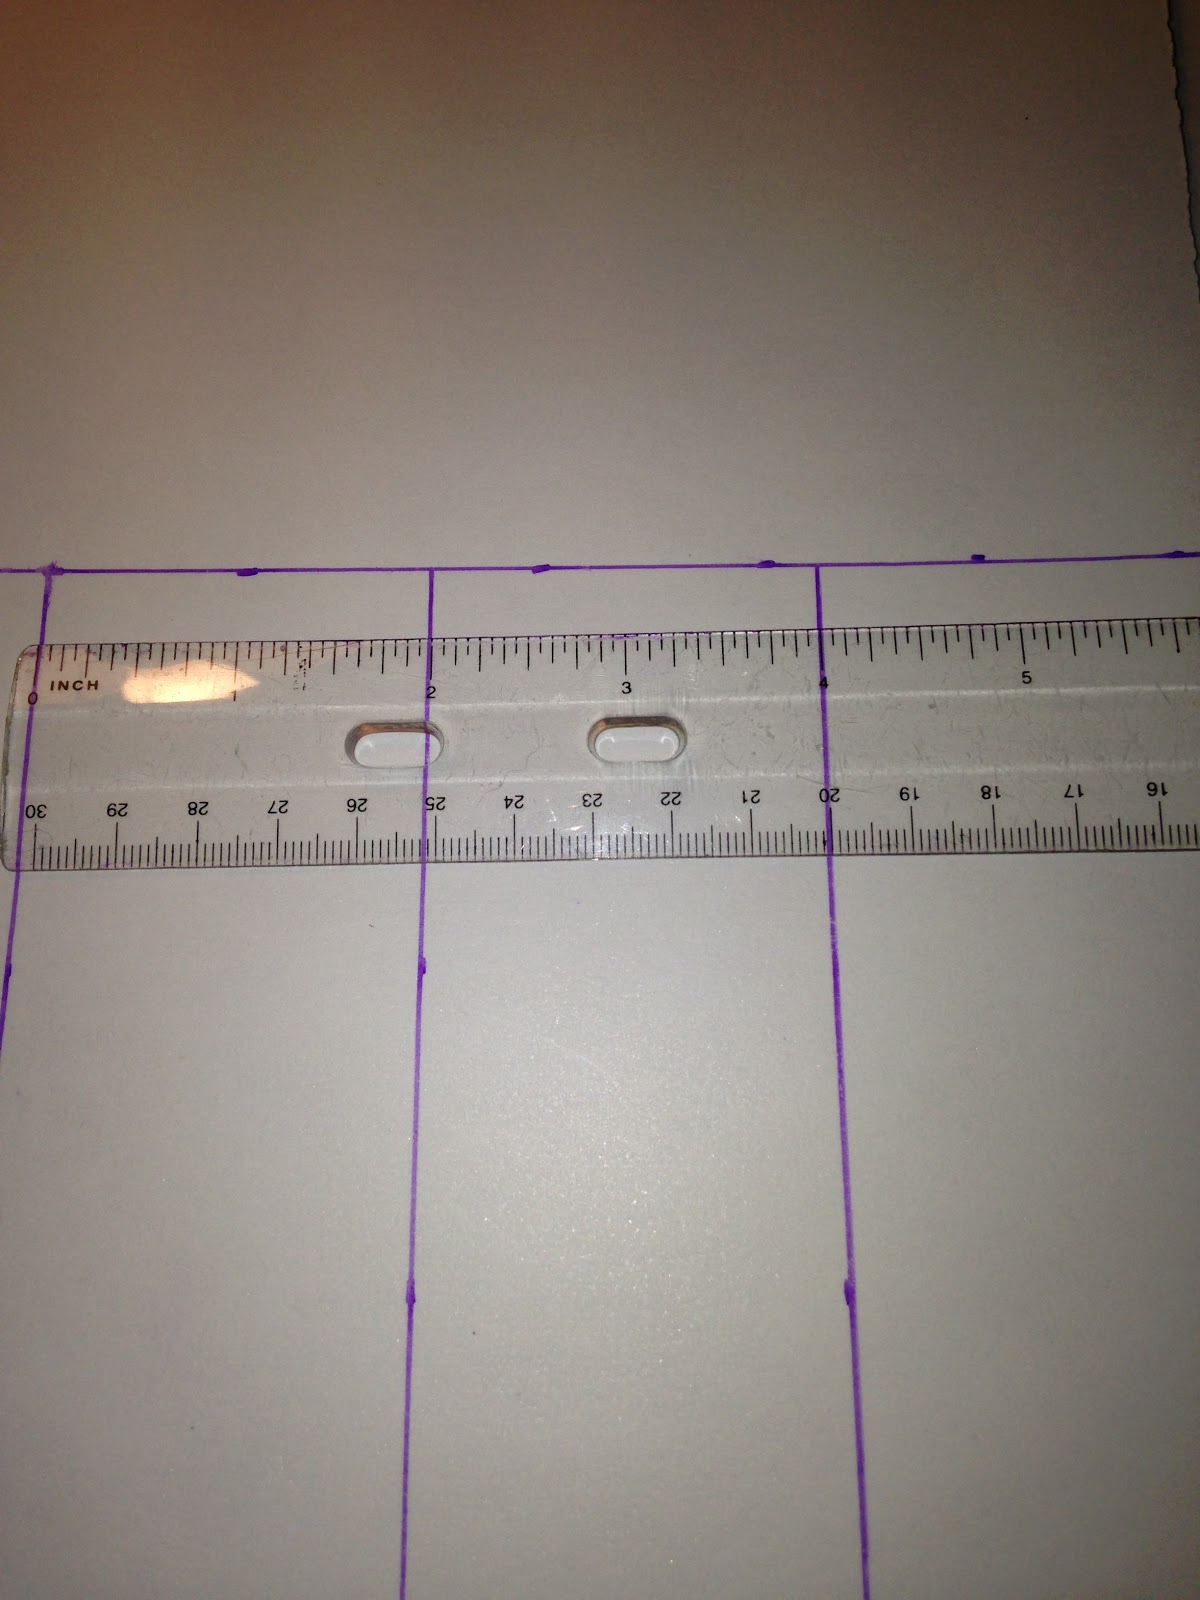
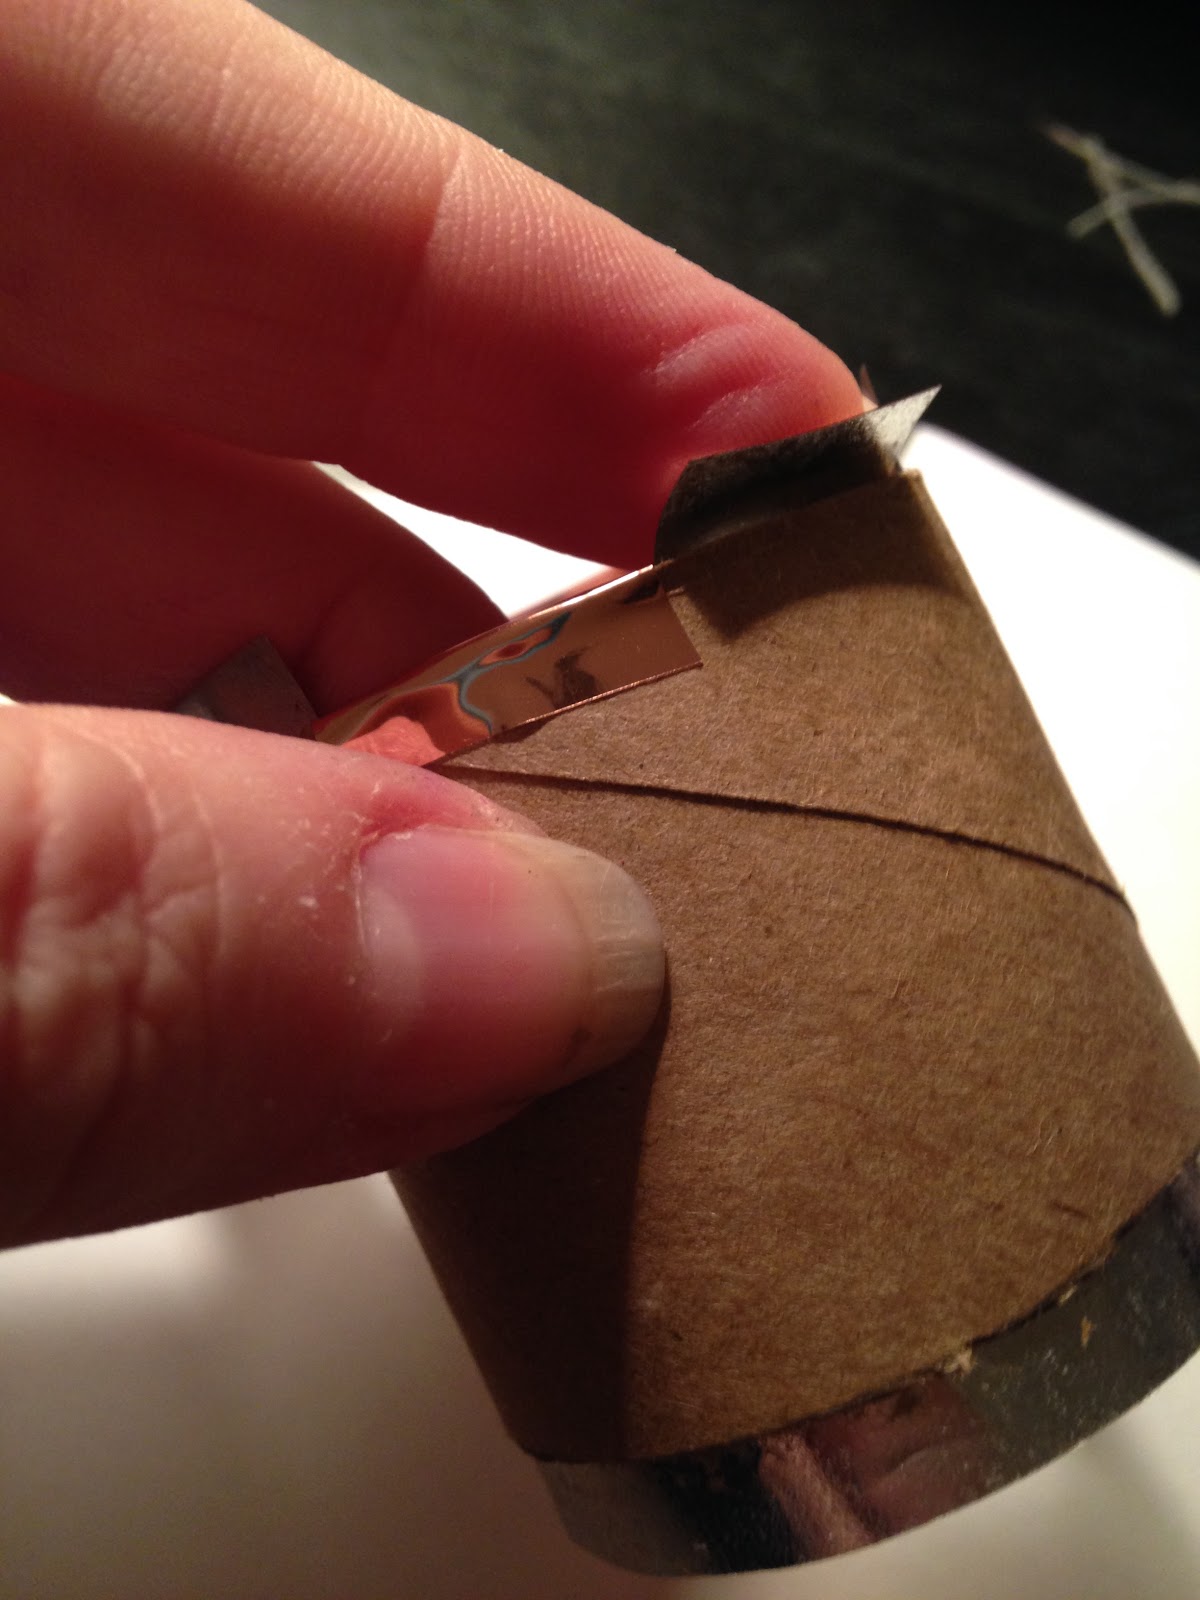
5.  Cut the vinyl strips with scissors.  You should have eight strips.  Four longer ones for the outside and four shorter ones for the inside.
6.  Start with the shorter inside strip.  Peel the paper off the back off of the back of the vinyl about 1-2 inches in length and cut with scissors.


Roll the paper with the tacky side facing outside so that it easily slides inside the toilet paper tube.

Using your fingers, press the tacky side to the toiler paper roll leaving approximately the same amount of vinyl on along each edge.
Use your finger to press the vinyl onto the tube.  Slowly peel the paper off of the back of the vinyl as you press.  This will prevent air bubbles.
7.  Cut the slits into the excess vinyl.  Basically following the same pattern that you would use to cut pizza or pie.  First slitting in half and then in quarters.  Fold the edges down onto the front of the toilet paper roll going all the way around the edges on the top and the bottom.

8.  Peel the back off of one of the front strips by an inch and cut with scissors.

9.  Place sticky side on the front of the toilet paper roll.  Make certain that your vinyl is straight or the strip will slowly go diagonally as you go along the tube.  Press the vinyl down on the toilet paper tube using your finger to press down.  Peel the back off the vinyl as you go around the tube, pressing as you go to avoid air bubbles.
10.  One down!  Repeat these steps three more times to create four napkin rings.

Here is a preview.  I am going to show you how to make the napkin in an upcoming post.
Copper Coupling Napkin Rings
These napkin rings are actually easier to make, but it requires tools that not everyone may have, so I wanted there to be another option.

Materials
2 copper couplings (1 inch wide and 2 inches long $2.97 each)
Painters tape
Pipe cutter or hacksaw
Fine grain sandpaper

So this round of copper napkin rings cost about $6.00 for a set of four.

Instructions
1.  Place painters tape on copper couplings so that each half of the coupling measures one inch.
2.  Cut along the edge of the tape using a pipe cutter or hacksaw.
3.  Remove tape and sand cut edges with fine grain sand paper to round the edges.
4.  Repeat to steps to other copper coupling.

That is it for this post.  So far, we have two candle holders and four napkin rings and I have spent approximately $11.00.
I still have a table runner, napkins, and a center piece to go.  My goal is to do this all, including the items above for less than $25.00.  Please check back to see if I succeed.


Sunday, November 13, 2016

Pumpkin - Its What's for Breakfast!


Hello Everyone!
I woke up this morning, there was an almost-crisp chill in the air, and I decided that I wanted to have a Fall inspired breakfast.  For me, my two most favorite Fall fruits are apples and pumpkins.  Unfortunately, I didn't have any apples, having eaten the last of them the night before for my evening snack, but I did have one of my pumpkin smoothie packets remaining.  Using this as inspiration, I decided that I would create Pumpkin Pie Waffles!


Pumpkin Pie Waffles

I admit, I cheated on this recipe and did not make "homemade" waffles.  Instead, I got some help from Pioneer Brand Baking Powder.  Its just plain easier than measuring flour and baking powder, etc.  For those of you who are purists, I apologize but I was out of the homemade pre-made stuff.  (That recipe will follow at a later date.)

Ingredients


1 cup baking mix  (I used Pioneer, and that may make a difference on the wet measurements)
1 egg
1/4 can of pure pumpkin puree  (If you are measuring, this is slightly less than 1/2 cup pumpkin)
3/4 cup milk or buttermilk
1/2 tsp. vanilla
1/4 tsp. ground ginger
1/4 tsp. ground cloves
1/4 tsp. ground nutmeg
1/2 tsp. cinnamon
1 tsp. raw cane (Turbinado) sugar

Instructions
1.  In a large mixing bowl combine the baking mix, egg, pumpkin puree and milk and whisk until all the ingredients are combined.  (If you follow my blog, you can see from the picture above that I used one of the packets I created for my pumpkin smoothie. (For instructions on the smoothie, please see the link below.)

http://frugalfemmecarole.blogspot.com/2016/10/pumpkin-pie-smoothie-its-not-as-scary.html

If you too are using one of your frozen packets, you will need to gently squeeze the defrosted pumpkin to get some of the extra liquid out of the pumpkin left over from the ice crystals formed during the freezing process.)
Adding the egg to the baking mix
As you can see by the picture, 1/4 of a can of pumpkin puree is slightly less than 1/2 cup of pumpkin.
 
Once you have mixed everything together, it turns this lovely orange color and really looks like you are making pumpkin pie.                                             
2.  Add the remaining ingredients to the pumpkin mixture.

I know it looks like alot of spices, but trust me.

Gently whisk until all of the spices are combined into the pumpkin mixture.
With all the ingredients in the bowl.

3.  The next few steps you will need to follow the instructions for your particular waffle machine.  So I am speaking in generalities when it comes to cooking your waffles.
Spray your waffle machine with oil or non-stick spray.  (This is a good idea even if your machine has non-stick plates.)
Ladle the waffle mixture into the machine. Making sure to fill it as full as your machine instructions advise.


4.  Close the lid and cook until done.  (This ranges from machine to machine.)

Yum.


Serve warm.  

Serving suggestions:  I served my waffles with butter and REAL maple syrup.  But this would also be good with apple butter, or powdered sugar.

For many, breakfast wouldn't be breakfast without coffee.  I am a tea person myself, but I do love all the different flavors for coffee that become available for the fall and Christmas.  If you don't want to go to Starbucks in the morning but would rather stay in your pj's, and you want a REAK pumpkin creamer for your coffee rather than just something that is pumpkin flavored and full of corn syrup, here is the recipe for you!

Spiced Pumpkin Pie Coffee Creamer


Sorry, I don't have pictures for this one, I was focusing more on taking pictures of the waffles.  But its super easy to do, so I don't think you will have any trouble making this, even without pictures.

Ingredients
2 cups heavy cream, half-and-half or milk of your choice  (You can even use almond milk.  This will effect the flavor however and, if you are using Vanilla almond milk, do not put in the vanilla and only use 2 tbsp. of sweetened condensed milk.)
1 12-oz can sweetened condensed low fat milk (I like Carnation)
3 tbsp. pumpkin puree  (NOT pumpkin pie filling)
1/4 tsp. ground ginger
1/4 tsp. ground nutmeg
1/4 tsp. ground cloves
1/2 tsp. ground cinnamon
1 tsp. vanilla

(You do no need to add any sugar to this.  It gets plenty of sweetness from the sweetened condensed milk.)

Instructions
1.  In a large measuring cup or medium size bowl, combine all of the ingredients and whisk to combine.
2.  Pour into a 1 quart canning jar or resealable container.  (I really like those plastic containers with the flip top lid for pouring.  I think they are technically for salad dressing, but they work great for this.)
3.  Store in refrigerator for up to two weeks.  (I find that the heavy cream and half-and half last the longest in the fridge, but you can do a more low fat version with the milk.  Especially if you use 2% milk.)

Serving Suggestions:  Shake before using.
This recipe will make about 3 1/2 cups of creamer.


I took this picture off of another website because I think it is adorable.  So the credit goes to her.  If you would like to see the website and her recipe for vanilla creamer, go to this link: http://www.cozycakescottage.com/2012/02/10/diy-project-homemade-coffee-creamer/


I hope you enjoyed this Fall inspired breakfast!  Soon I will be posting instructions on how to make your own table decorations for Thanksgiving and Thanksgiving week will be the start of another two week menu inspired by the Thanksgiving holiday.  


Tuesday, November 8, 2016

Thanksgiving Elegance - A Harvest Gold Bird Wreath for under $20!!!


Hello Everyone!
I don't know if it is because it is an election year, or if it is because 2016 has, in general, been beating everyone up - but the entire nation seems to already be ready for Christmas and we haven't even had Thanksgiving yet!  If you go into Walmart or Micheal's you will find the entire store dedicated to Christmas and NOTHING for Fall and Thanksgiving.  Now, I love Christmas.   And I do mean LOVE Christmas.  But I believe each holiday has their own time and that we should let them have their moments and Thanksgiving is no exception.  So, I have decided, for those of you who would still like to decorate for Thanksgiving and Fall before we get into the Christmas spirit, that I will dedicate the next few posts to helping you achieve a frugal and elegant Thanksgiving season.


This picture is how I like my Thanksgiving's to be.  An occasion.  A reason to dress nicely and eat wonderful food on your grandmother's good china.  And this is the motif that we will be striving for in the upcoming month.
This season, I am going to focus on an elegant Thanksgiving/Fall holiday.  Most of the decorations for this time of year focus on the farm and country life.  It makes sense.  It is the harvest time for pumpkins, gourds and haystacks.  And because of this, much of the decor is sort of a country/shabby chic style with scarecrows and gingham.  Although I think that style is cute, it is not my personal taste.  So, this year, we will focus on vintage elegant with a modern twist for our decorating.  That means there will not be any scarecrows, pilgrims or turkeys in any of the things that I will show you. (I think.  I could change my mind.)

To start off the season, I am going to show you how to make an elegant wreath for your front door or mantle.  

Harvest Gold Bird Wreath

I have better shots of this further down in the post.  This, so far, has been the hardest thing I have photographed for the blog yet.

Sometimes, the best laid plans just get ruined.
I went to Michael's today with a plan for a wreath in my head.  I was going to use a styrofoam wreath form, a brown feather boa, some orange leaves and the acorn made out of pine cone and rope that I had purchased there a couple of weeks before for $1.50 and make myself a wreath for the mantle.

Only one of those things happened.

When I got there, ALL of the fall items were gone and Christmas was everywhere, but I was not deterred.
I found the boas and was appalled to find out that they were $10 a piece for the ones that I wanted and I would need two.  Strike that idea.
The styrofoam wreath form was $15.  That, literally, would have only left me $5.00 for the rest of items to go on my wreath.  Strike that idea too.
Therefore, I had to rethink my plan.  So I roamed the store looking for inspiration.  
First, I had to find a wreath base.  I lucked out and found a straw wreath base for $3.59.  It seemed a little country, but I thought I could fix that by making sure my other decorations were sparkly and elegant rather than country.  Not a problem since the decrease in the cost of the wreath base left $16.50 for decorations.
Near the straw wreath I found some little life-like birds for $2.50 a piece.  I bought two.
To replace the feather boa, I found some ribbon that was burlap with some gold accent down the center. Although this was in the Christmas stuff, it looked fall-ish to me and could help to hide the straw in my wreath base.  Cost $2.50.
I decided that I wanted the color theme for my Thanksgiving to be rose gold or copper.  I love these colors and, it just so happens, that Michael's had some rose gold colored "greenery".  I picked up two rose gold glitter branches for $3.00.  And then found one with gold leaves and copper and gold acorns for $2.00.
(This rose gold/copper is a theme that is going to continue throughout the month in the projects that I show you.)
And, with my treasures in hand, I went to create a completely different wreath than the one that I had first imagined.

This picture also has more items than I actually used in the wreath.  I had thought to paint the tips of some pine cones that I had gathered from the yard with copper paint and add those to the wreath.  I was also thinking of adding the pumpkin.  But once I had the floral and birds on the wreath, I decided that was plenty.  But use your imagination.  If you wanted to add painted pine cones, go for it.

Tools 
Scissors
Wire Cutters

Items
1 Straw Wreath Form
1 roll of ribbon
2 rose gold glitter floral branches
1 gold branch with acorns
2 clip on feather birds
1 pinecone and rope acorn.  (Since you can get these at Michael's anymore, a good substitute would be to hang a pine from the center.  Try painting the tips with copper or gold paint to make it "gilded"
Several straight sewing pins
Twine

Instructions
1.  Unwrap the wreath from plastic wrap.  (You may want to do this outdoors because the straw gets everywhere. )
2.  Starting at the back of the wreath in what you have deemed the center, put a straight pin in the back of the wreath and the folded ribbon end to attach the ribbon.

This shows the ribbon at the beginning and end.  As you can see, I fold over the ribbon and then put a pin through both the ribbon and the wreath.

3.  Wrap the ribbon around the wreath.  You can cover the straw completely or you can leave some showing.  My husband really liked the straw and thought that it looked very Fall.  I kind of agreed with him, so I left about two inches of straw showing between each spiral of the ribbon near the center of the wreath.
Once the wreath is wrapped, fold the end of the ribbon and attach to the back of the wreath with a pin.


4.  Turn your wreath to where you would like your top and bottom to be and start decorating.  I will tell you what I did, but this isn't a science, you should do what moves you.  If you want to cover the entire wreath with items, DO IT!!!  This is your wreath and should make you happy.
5.  Take one of the rose gold branches and stick it, base first into the left side of the wreath.  (I didn't not cut this at all, I just put it in the wreath and then fiddled with it until it looked like I wanted it to.)
6.  Using your wire cutters, cut the branches off of the other rose gold branch and put them down near the base of the wreath.  (When you cut them, you should leave enough wire so that you can just "pin" them into the straw using their wires.)
Add some of the gold leaves attached to the acorn branch so that you get some color difference in your "greenery".

You can see, its already starting to come together

7.  Using the wire cutters cut away three of the acorns and put them in the rose gold branches wherever you think they would look good.
8.  Using the clip, attach one of the birds to the ribbon at the bottom of the wreath.  Do the same with the second bird at the top of the wreath.  Place your remaining acorns around the birds as well as some of the gold leaf branches left from your acorn branch.

I think these little birds are so much cuter than turkeys.

This picture is a little blurry, but you can see the bird on top better.
9.  At this point, the wreath is almost completed.  Now you have to make it hang-able.  Take some twine and cut it at about six inches.  Make a loop and tie together at the ends with a double knot.


10.  Attach the twine to the back, top, center of the wreath by placing a pin in the middle of the knot and the wreath.

Put the pin where my thumb is holding the knot.

11.  Use another straight pin and attach the yarn acorn or the pine cone you have painted to the back center of the wreath, making certain that it hangs where you would like it to hang in the center of the wreath.  (If you are using a pine cone, you need to attach some twine to the stem of the pine cone and then pin that to the back of the wreath.)


12.  Some of the leaves in your branches will not want to cooperate and lay exactly where you would like them to lay.  This is an easy fix.  Take your straight pins and pin your leaves where you would like them.  For this instruction bit, I have used sewing pins but, to pin your leaves down where you want them for your project, use corsage pins so that the pins will not be visible.

Hang on your mantle above the fireplace or on your door and enjoy!

The mantle, ready for fall.

I tried to get a couple shots of the wreath.
Getting a good picture of the bird on top was not easy.

So here's a picture of the top birdie, even though its not a great shot.
Well, that's it for this post.  I hope you enjoyed it!  I will post a few other ideas for table decorations, etc. on a budget in the upcoming posts and then, should everything go as planned, I will do a two week menu based on the Thanksgiving meal and items you will have remaining in your fridge.
Please let me know if there is anything that you would like to see for the Thanksgiving/November posts and I will see if I can't make it happen